How to Roast Bell Peppers: The Ultimate Broiler Method for Sweet, Smoky Perfection
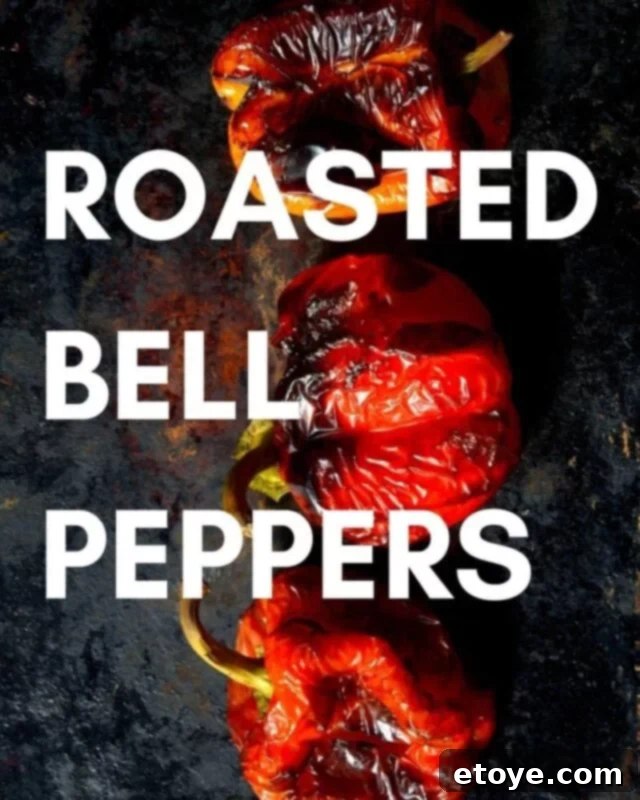
Roasted bell peppers are a culinary delight, transforming from crisp, vibrant vegetables into tender, sweet, and smoky gems. They are incredibly versatile, adding a burst of flavor to countless dishes. While pre-roasted bell peppers in a jar offer convenience, mastering the art of roasting them at home unlocks a superior level of freshness, taste, and control over your ingredients. For a truly effortless and efficient homemade version, the broiler method stands out as the best technique, delivering perfectly charred and tender peppers every time.
Many home cooks might shy away from roasting bell peppers, envisioning messy open flames or lengthy oven times. However, the broiler method demystifies this process, making it accessible and enjoyable. It’s not only a quicker alternative but also a safer and cleaner approach compared to roasting over an open gas flame. This guide will walk you through the simple steps to achieve beautifully roasted bell peppers, perfect for elevating your salads, sandwiches, pasta, or as a vibrant addition to popular healthy meals like Buddha bowls.

Buddha Bowl Veggies: Elevate Your Healthy Meals with Roasted Bell Peppers

Buddha bowls have become a staple for healthy and convenient eating, offering a nutritious and visually appealing meal in a single bowl. They typically feature a base of grains, a protein source, healthy fats, and an abundance of colorful vegetables. Roasted bell peppers are an absolute superstar when it comes to Buddha bowl components. Their inherent sweetness intensifies with roasting, and their texture softens to a tender, melt-in-your-mouth consistency that beautifully complements the other textures in your bowl.
Using roasted bell peppers in your Buddha bowls not only adds incredible flavor and color but also boosts the nutritional profile with vitamins A and C, antioxidants, and dietary fiber. They cook relatively fast, especially under the broiler, and you can easily tell they are done when their skins begin to blacken and blister, indicating the tender, vibrant flesh beneath is perfectly cooked. Integrating them into your meal prep makes assembling quick and healthy lunches or dinners a breeze. You can roast a large batch at once and have them ready to toss into various meals throughout the week, alongside other favorites like roasted broccoli, zucchini, or sweet potatoes.
Why Roasting Bell Peppers in the Broiler is Your Best Bet
Choosing the right method for roasting bell peppers can make all the difference in terms of ease, safety, and results. While there are several ways to achieve that coveted smoky char, the broiler method consistently proves to be the most efficient and user-friendly for home cooks.
Efficiency and Speed
Unlike traditional oven roasting, which can take 30-45 minutes at a lower temperature, the broiler utilizes intense, direct heat from above. This mimics the charring effect of an open flame or grill, cooking and blackening the pepper skins in a fraction of the time – often within 15-20 minutes total. This speed is a huge advantage, especially when you’re looking for a quick addition to your meal or doing weekly meal prep.
Safety and Cleanliness
In the past, many cooks (myself included) would roast bell peppers directly over an open gas flame on the stovetop. While effective for charring, this method can be incredibly messy and carries a greater risk. Juices from the peppers can leak onto the stovetop, causing burns, flare-ups, and a sticky residue that’s difficult to clean. Roasting under the broiler, however, keeps the entire process contained within your oven. The baking sheet catches any drips, preventing messes and ensuring a safer cooking experience.
Consistent Results and Capacity
The broiler allows you to roast multiple bell peppers at the same time, distributing heat evenly across the entire baking sheet. This means you can easily prepare a large batch of peppers in one go, which is perfect for meal prepping or feeding a crowd. The intense, consistent heat ensures that all sides of the peppers get properly charred, leading to that deep, sweet flavor and tender texture we all crave.
Achieving the Perfect Char
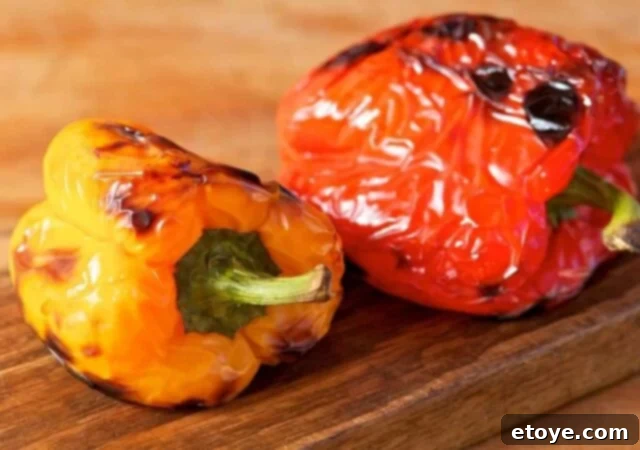
The goal of roasting bell peppers is to char the outer skin, which then allows for easy removal and leaves the sweet, smoky flesh intact. The broiler excels at this, providing the intense heat needed to blister and blacken the skins quickly without overcooking the inside. This delicate balance is key to achieving that perfect roasted bell pepper texture and flavor.


How to Roast Bell Peppers: The Broiler Method
Master the art of roasting bell peppers with this simple and efficient broiler method. Perfect for adding a sweet, smoky touch to any meal.
0 mins
15 mins
Side Dish
American
4
Ingredients
- 4-6 whole bell peppers (any color: red, yellow, orange, or a mix)
- 1 tablespoon olive oil (optional, for flavor)
- Pinch of salt and black pepper (optional)
Instructions
Prepare the Peppers: Wash and thoroughly dry your bell peppers. You can roast them whole or cut them in half and remove the seeds and membranes for faster cooking and easier handling later. For whole peppers, ensure they are stable on your baking sheet. Place the bell peppers on a sturdy baking sheet. Position an oven rack so there is at least 4 to 6 inches of space between the top of the peppers and the broiler flames (or heating element). This distance is crucial for even charring without burning.
Broil to Perfection: Turn your oven to the broil setting (high heat setting if available). Allow the broiler to preheat for a few minutes. Once hot, place the baking sheet with the peppers under the broiler. Roast for 5 to 7 minutes on one side, or until the skin is significantly blackened and blistered. Carefully use a pair of long-handled tongs to flip the bell peppers to a different side. Continue roasting and flipping every 5-7 minutes, repeating this process 3-4 times, until the skin on all sides of the peppers is uniformly blackened and blistered. Keep a close eye on them as broilers can vary in intensity and cook very quickly.
Steam and Peel: Once all sides are blackened, carefully remove the baking sheet from the oven. Immediately transfer the hot, blackened bell peppers to a large heat-safe bowl. Cover the bowl tightly with plastic wrap or a plate to create a sealed environment. This steaming process is essential; the residual heat will continue to cook the peppers slightly and, most importantly, will loosen the charred skin, making it incredibly easy to peel. Let the peppers steam for at least 15-20 minutes, or until they are cool enough to handle.
Peel and Prepare: Once cooled, uncover the bowl. Using a paring knife or your hands, gently peel away the blackened skin. It should slip off effortlessly. Discard the skin. If you roasted whole peppers, cut them open and remove the stem, seeds, and any remaining white membranes. If you halved them initially, simply remove the stem and any remaining seeds. Slice the roasted pepper flesh into strips or dice as desired. Drizzle with olive oil and season with salt and pepper to taste, if using.
Keywords
bell peppers, roasted bell peppers, broiler bell peppers, buddha bowl, buddhabowl, vegetables, easy roasted vegetables, healthy side dish, meal prep, how to roast bell peppers
Tips for Perfect Roasted Bell Peppers Every Time
Achieving perfectly roasted bell peppers is simple with a few key considerations:
- Choose Firm Peppers: Select bell peppers that are firm, shiny, and free of blemishes. Any color works wonderfully; red, yellow, and orange tend to be sweeter, while green peppers offer a slightly more bitter, earthy flavor.
- Don’t Overcrowd the Pan: Ensure your bell peppers have enough space on the baking sheet. Overcrowding can lead to steaming instead of charring, preventing that desirable blackened skin and smoky flavor. Use two baking sheets if necessary.
- Monitor Closely: Broilers can be intense and temperamental. Never leave the oven unattended while broiling. Peppers can go from perfectly charred to burnt in a matter of seconds.
- The Importance of Steaming: Do not skip the steaming step! This is critical for making the skin easy to peel. If the skin doesn’t come off easily, cover the peppers again and let them steam for a few more minutes.
- Handling Seeds and Membranes: While roasting whole makes peeling easier, you’ll need to remove seeds and membranes after. If you roast halves, you can remove most seeds before roasting, which can be slightly less messy later.
- Storage: Once peeled and sliced, roasted bell peppers can be stored in an airtight container in the refrigerator for up to 5-7 days. For longer storage, you can pack them in olive oil (ensure they are fully submerged) or freeze them in freezer bags for up to 3 months.
The Versatility of Roasted Bell Peppers
Once you’ve mastered roasting bell peppers, a world of culinary possibilities opens up. Their sweet, smoky flavor and tender texture make them an invaluable addition to a wide array of dishes:
- Salads: Add sliced roasted peppers to green salads, grain bowls, or pasta salads for a burst of color and flavor.
- Sandwiches and Wraps: Layer them into your favorite sandwiches, subs, or wraps for an instant upgrade. They pair wonderfully with hummus, cheese, and various meats.
- Pasta and Sauces: Chop them and toss into pasta dishes, or blend them into creamy tomato sauces for a richer flavor profile. They are fantastic in Mediterranean-inspired pasta salads.
- Eggs: Incorporate them into scrambled eggs, omelets, or frittatas for a delicious and healthy breakfast or brunch.
- Dips and Spreads: Blend with chickpeas and tahini to make a smoky roasted red pepper hummus, or mix into cream cheese for a flavorful spread.
- Pizza and Tarts: Scatter them over homemade pizzas, flatbreads, or savory tarts before baking.
- Soups and Stews: Add a depth of flavor to vegetable soups, chili, or stews.
- Antipasto Platters: Serve them as part of an antipasto platter with olives, cheeses, and cured meats.
The delicious transformation that occurs during roasting turns humble bell peppers into a gourmet ingredient, ready to enhance almost any meal with minimal effort.
If you’ve tried roasting bell peppers using this broiler method, or any other recipe from our blog, please consider leaving a rating and sharing your experience in the comments below! Your feedback is invaluable and helps other home cooks discover delicious new ways to enjoy their vegetables. Happy cooking!
