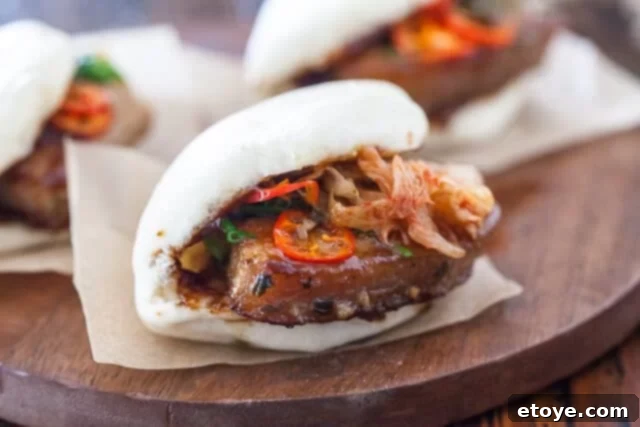
Ultimate Pork Belly Buns Recipe: Crafting the Perfect Braised Pork Belly and Pillowy Steamed Buns
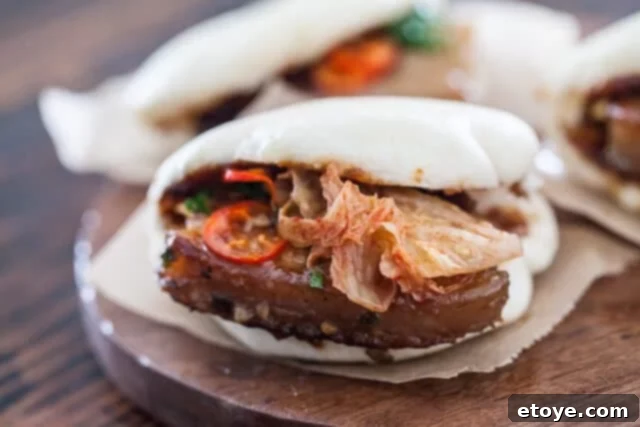
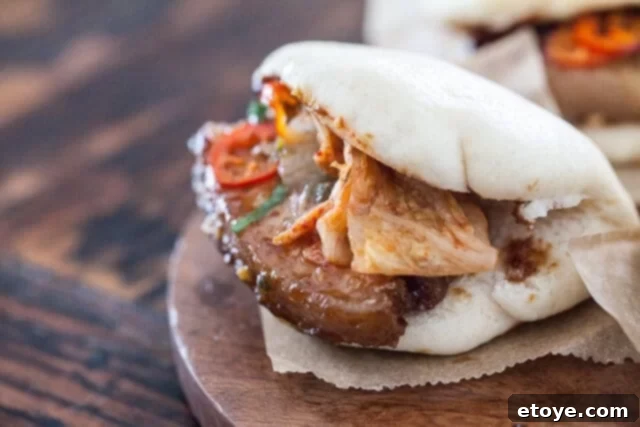
Embark on an exciting culinary adventure right in your own kitchen with this comprehensive guide to making the most exquisite Pork Belly Buns. This recipe unveils the secrets to crafting incredibly tender, slow-cooked pork belly, deeply infused with a rich, sweet-savory Vietnamese caramel sauce. Each succulent slice is then lovingly nestled inside remarkably soft, pillowy steamed buns, known as Gua Bao, creating an unforgettable symphony of textures and tastes. But the flavor journey doesn’t stop there – a vibrant kick of spice and tang comes from the irresistible combination of fiery fresh chilies, fragrant green onions, and optional, yet highly recommended, zesty kimchi, all brought together with a luscious hoisin glaze. Prepare to impress your taste buds and loved ones with this iconic and deeply satisfying Asian street food classic.
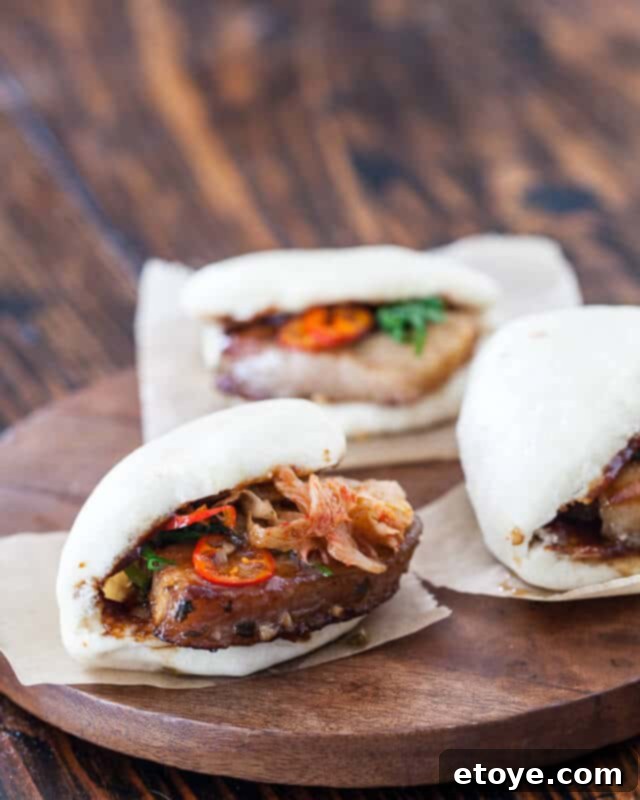
Why This Pork Belly Buns Recipe Stands Out
There’s an undeniable allure to Pork Belly Buns, and their widespread popularity is a testament to their incredible taste. This recipe not only captures the authentic essence of this beloved dish but also makes it achievable for home cooks, guaranteeing outstanding results every time. Here’s a closer look at what makes these homemade pork belly buns a truly unmissable culinary experience:
- Detailed Step-by-Step Visuals: We provide clear, high-quality photos to guide you through every critical stage of preparing the caramelized pork belly, ensuring you can follow along with confidence and achieve perfect results, even if you’re new to Asian cooking.
- Mastering Pillowy Steamed Buns: Discover the art of creating light, airy, and incredibly soft Chinese steamed buns (Gua Bao) from scratch using a convenient pre-mixed flour. For those times when you need a speedy solution without compromising on flavor, we also reveal a brilliant “cheater” bun recipe using readily available Pillsbury refrigerated dough, which yields surprisingly delicious and fluffy results.
- An Irresistible Fusion of Flavors: The star of the show, the slow-braised pork belly, boasts a melt-in-your-mouth texture and a complex, sticky-sweet, and savory glaze that is simply addictive. This richness is perfectly balanced by the vibrant crunch and heat of spicy fresh chilies, the refreshing tang of green onions, the zesty fermented goodness of kimchi, and a final flourish of sweet, sticky hoisin sauce. Every bite is a harmonious explosion of sweet, savory, spicy, and tangy notes.
- A Cultural Mashup of Delights: This recipe is a delightful fusion of culinary traditions, artfully blending the deep, aromatic Vietnamese caramel braising techniques, the classic craftsmanship of Chinese steamed buns, and the bold, tangy kick of Korean kimchi. This unique combination results in a dish that offers a truly unforgettable and memorable culinary experience.
Essential Ingredients for Your Authentic Pork Belly Buns
To craft these exceptional pork belly buns, you’ll need a selection of fresh produce and a few key Asian pantry staples. Gathering these ingredients beforehand will make your cooking process smooth and enjoyable.
For the Caramel Braised Pork Belly:
- Pork Belly: The star ingredient! Look for a high-quality slab, ideally around 2 pounds, with a good balance of lean meat and creamy fat. This will provide enough for your buns and potentially some delicious leftovers.
- Cooking Oil: A neutral-flavored oil such as vegetable, canola, or grapeseed oil.
- Fresh Aromatics: 2-3 cloves of garlic, finely minced; 1 tablespoon of finely chopped fresh ginger; and 1 fresh chili pepper, minced (optional, adjust to your preferred spice level).
- Green Onion: One stalk, chopped, used both in the braise and as a garnish.
- Brown Sugar: 1/4 cup, packed, essential for the deep caramelization and sweetness of the sauce.
- Asian Sauces: 2 tablespoons rice vinegar for acidity; 3 tablespoons high-quality Asian fish sauce for a profound umami depth; and 1 tablespoon soy sauce for savory notes and color.
- Water: 1/2 cup, to create the ideal braising liquid consistency.
For the Pillowy Steamed Buns (Gua Bao):
You have the flexibility to choose between a convenient mix or a clever shortcut for your buns.
- Steamed Bun Flour Mix (Banh Bao): One 14-ounce package. This pre-mixed flour simplifies the process and helps achieve that characteristic soft, white, and airy texture. You will also need additional ingredients as specified on the package instructions (typically milk, sugar, and a touch of cooking oil).
- All-Purpose Flour: 3 tablespoons, for lightly dusting your work surface.
- Parchment Paper: 16 squares, each approximately 4″x4″, crucial for preventing the buns from sticking during steaming.
- (Shortcut Option): Pillsbury Buttermilk Biscuit Dough: For an incredibly quick and easy alternative to traditional steamed buns, as detailed later in the recipe.
For the Zesty Chili & Green Onion Topping and Hoisin Glaze:
These vibrant toppings add crucial layers of flavor, heat, and freshness that truly complete the pork belly bun experience.
- Green Onion: 1 stalk, minced, for a fresh, pungent garnish.
- Fresh Chili: 1 fresh chili, minced or thinly sliced (adjust to your spice preference).
- Rice Vinegar: 1 teaspoon, or white vinegar, to add a bright, acidic counterpoint.
- Salt: 1/4 teaspoon, a pinch to enhance the topping’s flavors.
- Cooking Oil: 2 tablespoons, to be heated until smoking for the flash-fry technique.
- Hoisin Sauce: 3 tablespoons, a sweet, savory, and slightly tangy condiment essential for spreading on the buns.
- Kimchi (Optional but Highly Recommended): A small amount adds a fantastic fermented tang and a satisfying crunch.
Step-by-Step Guide: Crafting Your Delicious Pork Belly Buns
This recipe involves several key steps, each contributing significantly to the complex flavors and delightful textures of this incredible dish. We highly recommend reading through all instructions completely before you begin cooking to ensure a smooth and enjoyable process.
Part 1: Preparing the Caramel Braised Pork Belly
The heart of our pork belly buns lies in perfectly cooked and exquisitely flavored pork belly. This two-stage method – slow-roasting followed by braising – ensures maximum tenderness and a deeply infused flavor. When sourcing, look for a nice, thick slab of pork belly, ideally around 2 pounds. Asian markets with a dedicated fresh meat counter are often the best place to find it. If not, your local butcher can usually provide it. Remember, any leftover caramel pork belly is incredibly versatile and delicious, perfect served alongside miso ramen or simple steamed rice!
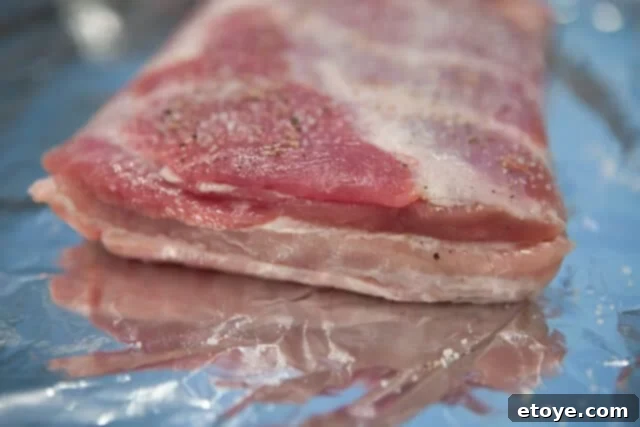
Step 1: Season and Slowly Roast the Pork Belly
Begin by generously seasoning your slab of pork belly on all sides with a good sprinkle of salt and freshly ground black pepper. The seasoning should be even but not excessive, designed to enhance the pork’s natural, rich flavors.
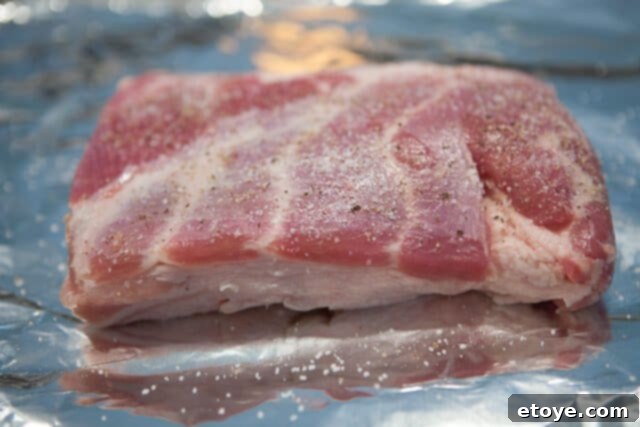
Next, meticulously wrap the seasoned pork belly in two layers of heavy-duty aluminum foil. The key here is to create a very tight, sealed packet. This prevents any precious juices or rendered fat from escaping during the long roasting process. The foil acts as a miniature steaming environment, ensuring the pork remains incredibly moist and tender.
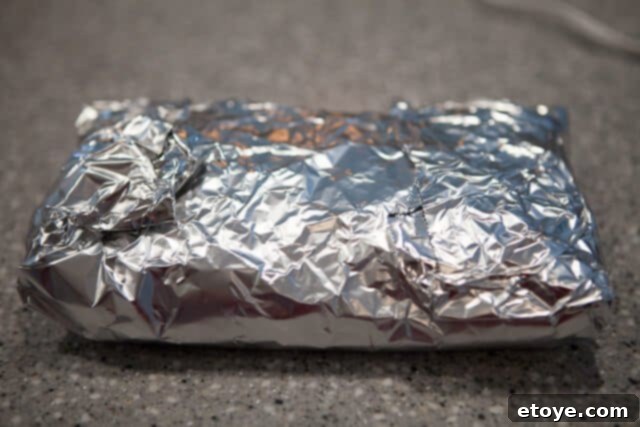
Place the tightly wrapped pork belly on a baking sheet and roast it “slow ‘n low” in a preheated oven at 275°F (135°C) for a substantial 2 hours. It’s crucial to resist the urge to open the foil packet during this time, as doing so would release the flavorful liquid and steam essential for tenderizing the meat. Once roasted, carefully remove the packet from the oven and allow it to cool on the counter until it’s safe to handle, but still do not open it. Finally, transfer the still-wrapped pork belly to the refrigerator and chill for at least a couple of hours, or ideally, overnight. This crucial chilling step allows the pork belly to firm up, making it significantly easier to slice neatly, and ensures all those delicious juices and flavors are locked in.
Step 2: Slice and Sear the Pork Belly for Texture
Only once the pork belly is thoroughly chilled can you finally unwrap it. You’ll observe how beautifully it has retained its shape, and the flavorful juices will have solidified, ready to be incorporated into your braising sauce. With a sharp knife, slice the pork belly into uniform 1/2-inch thick pieces. This thickness provides a satisfying bite while remaining perfectly manageable within the steamed bun.
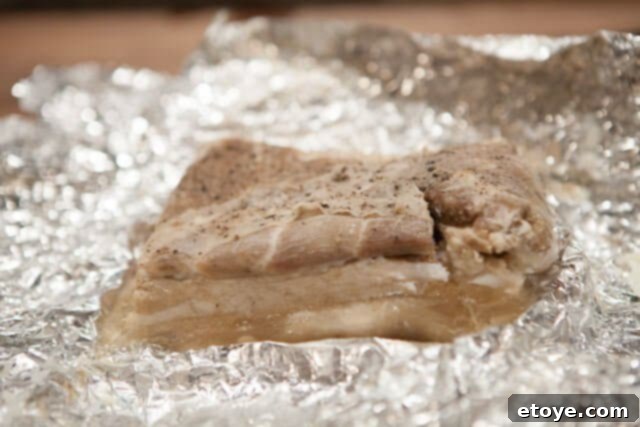
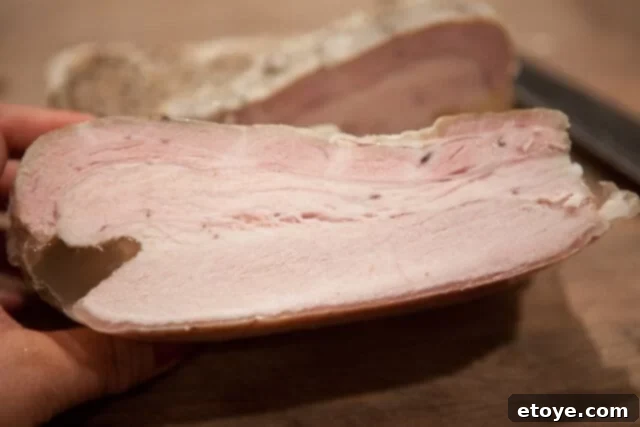
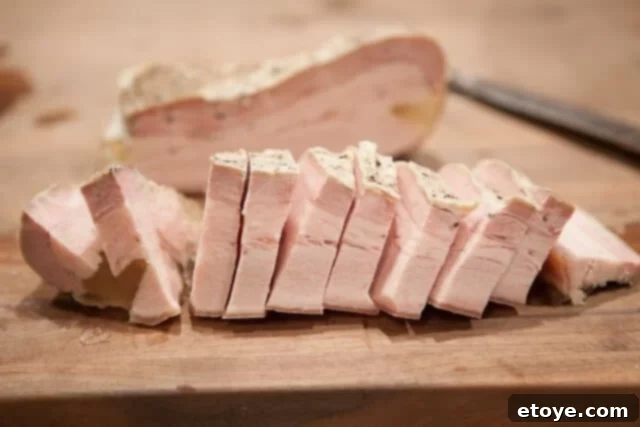
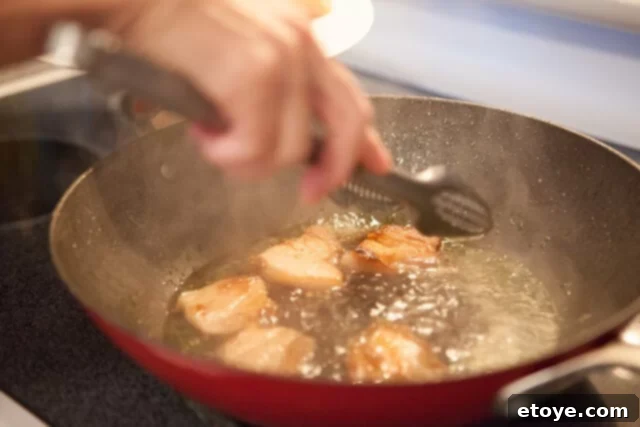
Heat a large sauté pan or wok over high heat. Swirl in about a tablespoon of cooking oil, then carefully place the pork belly slices in a single layer, ensuring not to overcrowd the pan. Fry each side until beautifully browned and the edges begin to crisp up. This searing step adds a wonderful textural contrast – a crispy exterior complementing the tender interior. Once browned, remove the pork belly slices from the pan and set them aside.
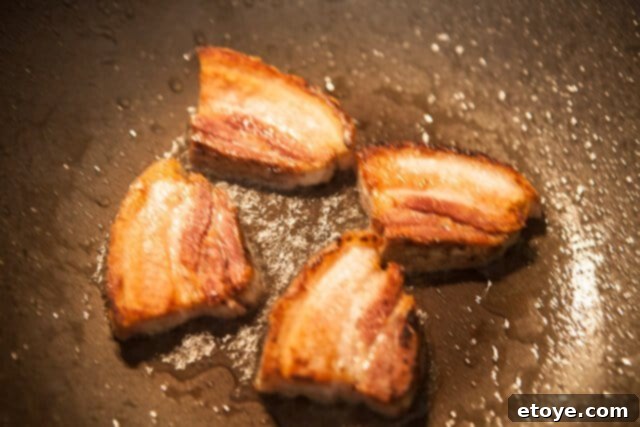
Step 3: Develop the Rich Vietnamese Caramel Braising Sauce
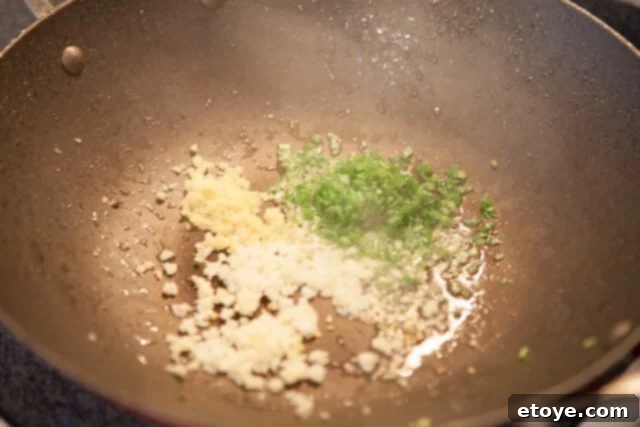
Crucially, keep the flavorful rendered fat in the pan! Reduce the heat to medium-low and add the minced garlic, ginger, and green onion (and fresh chilies if you’ve chosen to include them in the braise). Sauté these aromatics for about 30 seconds, stirring constantly, until they become wonderfully fragrant. Be careful not to burn them, as this would impart a bitter taste. Their gentle aroma will form the foundational layer of your exquisite caramel sauce.
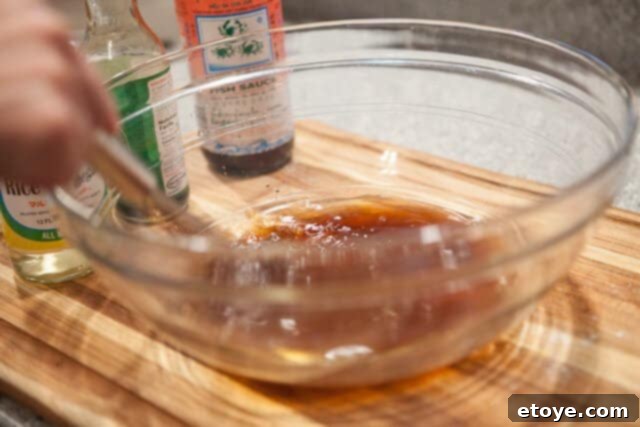
In a separate large bowl, whisk together the ingredients for your Vietnamese caramel braising sauce: Asian fish sauce, soy sauce, packed brown sugar, rice vinegar, and water. This carefully balanced blend of sweet, savory, and tangy notes is what truly makes the pork belly shine, imparting a complex and addictive glaze. Pour this aromatic sauce directly into the wok with the sautéed aromatics.
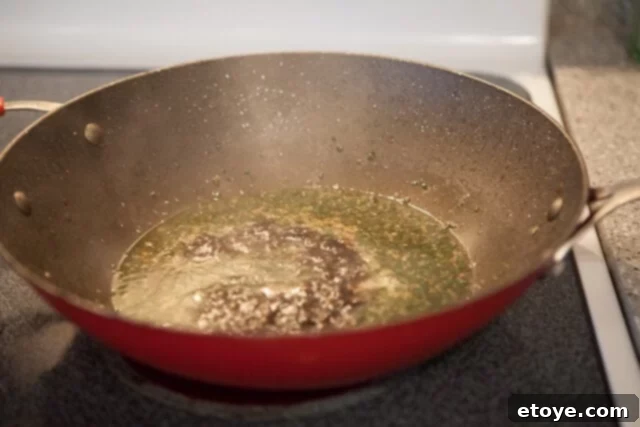
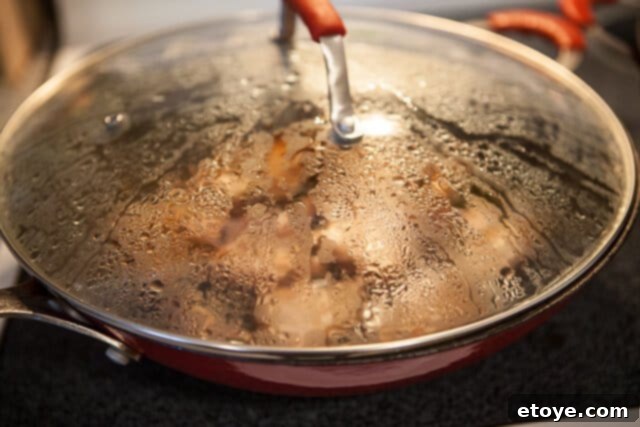
Return the browned pork belly slices to the pan, ensuring each piece is well coated by the rich, simmering sauce. Bring the sauce to a gentle simmer, then cover the pan tightly and let it cook on low heat for approximately 10-20 minutes. This crucial braising step allows the pork belly to fully absorb all the incredible flavors of the caramel sauce, becoming even more tender, succulent, and deeply flavored.
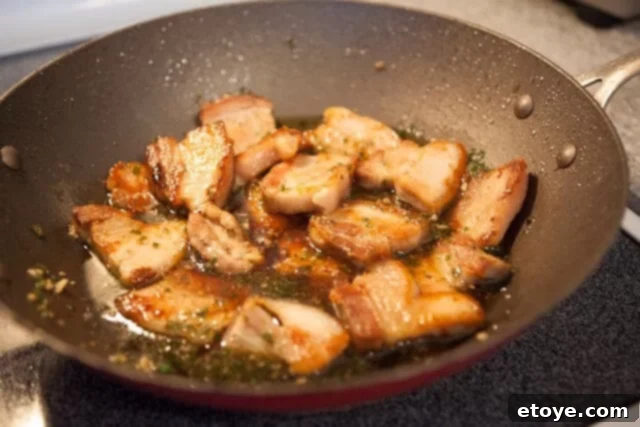
Once simmered, your caramel braised pork belly is complete! The sauce will have reduced slightly, becoming gloriously glossy and clinging beautifully to each piece of pork. It will be incredibly tempting to sneak a taste, or even devour the entire thing!
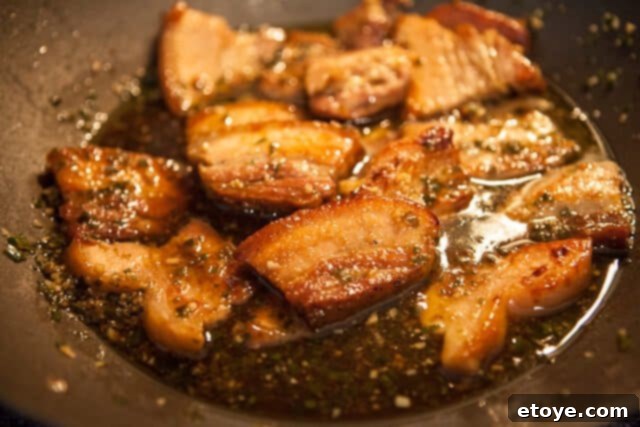
You can turn off the heat and allow the pork belly to rest in the sauce until you’re ready to assemble your buns. This resting period allows the flavors to deepen further. If preparing ahead, store the pork belly and sauce in an airtight container in the refrigerator for up to 2-3 days.
Part 2: Crafting the Perfect Pillowy Steamed Buns (Gua Bao)
The soft, ethereal, and pillowy texture of a freshly steamed bun is absolutely essential for a truly authentic and satisfying pork belly bun experience. Here, we’ll explore two excellent methods: using a convenient pre-mixed flour for ease, and an ingenious shortcut using store-bought dough for when time is short.
Method A: Using Steamed Bun Flour Mix for Traditional Results
For consistently excellent results and simplified preparation, we highly recommend starting with a package of pre-mixed steamed bun flour, which is often labeled “Banh Bao” mix in Asian markets. These mixes typically require just a few additional ingredients like sugar, milk, and a touch of cooking oil, making the process much less daunting than traditional scratch-made dough. If you prefer to make your buns entirely from scratch using all-purpose flour and yeast, you can follow a recipe similar to my Mom’s acclaimed Chinese Steamed Buns recipe. For this guide, we’ll focus on the convenience and quality of the mix!
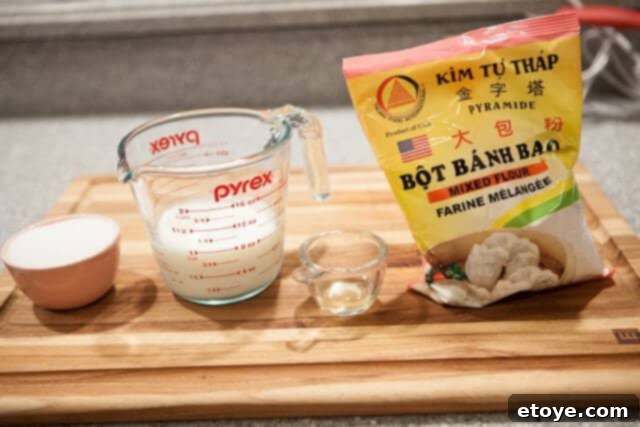
Step 1: Prepare and Knead the Dough
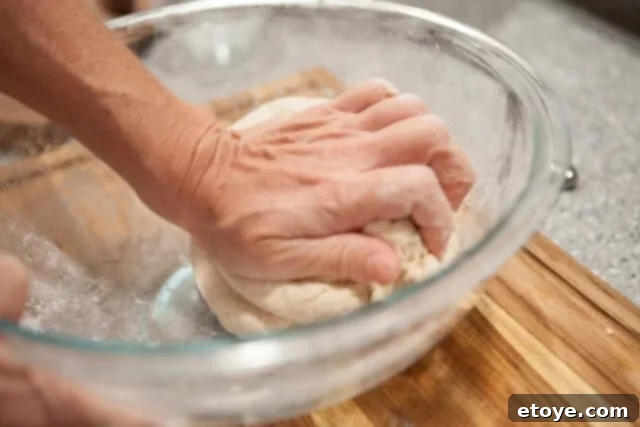
In a large mixing bowl (ensure it’s spacious enough for comfortable kneading!), combine the wet ingredients specified on your steamed bun flour package instructions. This typically includes sugar, milk, and a small amount of cooking oil. While continuously stirring with a sturdy wooden spoon, gradually pour in the steamed bun flour mixture. Keep stirring until the ingredients begin to come together and form a shaggy, cohesive dough.
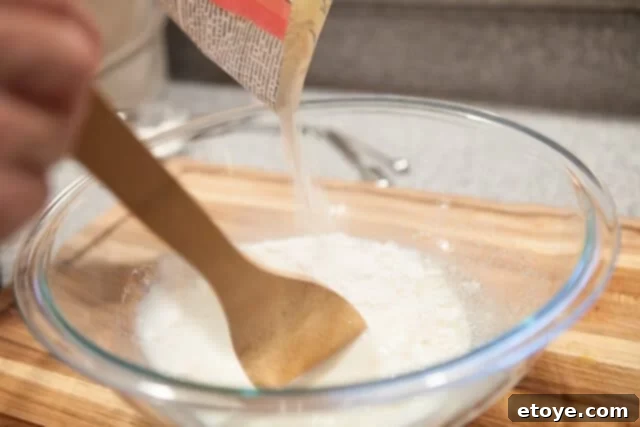
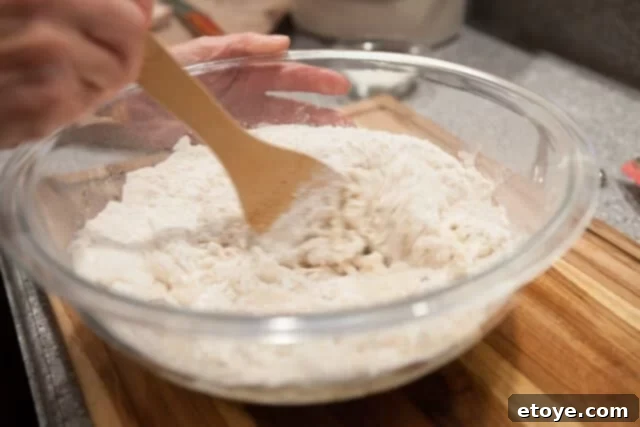
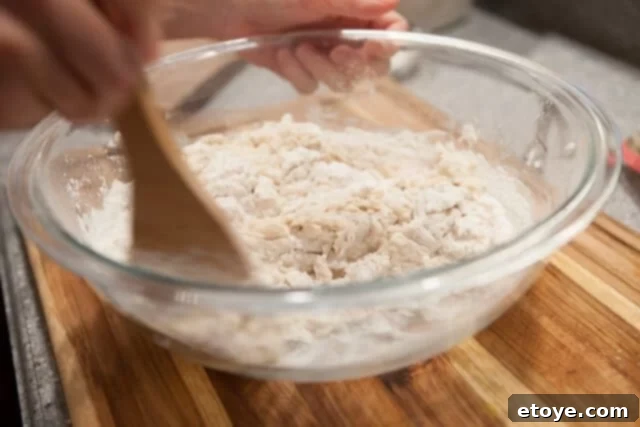
Once the dough begins to consolidate, turn it out onto a lightly floured surface or continue kneading directly in the bowl. Knead the dough vigorously for several minutes until it becomes beautifully smooth, elastic, and no longer sticky. You can use the traditional method of pushing with the palm of your hand, folding the dough over itself, rotating, and repeating. (Pro tip: a stand mixer fitted with a dough hook is a fantastic arm-saver and will achieve excellent results effortlessly!)
Step 2: The First Rise (Proofing)
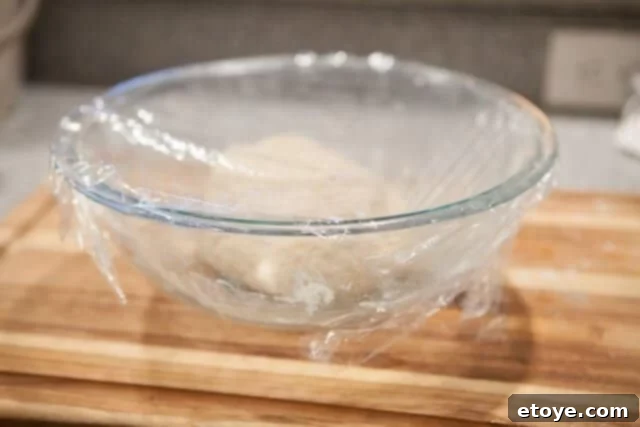
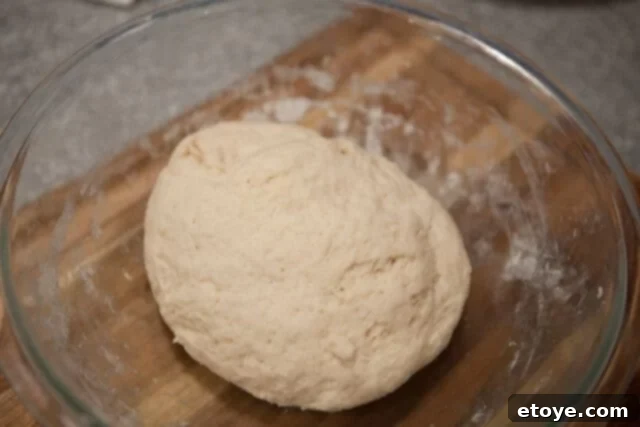
After kneading, form the dough into a smooth ball. Place it back into the mixing bowl, cover it securely with plastic wrap or a damp kitchen towel, and let it rise in a warm, draft-free place for about 20 minutes. During this crucial proofing stage, the yeast will activate, causing the dough to noticeably increase in size, becoming light, airy, and ready for shaping.
Step 3: Shape the Classic Gua Bao Buns
Lightly dust your work surface with all-purpose flour. Transfer the risen dough to the floured surface and sprinkle a small amount of flour on top of the dough itself. Gently flatten it out into a disc. Using a sharp knife or dough cutter, divide the dough into 8 equal pieces, then cut each of those pieces in half again, resulting in 16 total, uniformly sized pieces. This division will yield perfectly portioned buns for your pork belly fillings.
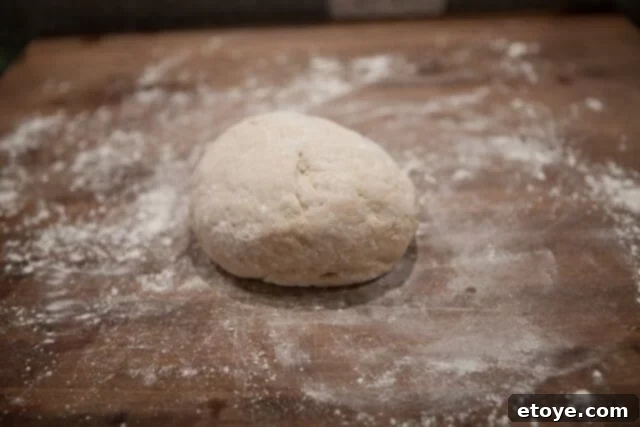
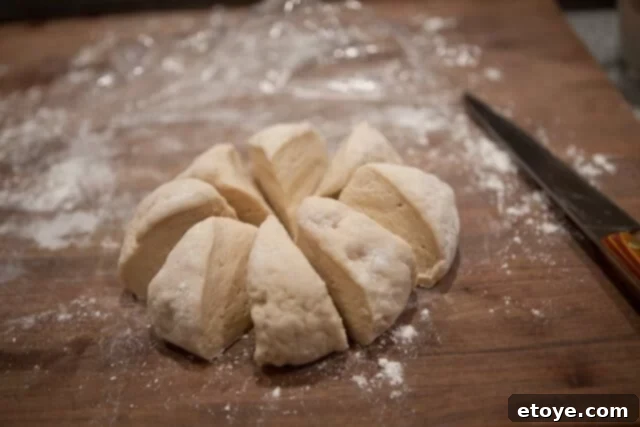
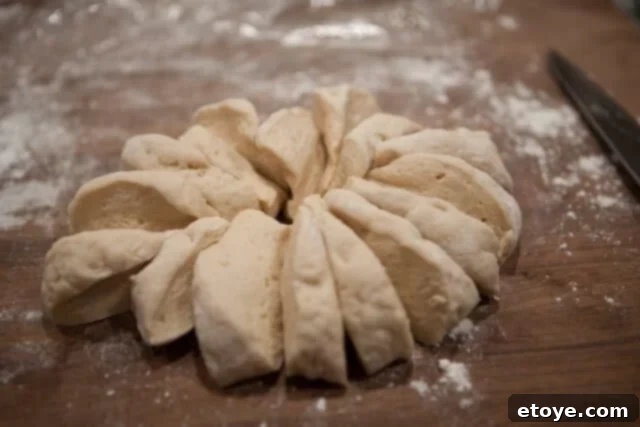
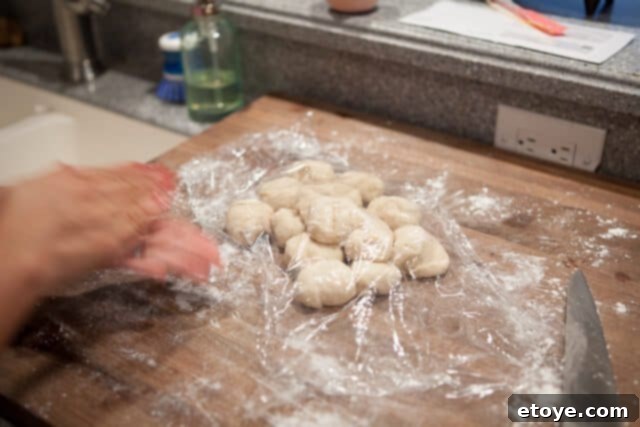
Roll each of these 16 individual pieces into smooth, neat round balls. It is absolutely crucial to keep the dough balls covered loosely with plastic wrap or a damp kitchen towel at all times. This prevents them from drying out and forming a crust while you work on shaping each one individually.
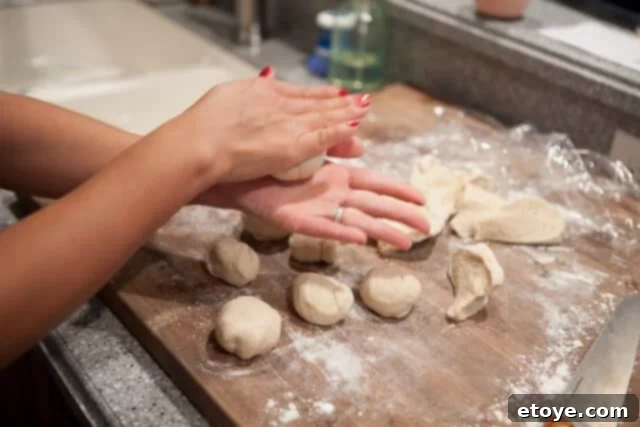
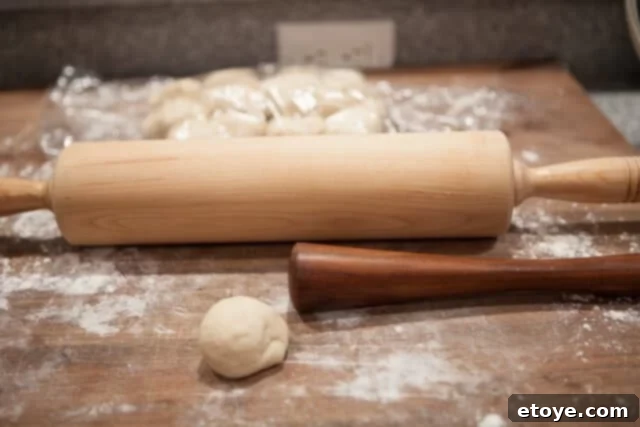
Take one dough ball at a time and, using a rolling pin (a smaller, 1-inch diameter rolling pin is ideal for these individual buns, but a muddler or even a clean, straight-sided glass can serve as a makeshift tool in a pinch!), roll it out into an oval shape, approximately 4 inches long by 3 inches wide. The slight oval shape is intentional and makes the next step of folding much easier and more effective.
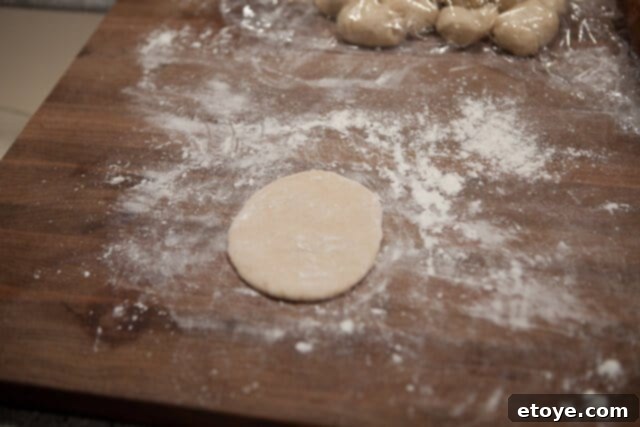
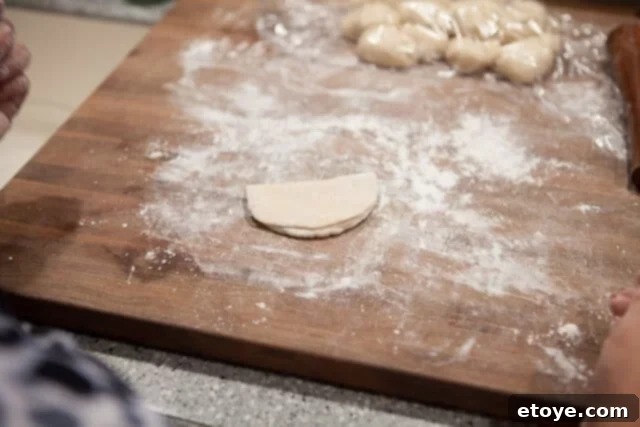
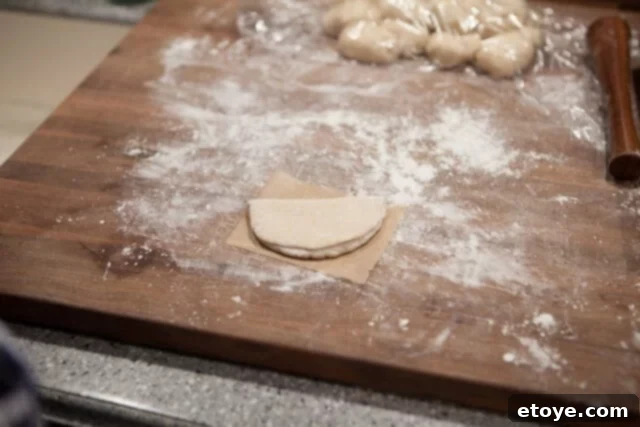
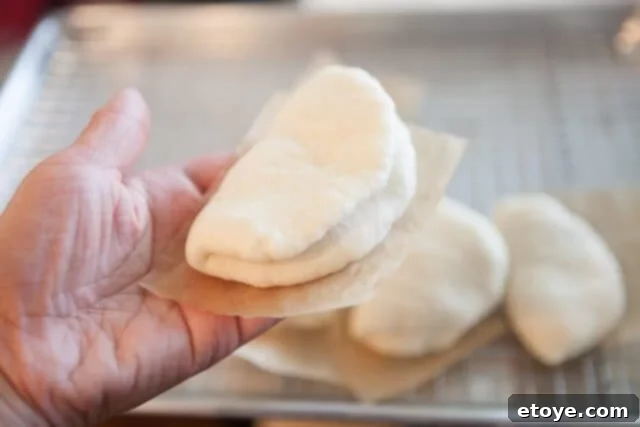
Once rolled into an oval, gently fold the dough in half to create the classic half-moon steamed bun shape. Place each folded bun onto a small square of parchment paper (about 4″x4″). This parchment paper is absolutely vital as it prevents the buns from sticking to the steamer basket or plate during the cooking process. Continue this process with the remaining dough balls, ensuring the finished buns are kept loosely covered with plastic wrap or a damp towel until you are ready to steam them.
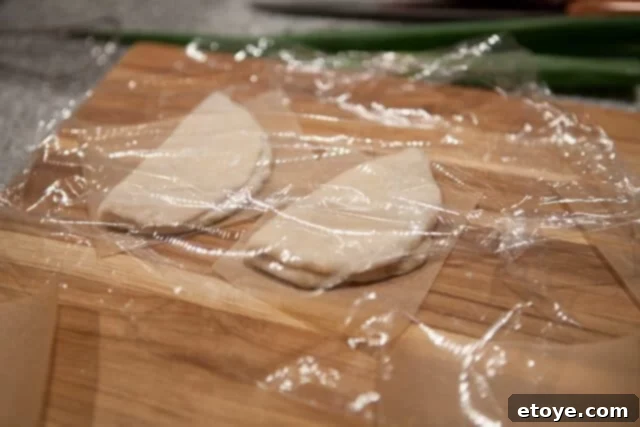
Step 4: Steam the Buns to Fluffy Perfection
To steam the buns, you’ll need a large wok or a wide, deep pot with a tight-fitting lid. Fill the bottom of the pot with about an inch of water. Place a steaming rack inside the pot, ensuring it sits well above the waterline. If you don’t have a dedicated steaming rack, don’t worry – you can improvise! Three inverted shot glasses, empty (and thoroughly cleaned) tuna cans, or even a few balls of crinkled aluminum foil can effectively prop up a heatproof plate.

Once your steaming setup is ready, carefully place a heatproof plate on top of the rack. Bring the water in the pot to a vigorous rolling boil, ensuring plenty of steam is generated.
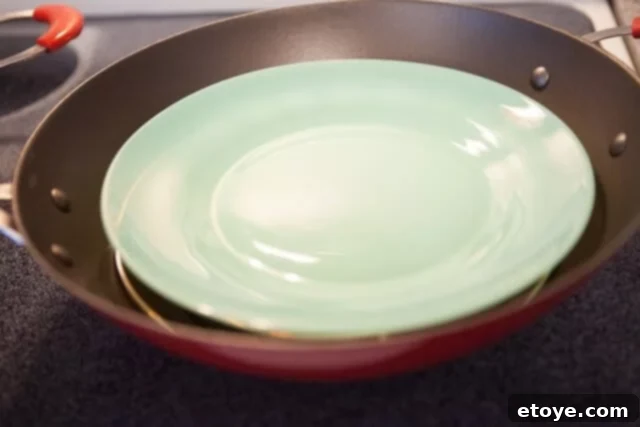
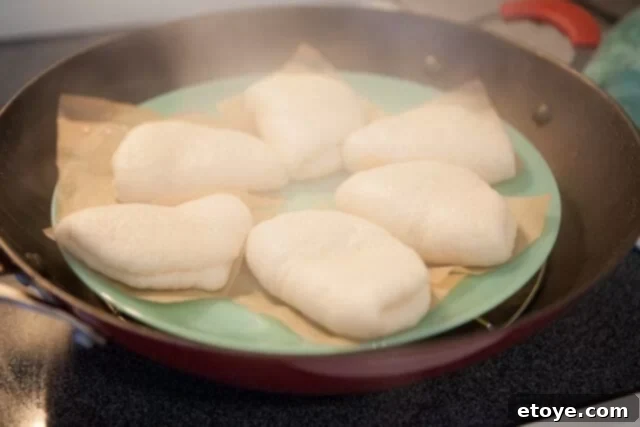
Carefully arrange the prepared buns, still on their parchment squares, onto the plate. It is crucial not to overcrowd them, as the buns will puff up significantly during cooking and require ample space to expand without touching each other. Steam in batches if necessary. Cover the pot tightly with its lid and steam for 15 minutes.
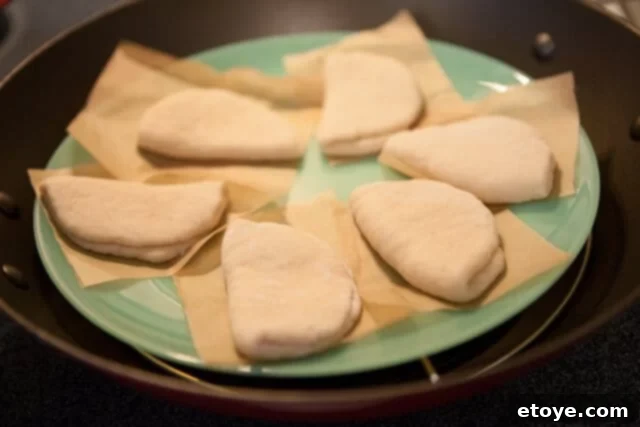
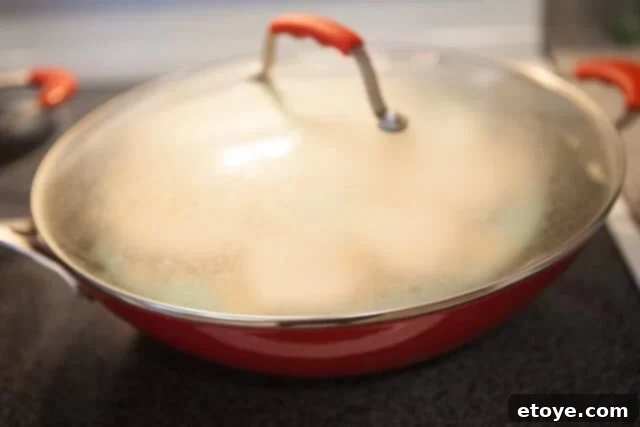
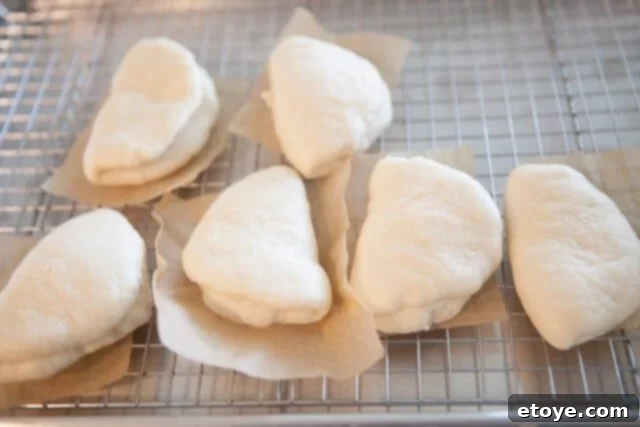
After 15 minutes, carefully remove the lid and behold! Your buns will have transformed into wonderfully fluffy, cloud-like creations, significantly larger and softer than before. Allow them to cool slightly for a few minutes before handling, as they will be very hot. They are now perfectly ready to be filled with your incredible caramel pork belly!
Part 3: Crafting the Zesty Chili & Green Onion Topping
This vibrant, fiery, and fresh topping adds a critical layer of flavor and textural contrast, perfectly cutting through the richness of the pork belly. It’s incredibly quick to make but delivers a powerful, aromatic punch.
Step 1: Prepare the Topping Base
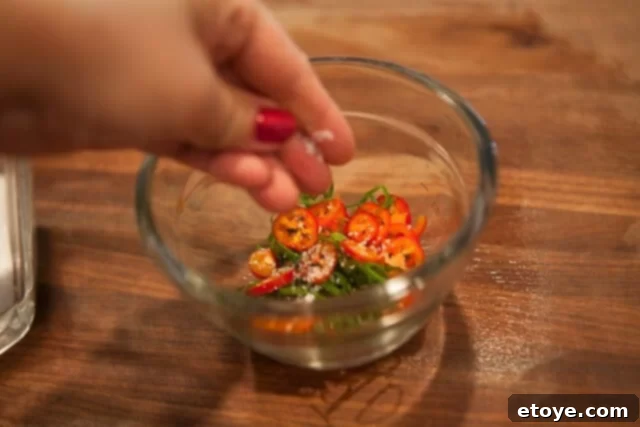
In a small, heatproof bowl, combine your minced green onions, fresh chilies (sliced very thinly or minced, depending on how much heat you desire), rice vinegar, and a small pinch of salt. Ensure your bowl is made of material that can safely withstand high heat, such as ceramic or glass.
Step 2: The Sizzling Hot Oil Infusion
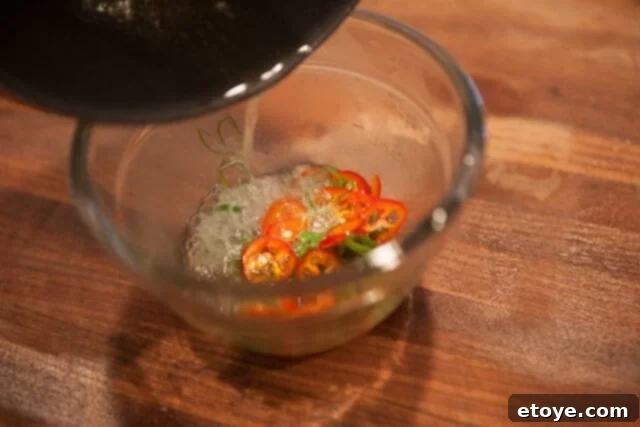
In a small saucepan, heat 2 tablespoons of cooking oil over high heat until it just begins to visibly smoke. This high temperature is crucial for achieving the desired sizzle and activating the intense flavors of the aromatics. Maintain constant vigilance and keep a close eye on the oil to prevent it from overheating and potentially setting off your smoke alarm or causing a fire. Once you observe faint wisps of smoke rising from the oil, immediately and very carefully pour the extremely hot oil directly over the green onion and chili mixture in the heatproof bowl.
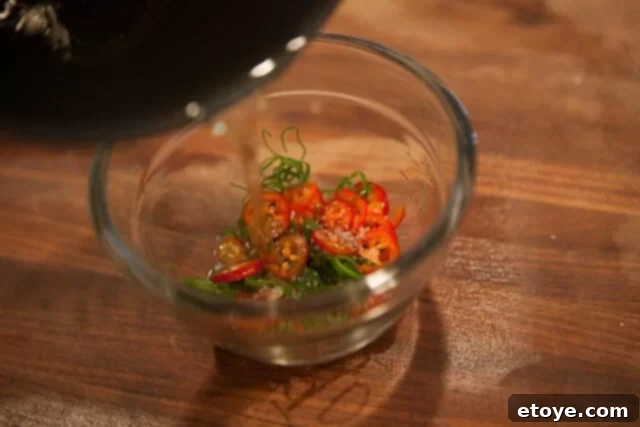
You’ll be greeted by a magical sizzle and crackle as the intensely hot oil instantly flash-cooks the aromatics, releasing their vibrant, pungent flavors beautifully without burning them. This unique technique creates a wonderfully fragrant and deeply flavorful topping. Stir gently and set aside until you are ready to assemble and serve your buns.
Part 4: Assemble and Serve Your Irresistible Pork Belly Buns
With all your delicious components ready – the tender caramel pork belly, the fluffy steamed buns, and the vibrant chili topping – it’s time for the most rewarding part: assembly! You’ll also want to have some sweet and savory hoisin sauce readily available to spread on the buns, offering another layer of traditional flavor and moisture.
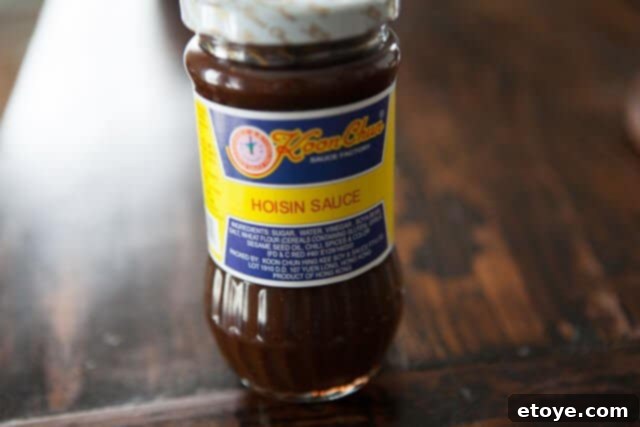
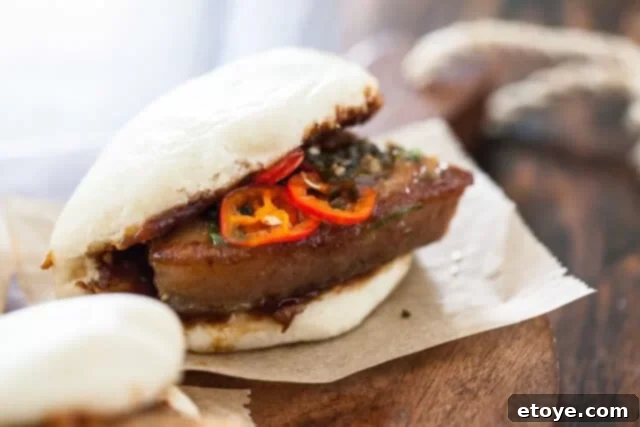
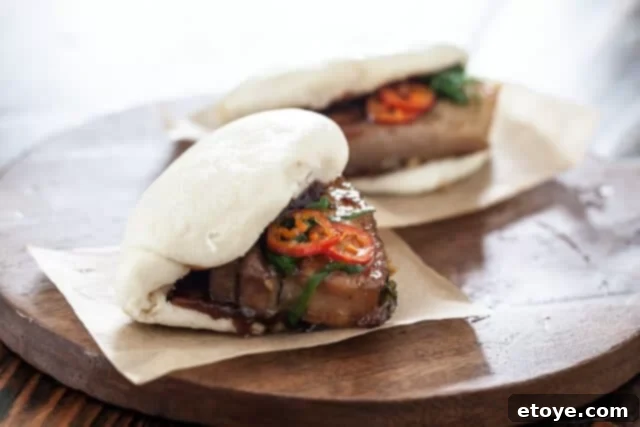
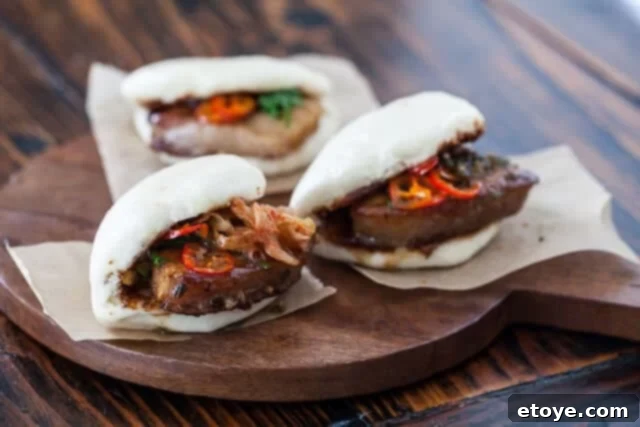
Gently open a warm, soft, and fluffy steamed bun. Spread a thin, even layer of hoisin sauce on the inside of the bun. Next, carefully place a slice or two of your rich, caramel-braised pork belly inside. Top generously with your fresh chili and green onion mixture, ensuring a burst of flavor in every bite. For an extra layer of tangy crunch and a delicious fermented kick, tuck in a small bite of kimchi if desired. Serve immediately while the buns are warm, and prepare for an explosion of perfectly balanced flavors and delightful textures!
Shortcut Alert: Steamed Buns with Pillsbury Buttermilk Biscuit Dough
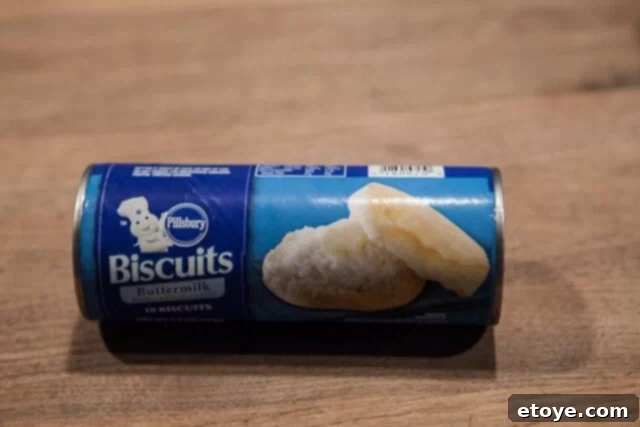
Sometimes, time is of the essence, but the craving for those amazing pork belly buns is undeniable. This ingenious “cheater” recipe, a brilliant trick passed down from my mom, utilizes an unexpected secret ingredient: canned Pillsbury Buttermilk Biscuit dough! I admit, I was quite skeptical at first, even betting against it, but these buns turn out surprisingly light, fluffy, and just as satisfying as their homemade counterparts. It’s an absolutely brilliant hack for busy weekdays or when you need a quick entertaining solution.
This method will yield approximately 20 slightly smaller buns compared to those made from the traditional mix, so you might consider slicing your pork belly a bit thinner to ensure a perfect fit. The texture is wonderfully smooth and pillowy, making them a fantastic and convenient alternative.
Ingredients for Shortcut Steamed Buns:
- 2 tablespoons all-purpose flour for dusting your work surface.
- 2 cans Pillsbury Buttermilk Biscuit dough (7.5 ounces each).
- 20 parchment squares (approximately 4″x4″).
Instructions for Shortcut Steamed Buns:
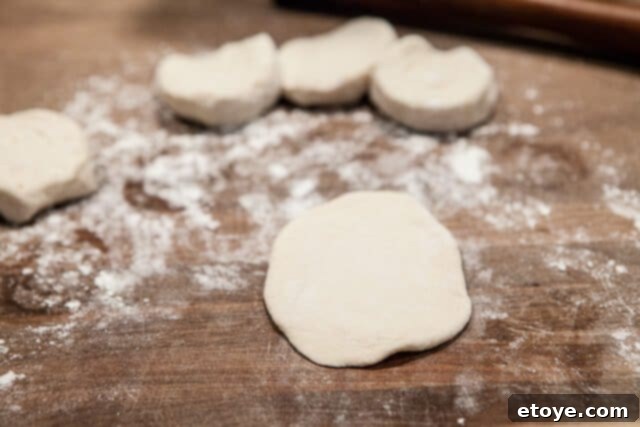
- Lightly dust your work surface with all-purpose flour. Carefully open the cans of biscuit dough and separate each individual biscuit (there are typically 10 biscuits per can, totaling 20). It’s important to keep the dough loosely covered with plastic wrap or a clean towel to prevent it from drying out while you work.
- Take one biscuit at a time and, using a rolling pin, roll it out into an oval-ish shape, similar to the method used for the traditional buns.
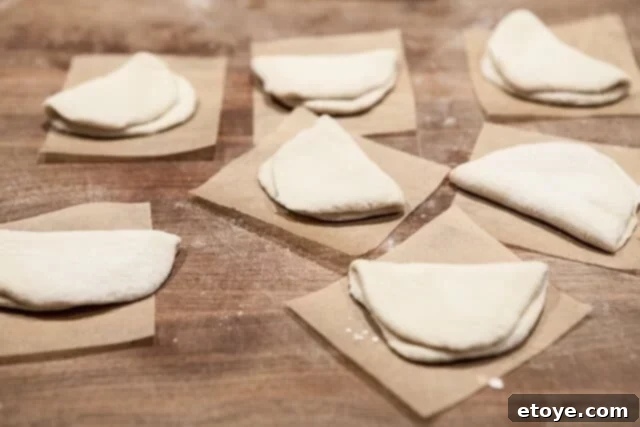
- Fold the oval dough in half to create the classic half-moon bun shape. Place each folded bun onto a parchment square. As with the homemade dough, it’s essential to keep all prepared buns loosely covered until you are ready to steam them to prevent them from drying out.
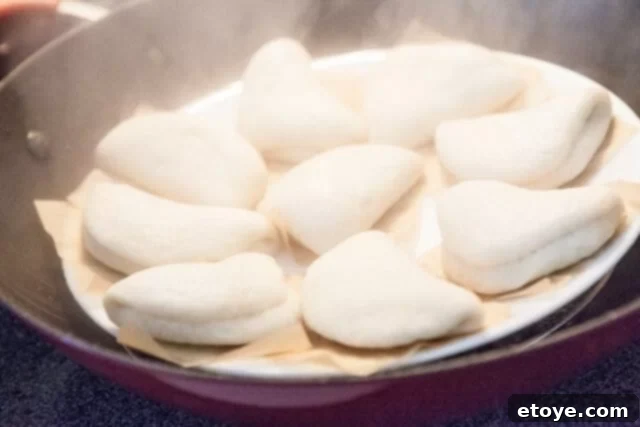
- Prepare your steamer exactly as shown in Part 2, Step 4 of the main recipe instructions. Once the water is boiling and generating plenty of steam, arrange the biscuit buns on the steaming plate, ensuring they are not overcrowded. Steam for approximately 12 minutes. You will undoubtedly need to steam in multiple batches.
- After steaming, the buns will puff up beautifully, looking incredibly similar to their homemade counterparts and emerging wonderfully fluffy and ready to enjoy. Allow them to cool slightly for a few minutes before filling.
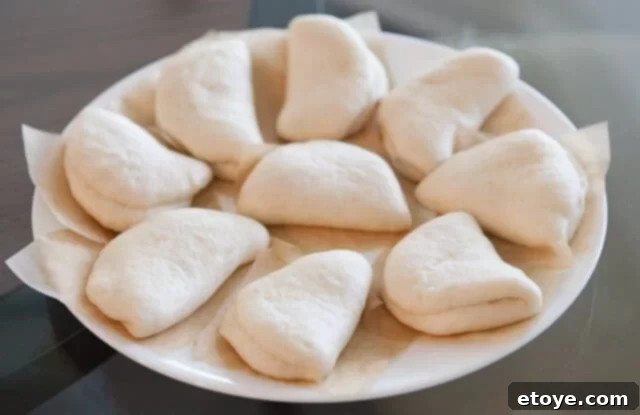
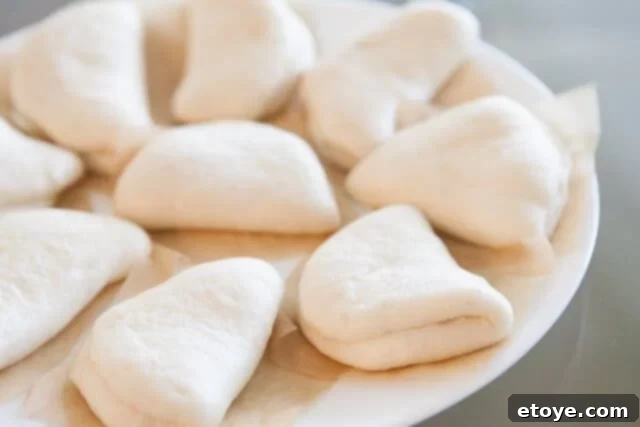
Seriously, my Mom’s trick is pure genius! These shortcut buns are a testament to finding delicious, efficient, and surprisingly effective ways to enjoy your favorite foods without hours of effort.
The Enduring Popularity of Pork Belly Buns: A Global Phenomenon
Pork belly buns, affectionately known as Gua Bao, have undeniably taken the culinary world by storm. They have transitioned from a humble street food to a beloved staple in modern Asian cuisine and are now celebrated globally. Their meteoric rise to fame rivals other recent Asian food sensations such as Korean tacos and the ubiquitous bubble tea. It comes as no surprise, given that pork belly is the incredibly flavorful and rich cut that gives us the universally adored bacon! The unparalleled combination of tender, rich, melt-in-your-mouth pork, perfectly balanced sweet and savory sauces, and the light, cloud-like texture of fluffy steamed buns creates an irresistible contrast that keeps food enthusiasts coming back for more, time and time again.
A Harmonious Fusion of Flavors in Every Bite
My unique rendition of Pork Belly Buns is a delightful cultural mashup, thoughtfully bringing together the very best elements of three distinct culinary traditions. It features the deep, complex, and utterly addictive notes of a Vietnamese caramel braising sauce, providing a sticky-sweet and savory coating to the pork. This rich flavor is perfectly complemented by the classic soft and airy texture of traditional Chinese steamed buns, which act as the ideal canvas. Finally, the vibrant, tangy crunch of Korean kimchi adds an exciting layer of fermented zest. This harmonious blend creates an unparalleled experience of balanced flavors and diverse textures that you won’t easily forget. The specific inspiration for the pork belly recipe comes from my talented friend John of Food Wishes – if you haven’t seen his engaging and educational cooking videos, you are truly missing out!
Frequently Asked Questions About Mastering Pork Belly Buns
To help you perfect your pork belly buns and answer any common queries, we’ve put together a list of frequently asked questions:
Can I use pre-made buns from the store?
Absolutely! If you’re fortunate enough to live near a well-stocked Asian market, you can often find high-quality frozen pre-made steamed buns, ready to be steamed. These are a great option for saving time. For everyone else, our recipe offers two excellent solutions for the buns: either using a convenient steamed bun flour mix or our ingenious “cheater” recipe using Pillsbury Buttermilk Biscuit dough, both of which yield surprisingly fluffy and delicious results.
Is this a fast recipe to make?
Full disclosure: this is **not** a fast recipe. Achieving perfectly tender, succulent pork belly requires time and patience, so you should plan for an afternoon dedicated to cooking. However, the excellent news is that many of the components can be split across two days, making the process much more manageable. For instance, you can slow-roast the pork belly one day and then finish the braising and prepare the buns the following day, which is a method I often use. We promise, the effort invested is absolutely worth it for the incredible, multi-layered flavor you’ll achieve!
Can I prepare any components of the recipe in advance?
Yes, definitely! Advanced preparation is key to making this recipe more manageable. The slow-roasted pork belly can be fully cooked, kept wrapped in its foil, and refrigerated for up to 2-3 days in advance. The caramel braising sauce can also be made ahead and stored separately or with the pork belly. The chili and green onion topping can be prepared a few hours ahead and stored at room temperature (if using hot oil infusion). While the buns are best steamed fresh, the dough (from the mix) can be made a few hours in advance and kept refrigerated until you’re ready to roll and steam.
What are some good serving suggestions for Pork Belly Buns?
Pork Belly Buns are incredibly versatile and can be served either as a substantial appetizer or as a light main course. If you’re looking to create a more extensive meal or a diverse Asian feast, they pair wonderfully with light, refreshing side dishes. Consider serving them with a simple cucumber salad dressed with sesame oil and vinegar, pickled daikon and carrot, or even a side of plain white rice to soak up any extra delicious sauce. They also complement other small plates like spring rolls or edamame.
Can I freeze cooked Pork Belly Buns for later?
Yes, you certainly can! Both the cooked caramel pork belly and the steamed buns can be frozen separately for optimal results. For the pork belly, allow it to cool completely, then freeze individual slices in a single layer on a baking sheet before transferring them to an airtight container or freezer-safe bag. They can be stored for up to 2-3 months. Reheat gently in a pan with a little extra sauce. For the steamed buns, once completely cooled, place them in a freezer-safe bag, ensuring they don’t stick together. Reheat by steaming for a few minutes until they are soft and warm again, or microwave briefly.
Top Expert Tips for Mastering This Pork Belly Buns Recipe
Follow these invaluable tips and tricks to ensure your homemade pork belly buns turn out perfectly succulent, fluffy, and bursting with flavor every single time:
- Double Up on Foil: When slow-roasting the pork belly, always use heavy-duty aluminum foil or, if you only have regular foil, use two layers. A tight, secure seal is absolutely crucial for trapping moisture and locking in all those precious flavors.
- Don’t Skip the Chill: Refrigerating the roasted pork belly overnight (or for at least 2 hours) is a non-negotiable step. It allows the rendered fat to solidify and the meat to firm up, making uniform and clean slicing much, much easier.
- Keep Dough Covered at All Times: Whether you’re working with homemade dough or the shortcut method, always keep your dough balls or shaped buns loosely covered with plastic wrap or a damp kitchen towel. This prevents them from drying out and forming an undesirable crust.
- Flour Lightly: A very light dusting of all-purpose flour on your work surface and rolling pin will prevent the dough from sticking without making it tough or altering its texture.
- Avoid Steamer Overcrowding: Always give your buns plenty of space to expand gracefully. Steaming in small batches, if necessary, ensures they cook evenly, puff up beautifully, and remain perfectly fluffy without sticking to each other.
- Smoking Hot Oil for Topping: For the chili-green onion topping, ensure your cooking oil is smoking hot before you pour it over the fresh aromatics. This flash-fry technique instantly releases and infuses their flavors beautifully without overcooking them.
- Embrace the Kimchi: While technically optional, a small amount of kimchi adds a fantastic tangy, spicy, and crunchy element that elevates the entire bun experience, providing a wonderful counterpoint to the rich pork.
- Achieve Flavor Balance: Remember that the hoisin sauce contributes sweetness, the chili topping brings the heat, and the kimchi offers tang and crunch. Adjust these components to your personal preference for a perfectly balanced and harmonious bite.
Discover More Delicious Pork Recipes
If you’ve thoroughly enjoyed preparing and devouring these incredible pork belly buns, you’re in for a treat with these other fantastic pork-centric dishes from our extensive culinary collection. Each recipe offers unique flavors and techniques to explore:
- Pork Belly Lettuce Cups Recipe: A lighter, fresher, and equally flavorful take on enjoying succulent pork belly, perfect for a crisp appetizer.
- Sous Vide Pork Belly Recipe: For those who appreciate precision cooking, this method guarantees incredibly tender and consistently perfect results every time.
- Thai Pork Chops in Ginger Coconut Sauce: A fragrant and intensely flavorful dish, combining the warmth of ginger with the richness of coconut, ideal for a satisfying weeknight meal.
- Pork and Spinach Wontons: Learn to make delicious homemade dumplings, offering a comforting and versatile option for appetizers or a light meal.
We sincerely hope you thoroughly enjoy the entire process of preparing and ultimately devouring these incredible Pork Belly Buns. They are truly a labor of love that rewards you with an unforgettable and deeply satisfying culinary experience. Have you tried this recipe or adapted it in your own creative ways? We’d absolutely love to hear about your experience! Feel free to leave a star rating and share your valuable thoughts, tips, or questions in the comments section below. Happy cooking!
Pork Belly Buns Recipe
By Jaden Hair
These Pork Belly Buns are a delightful fusion: slow-cooked pork belly, simmered in a sweet-savory Vietnamese caramel sauce, nestled in soft, pillowy steamed buns. Enhanced with spicy kimchi, flash-fried chilies, and green onions for an explosion of flavor.
Pin Recipe
Prep Time
1 hr
Cook Time
2 hrs
Refrigerate
8 hrs
Total Time
3 hrs
Course
Appetizer, Side Dish
Cuisine
Asian, Chinese
Servings
8 servings
Calories
876 kcal
Ingredients
FOR THE PORK BELLY
- 1 slab pork belly, about 2 pounds
- 1 tablespoon cooking oil
- 2-3 cloves garlic, finely minced
- 1 tablespoon finely chopped fresh ginger
- 1 fresh chili pepper, minced (optional)
- 1 green onion, chopped
- 1/4 cup packed brown sugar
- 2 tablespoons rice vinegar
- 3 tablespoons Asian fish sauce
- 1 tablespoon soy sauce
- 1/2 cup water
FOR THE BUNS
- 14 ounce package of steamed bun flour (Banh Bao)
- + ingredients as per package instructions (e.g., milk, sugar, oil)
- 3 tablespoons all-purpose flour for dusting work surface
- 16 squares of parchment paper, about 4″x4″
FOR THE CHILI SAUCE & TOPPINGS
- 1 stalk green onion, minced
- 1 fresh chili, minced or sliced very thinly
- 1 teaspoon rice vinegar (or white vinegar)
- 1/4 teaspoon salt
- 2 tablespoons cooking oil
- 3 tablespoons hoisin sauce
- Kimchi, optional
Instructions
- CARAMEL BRAISED PORK BELLY: Preheat oven to 275°F (135°C). Wrap the pork belly in heavy-duty aluminum foil (or use 2 layers). Place on a baking sheet and roast for 2 hours. Remove from oven and let cool before refrigerating for at least 2 hours or up to 2 days.
- Unwrap the pork belly and slice into 1/2-inch pieces.
- In a large bowl, whisk together the brown sugar, rice vinegar, fish sauce, soy sauce, and water to form the braising sauce.
- Heat a wok or large sauté pan over high heat. Swirl in 1 tablespoon of cooking oil and add several pork belly slices (do not overlap). Fry each side until browned and slightly crisp. Remove to a plate. Repeat with remaining slices.
- Turn the heat to medium-low. Add the minced garlic, ginger, chilies (if using), and chopped green onion to the pan. Sauté for 30 seconds until fragrant. Pour in the prepared caramel sauce. Return the browned pork belly slices to the wok and let simmer gently, covered, for 10-20 minutes, allowing flavors to meld and pork to tenderize further.
- FOR THE BUNS (USING MIX): Follow the directions on your steamed bun flour package to make the dough. Cover and let rise for 20 minutes.
- Sprinkle a clean work surface with all-purpose flour. Place the risen dough on the surface and cut into 16 equal pieces. Roll each piece into a ball and keep all balls loosely covered with plastic wrap or a damp towel to prevent drying.
- Using a rolling pin, roll out each dough ball into an oval (about 4″x3″). Fold the oval in half to create the classic half-moon bun shape. Place each bun on a 4″x4″ parchment square. Keep prepared buns covered loosely.
- Prepare your steamer: fill a wok or large pot with about an inch of water, place a rack inside, and a heatproof plate on top. Bring water to a boil. Arrange buns on the plate, ensuring they are not overcrowded. Cover and steam for 15 minutes. Steam in batches if needed.
- FOR THE CHILI SAUCE & ASSEMBLY: Place the minced green onion, chili, vinegar, and salt in a small heatproof bowl. In a small saucepan, heat 2 tablespoons of cooking oil until smoking. Immediately and carefully pour the hot oil over the green onion mixture. The oil will sizzle and crackle, infusing the topping with flavor.
- To serve, gently open each steamed bun. Spread a thin layer of hoisin sauce inside. Add a slice of caramel pork belly and top with the chili-green onion mixture. Add kimchi if desired. Serve warm and enjoy!
Nutrition Facts
- Calories: 876 kcal
- Carbohydrates: 51g
- Protein: 17g
- Fat: 66g
- Saturated Fat: 22g
- Cholesterol: 82mg
- Sodium: 867mg
- Potassium: 340mg
- Fiber: 2g
- Sugar: 9g
- Vitamin A: 148 IU
- Vitamin C: 17mg
- Calcium: 25mg
- Iron: 3mg
Keywords
pork belly, pork belly buns, steamed buns, gua bao, Asian street food, caramel pork belly
Tried this recipe?
Let us know how it was!
