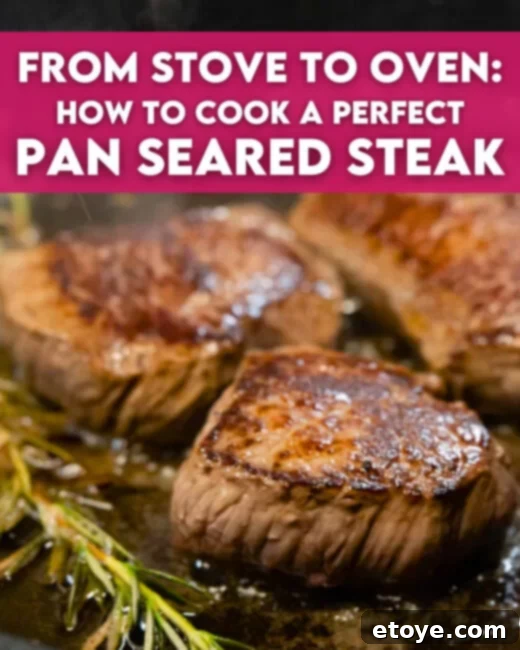
Imagine savoring a perfectly cooked, tender, and incredibly juicy steak right in the comfort of your own home. While dining at a high-end steakhouse often comes with a hefty price tag, you can replicate that exquisite experience in your kitchen. Forget complicated grilling setups; mastering the art of cooking steak in the oven, especially when paired with a foundational sear, offers a surprisingly simple path to culinary excellence.
This comprehensive guide will walk you through the definitive method for creating restaurant-quality steaks: the ‘pan-sear first, oven second’ technique. This approach guarantees a beautiful, flavorful crust while ensuring the interior reaches your desired level of doneness, from rare to well-done, with unparalleled juiciness. Prepare to impress your family and friends, or simply treat yourself, to a steak that rivals any upscale establishment – all in less than an hour of active cooking time.
Choosing the Ideal Steak Cut for Oven Cooking
The foundation of any great steak lies in selecting the right cut. For the pan-sear to oven method, we highly recommend cuts with generous marbling – those delicate streaks of fat woven throughout the muscle. This intramuscular fat renders during cooking, infusing the meat with incredible flavor, ensuring tenderness, and contributing to that desirable juiciness. Prime candidates include:
- Ribeye: Known for its rich marbling and robust flavor, the ribeye often includes a tender cap and a flavorful eye, making it a favorite among steak connoisseurs. Its fat content keeps it moist and tender during the high-heat cooking process.
- New York Strip (Strip Loin): A classic for a reason, the New York Strip offers a satisfying balance of tenderness and chew, with a good amount of marbling and a distinctive band of fat along one edge. It holds its shape well and develops a fantastic crust.
- Filet Mignon (Tenderloin): Hailed for its exceptional tenderness, the filet mignon is lean but incredibly buttery in texture. While it has less marbling than a ribeye or strip, its inherent tenderness makes it a luxurious choice for those who prioritize melt-in-your-mouth texture.
- T-Bone/Porterhouse: These cuts offer the best of both worlds, featuring both a tenderloin (filet) and a New York Strip, separated by a T-shaped bone. The bone adds flavor and helps conduct heat, resulting in a complex and satisfying steak experience.
Regardless of your choice, aim for steaks that are at least 1 to 1.5 inches thick. Thicker cuts are more forgiving and allow for better temperature control, making it easier to achieve a perfect gradient of doneness from edge to center without overcooking the exterior.
Essential Preparation for a Flawless Steak
Before you even think about heat, proper preparation is paramount to achieving a truly exceptional steak. These crucial steps lay the groundwork for a perfect crust and even cooking:
Bringing Steak to Room Temperature
One of the most overlooked yet vital steps is allowing your steak to come to room temperature before cooking. Remove your steak from the refrigerator at least 30 to 60 minutes prior to cooking. A cold steak hitting a hot pan will cook unevenly, often resulting in an overcooked exterior and a cold or undercooked center. By allowing it to warm up slightly, you promote more even heat penetration and a consistent doneness throughout.
Patting the Steak Dry
Moisture is the enemy of a good sear. Using paper towels, thoroughly pat both sides and the edges of your steak until it is completely dry. Any surface moisture will first have to evaporate before the Maillard reaction (the browning process that creates complex flavors and a crust) can occur. A dry surface ensures a quick, deep sear and that coveted golden-brown crust.
Seasoning Your Steak
Keep it simple and classic for the best results. Generously season both sides of your steak with coarse kosher salt and freshly ground black pepper. Don’t be shy – much of the salt will dissolve or fall off during cooking. For an added layer of flavor, you can rub it with a small amount of olive oil (or another high smoke point oil like avocado oil) before seasoning, or incorporate garlic powder, onion powder, or your favorite steak rub. For an aromatic touch, consider adding sprigs of fresh rosemary or thyme to the pan during the searing process.
Mastering the Pan-Sear to Oven Method: Step-by-Step
This technique combines the intense heat of searing with the gentle, even heat of oven roasting, delivering a steak that’s crusty on the outside and wonderfully juicy within.
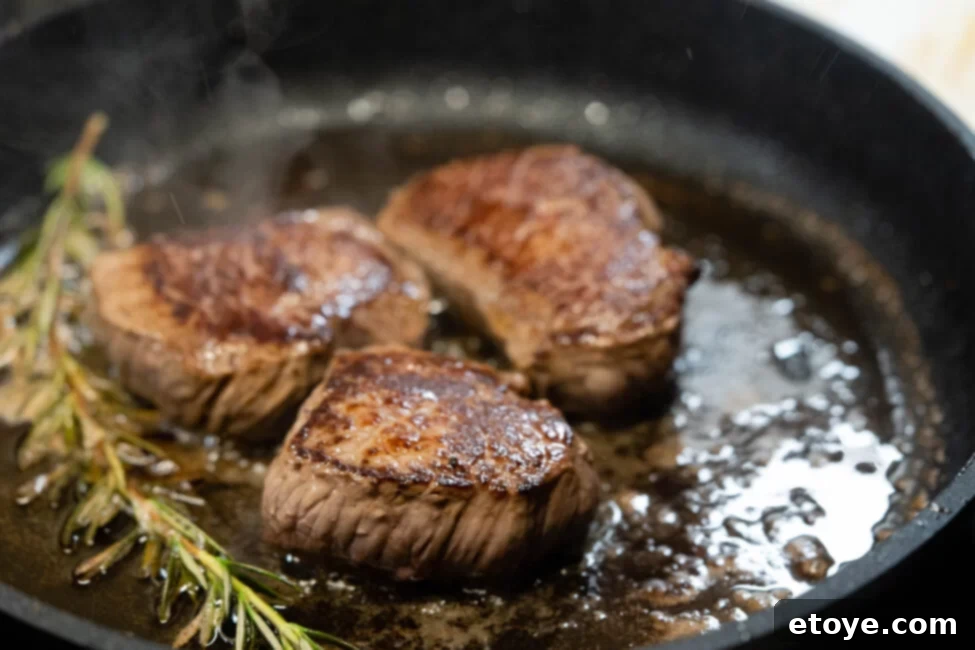
- Preheat Your Oven and Prepare Your Pan: Begin by preheating your oven to a blazing 450°F (232°C). This high temperature is crucial for the oven’s finishing stage. Simultaneously, place your heavy-bottomed, oven-safe skillet (a cast iron pan is highly recommended for its superior heat retention and distribution) on your stovetop over medium-high heat. Allow the pan to preheat for 3-5 minutes until it’s smoking lightly. A properly hot pan is essential for an immediate, effective sear.
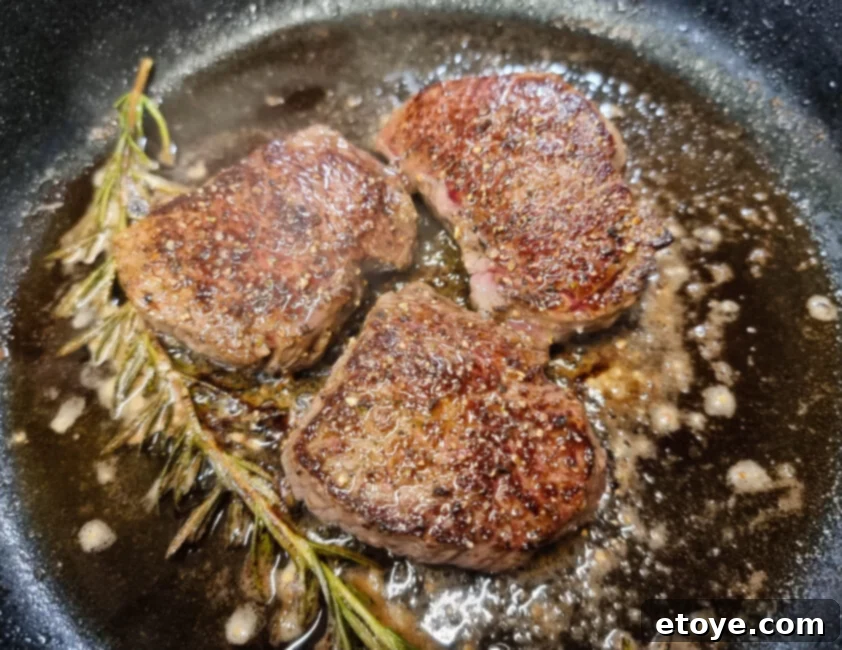
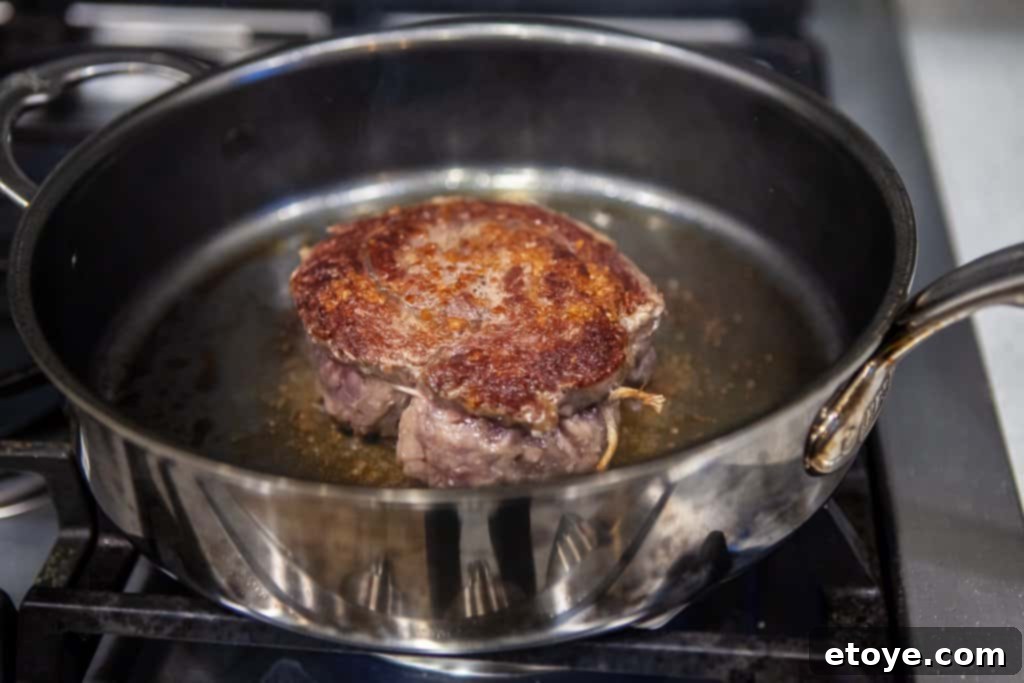
- Execute the Perfect Pan Sear: Add a tablespoon of high-smoke-point oil (like canola, grapeseed, or avocado oil) to the scorching hot pan. Once the oil begins to shimmer or smoke slightly, carefully place your seasoned, room-temperature, and dry-patted steak into the skillet. Sear the steak undisturbed for 2-4 minutes per side, depending on thickness and desired crust level. You’re looking for a deep, golden-brown crust to form. Use tongs to sear the edges of the steak as well, if applicable, to maximize that flavorful exterior. Avoid overcrowding the pan; cook steaks one at a time if necessary.
- Transfer to the Oven: Once both sides (and edges) are beautifully seared, carefully transfer the entire oven-safe skillet (with the steak still in it) into your preheated 450°F (232°C) oven. If you don’t have an oven-safe pan, transfer the seared steak to a rimmed baking sheet fitted with a wire rack. This allows for even airflow around the steak, promoting consistent cooking.
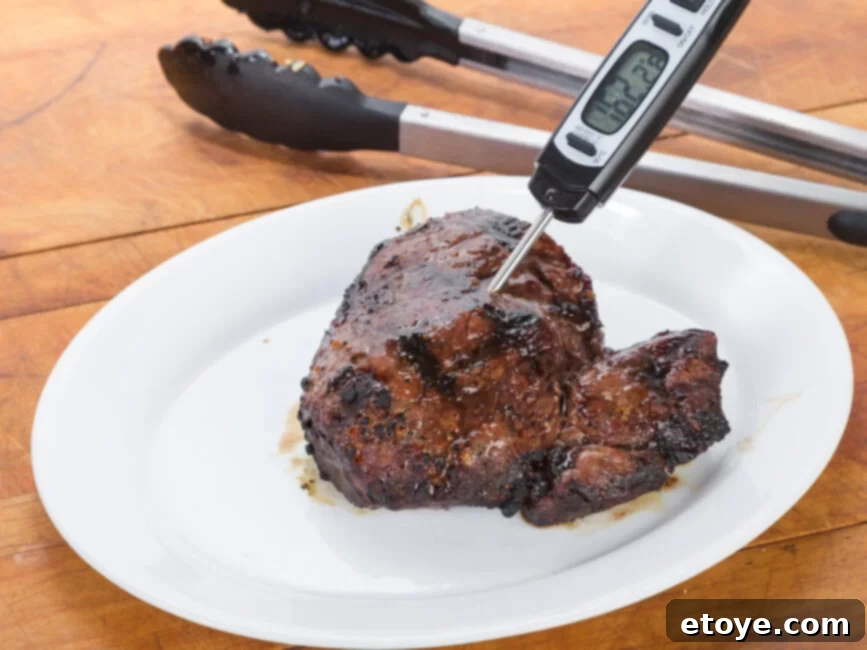
- Oven Roasting for Doneness: The oven time will vary based on your steak’s thickness and your preferred doneness. As a general guide for a 1.5-inch thick steak, expect approximately 8-10 minutes for medium-rare. Thinner steaks may require only 5-7 minutes. It’s crucial to use an instant-read meat thermometer inserted into the thickest part of the steak, avoiding the bone, to accurately monitor the internal temperature.
- The All-Important Rest: Once your steak reaches about 5°F (3°C) below your target internal temperature (remember carryover cooking!), remove it from the oven and transfer it to a clean cutting board. Tent the steak loosely with aluminum foil. This resting period, lasting 5 to 10 minutes, is non-negotiable. It allows the muscle fibers to relax and the juices, which have migrated to the center during cooking, to redistribute throughout the steak. Skipping this step will result in juices running out onto your plate, leaving you with a drier steak.
- Slice and Serve: After resting, slice your steak against the grain. Slicing with the grain will result in chewier meat, while slicing against it shortens the muscle fibers, making each bite incredibly tender. Serve immediately with your chosen side dishes for a truly memorable meal.
Achieving Your Desired Steak Doneness
Knowing your preferred internal temperature is key to consistently perfect steak. Always use a reliable meat thermometer:
- Rare: 120°F to 125°F (49°C to 52°C) – Cool red center.
- Medium-Rare: 130°F to 135°F (54°C to 57°C) – Warm red center. This is often considered the ideal doneness for many cuts.
- Medium: 140°F to 145°F (60°C to 63°C) – Warm pink center.
- Medium-Well: 150°F to 155°F (66°C to 68°C) – Slightly pink center.
- Well-Done: 160°F to 165°F (71°C to 74°C) – Little to no pink, firm texture.
Remember that the steak’s temperature will rise by a few degrees (known as carryover cooking) while it rests, so remove it from the oven just before it reaches your target temperature.
Advanced Techniques and Success Tips for Perfect Steak Every Time
Elevate your steak game with these expert tips and alternative methods:
The Reverse Sear Method
For exceptionally thick steaks (1.5 inches or more), the reverse sear method is a game-changer. Beloved by professional chefs and steak aficionados, this technique ensures edge-to-edge even doneness and an incredible crust:
- Slow Cook in Oven: Season your steak generously. Place it on a wire rack set over a baking sheet. Cook in a low-temperature oven, typically 225°F (107°C), until the internal temperature reaches about 10-15°F (5-8°C) below your desired final doneness (e.g., for medium-rare, cook to 115-120°F / 46-49°C). This slow cooking allows the heat to penetrate evenly, resulting in a perfectly cooked interior. This can take anywhere from 45 minutes to over an hour, depending on thickness.
- Rest and Dry: Remove the steak from the oven and let it rest for 10-15 minutes. This is a good time to thoroughly pat it dry again, as surface moisture can re-emerge during the slow cook.
- High-Heat Sear: While the steak rests, heat a cast iron skillet or heavy-bottomed pan over very high heat until it’s smoking hot. Add a high-smoke-point oil. Sear the steak for 1-2 minutes per side, just enough to develop a deep, dark, flavorful crust. This quick sear ensures the exterior is crisp without overcooking the perfectly even interior.
The reverse sear is particularly effective for achieving a perfectly uniform medium-rare throughout the steak, eliminating the gray band often associated with traditional searing methods.
Additional Expert Tips:
- Use a Cast Iron Skillet: While any heavy-bottomed, oven-safe pan will work, a cast iron skillet is truly superior. Its exceptional heat retention and even distribution are unparalleled, allowing for a more consistent sear and efficient cooking. It also transitions seamlessly from stovetop to oven, minimizing cleanup and fuss.
- Don’t Crowd the Pan: When searing, ensure there’s enough space between steaks (if cooking more than one) for proper heat circulation. Overcrowding can lower the pan’s temperature, leading to steaming rather than searing, and prevent the formation of that coveted crust. Cook in batches if necessary.
- Baste with Butter and Aromatics: During the last minute of searing, consider adding a pat of unsalted butter, crushed garlic cloves, and fresh herbs like rosemary or thyme to the pan. Tilt the pan slightly and continuously spoon the melted, aromatic butter over the steak for added flavor and moisture.
- Experiment with Flavors: While salt and pepper are fundamental, don’t shy away from culinary creativity. Explore different marinades (for more budget-friendly cuts), dry rubs, or even finishing salts like flaky sea salt. A compound butter (butter mixed with herbs, garlic, or other flavorings) melting over the hot, rested steak can add an incredible final touch.
- Check for Visual Cues: Beyond the thermometer, learn to recognize visual cues. A good crust should be deep brown, almost brick-red. The steak should feel firm to the touch but still have a slight give for medium-rare, becoming firmer as doneness increases.
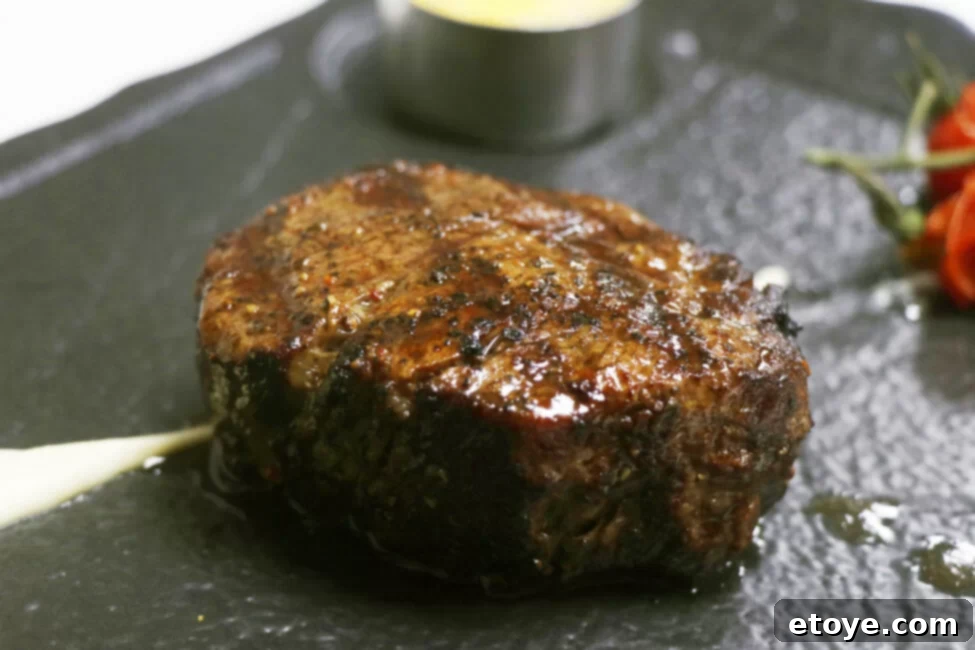
beef tenderloin fillet steak in serving plate in close up
Frequently Asked Questions for Cooking Perfect Steak
Here are answers to some common queries to help you master your home-cooked steak:
Q: What if my steak isn’t done after the recommended oven time?
A: Don’t panic! Oven times are estimates. The thickness of your steak and your oven’s calibration can affect cooking speed. Simply return the steak to the oven for a few more minutes, continually monitoring the internal temperature with your meat thermometer until it reaches your desired doneness. Always prioritize temperature over time.
Q: Can I use vegetable oil instead of olive oil for searing?
A: Absolutely, and often, it’s a better choice! While a drizzle of olive oil adds flavor before seasoning, oils with higher smoke points like vegetable oil, canola oil, grapeseed oil, or avocado oil are ideal for the high-heat searing stage. These oils can withstand extreme temperatures without burning and imparting off-flavors, helping you achieve a perfect crust. Olive oil has a lower smoke point and can burn easily, leading to bitter tastes.
Q: What’s the best way to get tender steaks every time?
A: Achieving consistently tender steaks relies on a few critical steps:
- Bring to Room Temperature: Allowing your steak to warm up before cooking ensures even heat distribution and prevents a tough, cold center.
- Resting the Steak: This is arguably the most crucial step for tenderness. A proper rest allows muscle fibers to relax and juices to redistribute, leading to a significantly more tender and moist result.
- Choosing the Right Cut: Opting for naturally tender cuts with good marbling, like ribeye or filet mignon, provides a head start.
- Slicing Against the Grain: Once rested, always slice your steak against the muscle fibers to shorten them, making each bite more tender.
Q: How do I achieve a perfect crust on my steak?
A: A beautiful, savory crust is the hallmark of a great steak. Here’s how to achieve it:
- Pat Dry Thoroughly: Remove all surface moisture from the steak before seasoning. This allows the Maillard reaction to begin immediately.
- Use a Very Hot Pan: Your cast iron or heavy-bottomed pan must be smoking hot before the steak touches it. This initial high heat is essential for rapid browning.
- Use High-Smoke-Point Oil: A thin layer of oil that can withstand high temperatures will help facilitate the sear without burning.
- Don’t Crowd the Pan: Cook steaks individually if necessary to maintain pan temperature.
- Resist the Urge to Move It: Let the steak sear undisturbed for at least 2-4 minutes per side. This allows a deep crust to form. You’ll know it’s ready to flip when it releases easily from the pan.
Q: What’s the difference between bone-in and boneless steaks for this method?
A: Bone-in steaks (like T-bone, Porterhouse, or bone-in ribeye) often offer more flavor and tend to stay juicier due to the bone acting as a heat conductor and insulator. However, they can take slightly longer to cook than boneless cuts of similar thickness. Boneless steaks are generally easier to handle and slice evenly.
Q: How should I store and reheat leftover steak?
A: Store leftover steak in an airtight container in the refrigerator for up to 3-4 days. To reheat without drying it out, gently warm it in a low oven (around 250°F / 120°C) until just warm through, or slice it thinly and quickly sear in a hot pan or add to a stir-fry.
Recipes to Elevate Your Next Steak Night
Take your steak dinner to the next level with these complementary recipes:
- How To Marinate Steak With Fresh Herbs Recipe
- How To Turn Cheap Steak Into Gucci Prime Steaks
- Steak With Kimchi Butter Recipe
Perfect Steak Side Dishes
Round out your steakhouse-at-home experience with these delicious side dish ideas:
- Very Best Mashed Potato Recipe
- Microwave Steamed Carrots
- Grapefruit Avocado Arugula Salad Recipe
- Roasted Asparagus with Parmesan
- Creamed Spinach
- Garlic Butter Mushrooms
With this detailed guide, you’re now equipped with all the knowledge and techniques to consistently cook a perfect, steakhouse-quality steak using the pan-sear to oven method. Experiment with different cuts, seasonings, and doneness levels to discover your ultimate preference. Enjoy the journey of becoming your own favorite chef!
