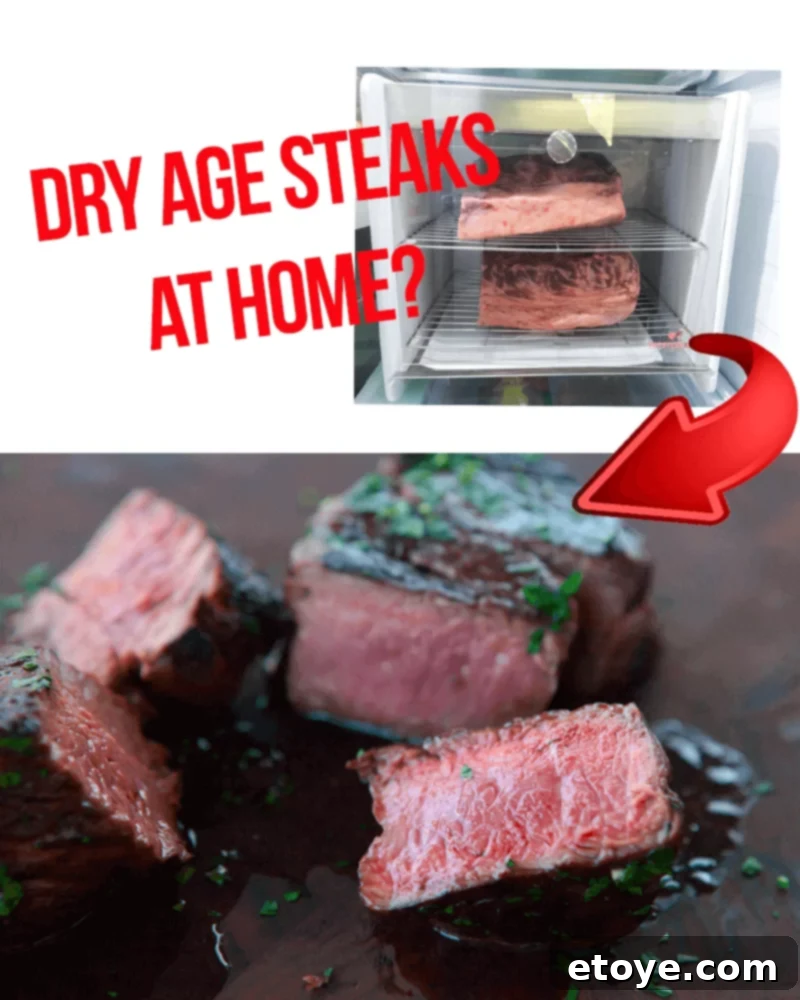
For three intense weeks, we’ve put the Steakager through its paces, rigorously testing its capabilities and documenting every step. This comprehensive Steakager review delves deep into our experience, offering a wealth of how-to photos, along with an honest assessment of its pros and cons. The ultimate question we sought to answer: Can you truly achieve high-end steakhouse-quality dry-aged steaks right in your home refrigerator, and at a fraction of the typical restaurant cost? Join us as we explore the exciting world of at-home dry aging and discover if the Steakager lives up to its bold promise.
Steakager Review: Elevating Your Home Steak Experience

There are very few dining experiences that leave an indelible mark on your palate, especially when it comes to dry-aged prime steak. In recent memory, only two prime steakhouses have achieved this feat for me. The first was an unforgettable dinner with the renowned Craig “Meathead” Goldwyn in his hometown of Chicago, where he graciously introduced me to the exceptional cuisine at David Burke Prime. The second is our cherished local gem here in Las Vegas, BLT Steakhouse, consistently delivering perfection.
The quest for that sublime, deeply flavored dry-aged steak at home isn’t new to us. Scott and I previously ventured into the world of home dry aging using the UMAI Dry Bag system. This innovative method allows controlled moisture evaporation, transforming ordinary cuts into something special. Our past reviews (read here and here) detail our success. When paired with a reliable Sous Vide Immersion Circulator and a searing-hot cast iron pan, we consistently produced restaurant-quality dry-aged steaks whenever the craving struck. Now, we turn our attention to the Steakager, a dedicated device promising even greater ease and consistency for the ultimate home dry aging experience.
Understanding Dry Aging: The Science Behind Superior Flavor
Restaurant Dry Aging Steaks
Dry aging is a time-honored culinary technique that dramatically improves both the flavor and tenderness of beef. It involves placing unpackaged wholesale cuts of meat in a carefully controlled refrigerated environment for an extended period. This room maintains precise temperature, relative humidity, and air velocity, creating optimal conditions for transformation. The goal is to enhance tenderness and develop complex, concentrated flavors. As the US Meat Export Federation aptly describes, “Although dry aging provides a unique flavor that no other aging method can achieve, it results in loss of yield from shrinkage and excessive trim.” This natural process is what makes dry-aged beef so distinct and sought after.
The High Cost of Perfection
The premium price tag on dry-aged steaks, often three to four times more expensive than regular cuts, is justified by several factors inherent to the process:
- Time Investment: Dry aging is a slow process, typically ranging from 14 days to as long as three months, requiring significant patience and dedicated space.
- Space Requirements: Proper dry aging demands ample space for air to circulate freely around the meat from all sides, preventing spoilage and ensuring even aging.
- Precise Environmental Control: Maintaining optimal, stable conditions is crucial. This includes a narrow temperature range of 32°F-38°F (0°C-3°C) and a humidity level of around 80% with consistent airflow. Deviations can lead to microbial growth and spoilage.
- Significant Yield Loss: The process inherently decreases the overall yield of edible meat by approximately 30%. This loss comes from moisture evaporation and, more substantially, from trimming away the hardened, dehydrated outer layer, known as the “bark,” which is typically inedible.
During this aging period, natural enzymes within the beef break down the connective tissues, resulting in a noticeably more tender steak. Concurrently, moisture loss concentrates the beef’s natural flavors, while enzymatic and oxidative processes create unique compounds that contribute to intense, beefy, earthy, roasted, nutty, and even subtly cheesy notes. These complex flavors are simply unattainable through any other aging method, making dry-aged steak a truly gourmet experience.
Wet Aging vs. Dry Aging: A Critical Distinction
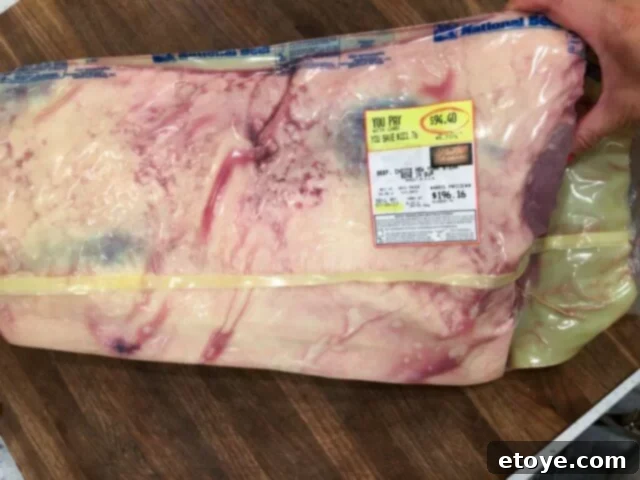
Sub-primal cut from Smith’s supermarket. I had to call butcher ahead of time to reserve it. This is not the beef you’ll see later in the photos of this review. But this beef is currently in my refrigerator, dry aging in the SteakAger.
When you purchase large cuts of beef, often referred to as “sub-primals” (uncut slabs of steak), from wholesale clubs like Costco, they typically come sealed in cryovac bags. This is the standard method for meat distribution to butchers and supermarkets. The beef undergoes a process called “wet aging” while in these sealed bags, usually for 1 to 14 days during transit from the supplier. This method, too, impacts flavor and tenderness, but in a distinctly different way.
Wet aging improves tenderness through microbial action and natural enzymes, similar to dry aging. However, the flavors developed are quite different. Instead of the deep, complex earthy, nutty, and cheesy notes characteristic of dry-aged beef, wet-aged beef is often described as having a “tangy” or “fresh” flavor profile. This difference arises because the beef ages in its own juices and blood within the sealed bag, creating an anaerobic environment. While this might sound unappetizing to some, if you enjoy most steaks purchased from a supermarket, you likely appreciate the flavors of wet-aged beef.
Interestingly, some studies, such as those referenced by Beef Checkoff, suggest that wet-aged beef can be more tender than dry-aged beef. While I personally find this conclusion challenging to reconcile with my own sensory experiences, it highlights the distinct characteristics of each method. Wet aging is particularly well-suited for smaller or flatter cuts of beef, such as flat iron, skirt steak, or tenderloin. For these cuts, the significant dehydration and trimming required in dry aging would leave very little edible steak, making wet aging a more practical and efficient choice.
The Pitfalls of DIY Fridge Aging: Why a Regular Refrigerator Won’t Do
Many aspiring home chefs might wonder if they can simply place a cut of beef in their standard kitchen refrigerator to dry age. In a single word: safety. A conventional refrigerator is fundamentally unsuited for safe and effective dry aging, primarily due to a lack of precise environmental control and hygiene.
Your typical refrigerator simply does not offer the adequate air circulation or humidity control necessary for dry aging. Exposed, raw steak placed directly in your refrigerator is highly susceptible to several risks:
- Contamination: Accidental touching or cross-contamination from other food items in the refrigerator can introduce harmful bacteria, leading to spoilage and potential health hazards.
- Flavor Absorption: Exposed meat tends to absorb the flavors and odors of other foods stored nearby, resulting in an undesirable taste in your expensive steak.
- Off-Odors: The aging process for meat produces a distinct, strong, funky odor that will permeate your entire refrigerator and kitchen every time the door is opened, which is often unpleasant for household members.
- Improper Conditions: Without precise humidity and airflow, the meat will either dry out too quickly and unevenly, or foster the growth of undesirable molds and bacteria, rendering it unsafe to eat.
While products like UMAI bags offer a partial barrier between the meat and other refrigerator contents, they still don’t fully address the critical need for consistent air circulation around the entire surface of the meat. Furthermore, the constant worry of fluctuating temperatures, perhaps from a child leaving the refrigerator door ajar, could quickly spoil an entire, valuable slab of beef. This is precisely why a dedicated, controlled environment like the Steakager is essential for safe and successful home dry aging.
Introducing the Steakager: Your Gateway to Home Dry Aging
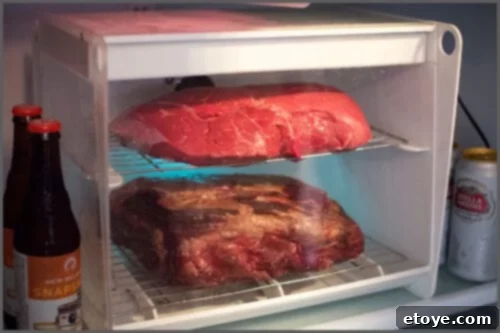
The Steakager positions itself as an innovative solution, designed to allow you to “turn grocery store beef into restaurant quality steak easily and safely.” This compact, self-contained unit transforms a portion of your existing refrigerator into a sophisticated dry-aging chamber, providing the ideal conditions previously only achievable in professional settings.
Key Features of the Steakager
- Compact Design: With dimensions of 12″x 12″x 13.5″, the Steakager is designed to fit conveniently into most standard home refrigerators, offering a dedicated, protected environment for your beef.
- Generous Capacity: Capable of dry aging up to 22 pounds of beef, it accommodates substantial cuts, making it suitable for entertaining or stocking up on premium steaks.
- Optimized Air Circulation: An integrated air circulation fan ensures continuous, even airflow around all sides of the meat. This is vital for uniform drying, preventing moisture pockets, and inhibiting mold growth.
- UVC Germicidal Light: A built-in UVC light provides active microbial spoilage retardation. This crucial feature enhances food safety by targeting and neutralizing unwanted bacteria and molds that could compromise the aging process.
- Wi-Fi Enabled Monitoring: The device connects to your home Wi-Fi, allowing you to monitor the internal conditions (temperature and humidity) remotely via a dedicated application or web interface, providing peace of mind and control.
- Proudly Made in USA: The Steakager is designed and manufactured in the United States, reflecting a commitment to quality and local production.
Unboxing and Setup: Getting Started with Your Steakager
Connecting the Steakager to your network can sometimes be a nuanced process, especially if a device reset is required. While we’ll delve into specific troubleshooting details later, it’s worth noting that patience is key. Once connected, however, the process becomes remarkably straightforward and intuitive. We celebrated when we finally achieved a stable connection!
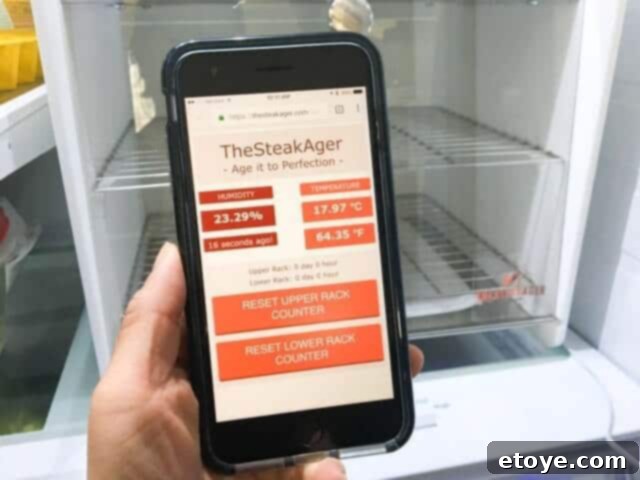
Our decision was to place the Steakager in our kitchen refrigerator. Living in Las Vegas, Nevada, means experiencing scorching summers, with outdoor temperatures often soaring past 100°F (38°C). Our garage refrigerator, unfortunately, struggles to maintain consistent temperatures under such conditions, making the kitchen fridge the more stable environment for precision aging.
The Steakager fit perfectly into our kitchen refrigerator after simply removing one shelf. Our split shelves made this adjustment particularly easy and convenient, demonstrating the device’s adaptability to various fridge configurations.
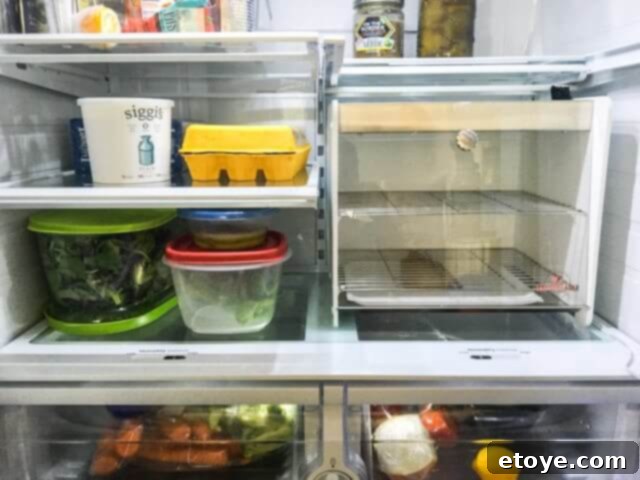
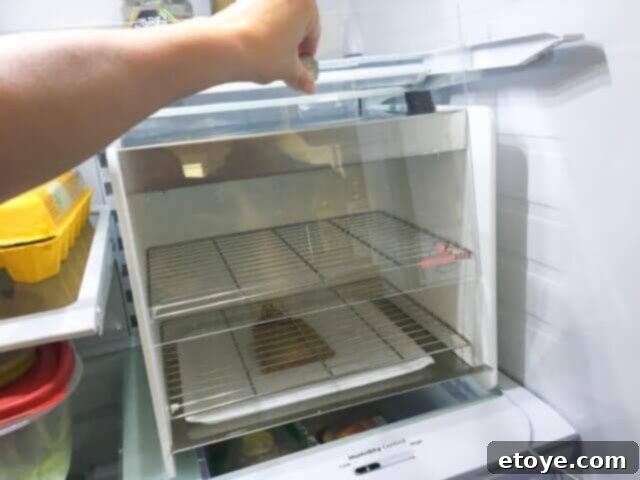
One practical tip we discovered: the Steakager’s lid opens upwards. If your refrigerator space is limited, we highly recommend placing the meat into the Steakager first, before carefully positioning the entire device into the refrigerator. Fortunately, our top shelf retracts, which made this step easier for us. Inside, a small bottom tray holds a burlap baggie of salt, intended to “add flavor and aid in drying,” although its precise impact on flavor remains somewhat unclear.
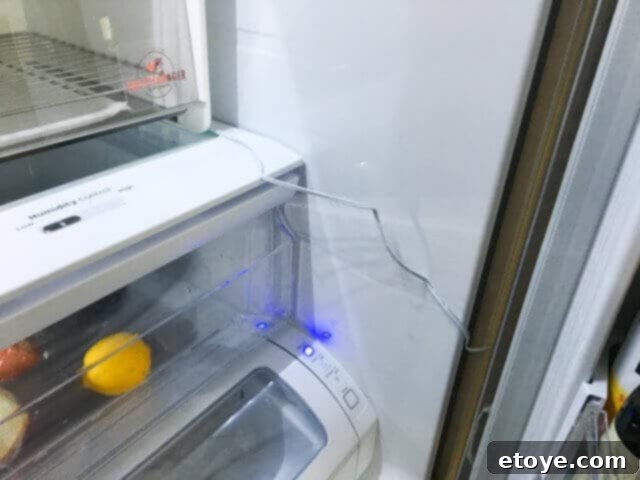
The power cord is notably slender, allowing it to snake easily and discreetly out of the refrigerator, nestled within the door’s rubber seal, without compromising the seal’s integrity or causing any issues with the refrigerator door closing properly.
Our Dry Aging Journey with the Steakager
For our initial dry-aging experiment, we sourced a beautiful USDA Choice Boneless Strip Loin (NY Strip) from our local Sam’s Club. Choosing a good quality sub-primal is the first step to a successful dry-aging process.
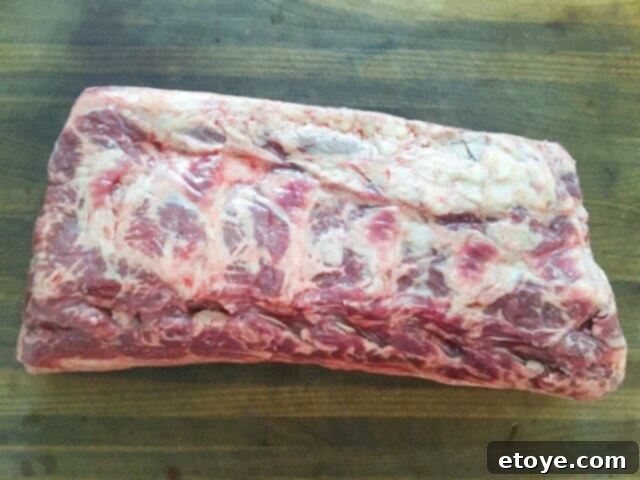
The sheer size of the strip loin meant it was too wide to fit comfortably into the Steakager as a single piece. To accommodate it, we made a clean cut right down the middle, splitting it into two manageable halves.
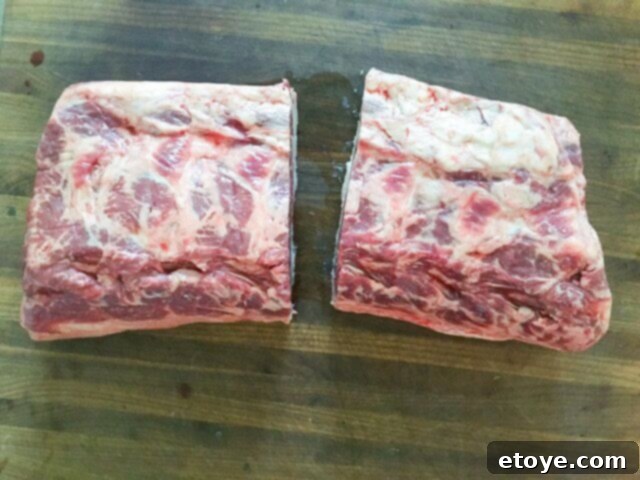
Each half was then carefully placed on its own rack within the Steakager, ensuring optimal air circulation. At the bottom of the unit, we positioned a disposable drip tray to catch any moisture, alongside the aforementioned bag of salt. The salt, as indicated by the manufacturer, is intended to “add flavor and aid in drying,” although its exact contribution to the final flavor profile is something we are still evaluating.
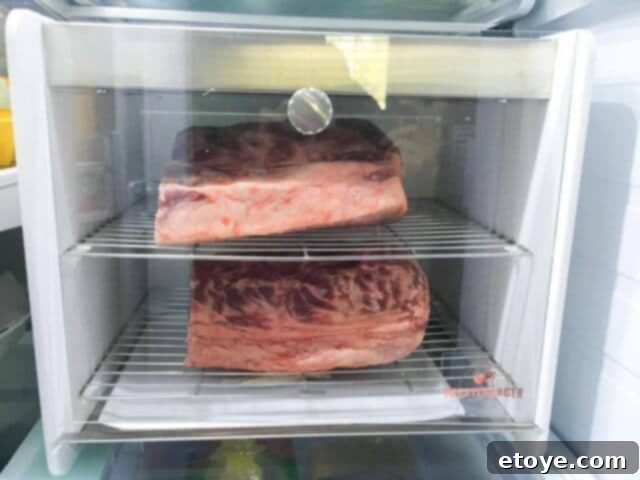
The Waiting Game: Witnessing Transformation
Once the meat is settled in the Steakager, the real magic of dry aging begins. The most dramatic visual changes typically occur within the first three days. During this initial phase, the outer surface of the meat begins to dry and darken as moisture evaporates. After this initial period, the steak’s appearance stabilizes, and it will largely maintain this look until it’s ready to be removed, usually after 14-21 days, or even longer if a more intense flavor profile is desired.
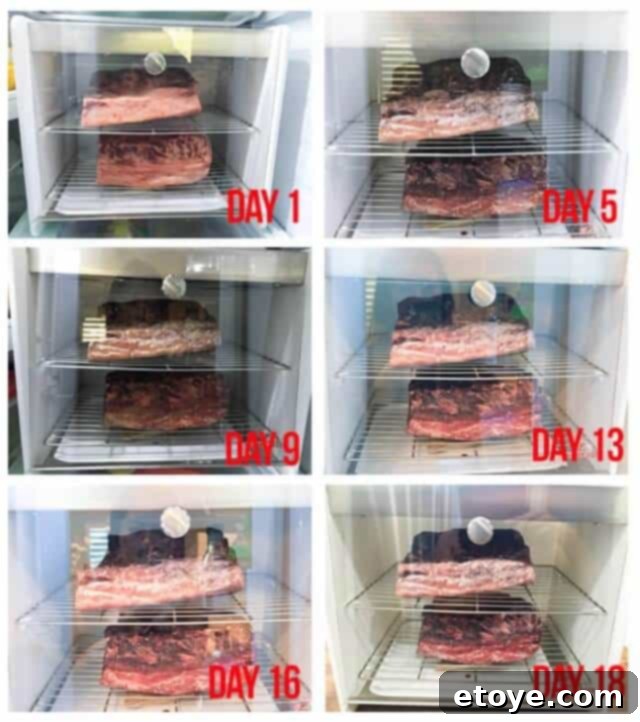
I understand it might not look particularly appealing at this stage. The dark, hardened outer layer, often referred to as the “bark,” is a natural and necessary part of the dry-aging process, protecting the tender, flavorful meat within. But don’t let its appearance fool you – the transformation beneath that bark is truly remarkable!
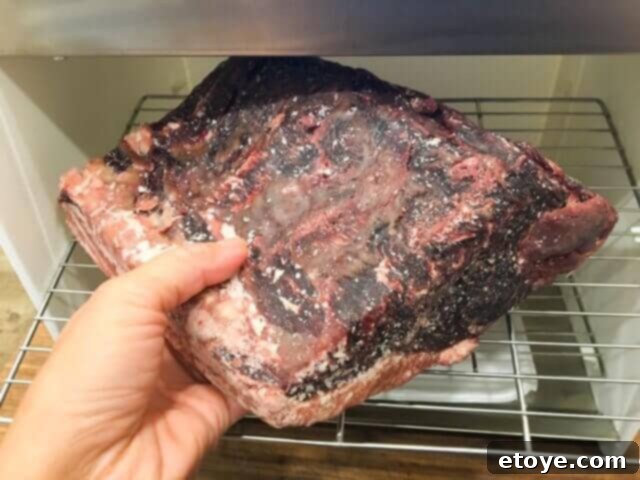
Trimming and Yield: Maximizing Your Dry-Aged Steak
After the dry-aging period, the next crucial step is carefully trimming the “bark” – the dehydrated, tough outer layer that forms a protective casing around the tender meat. For this, you’ll need a very sharp chef’s knife to ensure clean, precise cuts. We begin by trimming off the two “faces” or ends of the entire dry-aged slab. These end pieces typically have the thickest bark and are removed first to reveal the rich, red interior.
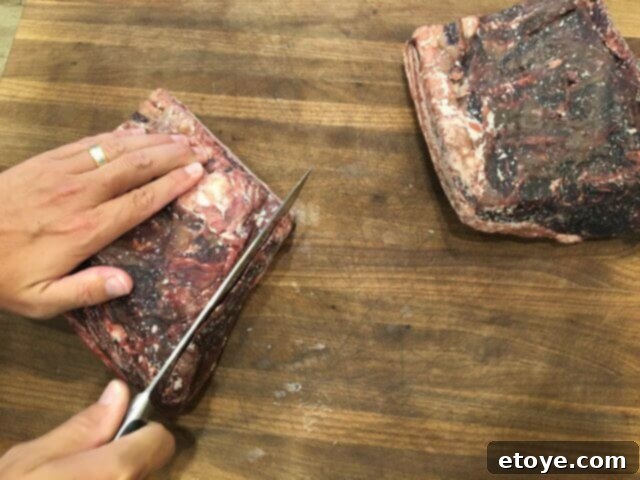
Just look at that magnificent reveal! Beneath the crusty exterior lies the concentrated, beautifully aged beef, ready to be transformed into exquisite steaks.
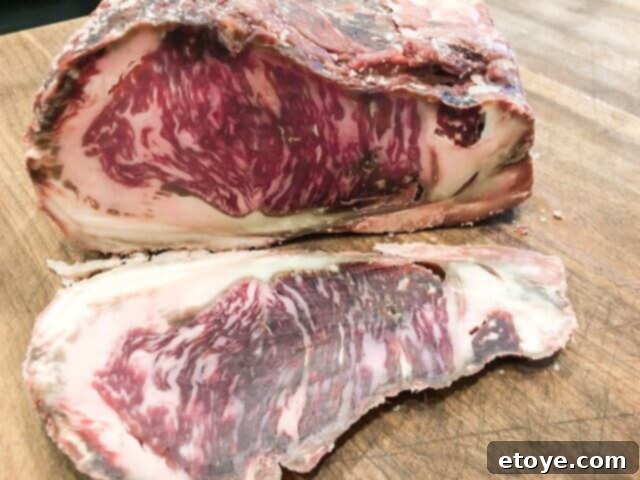
It’s important to trim conservatively. The bark is surprisingly thin, so take care not to cut too deep and waste any of the precious aged meat. Once the two faces are trimmed, hold off on trimming the sides of the entire slab for now. Instead, proceed to slice the remaining block into thick, individual steaks. We highly recommend a thickness of 1-3/4″ to 2″ (about 4.5-5 cm) for optimal cooking and enjoyment, especially with dry-aged beef.
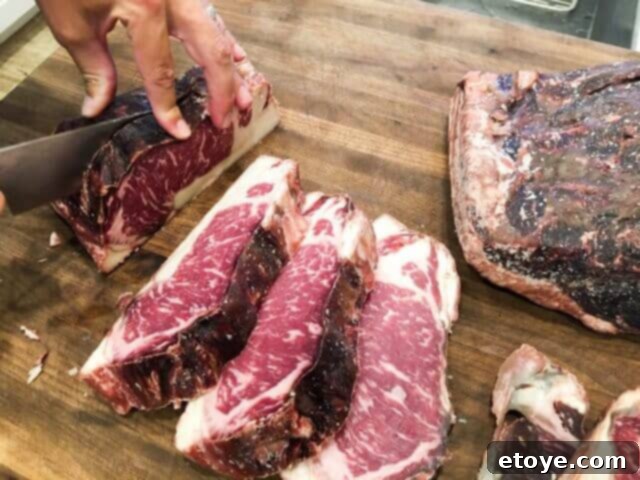
From our initial slab, we were able to yield five beautifully thick dry-aged steaks. To the right in the photo, you can see the two tough, discarded end pieces (bark) that were trimmed off. These are inedible and should be discarded.
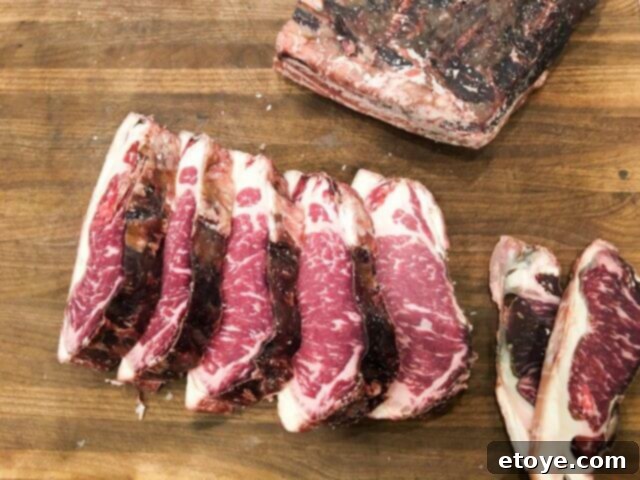
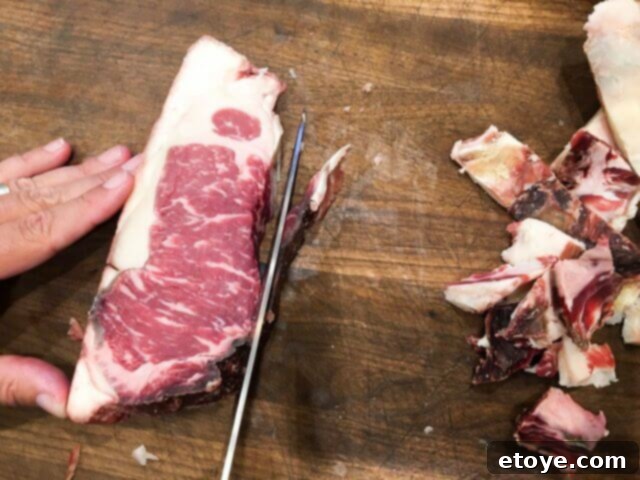
Now, with the slab divided into individual steaks, it’s much easier to manage. This is the ideal time to trim any remaining fat or bark from the sides of each steak. Remember to leave some of the fat on; it’s a critical component for flavor and juiciness, especially with dry-aged meat. The goal is to remove only the truly dehydrated or undesirable bits.
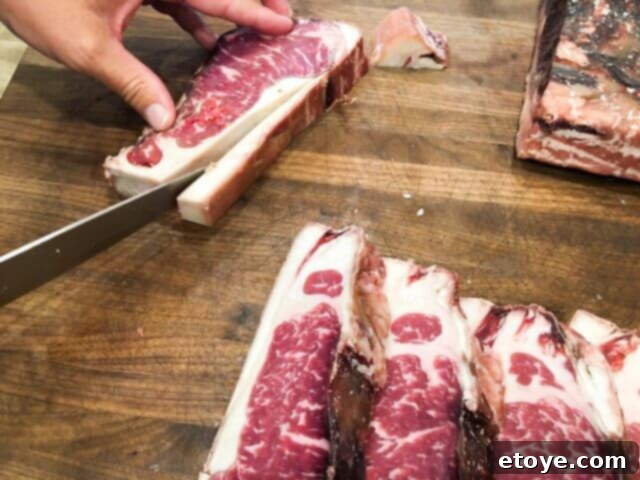
With careful precision, we remove the remaining bark, ensuring each steak is perfectly prepared for cooking.
The Value Proposition: Steakhouse Quality at Home
From the two halves of our original strip loin, we successfully yielded 4.25 pounds of exquisite dry-aged steak.
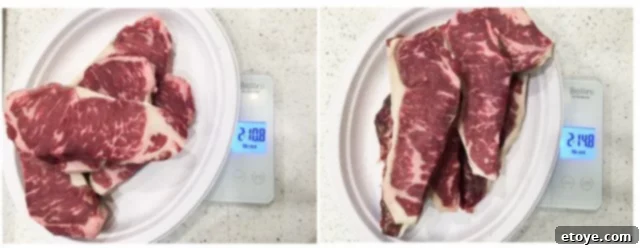
The total weight of the trimmings, including both the bark and excess fat, came to 2.13 pounds.
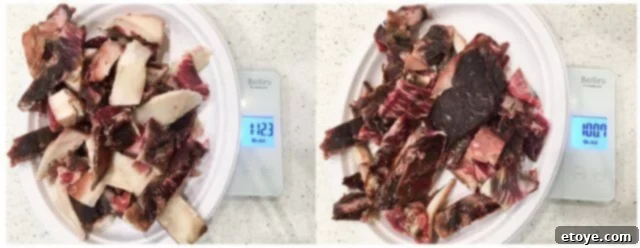
Our original sub-primal weighed 8 pounds. To accurately calculate the yield attributable specifically to dry aging, we need to consider the total weight loss, distinguishing between moisture loss and the fat that would have been trimmed regardless of aging. While the raw calculation shows: Original (8 lbs) – Trimming (2.13 lbs) – Steak (4.25 lbs) = 1.62 lbs unaccounted for (which is the moisture loss). We estimate that if we had been slightly less aggressive with fat trimming, we likely would have yielded around 4.5 pounds of dry-aged steak. This translates to a 56% yield or approximately a 44% loss due to moisture evaporation and necessary bark removal.
Our original 8-pound strip loin cost $105.00. Factoring in the yield, our dry-aged steak ended up costing approximately $23 per pound. This represents an incredible value for true dry-aged beef, especially when compared to market prices:
- Chicago Steak Company sells USDA Prime Dry-Aged Strip for $47/lb
- Meyer Natural Angus offers USDA Choice Dry-Aged Boneless Strip for $45/lb
- Debragga sells Dry Aged Boneless Kansas City Strip Steak for $56/lb
- Allen Brothers features USDA Prime Dry-Aged Boneless Strip for $58/lb
The Steakager empowers you to enjoy premium dry-aged steaks at a price point that makes it a sustainable luxury, far more affordable than ordering from a restaurant or a specialized online butcher.
Choosing Your Cut: USDA Prime or Choice for Dry Aging?
Having dry-aged both USDA Prime and USDA Choice beef extensively, I’ve come to a personal conclusion that challenges conventional wisdom: I don’t believe dry-aging Prime beef is always worth the significant extra cost. In our experience, dry-aged Choice cuts yielded steaks that were just as flavorful, offering an incredibly satisfying culinary experience. The intense, complex flavors developed through the dry-aging process are so profoundly impactful that the subtle differences in tenderness typically associated with Prime grade beef become nearly indistinguishable. Your senses are so delightfully overwhelmed by the concentrated, unique taste of dry-aged meat that the marginal tenderness advantage of Prime becomes less pronounced.
For those seeking a more detailed, scientific exploration into the nuances of dry aging beef, I highly recommend this comprehensive article published by Beef Checkoff. This organization, funded by U.S. beef producers, provides valuable research and insights into beef production and consumption. Their findings, and those of other research, occasionally present intriguing perspectives.
For instance, one study by Sitz, B. M. et al. (2006) titled “Consumer sensory acceptance and value of wet-aged and dry-aged beef steaks” (Journal of Animal Science, 84, 1221-1226), cited in the Beef Checkoff article (page 5), concluded that “wet-aged U.S. Prime steaks had significantly higher flavor desirability and overall acceptability scores than dry-aged Prime steaks.” This suggests that for some, the inherent qualities of Prime beef might be better showcased through wet aging, or that the dry-aging process itself brings such a unique set of flavors that it can sometimes overshadow the more subtle distinctions between Prime and Choice grades. Ultimately, the choice between Prime and Choice for dry aging often comes down to personal preference and how you prioritize flavor intensity versus marginal tenderness.
Mastering the Cook: Achieving Perfection with Sous Vide and Cast Iron
When it comes to cooking a premium, dry-aged steak – or any steak, for that matter – our preferred method is a tried-and-true combination: the Sous Vide immersion circulator followed by a searing-hot cast iron skillet. This technique consistently delivers unparalleled results, ensuring every bite is perfect.
Why This Method Reigns Supreme:
- Perfect Consistency: Sous Vide guarantees that your steak will ALWAYS be cooked to your exact desired doneness, from edge to edge. You simply set the temperature, and the immersion circulator maintains it with unwavering precision, eliminating any guesswork or risk of overcooking. This is especially crucial for expensive dry-aged cuts.
- Superior Sear: We opt for a cast-iron skillet over a traditional BBQ grill for searing. The stovetop provides superior control over the heat, allowing us to achieve a “rippin’ hot” pan. This direct, intense heat ensures 100% contact between the pan and the steak’s surface, creating a thin, crispy, and incredibly flavorful crust – the hallmark of a perfectly seared steak. We prioritize this rich crust over mere grill marks.
If you’re new to the world of Immersion Circulators, I highly recommend reading our detailed review of the Joule, one of our top recommendations, to understand its full potential.
First, we place the individual dry-aged steaks into a heavy-duty, food-grade bag – either one specifically designed for sous vide/vacuum sealing, or a sturdy gallon-sized freezer bag. It’s important to ensure there’s adequate space between the steaks, and that they are arranged in a single layer for even cooking.
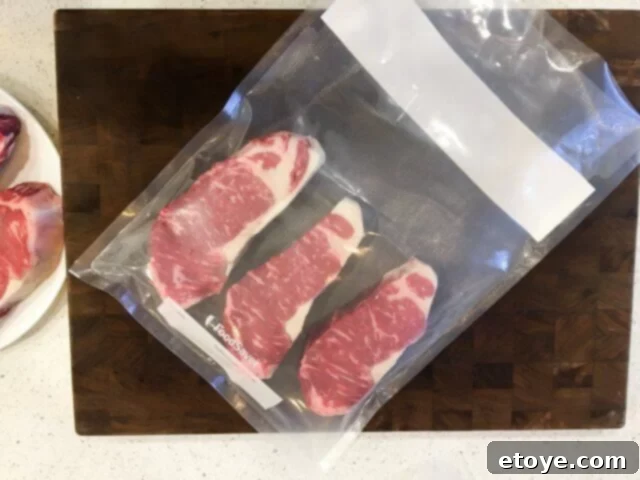
Next, we carefully lower the bag into the water bath with the immersion circulator, keeping the open edge of the bag out of the water. Gently pushing the bag down helps to submerge the steaks and forces out all the air, creating a near-vacuum seal. (This particular setup features our Oliso Immersion Circulator, a robust machine that caters to our family’s frequent sous vide needs, as we cook this way 3-4 times a week).
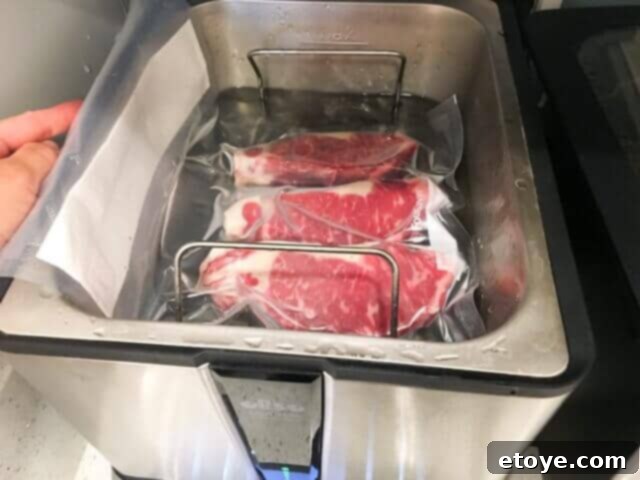
For a perfect medium-rare, we set the sous vide to 127°F (52.8°C) and cook for approximately 90 minutes. While medium-rare typically registers at 130°F (54.4°C), we account for the slight temperature increase that will occur during the high-heat searing in the cast iron pan, ensuring the steak reaches its ideal doneness. Tonight, it’s a big celebration – my Mom’s birthday! – so we even have our beloved Joule Sous Vide running as well to handle the volume.
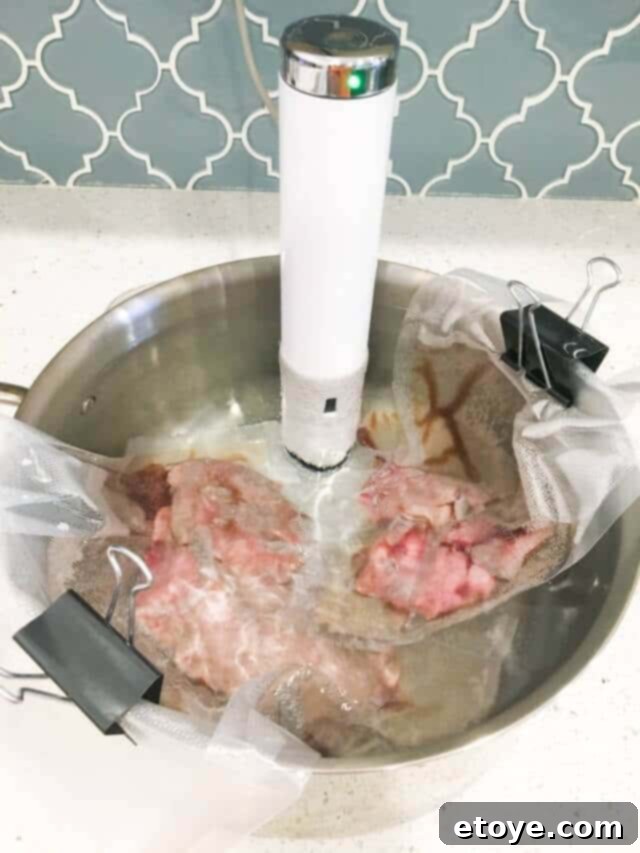
After the sous vide bath, the steak emerges cooked to a uniform 127°F (52.8°C) from top to bottom, with no overcooked edges. This precise internal temperature is key to its tender texture.
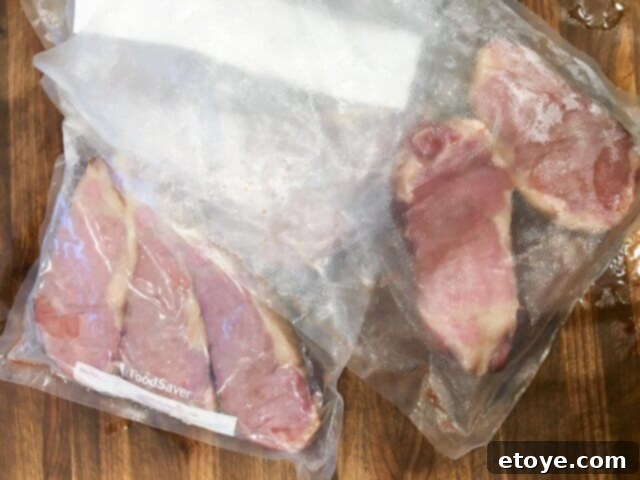
The next critical step is to pat the steak thoroughly dry – and I mean *very* dry. Any moisture on the surface will inhibit the formation of a crisp, flavorful sear. I know, at this stage, the steak might look a bit sad and unappealing, but don’t worry; the magic of the cast iron pan is about to transform it.
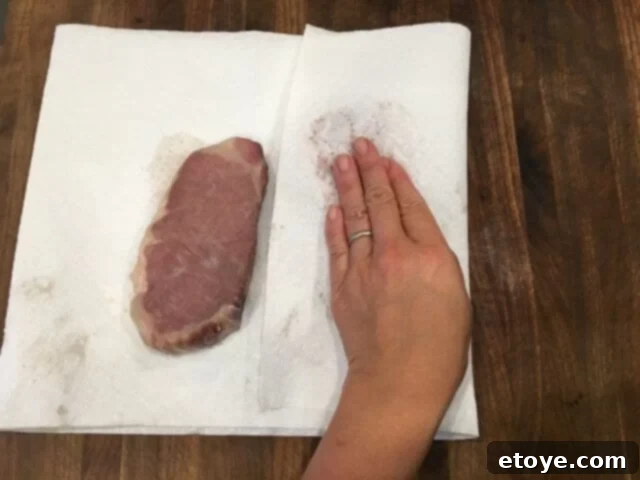
Personally, I prefer to salt my steak *after* the searing process. My objective is a bone-dry surface, which allows for that incredible blackened, crispy sear to form almost instantly. Salting the steak beforehand can draw moisture to the surface, creating a steamy environment that prevents the desired crust from forming. It’s a small detail that makes a significant difference.
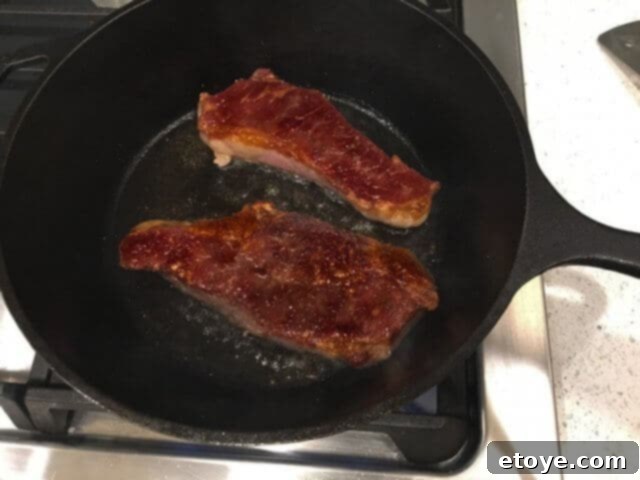
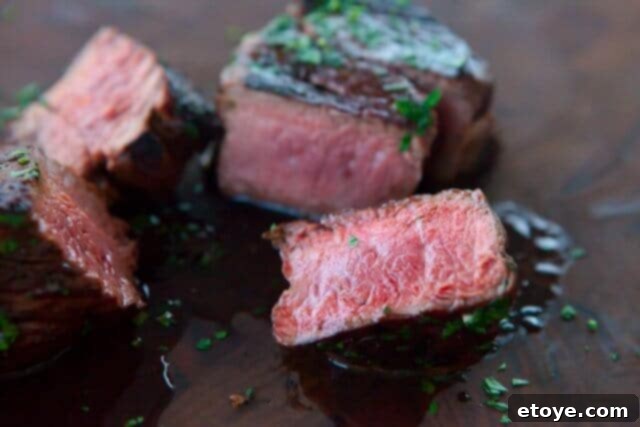
Once seared to perfection, we season the steak generously with flaky sea salt, top it with a dollop of aromatic garlic herb butter, and let it rest for a few minutes. This resting period allows the juices to redistribute throughout the meat, ensuring maximum succulence.
The Unforgettable Flavor Profile
The resulting steak was, predictably, everything a dry-aged steak should be and more. Each bite delivered a symphony of flavors: nutty, complex, earthy, and bursting with umami. The texture was incredibly juicy, tender, and robust. It’s challenging to find adequate words to describe such a profound culinary experience, but “complex” and “deeply savory” come closest to capturing the essence of its extraordinary taste. This is the flavor that transforms a meal into a memorable event.
Final Verdict: Is the Steakager Worth the Investment?
Once we successfully navigated the initial hurdle of installation and network connection, the entire process of dry aging with the Steakager became remarkably effortless. At its current price of $249.99 with free shipping, the Steakager presents a compelling proposition for home dry-aging enthusiasts. While it’s a fantastic device, there are a few areas where we believe the product could be further refined.
Areas for Improvement (Our Wish List):
- Integrated Display and Control Panel: While current photos on their website sometimes show units with an LCD display, our review unit lacked one. Having a display directly on the Steakager itself for monitoring temperature and humidity, along with basic controls, would significantly enhance user convenience and reduce reliance on a separate device.
- Dedicated App with Proactive Alerts: Currently, the only way to check the Steakager’s status is by actively logging onto their website. A dedicated mobile application that provides real-time alerts if the temperature or humidity deviates from optimal levels would be an invaluable feature, offering true peace of mind.
- Enhanced Documentation and Troubleshooting: Clearer, more comprehensive, and easier-to-understand instructions, along with a more robust troubleshooting guide, would greatly improve the initial user experience.
The Steakager is a relatively sizable unit. We recommend considering its placement carefully. Ideally, utilizing a second refrigerator, or even investing in a small mini “dorm-room” refrigerator dedicated solely to dry aging, would be the most convenient option, freeing up valuable space in your main kitchen fridge.
Despite these nit-picky details, our overall sentiment towards the Steakager is overwhelmingly positive – we absolutely love it! In fact, as we speak, we have another strip loin happily aging away, this time for an extended 21-day period. Here’s why the Steakager has earned our enthusiastic endorsement:
- Complete Meat Protection: The enclosed design of the Steakager provides a secure and hygienic environment, completely protecting the meat from external contaminants and odors within your refrigerator.
- Advanced Microbial Control: The integrated UV-C light is a powerful feature, actively working to kill unwanted microbes and ensure a safe aging process, a critical advantage over passive methods.
- Optimal Air Circulation: The internal fan guarantees consistent airflow, which is paramount for even drying, proper bark formation, and preventing unwanted mold growth.
- Quality American Craftsmanship: The fact that it’s Made in USA speaks to its potential for durability and quality control.
- Supporting Innovation: We appreciate and love supporting new companies that bring genuinely great ideas to the culinary world. The Steakager is one such innovation that we believe will fundamentally change how many of us enjoy and prepare steaks at home, forever.
Troubleshooting Guide: Seamless Steakager Operation
As promised, here’s a detailed account of the connection trouble we encountered and how we successfully resolved it:
Initially, our Steakager connected to our Wi-Fi network without any issues. However, upon logging back into the website after some time, it appeared that the Steakager’s servers had lost recognition of our specific device. Since the Steakager itself lacks an on-board display or control unit, there was no immediate or obvious way to force a reconnection from the device end.
After a frustrating hour of searching online forums and social media, we discovered that other users had experienced similar problems on Facebook and, crucially, shared a solution. Our fix involved a simple yet effective step: we turned off our home router for approximately five minutes. This action caused the Steakager to lose its connection to our router and effectively reset its network state. Only after this hard reset of the router were we able to successfully reconnect the Steakager to our home network.
To prevent future headaches, we highly recommend that you carefully note down the 12-digit Steakager ID number. You can find this unique identifier after successfully logging into your My SteakAger Dashboard. In the event that the servers momentarily lose track of your device, having this ID will allow you to quickly search for and reconnect to your Steakager, minimizing downtime and ensuring a continuous dry-aging process.
Further Reading: Deep Dive into Dry Aging
For those eager to delve deeper into the science and art of dry aging, we recommend the following authoritative sources:
- Beef Checkoff – Dry Aging of Beef for National Cattlemen’s Beef Association’s Center for Research & Knowledge Management
- The Atlantic – Dry vs. Wet: A Butcher’s Guide to Aging Meat
- Beef Checkoff – The Chemistry of Beef Flavor
- The Food Lab – Dry Aging Beef at Home
SteakAger Giveaway
