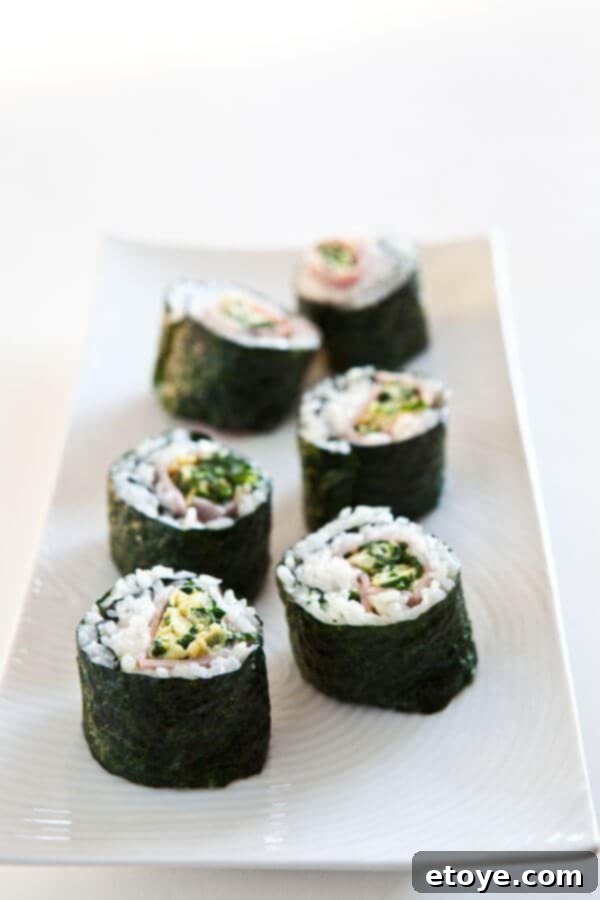
Whimsical Bites: Crafting Dr. Seuss’s Green Eggs and Ham Sushi

This year, we’re celebrating a momentous milestone: the 50th Anniversary of Dr. Seuss’s beloved classic, “Green Eggs and Ham”! To honor this timeless tale of culinary persuasion, I joined forces with a fantastic lineup of culinary rock stars: Melissa d’Arabian, Michael Symon, and Mitzi Dulan. As members of the Pork Board’s consumer advisory council, our mission was clear yet delightfully challenging: to create fun, appetizing recipes featuring, you guessed it, green eggs and ham. This journey led us to some truly imaginative dishes, but my personal quest revolved around a dish that would capture the whimsical spirit of Seuss while being genuinely delicious.
The Quest for Appealing Green Eggs: A Culinary Adventure
My biggest culinary hurdle for this celebration was transforming “green eggs” into something truly appetizing. My first attempts with artificial green food coloring yielded a rather unappetizing concoction, a vibrant but slightly grotesque shade that looked as if it had jumped straight out of a Dr. Seuss illustration, perhaps from a forgotten page in the “Green Eggs and Ham” book itself. While charming in illustration, such a sight on a plate is far from enticing!

After a brief moment of amusement and a suspicious glance at the Green Eggs and Ham Cookbook (wondering if others had faced similar green dilemmas), I knew I needed a different approach. The goal wasn’t just a novelty dish for show-and-tell. I wanted to create something genuinely delicious and appealing to both the pickiest little eaters and their grown-up counterparts. The challenge was to harness that playful green color in a way that screamed “eat me,” not “what is that?”
Introducing Green Eggs and Ham Sushi: A Whimsical and Delicious Twist
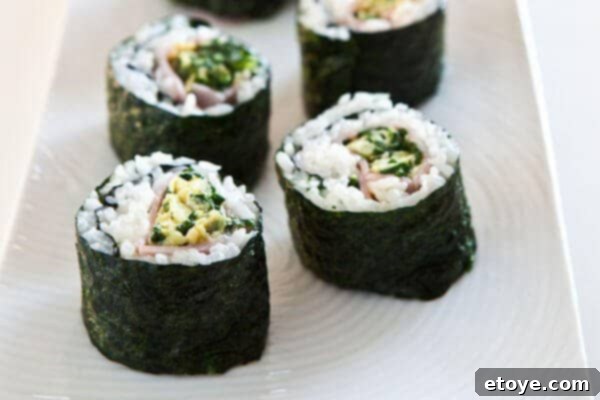
That’s when inspiration struck, leading to the birth of this delightful “Green Eggs and Ham Sushi”! A tip of the hat goes to the American Style Sushi Cookbook for sparking the idea of adapting sushi. The secret to our vibrant, natural green eggs? Loads of finely chopped spinach! By incorporating a generous amount of spinach directly into the eggs, we achieve a beautiful, earthy green hue that’s both visually appealing and packed with natural goodness. This method not only makes the dish healthier but also ensures the color looks completely natural and inviting.
This sushi recipe transforms the beloved breakfast elements into a fun, interactive meal that kids will adore making and eating. It’s a fantastic way to introduce children to new flavors and textures, especially if they’re fans of the book. Imagine the delight on their faces as they roll their own “Green Eggs and Ham” and then proudly devour their culinary creations!
The Enduring Charm of Dr. Seuss: A Global Phenomenon

“Green Eggs and Ham” transcends linguistic barriers, captivating audiences worldwide. Did you know the book is available in numerous translations? You can find it in Chinese and English, French (“Les Oeufs Vert et Jamon”), and even Italian (“Prosciutto e Uova Verdi”). The timeless story and whimsical illustrations continue to inspire imagination across cultures. For an added dose of fun, the boys in my family absolutely love the animated DVD – a fantastic and affordable way to enjoy the story in motion!
Crafting Your Own “Green Eggs and Ham” Sushi Rolls
Making sushi at home might sound daunting, but it’s an incredibly rewarding and fun activity, especially when you involve the kids. This Green Eggs and Ham Sushi recipe is designed to be approachable and engaging for the whole family. Below, you’ll find detailed step-by-step instructions on how to roll these delightful sushi pieces. Envision the joy of your children as they participate in every stage, from spreading the rice to laying out the vibrant green egg and savory ham. It’s not just cooking; it’s an experience that fosters creativity, teaches basic culinary skills, and, most importantly, creates lasting family memories.
Before diving into the full recipe, let’s take a peek at some other creative “Green Eggs and Ham” inspired dishes from my fellow culinary experts:
- Melissa d’Arabian: Ham and Green Egg Mini Tartlets
- Mitzi Dulan: Ham and Avocado Deviled Eggs
- Michael Symon: Ham Sandwich with Greens and Eggs
Oh, and before you go, can I share a little chuckle with you? If you appreciate a good parody, check out An Ode to Spam in the Style of Seuss – it’s sure to bring a smile!
Green Eggs and Ham Sushi
A few tips for success: Always opt for short-grain sushi rice, as long-grain varieties won’t achieve the desired sticky texture. For convenience, I use seasoned rice vinegar, which already contains sugar and salt. If you only have unseasoned vinegar, simply simmer 1/3 cup unseasoned rice vinegar with 2 tablespoons sugar and 1 teaspoon salt until dissolved, then allow it to cool completely before using. When selecting ham, look for very thin, deli-style slices – the thinner, the better for easy rolling and an enjoyable texture.
This recipe yields 4 servings (approximately 4-6 large rolls, which can be sliced into 24-36 sushi pieces).
Ingredients
Sushi Rice:
- 2 cups short-grain sushi rice
- 2 cups + 2 tablespoons water
- 1/4 cup seasoned rice vinegar
Sushi Spinach-Egg Filling:
- 1/2 cup chopped frozen spinach, defrosted
- 1 teaspoon cooking oil
- 3 eggs, beaten
- 1/4 teaspoon salt
Sushi Rolls:
- 6-8 thin ham slices (thin deli-style sandwich ham)
- 6 sheets seaweed (nori) 7 1/2″ x 9″ sheet
- Bamboo sushi mat, completely wrapped with plastic wrap on both sides
- Prepared Sushi Rice (from above)
Instructions
- Make the sushi rice: Place rice in a fine-mesh colander and rinse thoroughly under cold water to remove excess starch; drain well. Transfer the rinsed rice to a 2 1/2- to 3-quart heavy saucepan. Add the measured water. Cover the saucepan with a tight-fitting lid and bring the water to a boil over high heat. Once boiling, reduce the heat to low or medium-low and gently simmer, covered, for about 20 minutes, or until all the water has been absorbed by the rice. Remove the pan from heat and let it stand, still covered, for 15 minutes to allow the rice to steam. Transfer the rice to a large baking dish or a large bowl to spread it out slightly. Allow it to cool slightly. Sprinkle the seasoned rice vinegar evenly over the rice and very gently toss until it is well combined. Continue cooling the rice to room temperature. Cover it with a damp towel to prevent it from drying out while you prepare the other ingredients. Remember, for sushi, you want the rice to be close to room temperature, as hot, steaming rice will make the seaweed soggy.
- Prepare the spinach-egg filling: Meanwhile, for the spinach-egg filling, ensure the frozen spinach is fully defrosted. Squeeze as much water out of the spinach as possible using your hands or a clean kitchen towel. This step is crucial to prevent a watery filling.
- Finely chop the squeezed spinach. In a medium bowl, beat the eggs and stir in the finely chopped spinach and salt. Heat the cooking oil in a non-stick skillet over medium heat. Gently fry the spinach-egg mixture, stirring occasionally, until it’s cooked through and resembles scrambled eggs. Let this mixture cool completely before you begin rolling your sushi.
- Get ready to roll: To roll the sushi, have all your prepared ingredients within easy reach: the cooled sushi rice, the cooled spinach-egg filling, ham slices, nori sheets, and your plastic-wrapped bamboo sushi mat.
- Lay out the sushi mat on a clean, flat surface, ensuring the bamboo strips run horizontally. The sushi mat should be completely wrapped in plastic wrap to prevent the sticky rice from adhering to it. Place one sheet of nori (seaweed) on the mat.
- Wet your hands slightly with water, shaking off any excess. This dampness will prevent the rice from sticking to your hands. Grab about 3/4 cup of the prepared sushi rice. Using your fingertips, gently spread the rice evenly over the entire surface of the nori sheet, leaving about a 1/2-inch border along the top edge of the nori (the edge furthest from you).
- You don’t want to use too much rice; just enough to create a thin, even layer that barely covers the nori.
- Lay down 1-2 slices of thin ham horizontally across the center of the rice-covered nori. Overlap slightly if needed.
- Spoon about 3 tablespoons of the cooled spinach-egg mixture over the ham, forming a line across the center. Position the nori sheet so that its bottom edge is flush with the bottom edge of your bamboo mat.
- Now, bring up the bottom edge of the bamboo mat, carefully aligning it with the bottom edge of the nori sheet.
- Begin rolling: use your thumbs to lift the mat and the nori, while using your other fingers to hold the filling in place. Roll forward, but keep the edge of the bamboo mat up and just above the rolling rice. As you roll, gently tug the mat towards you. This technique helps ensure a tight and uniform roll.
- Continue rolling, maintaining the upward pressure on the bamboo mat’s edge. This ensures the roll stays compact and well-formed. Continue this motion until the roll is complete.
- Once the roll is formed, give it a nice final gentle tug back with the mat to tighten it further and create a perfect cylindrical shape.
- There you have it – a perfectly rolled sushi cylinder! Notice how even the roll is.
- To slice the sushi, dip the tip of a sharp knife in water before each cut. This wet tip will prevent the rice from sticking to the blade. Slice the roll into 6 even pieces. Serve immediately and enjoy!
Tips for Sushi Success
Achieving perfect sushi rolls is all about technique. Always ensure your hands are damp when handling sushi rice to prevent sticking. When spreading the rice on the nori, aim for an even, thin layer; too much rice can make the roll unwieldy. The key to a tight roll lies in a firm, consistent tug of the bamboo mat as you roll, ensuring the ingredients are snugly packed. A sharp, wet knife is your best friend for clean cuts, giving your sushi a professional finish.
Tried this delightful recipe? We’d love to hear how it turned out! Share your experience in the comments below!
