Effortless Microwave Herb Drying: Preserve Freshness in Minutes
Unlock the secret to creating your own perfectly dried herbs in a flash! Whether you’ve got a bountiful backyard garden overflowing with aromatic greens or simply want to salvage those wilting bunches from the grocery store, the microwave offers an incredibly fast and efficient solution. Say goodbye to store-bought dried herbs that often lack vibrancy and potency, and hello to a kitchen full of your own flavorful, robust seasonings, ready in mere minutes. This revolutionary method allows you to capture the peak essence of your favorite herbs, ensuring you have a steady supply of high-quality, homemade additions to your culinary creations all year long.
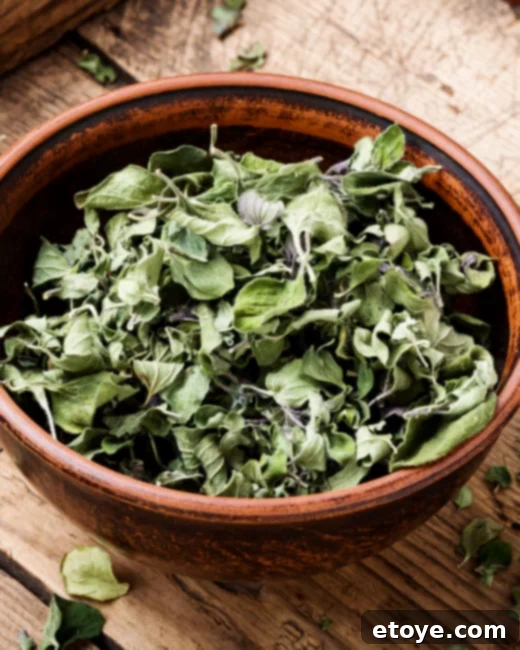
This quick microwave method isn’t just a time-saver; it’s a game-changer for anyone looking to maximize their herb harvest or simply avoid food waste. Imagine preserving the peak freshness of your summer garden herbs, or giving a second life to those store-bought bundles that are starting to look a little sad. By drying them yourself, you capture their essential oils and concentrated flavors, enhancing their longevity without compromising on taste. This approach ensures you’re always prepared with premium dried herbs for all your cooking needs, making every dish burst with garden-fresh goodness.
Why Microwave Drying is Your Go-To Method for Herbs
When it comes to preserving herbs, various traditional methods exist, from air-drying and oven-drying to using a dedicated dehydrator. However, the microwave stands out as the ultimate choice for its unparalleled speed, simplicity, and remarkable ability to retain the vibrant color and robust flavor of your herbs. Unlike longer drying processes that can diminish aromatic compounds, the rapid action of the microwave locks in the goodness. Here’s why embracing this ingenious technique will revolutionize your kitchen:
- Unmatched Speed and Efficiency: This is, without a doubt, the fastest and easiest way to transform fresh herbs into their dried counterparts. Air-drying can take days or even weeks, while dehydrators require hours of consistent heat. The microwave, however, completes the entire job in just minutes, making it perfect for spontaneous preservation or busy schedules.
- Superior Freshness and Potency: Homemade microwave-dried herbs consistently surpass the quality of most store-bought varieties. Commercial herbs often sit on shelves for extended periods, losing potency before they even reach your pantry. Furthermore, once a jar of dried herbs is opened, its flavor and aroma degrade rapidly, typically losing peak freshness within six months. By drying your own, you’re guaranteed a fresher, more potent product, ensuring every dish is packed with maximum flavor.
- Minimal Prep Time and Easy Cleanup: The entire process is designed for convenience. It requires virtually no elaborate setup or specialized equipment, simplifying your culinary routine. A quick wash, a thorough pat dry, and a few minutes in the microwave are all it takes. This means less planning and effort on your part, coupled with quick and minimal cleanup, leaving you more time to enjoy your cooking.
- Enhanced Flavor and Aroma Retention: The rapid drying process within a microwave is key to preserving the volatile essential oils of the herbs. These oils are responsible for their distinctive fragrance and flavor. Unlike slower drying methods where more of these compounds can evaporate, microwave drying helps to encapsulate these precious elements, resulting in dried herbs that are significantly more aromatic and flavorful.
- Cost-Effective and Environmentally Friendly: Drying your own herbs offers significant economic advantages, saving you money on expensive store-bought varieties that often come in plastic packaging. More importantly, it helps reduce food waste by preventing fresh herbs from spoiling. This sustainable practice not only benefits your wallet but also contributes positively to environmental conservation by minimizing packaging waste.
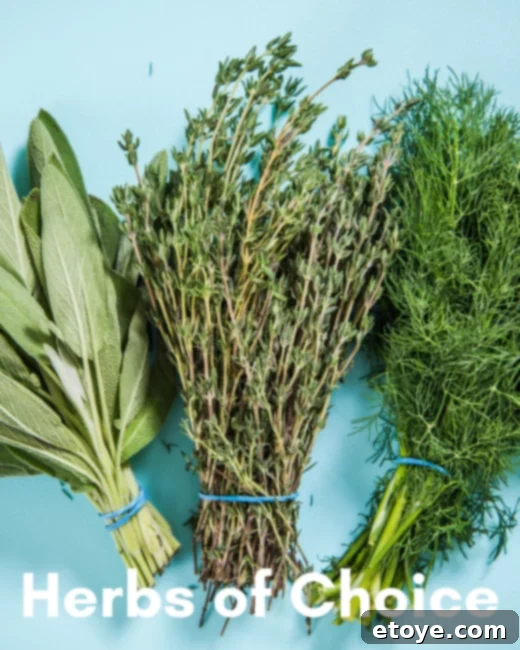
Essential Ingredient for Microwaved Dried Herbs
The beauty of this method lies in its profound simplicity. You only need one core ingredient, making it accessible to every home cook:
- Any Bunch of Fresh Herbs: From robust woody herbs like rosemary to delicate leafy varieties such as dill or parsley, almost any herb can be successfully dried in the microwave. The key to optimal results is selecting herbs that are vibrant in color, free from blemishes, and possess a strong, fresh aroma. Whether freshly harvested from your garden or newly purchased, quality fresh herbs are the foundation for potent dried seasonings.
Selecting the Best Herbs for Microwave Drying: A Comprehensive Guide
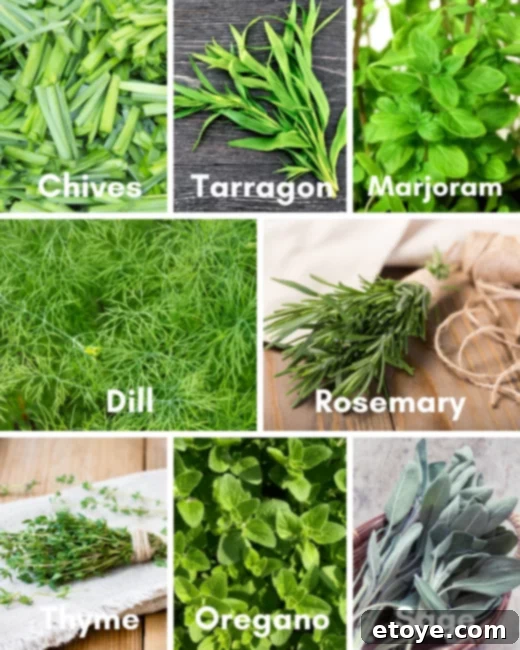
While many herbs excel with this quick drying method, understanding their individual characteristics can help you make the best choices and anticipate their dried flavor. Each herb offers a unique culinary contribution, and microwave drying helps to concentrate these essences. Here’s a closer look at some popular options and how they perform when dried:
- Chives: These slender green shoots offer a delicate, fresh onion-like flavor, much milder and more refined than raw onions. They are a fabulous garnish, adding a fresh, piquant touch and a pop of vibrant color to everything from eggs and soups to baked potatoes. When dried, their subtle flavor becomes more concentrated, making them perfect for seasoning dips, cream cheese spreads, or delicate sauces where a mild onion note is desired.
- Tarragon: Often hailed as a chef’s secret weapon, tarragon boasts a truly unique flavor profile – a delightful blend of sweet, anise-like notes with a subtle peppery bitterness. It’s magnificent with poultry and fish, indispensable in classic French sauces like Béarnaise, or incorporated into a creamy aioli. Dried tarragon remarkably retains much of its distinctive essence, making it a powerful and sophisticated addition to your spice rack, ideal for enriching vinaigrettes or seasoning light meats.
- Marjoram: Closely related to oregano but distinguished by its sweeter, more delicate, and slightly floral aroma. Marjoram has a pronounced, subtly spicy flavor that is incredibly versatile, lending a gentle warmth to dishes. It pairs wonderfully with lamb, poultry, and various vegetables. When dried, its gentle and aromatic qualities become more evident, making it a staple for savory dishes, particularly in Mediterranean and Middle Eastern cuisines.
- Dill: Known for its feathery fronds and a grassy, slightly licorice-like flavor, dill is incredibly versatile. Beyond its famous role in pickles, it brightens up seafood, yogurt-based sauces, potato salads, and even certain breads. Dried dill maintains its unique zest and is excellent in rubs, marinades, or sprinkled over roasted vegetables, adding a refreshing, herbaceous note.
- Rosemary: One of the most fragrant and robust herbs, rosemary is instantly recognizable by its pine-like aroma and pungent, savory flavor. Its strong character makes it exceptional for infusing olive oil and it pairs beautifully with roasted meats (especially lamb, pork, and chicken), potatoes, and, of course, butter. Microwave drying preserves its powerful fragrance and needle-like texture, making it a long-lasting and indispensable culinary asset for hearty dishes.
- Thyme: A cherished member of the mint family, thyme features tiny, sage-green leaves with a subtle, earthy flavor. Its delicate notes make it a versatile companion to many other spices and a wide range of dishes, including hearty stews, comforting soups, and roasted root vegetables. Dried thyme becomes slightly more intense, providing a warm, comforting base for numerous recipes without overpowering other ingredients.
- Oregano: More pungent and sometimes slightly bitter and grassy than its cousin marjoram, oregano is a cornerstone of Italian, Greek, and certain Mexican cuisines (look for Mexican oregano for an even more distinct, citrusy profile). It lends a bold, earthy character to pizza, pasta sauces, grilled meats, and bean dishes. Dried oregano is a powerhouse of flavor, often intensifying and developing greater depth with the drying process, making it a must-have for robust cooking.
- Sage: A very “holiday-friendly” herb, sage is savory with subtle citrus notes and a slightly piney, earthy aroma. It has a robust flavor that can truly be the star of a dish, especially when paired with poultry (think classic Thanksgiving turkey), pork, or hearty vegetable dishes. It combines wonderfully with marjoram and rosemary for a classic poultry seasoning blend. Drying sage enhances its earthy and musky notes, making it perfect for long-simmering dishes and stuffings.
- Parsley & Cilantro: While often considered “soft” herbs due to their delicate leaves and high water content, these also dry surprisingly well in the microwave. They will require careful and thorough patting dry as they contain more moisture than their woody counterparts. Dried parsley is a classic versatile garnish and seasoning, while dried cilantro can be powdered and used in Mexican and South Asian dishes, adding an incredible depth of flavor to guacamole, curries, or salsas.
Step-by-Step Guide: How to Dry Herbs in the Microwave
This method is incredibly straightforward and requires minimal effort, but a few key steps ensure optimal results. Follow these simple instructions to achieve perfectly dried herbs, preserving their vibrant color and robust flavor every time:
- Thoroughly Clean Your Herbs: Begin by washing your herbs well under cool, running water. This step is particularly important if they’ve come straight from your garden, where they might have soil residue or small insects. Ensure all dirt, dust, and any unwanted debris are completely removed. Gently shake off excess water.
- Crucial Pat Drying: This is a vital step for successful microwave drying. Lay the washed herbs on a layer of clean paper towels and gently pat them as dry as possible with another layer of paper towels. The goal is to remove as much surface moisture as you can. Excess moisture will significantly prolong the drying process, potentially leading to steaming rather than the desired crisping. While patting, take the opportunity to pick off any thick, woody stems or dead/discolored leaves, as these won’t dry effectively and can affect the final quality of your batch.
- Arrange on a Microwave-Safe Plate: Spread the thoroughly patted-dry herbs in a single, even layer on a microwave-safe plate. Avoid overcrowding at all costs, as this can trap moisture, prevent proper airflow, and lead to uneven drying. If you have a large quantity of herbs, it’s always better to work in smaller batches to ensure consistent and efficient drying.
- Initial Microwave Exposure: Place the plate containing the herbs in the microwave and heat on high for an initial period of 2 minutes. Keep in mind that microwave power levels can vary significantly, so this duration serves as a conservative starting point.
- Check and Continue Drying in Intervals: Carefully remove the plate from the microwave (it may be hot). Gently touch the herbs to assess their dryness. They should feel noticeably dry, possibly slightly crispy, but not necessarily brittle just yet. If they are not completely dry and brittle (meaning they easily crumble or snap when gently touched), return them to the microwave. Continue heating them in short 30-second intervals. After each interval, check the herbs again, stirring or flipping them if necessary to promote even drying. Repeat this process until the herbs are brittle, crisp, and easily crumble. Be extremely cautious not to over-microwave them; herbs can go from perfectly dry to scorched very quickly, which will ruin their flavor and aroma.
Once your herbs have reached the desired brittleness, they are ready! Allow them to cool completely on the plate before proceeding to the storage phase. Cooling ensures they maintain their crisp texture.
Recommended Tools for Herb Drying Success
While the microwave method is wonderfully simple and accessible, a couple of handy tools can make the process even smoother and more efficient, enhancing your overall experience:
- Silicon Tongs: These are ideal for carefully flipping, stirring, or adjusting herbs on a hot plate without the risk of burning your fingers. They provide excellent grip and control, which is particularly useful when checking for dryness during those crucial microwaving intervals.
- Microwave-Safe Plates: Any standard microwave-safe ceramic or glass plate will work perfectly. Using a non-plastic option is generally recommended to avoid potential chemical leaching and often provides better, more even heat distribution for optimal drying results.
Frequently Asked Questions About Microwave Drying Herbs
What is the typical shelf life for microwave-dried herbs?
The longevity of your homemade dried herbs largely depends on their form and how they are stored. Whole dried leaves and sprigs tend to retain their potency longer due to less surface area exposure, typically lasting 1-3 years. Crushed or powdered herbs, however, have a larger surface area exposed to air, which accelerates flavor degradation. These are generally best used within 6 months to a year for optimal flavor and aroma. Proper storage is paramount to maximizing their shelf life.
Why are my herbs taking longer than expected to dry out?
Several interconnected factors can influence the drying time of your herbs in the microwave:
- Microwave Wattage and Power: Not all microwaves are created equal. Some operate with lower voltage or wattage, requiring longer drying times. Be patient, and adjust the duration and intervals as needed for your specific appliance.
- Initial Moisture Content: The most common reason for extended drying times is insufficient patting dry after washing. If the herbs are still quite wet, your microwave must first evaporate that excess water before it can effectively dry the herb tissue, significantly prolonging the process. Ensure your herbs are as dry as possible to start.
- Herb Type and Thickness: Thicker-leaved herbs (like sage or rosemary) or those with naturally higher water content (such as parsley or cilantro) may inherently take a bit longer to dry compared to thin, delicate herbs.
- Overcrowding on the Plate: If you’ve placed too many herbs on the plate at once, they won’t dry efficiently or evenly. Proper airflow, even within a microwave, is essential, so always ensure they are spread in a single, uncrowded layer.
Can I truly use any type of herb I want for this microwave drying method?
Yes, absolutely! The microwave drying method is remarkably versatile and effective for a wide array of herbs. Even softer, more delicate herbs like parsley and cilantro work exceptionally well with this technique. For these types, which naturally have a higher water content after washing, pay extra attention to patting them thoroughly dry before placing them in the microwave. Once dried, you can easily crumble them by hand or even powder them for specific culinary uses. For instance, dried cilantro can be finely ground into a powder and added to guacamole, tacos, or chili for an incredible, concentrated burst of flavor. Don’t hesitate to experiment with your favorite fresh herbs!
How should I store my homemade dried herbs to maintain their quality?
Proper storage is absolutely crucial for maintaining the flavor, aroma, and potency of your microwave-dried herbs over time. Once your herbs are completely cool and brittle, you can crumble them by hand, or for a finer texture, gently pulse them in a clean coffee grinder (dedicated to spices) or a small food processor. Store the dried herbs in airtight containers, such as small glass jars with tight-fitting lids. Crucially, keep these containers in a cool, dark, and dry place, away from direct sunlight, heat, and humidity. A pantry or a closed cupboard is ideal. Avoid storing them above the stove or near other heat-generating appliances, as fluctuations in temperature and moisture will quickly degrade their quality. Always label your jars with the herb name and the date dried for easy tracking of their freshness.
What are some creative ways to use my homemade dried herbs?
The possibilities are truly endless when it comes to incorporating your fresh, potent homemade dried herbs into your cooking. They are a fantastic addition to almost any savory dish, elevating flavors with their concentrated essence. Here are a few ideas to get you started:
- Custom Seasoning Blends: Unleash your inner chef by creating your own unique seasoning mixes for poultry, fish, vegetables, or even popcorn.
- Soups, Stews, and Chili: Add a pinch or a generous amount to simmering soups, hearty stews, and warming chili for deep, layered, and comforting flavors.
- Marinades and Rubs: Incorporate them into flavorful dry rubs for grilled, roasted, or pan-fried meats, or blend them into oil-based marinades for enhanced tenderness and taste.
- Breads and Baked Goods: Mix dried herbs into focaccia dough, savory muffins, scones, or sprinkle them over homemade bread (like a crusty artisan loaf) before baking for an aromatic crust.
- Infused Oils and Vinegars: Steep your dried herbs in high-quality olive oil or your favorite vinegar to create custom flavorful infusions perfect for dressings, dipping, or cooking.
- Compound Butters: Blend finely crumbled dried herbs with softened butter, a touch of minced garlic, and a pinch of salt to create a gourmet compound butter for steaks, corn on the cob, or spreading on warm bread.
- Egg and Breakfast Dishes: Brighten up your morning meals by sprinkling dried herbs over scrambled eggs, omelets, frittatas, or even savory pancakes.
Recipe: How to Dry Herbs in the Microwave
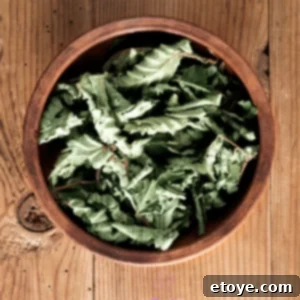
Microwave Dried Herbs
Add fresh, vibrant dried herbs to any recipe! This super-fast microwave method allows you to easily transform herbs from your fridge or garden into your very own potent seasonings in minutes.
Prep Time: 2 minutes
Cook Time: 2-5 minutes (depending on microwave and herb type)
Yields: 1 batch (yield varies based on initial fresh herb quantity)
Ingredients
- 1 bunch of any fresh herbs of your choosing (e.g., parsley, cilantro, rosemary, thyme, sage, dill, oregano, marjoram, tarragon, chives)
Instructions
- Wash the herbs thoroughly under cool water to ensure they are clean. Gently pat them as dry as possible with paper towels, removing any excess moisture. Pick out any thick stems or dead/discolored leaves.
- Lay the patted-dry herbs out flat in a single layer on a microwave-safe plate. Avoid overlapping to ensure even drying. Work in batches if you have a large quantity.
- Microwave on high for an initial 2 minutes.
- Remove the plate and carefully check the herbs. If they are not yet brittle and crumbly (meaning they don’t easily snap or shatter), return them to the microwave. Continue heating in short 30-second intervals until they are completely dry and easily crumble when touched. Be vigilant to avoid burning them.
- Allow the dried herbs to cool completely on the plate. Once cool, crumble them by hand or process them to your desired texture. Store in an airtight container in a cool, dark place.
Conclusion: Embrace the Ease and Flavor of Homemade Dried Herbs
Drying herbs in the microwave is a simple, quick, and incredibly rewarding kitchen hack that offers immense benefits for any home cook. It empowers you to enjoy the unparalleled freshness, potent flavor, and vibrant aroma of your favorite herbs all year long, whether they come directly from your flourishing garden or are salvaged from a trip to the grocery store. By following these easy and efficient steps, you’re not just preserving food; you’re actively elevating your culinary game, reducing kitchen waste, and making a sustainable choice for your household. So, the next time you find yourself with an abundance of fresh herbs, don’t let their beauty and flavor go to waste. Grab your microwave, and embark on the delightful journey of creating your very own pantry full of aromatic, homemade dried seasonings!
