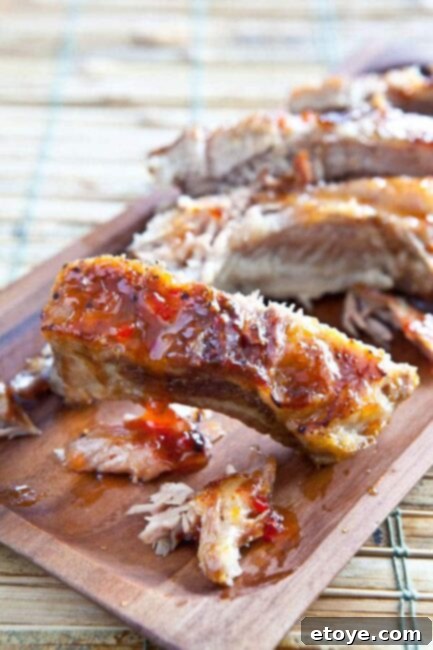
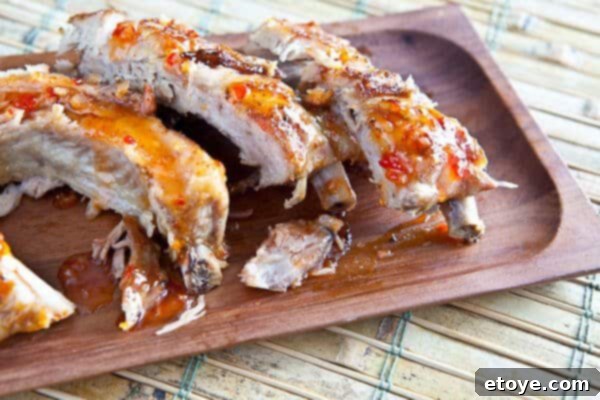
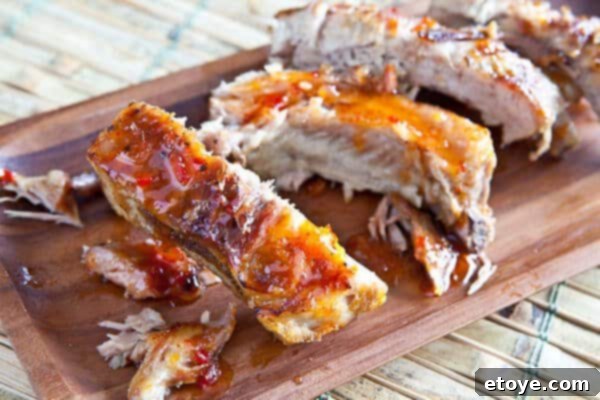
Welcome, fellow food enthusiasts and rib aficionados! Prepare to embark on a culinary journey that redefines simplicity without compromising on flavor. We’re talking about incredibly delicious, fall-off-the-bone baby back ribs, crafted with just two star ingredients. Yes, you read that right – only two! Forget elaborate spice rubs or complex marinades; our secret lies in a tantalizing Thai sweet chili sauce that delivers a perfect balance of sticky sweetness with just a whisper of chili heat, making it universally appealing. These aren’t just any ribs; they are the epitome of tender, juicy perfection, guaranteeing a finger-licking experience that will have everyone reaching for more. Whether you’re planning an epic game day feast, a festive holiday gathering, or simply a standout weeknight dinner, this easy baby back ribs recipe is guaranteed to be a sensational crowd-pleaser.
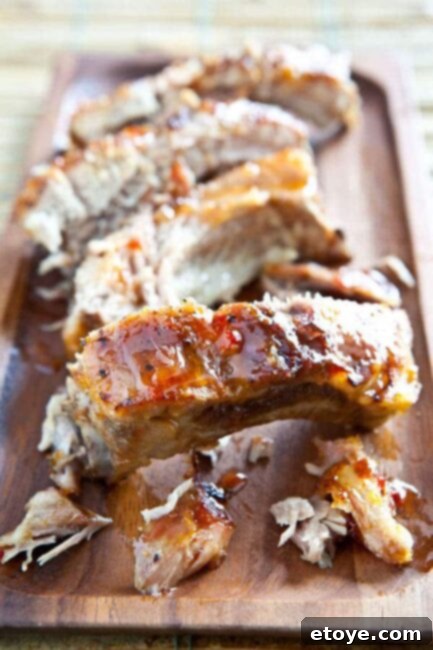
Why This Simple Baby Back Ribs Recipe is an Absolute Game-Changer
In a world where elaborate recipes often dominate, this simple approach to crafting perfect baby back ribs stands out. With minimal fuss and maximum flavor, here’s why this recipe deserves a permanent spot in your culinary repertoire:
Unbeatable Simplicity with Just 2 Key Ingredients: Beyond the star of the show – premium baby back ribs – you’ll only need Thai sweet chili sauce and a touch of salt and pepper. This eliminates the need for a lengthy grocery list filled with obscure spices or a pantry overflowing with specialty items. Sometimes, the most extraordinary flavors emerge from the simplest combinations, proving that you don’t need complexity to achieve perfection in your home kitchen. This focus on essential ingredients makes the recipe incredibly accessible and budget-friendly for any occasion.
Achieve Ultimate Tenderness: Fall-Off-The-Bone Perfection: Prepare for a truly melt-in-your-mouth experience. These baby back ribs will boast an unmatched tenderness that allows the meat to effortlessly pull away from the bone. The magic behind this incredible texture lies in our slow-cooking method. By roasting the ribs at a low temperature in the oven, you allow the collagen within the meat to slowly break down and transform into gelatin. This process not only tenderizes the meat but also infuses it with incredible juiciness, ensuring every bite is succulent and flavorful. You’ll be amazed at how easily you can create restaurant-quality ribs right in your own oven.
Minimal Hands-On Time for Maximum Relaxation: Who knew ribs could be so low-maintenance? This recipe requires only about 10 minutes of active preparation time. The vast majority of the cooking process unfolds passively in your oven, where the ribs are snugly wrapped in aluminum foil, slowly roasting to peak tenderness. This “set it and forget it” approach frees up your time to focus on other tasks, whether that’s preparing complementary side dishes, enjoying time with guests, or simply relaxing. It’s the perfect solution for busy weeknights or when hosting a gathering without the stress of constant kitchen attention.
A Symphony of Sweet & Sticky Flavors with a Gentle Chili Kick: The choice of Thai sweet chili sauce is pivotal to the unique character of these ribs. It delivers a delightful interplay of sweet and sticky notes, beautifully complemented by a subtle hint of chili that invigorates the palate without overpowering it. This nuanced flavor profile makes the ribs appealing to a wide audience, even those who might typically shy away from spicy foods. Furthermore, a quick finish under the broiler caramelizes the sauce to perfection, creating a slightly crisp, beautifully charred exterior that adds another layer of texture and an irresistible sheen to your finished ribs.
The Ultimate Crowd-Pleaser for Any Gathering: Whether it’s the roar of the crowd on game day, a lively backyard barbecue, a relaxed family dinner, or a special celebration, these juicy ribs are an undeniable hit. Their universal appeal, combined with their striking presentation and incredible taste, makes them a go-to dish for any social occasion. They are designed to impress and satisfy even the most discerning palates, ensuring your guests leave with happy memories and full stomachs.
Infinitely Customizable to Suit Your Palate: While the core two-ingredient recipe is phenomenal, it also serves as a fantastic canvas for personalization. Feel free to unleash your culinary creativity and tailor the flavors to your exact preferences. Craving a deeper, more robust smokiness? A generous sprinkle of smoked paprika or a dash of liquid smoke added during the initial seasoning can work wonders. For those who prefer a homemade touch, consider crafting a bespoke dry rub. A classic combination of brown sugar for sweetness, garlic powder and onion powder for aromatic depth, and a pinch of dry mustard for a subtle tang can elevate the flavor profile even further, transforming these already delicious ribs into a truly bespoke culinary masterpiece.
Essential Ingredients for Your Tender Baby Back Ribs
Gathering your ingredients for these sensational ribs is remarkably straightforward. The beauty of this recipe truly lies in its simplicity, proving that fewer components can still lead to an explosion of flavor.
- Baby Back Ribs: Approximately 5 pounds, which typically feeds 4-6 hungry people. Look for well-marbled ribs for the best results.
- Thai Sweet Chili Sauce: About 1/2 cup, or more if you like them extra saucy. This sauce is the backbone of our flavor profile.
- Salt and Pepper: To taste, for seasoning the ribs before cooking. Alternatively, use your favorite dry rub.
Mastering the Art of Tender Baby Back Ribs: Step-by-Step Guide
This foolproof technique ensures irresistibly tender, fall-off-the-bone ribs every single time. While our recipe highlights Thai sweet chili sauce, the foundational cooking method can be paired with any barbecue sauce or dry rub of your choice. The key is the slow, gentle heat that transforms tough meat into succulent perfection.
- Prepare the Ribs: Remove the Membrane (Crucial Step!)
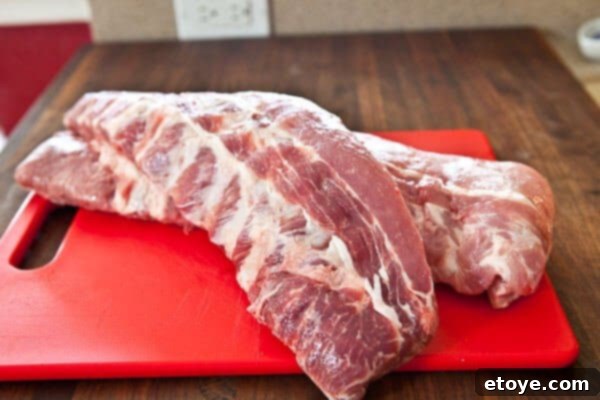
Begin by carefully inspecting the backside of your rack of baby back ribs. You’ll often find a thin, silvery membrane covering the bones. This membrane, known as the peritoneum, is tough, doesn’t break down during cooking, and prevents seasonings and sauces from fully penetrating the meat. Removing it is perhaps the single most important step for achieving truly tender ribs.

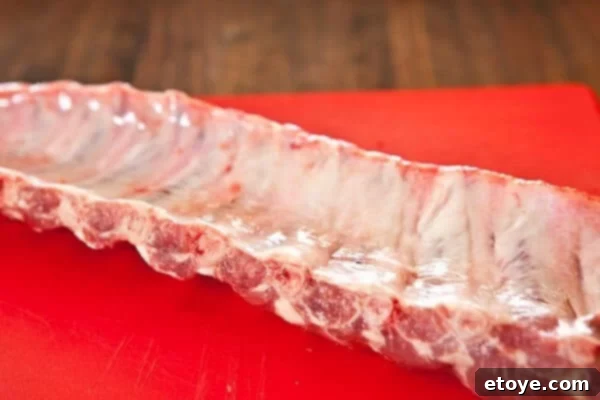
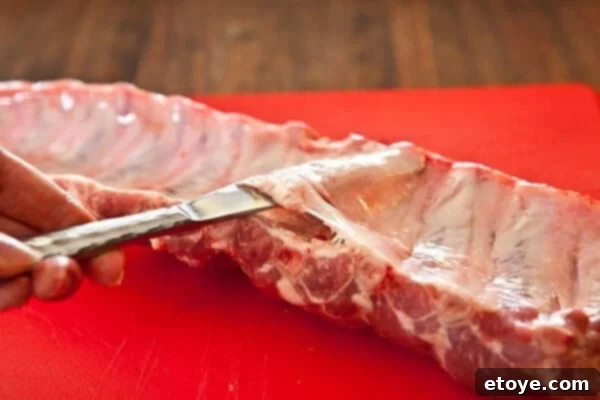
Identify the thin membrane on the underside of the ribs – its removal is key to tender results. To remove it, turn the rib rack bone-side up. Look for that thin, opaque layer covering the meat between the bones.

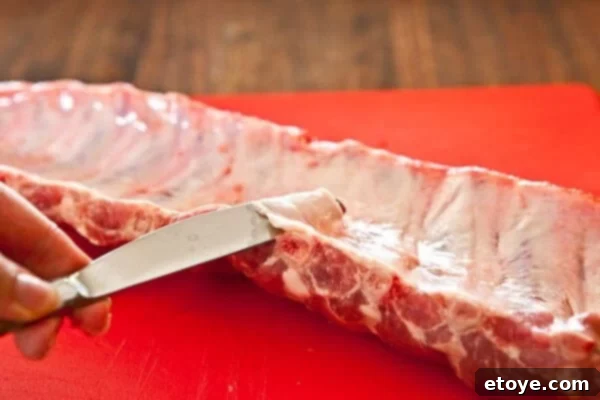
The membrane appears as a shiny, whitish layer on the back of the ribs. Some butchers remove this for you, so always check! Using a butter knife or the handle of a spoon, gently wedge it underneath the edge of the membrane, usually starting at one of the shorter ends. Pry it up until you can get a good grip on it.

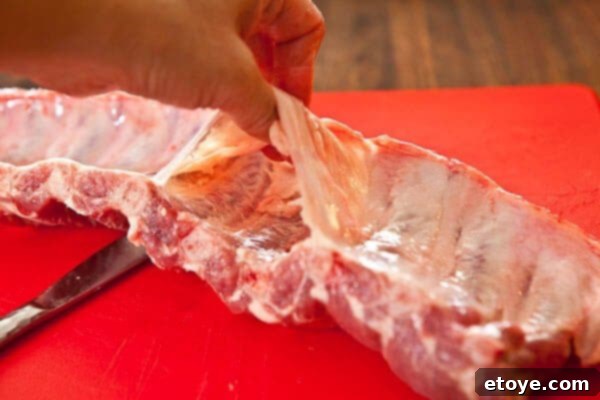
Carefully slide a butter knife or spoon handle under the membrane to loosen it from the bone. Once you have a small section lifted, grab it firmly with a paper towel (this provides a much better grip, as the membrane can be slippery). Slowly pull the membrane upwards and away from the bones. It should peel off in one long strip. If it tears, simply re-position your grip and continue pulling.

With a paper towel for grip, pull the membrane cleanly off the rib rack. 
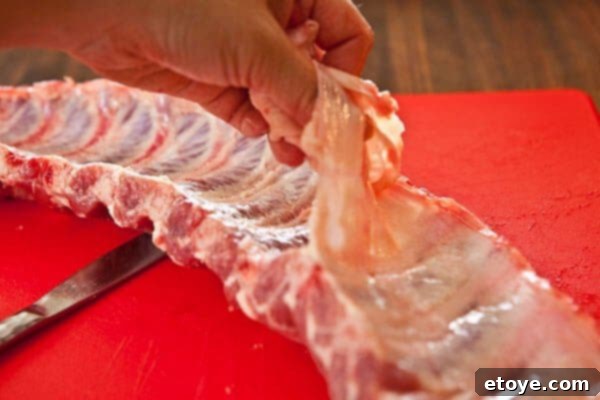
Continue peeling with your fingers until the entire membrane is removed, ensuring maximum tenderness. Discard the removed membrane. You’ll notice how thick and tough it often is. This small effort makes a monumental difference in the final tenderness and flavor absorption of your ribs. Some ribs come with the membrane already removed; don’t hesitate to ask your butcher if you’re unsure.

Observe the thickness of the removed membrane—a testament to why this step is essential for superior ribs. - Season the Ribs Generously
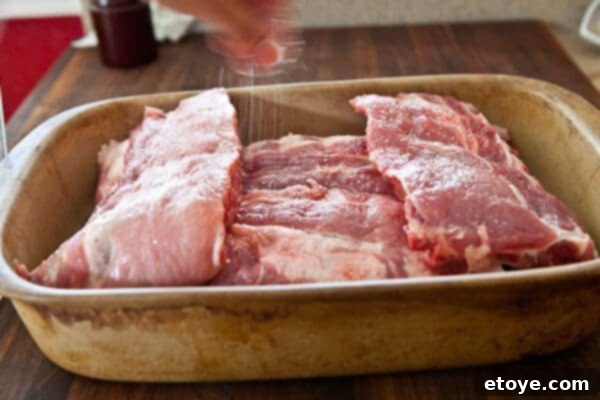
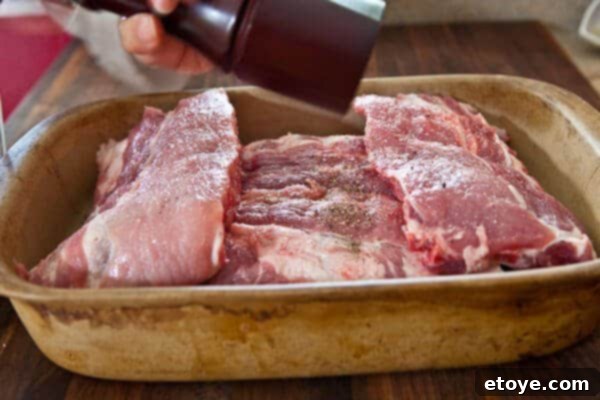
Preheat your oven to 275°F (135°C). Place the membrane-free ribs in a large roasting pan. It’s perfectly fine if they overlap slightly, especially if you’re cooking multiple racks. Season both sides of the ribs generously with salt and freshly ground black pepper. For those who enjoy a more complex flavor profile, this is where you could apply your favorite pork dry rub. Ensure an even coating for maximum flavor penetration.

Liberally season both sides of your baby back ribs with salt, preparing them for the oven. 
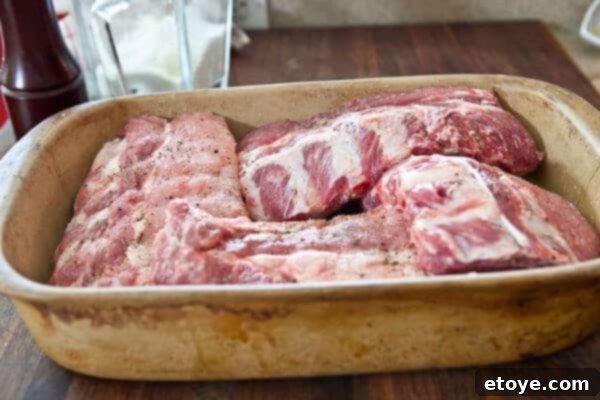
Follow with a generous coating of black pepper, or your chosen dry rub. If you’re cooking multiple racks and they need to overlap, arrange them in a way that allows some air circulation, like layering them slightly on an angle. This helps ensure even cooking.

When preparing multiple racks, layer them efficiently in your roasting pan to ensure consistent cooking. - Slow Roasting to Perfection
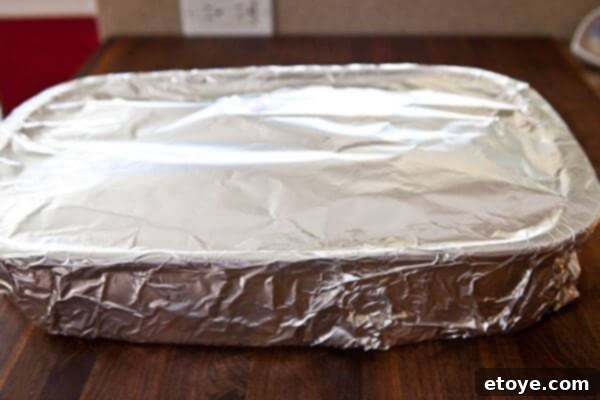
Cover the roasting pan tightly with a double layer of heavy-duty aluminum foil. This creates a steamy environment that tenderizes the ribs beautifully and locks in moisture. Place the covered pan in your preheated oven and roast for approximately 4 hours. The low temperature and long cooking time are the secrets to achieving that coveted fall-off-the-bone texture. Resist the urge to peek during this phase; the consistent heat and moisture are critical.

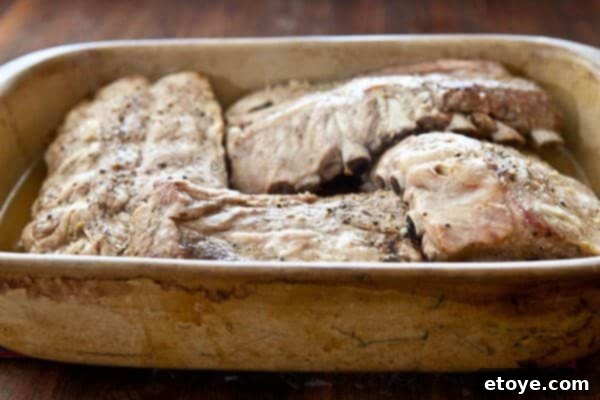
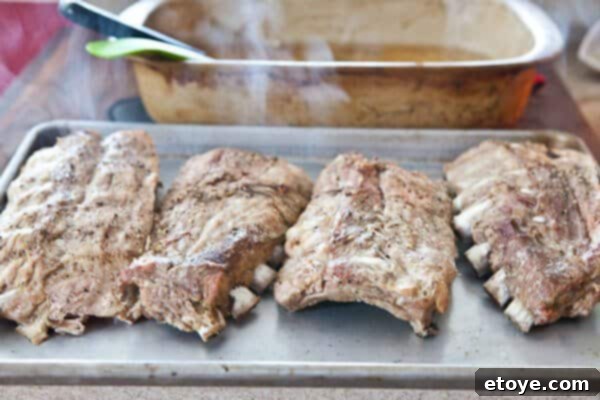
Cover the pan securely with a double layer of foil and bake for approximately 4 hours at 275°F for maximum tenderness. After 4 hours, carefully remove the foil. The ribs should be incredibly tender, and the meat will have pulled back from the bones.

After slow roasting, your ribs will emerge perfectly tender, ready for the next delicious step. - Sauce and Broil for a Sticky, Caramelized Finish
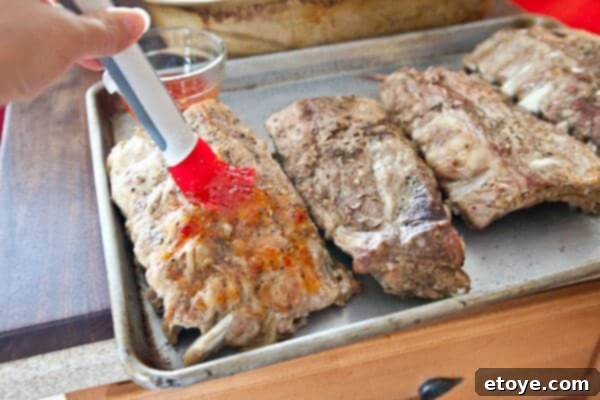
Using a wide, flat spatula, carefully transfer the tender ribs from the roasting pan to a baking sheet. Be gentle, as they will be very delicate and prone to falling apart. Generously brush both sides of the ribs with the Thai sweet chili sauce (or your preferred BBQ sauce). Don’t be shy; a thick, even layer will create the best glaze.

Gently transfer the delicate, roasted ribs onto a baking sheet. 
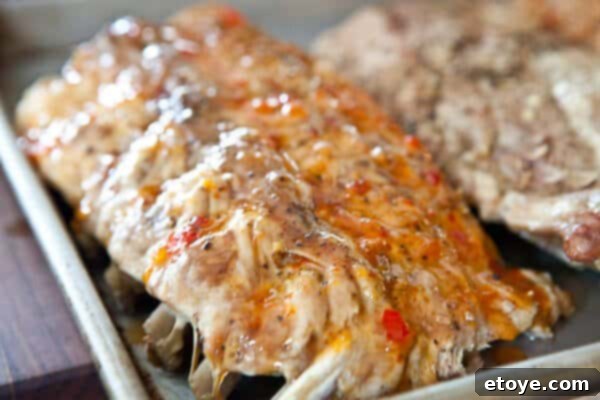
Lavishly brush the sweet chili sauce, or your favorite BBQ sauce, over the ribs. 
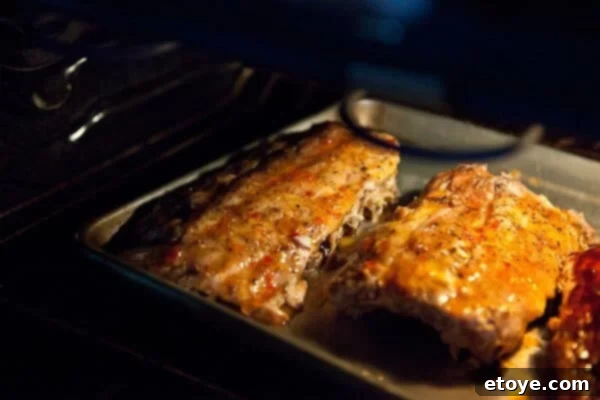
Ensure a generous coating of sauce for the perfect sticky glaze. Move your oven rack to the top third of the oven. Turn on the broiler and broil the ribs for 3-5 minutes. This step is critical for caramelizing the sauce and creating that desirable sticky, slightly charred exterior. However, broilers can be intense, so watch the ribs very closely to prevent burning. The sauce can go from perfectly caramelized to burnt in a matter of seconds. Once golden brown and bubbling, remove them from the oven.

Broil for a few minutes until the sauce caramelizes, keeping a watchful eye to prevent burning. And that’s it! Your incredibly tender, sticky, and flavorful Baby Back Ribs with Sweet Chili Sauce are ready to be devoured.

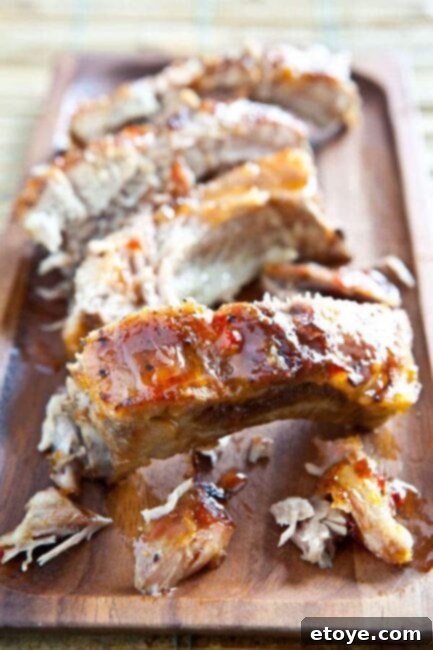
The finished masterpiece: perfectly tender, fall-off-the-bone baby back ribs with a glistening sweet chili glaze. 
Serve these delightful ribs on a platter, ready to impress your family and friends. 
A close-up view reveals the incredible tenderness and luscious sauce.
Choosing the Perfect Sauce for Your Ribs
While this recipe champions the delightful tang and sweetness of Thai sweet chili sauce, the world of rib sauces is vast and exciting. Our preferred brand, Mae Ploy, offers a fantastic balance that’s sweet, sticky, and surprisingly mild, despite its name, making it a crowd-pleaser for all ages. However, don’t feel limited! This cooking method works beautifully with virtually any thick barbecue sauce you love – from smoky chipotle to tangy Carolina-style, or even a rich, savory teriyaki sauce. The goal is a sauce that caramelizes nicely under the broiler, creating that desirable sticky glaze. We highly recommend trying the sweet chili sauce at least once to experience its unique charm, but feel free to experiment and find your own perfect pairing. Homemade barbecue sauces, crafted with ingredients like ketchup, brown sugar, apple cider vinegar, and a hint of garlic powder, are also excellent choices for a personalized touch.

Expert Tips for the Best Tender Baby Back Ribs
To ensure your baby back ribs are nothing short of spectacular, keep these invaluable tips in mind:
- Always Remove the Membrane: This is a non-negotiable step for truly tender ribs. The membrane acts as a barrier, preventing flavor penetration and resulting in a tough chew. Don’t skip it!
- Embrace “Low and Slow”: The 275°F oven temperature for 4 hours is crucial. This gentle, prolonged cooking breaks down the connective tissues without drying out the meat, creating that signature fall-off-the-bone texture. Patience is a virtue here.
- Double Up for a Crowd: This recipe scales effortlessly. If you’re feeding a larger group, simply double the amount of ribs and sauce. The cooking time remains the same, making it incredibly convenient for entertaining.
- Don’t Be Afraid to Customize Your Seasoning: While salt and pepper are perfectly fine, consider experimenting with a dry rub before the slow roast. Brown sugar, paprika, garlic powder, onion powder, and a touch of cayenne can add fantastic depth.
- Monitor the Broiler Closely: The broiler step is quick and transformative, but it requires your undivided attention. Sauces with high sugar content can burn quickly. Keep a watchful eye to achieve a beautiful caramelization without charring.
- Rest Your Ribs: Although not explicitly stated in the steps, allowing the ribs to rest for 5-10 minutes after broiling helps the juices redistribute, resulting in an even more succulent final product.
Frequently Asked Questions: Crafting the Best Baby Back Ribs
Here are answers to common questions about making these incredibly tender baby back ribs, ensuring your success in the kitchen.
Can I use homemade barbecue sauce instead of the Thai sweet chili sauce?
Absolutely! This recipe is incredibly versatile. Feel free to whip up your favorite homemade barbecue sauce. Classic ingredients like ketchup, brown sugar, apple cider vinegar, Worcestershire sauce, and a little garlic powder and paprika can create a fantastic, personalized sauce that perfectly complements the tender ribs.What’s the best way to remove the membrane from the back of the ribs?
The easiest and most effective method is to use a butter knife or the handle of a spoon to gently lift a corner of the membrane. Once you have a small section loosened, grab it firmly with a paper towel (which provides excellent grip) and pull it off in one smooth motion. If it tears, simply find another edge and continue.How can I make sure the ribs are juicy and not dry?
The secret to juicy ribs lies in two key techniques: slow cooking at a low temperature (275°F for 4 hours) and wrapping them tightly in a double layer of aluminum foil. This creates a moist, steamy environment in the oven, ensuring the ribs cook through without drying out, making them incredibly succulent.What are some good side dishes to serve with baby back ribs?
Classic pairings that perfectly complement the rich flavor of ribs include creamy coleslaw, sweet and savory cornbread, and hearty baked beans. For lighter options, consider a crisp green salad, roasted corn on the cob, or steamed seasonal vegetables.How do I know if the ribs are done?
The ultimate test for doneness is tenderness. The meat should be easily pulling away from the bone, almost to the point of falling off. You can gently tug at a bone with a fork; if it slides out with minimal resistance, your ribs are perfectly cooked and ready to enjoy.Can I add other spices to the dry rub for more flavor?
Absolutely! Customizing your dry rub is a fantastic way to tailor the ribs to your taste. Experiment with spices like a touch of cayenne pepper for heat, chili powder for a smoky depth, or a pinch of smoked paprika for an earthier flavor. Integrating these into your salt and pepper seasoning or a more complex rub can significantly enhance the flavor profile.How should I store leftover ribs, and how long do they last?
To store leftover ribs, allow them to cool completely, then place them in an airtight container or wrap them tightly in foil. Refrigerate promptly. They should maintain their quality for 3-4 days. To reheat, you can warm them gently in the oven at a low temperature (around 250°F) until heated through, or briefly in the microwave.Can I prepare these ribs on a grill instead of the oven?
While this specific recipe is designed for oven baking to guarantee fall-off-the-bone tenderness, you can certainly adapt the concept to a grill. For grilled ribs, you would typically par-cook them (often by simmering or wrapping in foil and grilling indirectly) to tenderize them, then finish them over direct heat with sauce to caramelize. However, for maximum simplicity and tenderness, the oven method is highly recommended.
Discover More Delicious Rib Recipes
If you’ve loved these tender baby back ribs, you might be ready to explore other incredible rib variations. Each recipe offers a unique flavor journey:
- Classic Chinese Sweet & Sour Spare Ribs
- Authentic Korean BBQ Baby Back Ribs
- Exotic Kalbi Ribs with Macadamia Nut Rice
- Spiced Cayenne Cinnamon Ribs with Maple Glaze
We hope you enjoy making these incredibly simple yet profoundly delicious tender baby back ribs. If you’ve given this recipe a try, we’d love to hear about your experience! Please consider leaving a star rating and sharing your thoughts in the comments section below. Your feedback helps us and other home cooks!
Tender Baby Back Ribs
There aren’t very many recipes that can boast “2 ingredients” and taste better than fall-off-the-bone Tender Baby Back Ribs, smothered in sweet, sticky Thai chili sauce. Which, by the way, isn’t really all that spicy despite the name, making it a family favorite.
Prep Time: 10 mins
Cook Time: 4 hrs 5 mins
Total Time: 4 hrs 5 mins
Course: Appetizer, Main Course
Cuisine: American
Servings: 6 people
Calories: 577 kcal
Equipment
- Roasting pan
Ingredients
- 5 pounds baby back ribs
- Salt & pepper, or your favorite pork dry rub
- 1/2 cup Thai sweet chili sauce, or your favorite BBQ sauce
Instructions
- Preheat oven to 275°F (135°C). On the underside of the rib, carefully remove the thin membrane and discard it. Season both sides of the ribs generously with salt and pepper (or your chosen dry rub).
- Place the seasoned ribs in a roasting pan. Cover the pan tightly with a double thickness of heavy-duty aluminum foil to create a sealed environment.
- Roast in the preheated oven for approximately 4 hours, or until the ribs are incredibly tender and the meat pulls away easily from the bone. Discard the foil. Use a wide, flat spatula to carefully lift the delicate ribs onto a baking sheet. Spread the sweet chili sauce generously over the top side of the ribs.
- Adjust your oven rack to the position nearest the top of the oven. Turn the broiler on and broil the ribs for 3-5 minutes, or until the sweet chili sauce begins to caramelize and become sticky with slight charring. Monitor the ribs continuously to prevent the sauce from burning.
Nutrition
Calories: 577 kcal | Carbohydrates: 10g | Protein: 46g | Fat: 39g | Saturated Fat: 14g | Cholesterol: 164mg | Sodium: 420mg | Potassium: 588mg | Fiber: 1g | Sugar: 10g | Vitamin A: 52 IU | Calcium: 74mg | Iron: 2mg
Keyword: baby back ribs, sweet chili ribs, tender ribs
