From the irresistible aroma of smoky barbecue ribs to the comforting satisfaction of a slow-cooked, fall-off-the-bone pork shoulder, pork is a versatile and beloved white meat staple in kitchens worldwide. It anchors countless culinary traditions, celebrated for its rich flavor and adaptability to a myriad of cooking styles. Whether it’s the centerpiece of a holiday feast or a quick weeknight meal, pork offers an array of delicious possibilities.
However, truly mastering the art of cooking pork – ensuring it’s consistently tender, juicy, and flavorful rather than dry, tough, or undercooked – can be a significant challenge for even experienced home chefs. The secret to unlocking its full delicious potential lies predominantly in precise cooking times and, more importantly, reaching the correct internal temperature. With so many diverse cuts of pork and an equally wide range of cooking methods, it’s easy to feel overwhelmed when deciding how to best prepare your meal.
That’s precisely why we’ve meticulously researched and compiled an exhaustive resource for you. This comprehensive guide provides quick-look cooking times for all popular pork cuts across a variety of cooking methods, ensuring perfect results every time. Forget the endless searching and uncertainty; everything you need to know, including critical internal temperature requirements, is meticulously laid out right here. Prepare to transform your pork dishes from good to absolutely unforgettable!
How Long Do You Cook Pork? The Essential Guide to Perfect Pork
For those navigating the fast pace of dinner preparation and seeking immediate answers, here’s the fundamental truth about pork cooking times: there is no universal “one-size-fits-all” approach. The ideal cooking duration varies significantly based on the specific cut, its thickness, and your chosen cooking method. However, the ultimate indicator of perfectly cooked pork, regardless of the cut or method, is its internal temperature.
Always aim for the USDA’s golden standard of 145°F (63°C) for most cuts of pork, measured with a reliable meat thermometer in the thickest part of the meat, avoiding any bones. This temperature ensures both safety and optimal juiciness. Once your pork reaches this critical temperature, it’s crucial to follow with a brief but vital three-minute rest period. This essential pause allows the meat’s internal juices to redistribute evenly throughout the cut, resulting in every bite being exceptionally tender, moist, and flavorful. Skipping this step often leads to dry, less satisfying results, as the juices escape when the meat is cut too soon.
With this crucial guideline in mind, let’s delve into the specific details for each cooking method and various pork cuts, empowering you with all the information needed to cook pork to perfection.
Cooking Method: Pan Frying – Achieving a Golden Crust and Juicy Interior
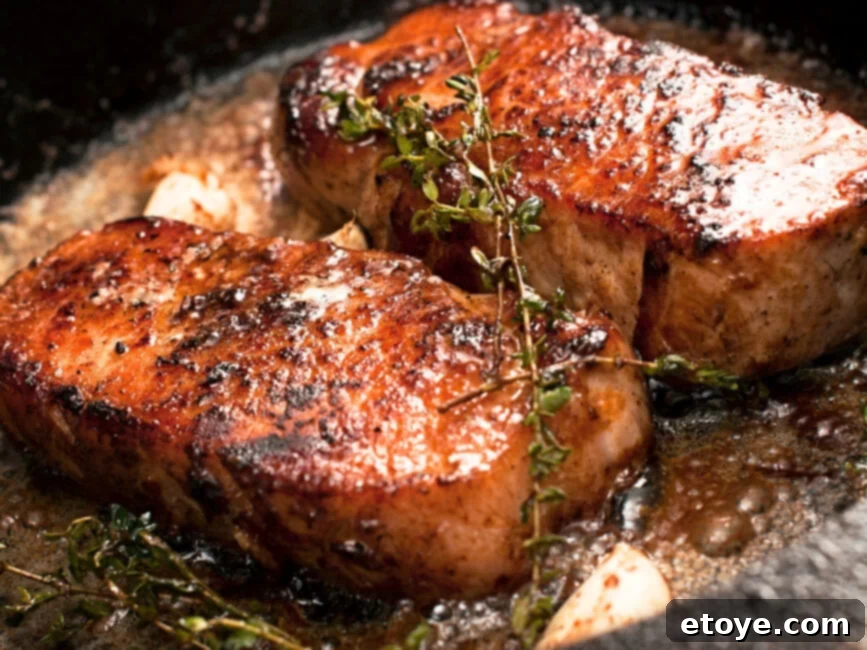
Pan-frying is a fantastic method for achieving a beautifully golden, crispy crust on the exterior of your pork while ensuring a tender and juicy experience on the inside. It’s particularly well-suited for thinner cuts that cook relatively quickly. The direct, high heat of a skillet creates a delicious sear, locking in moisture and developing rich, complex flavors. Let’s explore how to perfectly pan-fry your favorite pork cuts.
Pork Chops
Pork chops, whether bone-in or boneless, are a classic choice for pan-frying. Their relatively thin structure allows them to cook quickly and evenly, making them an excellent option for a fast and flavorful meal. Proper searing is key to developing their succulent taste and achieving that desirable golden-brown exterior.
- Cooking Time: 4 minutes per side (for 1/2 to 3/4 inch thick chops)
- Steps:
- Prepare Your Chops: Begin by thoroughly patting your bone-in or boneless pork chops dry with paper towels. This crucial step removes surface moisture, which is essential for achieving a proper, flavorful sear. Lightly brush or rub the chops with a high smoke point oil, such as canola, vegetable, or grapeseed oil, then generously season both sides with salt, black pepper, and your choice of herbs or spices.
- Fry to Perfection: Place a heavy-bottomed frying pan or cast-iron skillet on your stovetop over medium-high heat. Allow the pan to get very hot before adding the chops – a few drops of water should sizzle and evaporate instantly. Gently lay the pork chops in the hot pan, ensuring not to overcrowd the pan, which can lower the temperature and lead to steaming instead of searing. Cook for approximately 4 minutes on the first side until a deep golden-brown crust forms. Flip the chops carefully and cook for another 3-4 minutes on the second side, or until they reach an internal temperature of 145°F (63°C) when measured with a meat thermometer.
- Rest and Serve: Once cooked, immediately transfer your pork chops to a wire rack set over a plate or directly onto a warm plate. Tent loosely with foil and let them rest for at least 3-5 minutes before slicing or serving. This allows the juices to redistribute, ensuring maximum tenderness and flavor.
Bacon
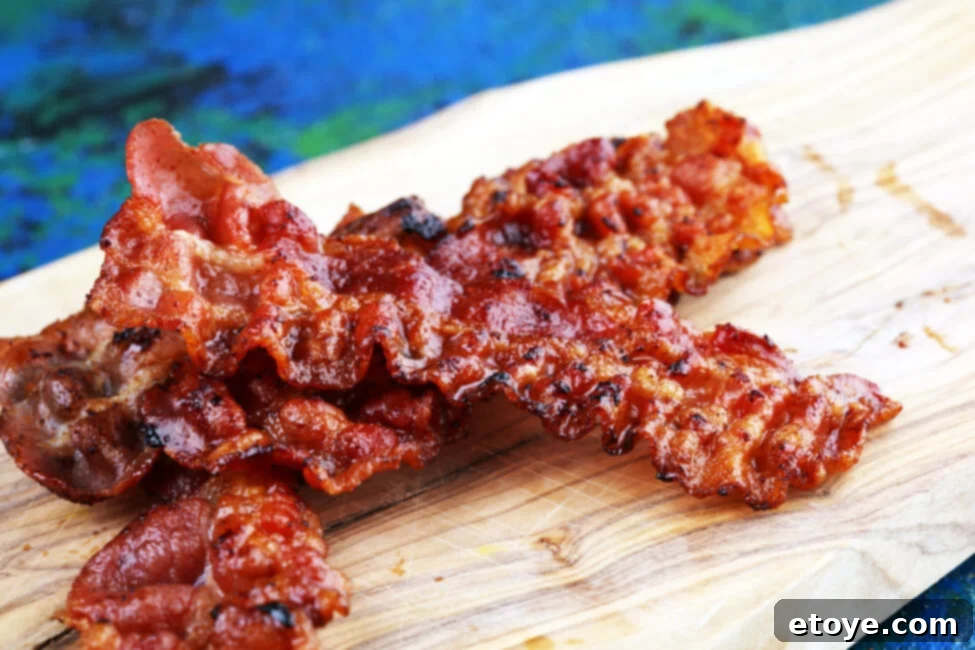
Pan-fried bacon is a breakfast favorite, celebrated for its crispy texture and irresistible savory flavor. The key to perfect bacon lies in patient cooking over medium heat, allowing the fat to render slowly and the meat to crisp up beautifully.
- Cooking Time: 4 to 8 minutes total, depending on desired crispiness
- Steps:
- Heat Things Up: Set a large frying pan or skillet over medium heat on your stovetop. There’s no need to add oil, as the bacon will naturally render its own fat as it cooks.
- Cook Slowly: Arrange bacon slices in a single layer in the pan once it’s heated. Avoid overcrowding; cook in batches if necessary. Cook for about 4-5 minutes on the first side, observing as the fat renders and the bacon begins to crisp. Carefully flip the slices and cook for another 3-4 minutes on the second side, adjusting the time based on your preferred level of crispiness. For extra crispy bacon, continue cooking, flipping occasionally, until it reaches your desired texture.
- Drain and Enjoy: Once the bacon is cooked to your liking, use tongs to transfer the crispy slices to a plate lined with several layers of paper towels. This will help absorb any excess rendered fat, making the bacon even crispier and less greasy. Serve immediately and enjoy!
Cooking Method: Oven – Roasting for Tender, Juicy Results
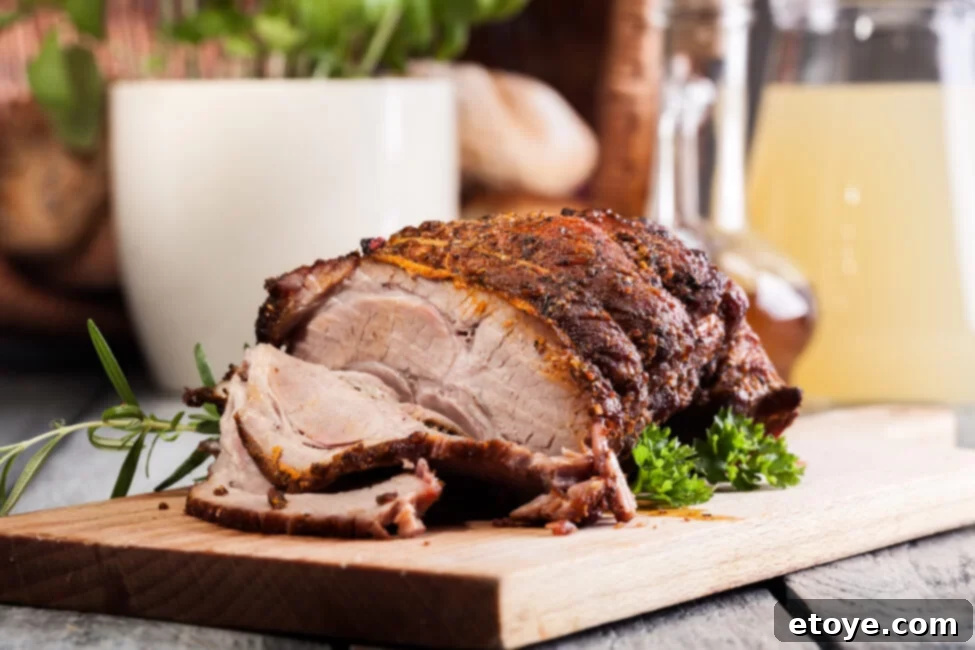
The oven is a wonderfully versatile tool for cooking pork, especially for larger cuts or when you want to minimize hands-on time. Roasting in the oven allows for even cooking, creating tender, juicy meat with a beautiful exterior. It’s ideal for everything from quick-cooking chops to impressive holiday roasts. The sustained, ambient heat of the oven gently cooks the pork, ensuring moisture retention and consistent doneness throughout.
Pork Chops
Oven-baked pork chops are a convenient and reliable way to achieve tender, flavorful results without the need for constant flipping. This method is particularly good for slightly thicker chops, allowing them to cook through evenly.
- Cooking Time: 7 to 8 minutes per 1/2 inch of thickness (e.g., a 1-inch chop would take 14-16 minutes)
- Steps:
- Preheat and Prepare: Preheat your oven to a comfortable 350°F (175°C). While the oven heats, gently pat your pork chops dry with a paper towel to aid in browning. Lightly brush them with a neutral oil (like olive or vegetable oil) and season generously with salt, pepper, garlic powder, onion powder, or your favorite pork rub.
- Bake to Perfection: Arrange the seasoned chops in a single layer on a baking sheet or in a shallow roasting pan. Slide them into the preheated oven. Cook for approximately 7 to 8 minutes per 1/2 inch of thickness. For even cooking, consider flipping the chops halfway through the cooking time. The chops are done when they reach an internal temperature of 145°F (63°C).
- Rest Before Serving: Once removed from the oven, transfer the pork chops to a plate or cutting board and tent them loosely with aluminum foil. Allow them to rest for 3-5 minutes. This resting period is crucial for the juices to redistribute, ensuring moist and tender chops.
Pork Tenderloin
Pork tenderloin is one of the leanest and most delicate cuts of pork, making it a healthy and quick-cooking option. Roasting it in the oven is an excellent way to keep it moist and tender, preventing it from drying out. Its mild flavor also makes it perfect for a wide range of marinades and seasonings.
- Cooking Time: 20 to 25 minutes per pound, or until internal temperature is reached
- Steps:
- Warm Up the Oven: Preheat your oven to 350°F (175°C).
- Season and Sear (Optional but Recommended): Pat the tenderloin dry. Season it generously on all sides with salt, pepper, and desired herbs like rosemary or thyme. For an extra layer of flavor and a beautiful crust, consider quickly searing the tenderloin in an oven-safe skillet on the stovetop over medium-high heat for 2-3 minutes per side before transferring the skillet directly to the oven.
- Roast and Monitor: Let the tenderloin roast in the preheated oven for 20 to 25 minutes per pound. The critical point of doneness is when a meat thermometer inserted into the thickest part reads 145°F (63°C).
- Rest: Remove from the oven and tent with foil. Allow to rest for at least 5-10 minutes before slicing to retain maximum juiciness.
Pork Roast (Loin Roast, Shoulder Roast)
A pork roast is perfect for feeding a crowd and makes for a stunning centerpiece. Roasting it slowly in the oven helps to break down tough connective tissues, resulting in exceptionally tender and flavorful meat. This method is suitable for both leaner loin roasts and fattier shoulder cuts.
- Cooking Time: 20 to 25 minutes per pound for loin roast; longer for shoulder roasts (see Pulled Pork)
- Steps:
- Preheat Oven and Prep Roast: Preheat your oven to 375°F (190°C) for a typical pork loin roast. For an extra layer of flavor and a beautiful crust, consider searing your roast on all sides in a hot, oven-safe pan with a little oil before it hits the oven. Season generously with a robust rub of salt, black pepper, garlic powder, and paprika.
- Roast to Perfection: Place the seasoned roast in a shallow roasting pan. Roast for 20 to 25 minutes per pound, or until the internal temperature, measured in the thickest part of the meat, reads 145°F (63°C). For fattier cuts like a pork shoulder meant for slicing, a slightly higher temperature of 160°F (71°C) might be preferred for tender slicing, but 145°F is safe.
- Crucial Resting Period: Once cooked, remove the roast from the oven, transfer it to a cutting board, and tent it loosely with aluminum foil. Let it rest for a minimum of 10-15 minutes before carving. This resting period is absolutely vital for the juices to redistribute, ensuring maximum juiciness and tenderness throughout the roast.
Ribs (Baby Back or Spare Ribs)
Slow-roasted ribs in the oven are a fantastic way to achieve fall-off-the-bone tenderness without needing a smoker. This low-and-slow method allows the connective tissues to break down gradually, resulting in incredibly succulent meat.
- Cooking Time: Approximately 1 hour per pound (or 2-4 hours for racks, depending on size and desired tenderness)
- Steps:
- Pre-Prep for Best Results: For optimal tenderness, remove the ribs from the refrigerator 30 to 60 minutes before you begin preparation, allowing them to come closer to room temperature.
- Low and Slow Preheat: Preheat your oven to a low 250°F (120°C). This low temperature is key to achieving that desired slow-roasted tenderness.
- Prepare the Ribs: Crucially, remove the thin membrane from the bony side of the ribs (if your butcher hasn’t already). This membrane can become tough when cooked. Season both sides generously with your favorite dry rub, or a classic mix of brown sugar, smoked paprika, garlic powder, onion powder, and chili powder. For extra moisture and flavor, you can lightly brush with apple cider vinegar.
- Roast Until Tender: Place the seasoned ribs on a baking sheet, ideally elevated on a wire rack, or wrapped tightly in aluminum foil. Roast for an hour per pound, or generally 2.5 to 4 hours for a full rack of baby back ribs, and 3-5 hours for spare ribs. The ribs are done when they are fall-off-the-bone tender, easily bending and tearing. For pulled rib meat, aim for an internal temperature of 195-205°F (90-96°C). If you prefer a chewier, more structured rib, you can stop at 180-190°F (82-88°C).
- Finish (Optional): For a glazed finish, remove the ribs from the oven during the last 30 minutes of cooking, discard foil if used, and brush generously with your favorite barbecue sauce. Return to the oven (or briefly under the broiler) until the sauce is caramelized and bubbly.
Pulled Pork (Pork Shoulder or Pork Butt)
Pulled pork is the epitome of low-and-slow cooking, transforming a tough but flavorful cut like pork shoulder (also known as pork butt) into incredibly tender, shreddable meat. The oven provides a consistent, gentle heat that’s perfect for breaking down connective tissue over several hours, resulting in succulent pulled pork ideal for sandwiches, tacos, or salads.
- Cooking Time: 40 to 60 minutes per pound, or until fall-apart tender (typically 6-10 hours for a 4-8 lb roast)
- Steps:
- Preheat Oven: Preheat your oven to 275°F (135°C). This low temperature is essential for slow cooking.
- Season and Sear (Optional): Pat the pork shoulder dry. Season generously with a bold spice rub – a mix of brown sugar, smoked paprika, garlic powder, onion powder, chili powder, salt, and black pepper works wonderfully. For an extra depth of flavor and a beautiful crust, optionally sear the pork shoulder on all sides in a heavy-bottomed frying pan over high heat for a few minutes per side before placing it in the oven.
- Slow Roast: Place the seasoned and optionally seared pork shoulder in a large, oven-safe Dutch oven or roasting pan. You can add about 1-2 cups of liquid (such as chicken broth, apple cider, or even root beer) to the bottom of the pan to keep the meat moist and add flavor. Cover the pan tightly with a lid or aluminum foil. Roast for 40 to 60 minutes per pound, or until it reaches pull-apart tenderness. This usually occurs when the internal temperature is around 195-205°F (90-96°C), where the meat fibers easily separate with a fork.
- Rest and Shred: Once cooked, remove the pork from the oven and let it rest, still covered, for at least 20-30 minutes. This helps reabsorb juices. Then, transfer the pork to a large cutting board or bowl and shred it using two forks. Mix the shredded pork with some of the cooking liquid or your favorite BBQ sauce for ultimate flavor and moisture.
Pork Belly
Oven-roasted pork belly is a true delicacy, prized for its crispy crackling skin and incredibly tender, rich meat layers. The slow roasting process renders out much of the fat while keeping the meat succulent, making it a show-stopping dish.
- Cooking Time: Approximately 25 minutes per pound for a tender finish (often followed by a high-heat crisping stage)
- Steps:
- Preheat Oven: Preheat your oven to a moderate 250°F (120°C). This initial low temperature is for rendering the fat and tenderizing the meat.
- Prep for Crispness: Score the skin of the pork belly every 1.5 inches in a crosshatch pattern, being careful not to cut into the meat. This allows the fat to render more efficiently and creates beautifully crispy crackling. Pat the skin extremely dry. Rub generously with salt, ensuring it gets into the scores, and season the meat side with pepper and your preferred spices (e.g., Chinese five-spice powder, garlic, ginger).
- Slow Roast: Place the pork belly, skin side up, on a wire rack set over a baking sheet (to catch drippings). Roast for approximately 25 minutes per pound at 250°F (120°C). For ultimate tenderness and rendered fat, you might continue at this temperature for 2-3 hours for a 2-3 lb piece. During this stage, the internal temperature should reach 145°F (63°C) for safety, but rendering continues past this.
- Crisp the Skin: Increase the oven temperature to 400-450°F (200-230°C) or switch to the broiler (watching very closely). Continue cooking for another 15-30 minutes, or until the skin is beautifully puffed, golden-brown, and audibly crispy. Keep a close eye to prevent burning.
- Rest and Serve: Let the pork belly rest for 10-15 minutes before slicing into thick, delicious pieces.
Bacon (Baked)
Baking bacon in the oven is a less messy and often more even way to cook multiple slices at once, resulting in perfectly crisp strips without constant attention.
- Cooking Time: 14 to 18 minutes (for regular thickness bacon)
- Steps:
- Preheat Oven: Preheat your oven to a hot 400°F (200°C) to ensure a perfect, even crisp.
- Arrange Bacon: Line a baking sheet with aluminum foil or parchment paper for easy cleanup. Arrange the bacon slices in a single layer on the prepared baking sheet. Do not overlap them.
- Bake Until Crisp: Cook for 14 to 18 minutes, depending on the thickness of your bacon and your desired level of crispiness. For even cooking, give those slices a flip halfway through the baking time. Transfer to a paper towel-lined plate to drain excess fat before serving.
Ham (Pre-cooked or Uncooked)
Baking ham in the oven is a traditional choice for holidays and family gatherings, offering a large, flavorful cut that’s relatively easy to prepare. Whether you’re reheating a fully cooked ham or cooking a fresh one, the oven provides consistent heat for delicious results.
- Cooking Time: 15 to 20 minutes per pound (pre-cooked); 35 to 40 minutes per pound (uncooked or bone-in fresh ham)
- Steps:
- Preheat Oven: Preheat your oven to 350°F (175°C).
- Prepare the Ham: For uncooked hams or for adding extra flavor to pre-cooked hams, consider scoring the surface of the ham in a diamond pattern and studding it with whole cloves. A glaze made from brown sugar, mustard, and pineapple juice or fruit preserves can be brushed on during the last 30-60 minutes of cooking. Place the ham cut-side down (if applicable) in a shallow roasting pan, and for bone-in ham, add about 1/2 cup of water or broth to the bottom of the pan to prevent drying.
- Bake and Glaze: Bake for 15 to 20 minutes per pound for pre-cooked ham, or 35 to 40 minutes per pound for uncooked or fresh bone-in ham. The ham is safely and deliciously cooked when it reaches an internal temperature of 145°F (63°C). If using a glaze, apply it during the last 30-60 minutes of baking, basting occasionally.
- Rest: Allow the ham to rest, tented with foil, for 10-15 minutes before carving to ensure maximum juiciness.
Cooking Method: BBQ – Grilling for Smoky Flavor and Outdoor Perfection
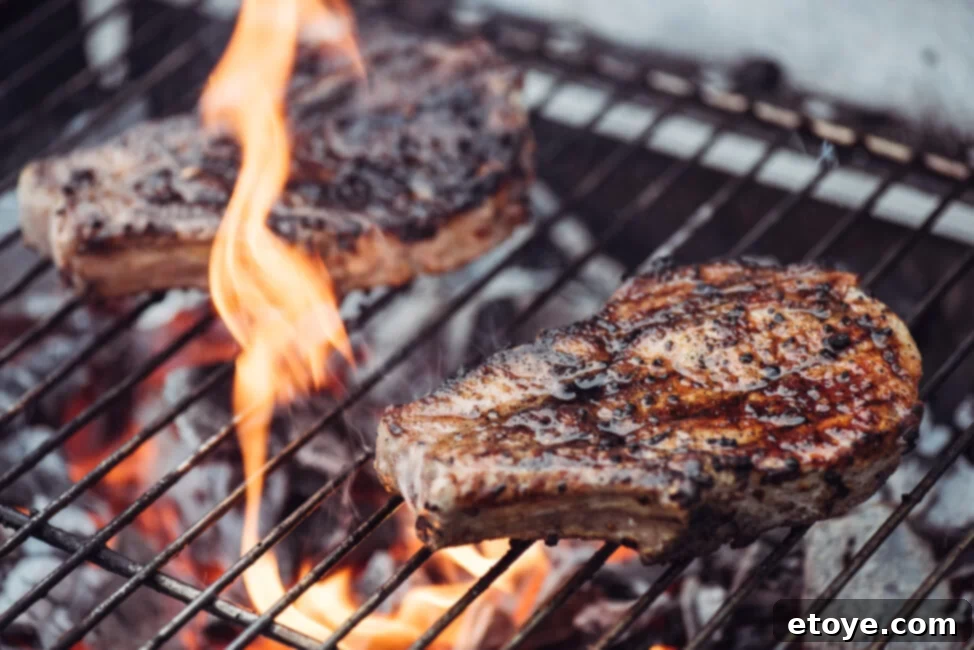
There’s nothing quite like the flavor of pork cooked on the barbecue. Grilling imparts a unique smoky char and creates a fantastic crust, making it a favorite method for outdoor cooking enthusiasts. Whether you’re looking for quick sears over direct heat or slow-smoked tenderness, the BBQ offers incredible versatility. Here’s your go-to guide for BBQing pork like a seasoned pro, ensuring every piece of pork leaves your grill perfectly cooked and bursting with flavor.
Pork Chops
Grilling pork chops offers a fantastic way to achieve a delicious smoky flavor and beautiful sear. They cook relatively quickly over direct heat, making them an ideal choice for a weeknight BBQ.
- Cooking Time: 4 minutes per side (for 3/4-inch thick chops)
- Steps:
- Preheat Grill: Preheat your barbecue to a sizzling 500°F (260°C) on one side, leaving another section for medium-low or indirect heat if needed.
- BBQ Settings: Adjust the grill dials for medium-high direct heat, ensuring your grates are clean and oiled to prevent sticking.
- Grill to Perfection: Place seasoned pork chops directly over the flame. Grill each side for about 4 minutes, or until distinct grill marks appear and the chops reach a beautiful golden-brown. You can keep the lid open or close it for slightly faster cooking and more smoke flavor, depending on your preference. The ultimate goal is a beautiful sear and an internal temperature of 145°F (63°C) in the thickest part.
- Rest: Transfer to a plate, tent with foil, and rest for 3-5 minutes before serving.
Pork Tenderloin
Pork tenderloin is excellent on the grill, offering a lean, quick-cooking option with wonderful smoky notes. Its shape allows for even cooking and a lovely char on multiple sides.
- Cooking Time: 5 minutes per side (there are typically 3-4 sides to a tenderloin)
- Steps:
- Warm Up the Grill: Set that barbecue roaring to 500°F (260°C).
- BBQ Settings: Prepare for medium-high direct heat, perfect for this lean and delicate cut.
- Grill All Sides: Lightly oil and season the tenderloin. Hit all three or four sides of your pork tenderloin for about 5 minutes each under direct heat, rotating it regularly. Closing the lid is recommended to help cook it through and infuse more smoke, but it’s chef’s choice! Aim for a total grilling time of approximately 15-20 minutes, or until it reaches the perfect 145°F (63°C) inside.
- Rest: Allow it to rest for 5-10 minutes before slicing and serving.
Pork Roast (Loin Roast)
Grilling a pork roast, especially a loin roast, using indirect heat yields a wonderfully juicy and flavorful result with a subtle smoky essence. It’s a great alternative to oven roasting for outdoor entertaining.
- Cooking Time: 25 to 30 minutes per pound
- Steps:
- Moderate Grill Heat: Bring the grill heat to a moderate 325°F (160°C).
- BBQ Settings for Indirect Heat: For indirect cooking, dial in medium heat on both outer burners, leaving the center burner off (for a gas grill). For a charcoal grill, push coals to one side.
- Indirect Roasting: Season your pork roast generously. Nestled your roast in the middle of the grill, away from the direct flames, and close the lid. Let it bask under the indirect heat for 25-30 minutes per pound, or until it hits 145°F (63°C) internally. Keep a meat thermometer handy for accuracy.
- Rest: As with all roasts, rest for 10-15 minutes before carving.
Ribs (Smoked)
Smoking ribs on the BBQ is the quintessential way to achieve tender, smoky, and flavorful ribs that practically melt in your mouth. This method requires patience and low, consistent heat.
- Cooking Time: Approximately 1 hour per pound (or 4-6 hours for a rack, using the 3-2-1 method for baby back or 5-6 hours for spare ribs)
- Steps:
- Low and Slow Preheat: Preheat your grill or smoker to a low and slow 250°F (120°C). Incorporate wood chips or chunks (like hickory or apple) for desired smoke flavor.
- BBQ Settings: Set your grill for indirect heat with the dials turned to low (gas grill) or coals pushed to one side (charcoal grill).
- Smoke to Perfection: After removing the membrane and applying your favorite rub, place the ribs away from direct flame, close the lid, and let them slowly cook to perfection. A common method is the 3-2-1 method: 3 hours smoking directly on the grates, 2 hours wrapped in foil with a liquid (like apple juice), and 1 hour unwrapped to firm up and allow sauce to set. Your patience will be richly rewarded at an internal temperature of 195-205°F (90-96°C) for fall-off-the-bone tenderness.
Pork Belly
BBQ pork belly, especially when smoked, offers an incredible combination of rich flavor, tender meat, and often crispy skin. It’s a true indulgence for grilling enthusiasts.
- Cooking Time: Approximately 1.5 hours per pound (for slow rendering and tenderness, may require a final crisping stage)
- Steps:
- Steady Grill Temperature: Aim for a steady 250°F (120°C) on your grill or smoker.
- BBQ Settings for Indirect Cook: Use medium heat, but always keep it indirect for this fatty delight to allow slow rendering and prevent burning. Add wood chunks for smoke.
- Smoke and Render: Season the pork belly (scored skin-side up if desiring crispy skin). Place it on the grill grates away from direct flame, close the lid, and let it slowly cook, about 1.5 hours per pound. You’re shooting for a succulent, tender interior. For the ultimate crispy skin, you might need to finish it over high direct heat for a few minutes at the very end (watch carefully!). Aim for an internal temperature of 145°F (63°C) for the meat, but the rendering process will continue beyond this for texture.
- Rest: Rest for 10-15 minutes before slicing.
Pulled Pork (Smoked)
Smoking a pork shoulder on the BBQ for pulled pork is a rewarding endeavor that yields unbelievably tender, smoky, and flavorful results. It’s a low-and-slow commitment that pays off big time.
- Cooking Time: Approximately 1.5 hours per pound (or 8-12+ hours for a large roast)
- Steps:
- Consistent Low Heat: Get your BBQ or smoker to a consistent 225-250°F (107-120°C).
- BBQ Settings for Low and Slow: Maintain a lower temperature and keep the pork shoulder away from direct flame for the entire long haul. Add wood chunks (hickory, apple, pecan) for ample smoke flavor.
- Smoke Until Fall-Apart: Season your pork shoulder generously with a good rub. Place it on the grates over indirect heat, close the lid, and maintain a consistent temperature. A fall-apart pork shoulder needs about 1.5 hours per pound (or significantly longer for very large cuts) under a closed lid, reaching an internal temperature of 195-205°F (90-96°C). You’ll know it’s ready when a probe slides into the meat with almost no resistance.
- Rest and Pull: Wrap the finished pork shoulder tightly in foil and rest it in a cooler (without ice) for 1-2 hours. This helps redistribute juices. Then, transfer to a large pan and shred using two forks. Mix with any accumulated juices and/or BBQ sauce.
Ham (Grilled)
Grilling ham adds a wonderful smoky char and can enhance the flavor of both pre-cooked and fresh hams. It’s perfect for adding a unique touch to your holiday feast or a weekend meal.
- Cooking Time: 15 minutes per pound if pre-cooked; 1.5 hours per pound if fresh
- Steps:
- Prepare Grill Temperature: Set the stage with your BBQ between 350°F and 375°F (175-190°C) for indirect heat.
- BBQ Settings: Use medium heat on the outer burners, ensuring no direct heat under the ham for even cooking.
- Grill Indirectly: Whether it’s pre-cooked or fresh, ham loves indirect heat and a closed lid. Place the ham in a roasting pan or directly on the grates over indirect heat. Cook for 15 minutes per pound if it’s pre-cooked (primarily reheating), or increase the time to 1.5 hours per pound if starting from a fresh, uncooked ham. In both cases, aim for an internal temperature of 145°F (63°C). If glazing, apply during the last 30 minutes of cooking.
- Rest: Allow to rest for 10-15 minutes before carving.
Cooking Method: Slow Cooker – Effortless Tenderness and Deep Flavor
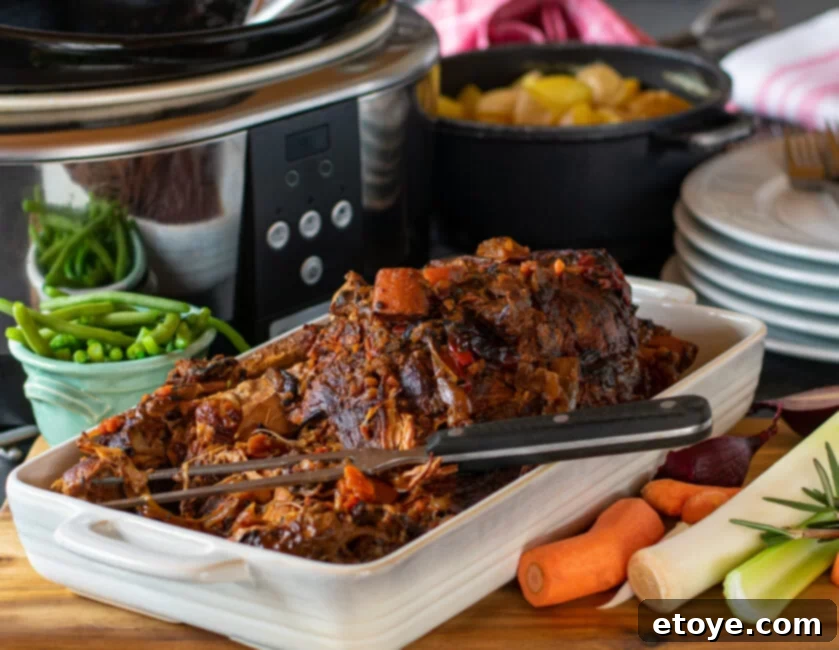
For those who love the convenience of “set it and forget it,” the slow cooker is an absolute game-changer for pork. Crockpots are arguably the best way to consistently achieve fall-off-the-bone tenderness and deep, infused flavors with minimal effort. The gentle, moist heat over an extended period breaks down even the toughest cuts, resulting in incredibly succulent meat every time. All you need to do is prepare your chosen cut, add your desired liquids and seasonings, and set it to the specified time. Done and done!
Pork Chops
Slow-cooked pork chops transform into incredibly tender, moist pieces of meat, especially when cooked with a flavorful liquid or sauce. This method prevents them from drying out and allows them to absorb rich flavors.
- Cooking Time: About 4 hours on LOW or 2-3 hours on HIGH
- Steps:
- Set Slow Cooker: Set your slow cooker to LOW.
- Prep and Sear (Optional): Pat the pork chops dry and season generously with salt, pepper, and your favorite spices. For enhanced flavor and a beautiful color, consider giving them a quick sear in a hot frying pan with a bit of oil for about 1 minute per side before placing them in the slow cooker. Add about 1/2 cup of liquid (broth, cream of mushroom soup, apple juice) to the slow cooker before adding the chops.
- Slow Cook: Place the seared (or unseared) chops into the slow cooker, ensuring they are partially submerged in the liquid. Cook for around 4 hours on LOW, or 2-3 hours on HIGH, until the internal temperature reaches 145°F (63°C) and they are fork-tender.
- Rest: Remove and rest briefly before serving, allowing them to carry over cook slightly.
Pork Tenderloin
While often roasted, pork tenderloin can also be slow-cooked to achieve a delicate, moist texture, particularly when cooked in a flavorful sauce. This is a great way to ensure it remains tender without the risk of overcooking at higher temperatures.
- Cooking Time: About 4 hours on LOW or 2-3 hours on HIGH
- Steps:
- Set Slow Cooker: Set your slow cooker to LOW.
- Prep and Liquid: Pat the tenderloin dry and season liberally with salt, pepper, and herbs. For the best results, add at least 2 cups of flavorful liquid or sauce (chicken broth, mushroom soup, teriyaki sauce, etc.) to the slow cooker to keep the lean tenderloin moist.
- Cook Gently: Nestle the tenderloin into the slow cooker, ensuring it’s partially submerged in the liquid. Let it cook for approximately 4 hours on LOW, or 2-3 hours on HIGH, to a perfect 145°F (63°C). The meat should be tender but still hold its shape.
- Rest: Remove, rest for a few minutes, then slice against the grain.
Pork Roast (Shoulder or Loin)
Slow-cooking a pork roast is an ideal way to break down connective tissues, especially in cuts like pork shoulder, resulting in incredibly tender meat that’s easy to slice or shred. It’s perfect for hearty family meals.
- Cooking Time: 6-7 hours on LOW or 3-4 hours on HIGH
- Steps:
- Warm Up Slow Cooker: Adjust your slow cooker to either LOW or HIGH, depending on your schedule and how quickly you need the meal.
- Prepare Roast: Season your pork roast generously to your liking. A simple salt, pepper, garlic, and onion powder rub works well, or you can use a more complex spice blend. For added flavor, you can sear the roast on all sides in a pan before placing it in the slow cooker. Add about 1 cup of liquid (broth, water, wine) to the bottom of the slow cooker.
- Slow Cook Until Tender: Simply place the pork roast in the slow cooker. Let it tenderize for 6 to 7 hours on LOW or 3 to 4 hours on HIGH. The roast is done when it’s incredibly tender and can be easily pulled apart with forks (for shredding) or sliced with minimal effort. You can check for tenderness an hour before the estimated end time.
Ribs (Slow Cooker)
For incredibly tender, “fall-off-the-bone” ribs without the grill or oven, the slow cooker is an excellent choice. This method ensures the meat is succulent and easily separates from the bone.
- Cooking Time: 7-9 hours on LOW or 3-5 hours on HIGH
- Steps:
- Set Heat: Set your slow cooker to your desired heat setting (LOW or HIGH).
- Prep Ribs: Crucially, remove the membrane from the back of the ribs. Season generously with a dry rub of your choice. You may also add your favorite BBQ sauce or other liquid (like apple cider vinegar or broth) to the slow cooker to create a flavorful braising liquid. Arrange the ribs in the slow cooker, cutting them into smaller sections if needed to fit.
- Cook Until Meltingly Tender: Allow the ribs to slow cook until they are so tender they nearly melt in your mouth and easily pull from the bone. Check for doneness an hour before you anticipate they’ll be ready to ensure they don’t overcook.
- Optional Finish: For a crisper, saucier finish, you can transfer the cooked ribs to a baking sheet, brush with additional sauce, and broil for a few minutes until caramelized.
Pulled Pork (Slow Cooker)
The slow cooker is arguably the most popular and easiest way to make delicious pulled pork. It guarantees tender, shreddable meat with minimal effort, perfect for feeding a crowd or meal prepping.
- Cooking Time: 8-10 hours on LOW or 4-5 hours on HIGH
- Steps:
- Choose Setting: Choose either LOW or HIGH on your slow cooker, depending on your desired cooking time.
- Season and Add Liquid: Generously season a pork shoulder (or butt) with a savory spice rub. Add it to the cooker along with your chosen spices, a few aromatics like chopped onion and garlic, and a flavorful liquid (chicken broth, root beer, or apple cider are great choices) to ensure moisture and add depth. Ensure the liquid covers about 1/3 to 1/2 of the pork.
- Slow Cook and Shred: Slow cook until the pork is tender enough to be easily shredded with two forks. This typically happens when the internal temperature is around 200-205°F (93-96°C). Once cooked, remove the pork, shred it, and return it to the slow cooker with some of the cooking liquid or your favorite BBQ sauce for a final soak. Then, prep for your pulled pork meal of choice, whether that be sandwiches, tacos, or a hearty bowl!
Cooking Method: Air Fryer – Quick Crispy Results
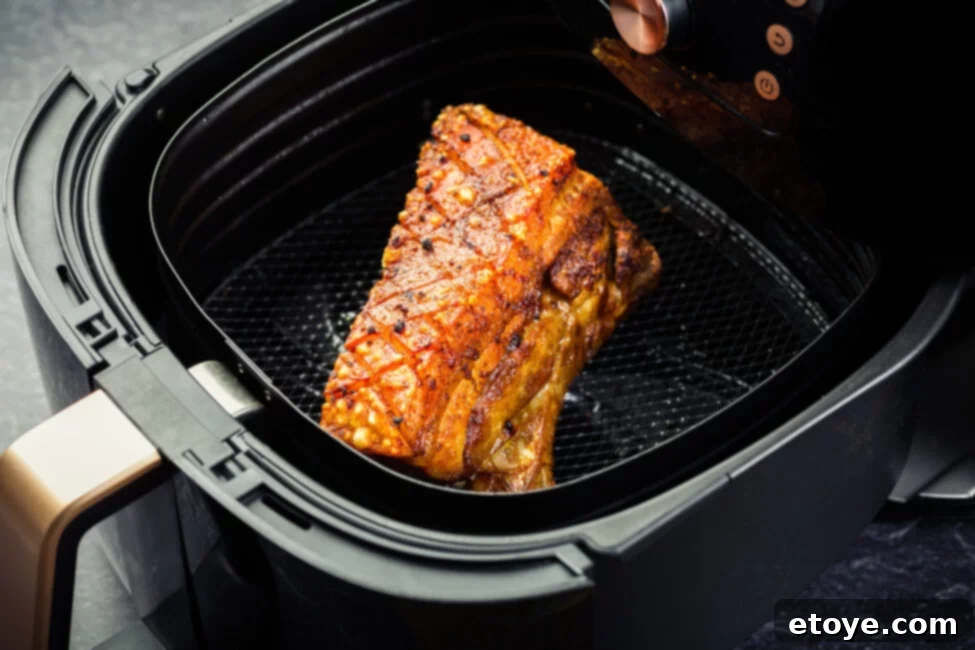
The air fryer has revolutionized home cooking, offering a fantastic way to achieve crispy, perfectly cooked pork with remarkable speed and minimal mess. It circulates hot air rapidly, mimicking the results of deep-frying or convection baking but using significantly less oil. If you want a fantastic sear without pan-frying, or to avoid firing up a large oven or grill, the air fryer is your go-to. Let’s uncomplicate your pork dishes (while keeping them succulent) with just a few simple steps in this versatile appliance.
Pork Chops
Air-fried pork chops are incredibly tender on the inside with a wonderfully crispy exterior, making them a quick and easy weeknight meal solution.
- Cooking Time: About 10-15 minutes (for 3/4-inch thick chops)
- Steps:
- Warm Up Air Fryer: Preheat your air fryer to a hot 400°F (200°C) for at least 5 minutes.
- Prepare Chops: Pat pork chops dry. Lightly coat them with just a bit of oil (such as olive or avocado oil) to help with crisping and seasoning adhesion. Season generously to your liking with salt, pepper, and your preferred blend of spices.
- Air Fry and Flip: Place the seasoned chops in a single layer in the air fryer basket or on the shelf, ensuring not to overcrowd it. Cook for approximately 10-15 minutes at 400°F (200°C). After about 5-7 minutes, carefully flip the chops to ensure even cooking and browning on both sides. The chops are done when they reach an internal temperature of 145°F (63°C).
- Rest: Remove and let rest for 3-5 minutes before serving.
Pork Tenderloin
Air frying pork tenderloin is a quick and efficient method to cook this lean cut, resulting in a tender interior and a slightly browned exterior. It’s perfect for a flavorful meal in under 30 minutes.
- Cooking Time: About 20-25 minutes
- Steps:
- Preheat Air Fryer: Preheat your air fryer to 400°F (200°C).
- Prep Tenderloin: Pat the tenderloin dry. Season as desired with salt, pepper, and a dry rub. Depending on the size of your air fryer basket, you might need to cut the tenderloin in half or into medallions to ensure it fits and cooks evenly.
- Air Fry Until Done: Place the seasoned tenderloin pieces in the air fryer basket in a single layer. Cook for roughly 20-25 minutes at 400°F (200°C), flipping halfway through. The tenderloin is cooked through when it reaches an internal temperature of 145°F (63°C).
- Rest: Let the tenderloin rest for 5-10 minutes before slicing against the grain to retain all its delicious juices.
Cooking Method: Instant Pot – Speed and Succulence Under Pressure
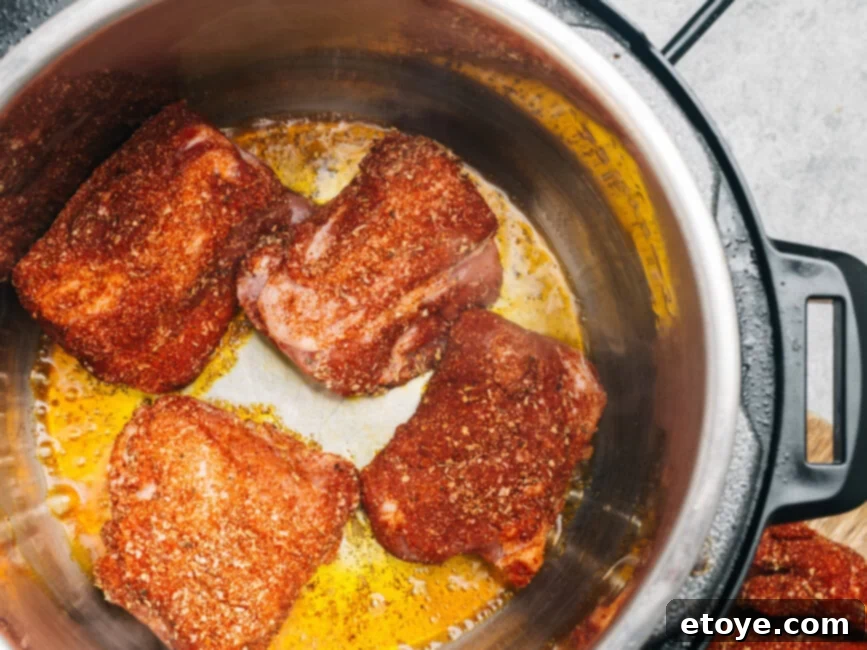
Are you one of the many home cooks in LOVE with your Instant Pot? If so, this section is tailor-made for you. The Instant Pot combines the best of pressure cooking and sautéing, delivering incredibly tender meat with a lovely sear in a fraction of the time required by traditional methods. Following these straightforward steps will result in seriously succulent pork roast or exceptionally flavorful pulled pork, making it an indispensable tool for busy weeknights or when you need quick, melt-in-your-mouth results.
Pork Roast (e.g., Loin Roast or Smaller Shoulder Roast)
Cooking a pork roast in the Instant Pot drastically reduces the cooking time while producing remarkably tender and moist results. The pressure cooking method infuses flavors deeply into the meat.
- Cooking Time: 25 minutes on HIGH pressure per 2 pounds (plus natural release time)
- Steps:
- Sauté and Brown: Switch your Instant Pot to “sauté” mode (Normal or More setting) and add a bit of oil (e.g., olive oil) to coat the bottom. Generously season your pork roast. Brown the pork roast on all sides for 3-4 minutes per side to develop a rich, caramelized flavor. Remove the roast and set aside.
- Deglaze and Setup: Pour in 1/4 cup of your chosen liquid (broth, wine, or water works well) to deglaze the pot, scraping up any browned bits from the bottom to prevent a “burn” notice. Place the trivet (steaming rack) in the bottom of the pot, then place the browned pork roast on top of the trivet.
- Pressure Cook and Release: Secure the lid and set the Instant Pot to pressure cook on HIGH for 25 minutes for a 2-pound roast. For larger roasts, increase the cooking time by about 10-12 minutes per additional pound. Once cooking is complete, allow the pressure to naturally release for 8-10 minutes (Natural Release, NR) before manually releasing any remaining steam (Quick Release, QR). Carefully remove the roast. Check that the internal temperature reaches 145°F (63°C) for safe consumption. Adjust cooking time as necessary for larger cuts, always ensuring doneness with a meat thermometer. Rest for 10 minutes before slicing.
Pulled Pork (Pork Shoulder or Pork Butt)
The Instant Pot makes quick work of pulled pork, transforming a tough pork shoulder into unbelievably tender, shreddable meat in a fraction of the time it would take in a slow cooker or oven.
- Cooking Time: 40 minutes on HIGH pressure per pound (plus natural release time)
- Steps:
- Sauté for Flavor: Begin by seasoning your pork shoulder generously with your preferred spice rub. Switch your Instant Pot to “sauté” mode and add a bit of oil. Brown the pork shoulder on all sides for 3-4 minutes per side to enhance flavor and tenderness. Remove the pork and deglaze the pot with about 1 cup of liquid (chicken broth, apple cider vinegar, root beer).
- Load the Pot: No trivet needed for this one; just add the pork shoulder directly into the pot along with your chosen flavorful liquid and any other desired aromatics (like sliced onions or garlic) to keep things moist and flavorful. Ensure the liquid covers at least the bottom inch of the pot.
- Pressure Cook and Release: Secure the lid, make sure the vent is sealed, and set to pressure cook on HIGH for 40 minutes per pound. For example, a 3-pound shoulder would cook for 120 minutes (2 hours). Once the cooking cycle is complete, allow for a natural release of pressure for 10-15 minutes (Natural Release, NR). This is crucial for the meat to settle and reabsorb its juices, resulting in a more tender outcome. After the natural release, manually release any remaining pressure (Quick Release, QR). Carefully remove the pork and transfer it to a large bowl.
- Shred and Serve: Using two forks, easily shred the pork. Return the shredded meat to the Instant Pot with some of the cooking liquid or your favorite BBQ sauce to keep it moist and infuse more flavor. That’s how you’ll know it’s perfectly cooked for pulling and ready to be served in sandwiches, tacos, or on its own!
How To Cook Pork FAQs
Cooking pork to perfection often raises a few common questions. Here are detailed answers to help you navigate your culinary journey with confidence.
What’s the best way to keep my pork chops tender and not dry?
Preventing dry pork chops is a common goal. Here are several effective strategies:
- Don’t Overcook: This is the most crucial tip. Pork chops are lean and dry out quickly. Aim for an internal temperature of 145°F (63°C) and then let them rest.
- Pound Them Thin and Even: For thinner chops, pounding them to an even thickness with a meat mallet (between two sheets of plastic wrap) ensures they cook uniformly and quickly, reducing the chance of tough spots.
- Marinate or Brine: Marinating in an acidic liquid (like citrus juice or vinegar) or a tenderizing enzyme (like pineapple or papaya juice) for at least 30 minutes (but not more than a few hours) can break down muscle fibers and add flavor. Brining (soaking in a salt water solution) is even more effective at adding moisture directly into the meat, ensuring juicier results.
- Sear Then Finish: For thicker chops, sear them aggressively on both sides in a hot pan to develop a crust, then transfer to a preheated oven (350-375°F / 175-190°C) to finish cooking to 145°F (63°C).
- Rest the Meat: Always allow pork chops to rest for 3-5 minutes after cooking. This allows the juices, which concentrate in the center during cooking, to redistribute throughout the chop, keeping it moist.
Can I cook pork from frozen?
Yes, you can cook most cuts of pork from frozen, but there are important considerations. It’s generally recommended to thaw meat first for more even cooking and better texture, but if you’re in a pinch:
- Expect Longer Cooking Times: Cooking pork from frozen will take approximately 50% longer than cooking thawed meat.
- Safe Methods: Slow cookers and Instant Pots are particularly well-suited for cooking frozen pork because they provide a consistent, moist heat environment. For a slow cooker, ensure the meat is fully submerged in liquid to cook safely. For an Instant Pot, pressure cooking frozen meat is effective.
- Avoid Certain Methods: Avoid cooking large frozen cuts of pork in the oven or on the grill, as the exterior may overcook or burn before the interior thaws and cooks through. Thin cuts like frozen pork chops can be pan-fried or baked, but monitor internal temperature carefully.
- Always Use a Meat Thermometer: When cooking from frozen, a reliable meat thermometer is absolutely essential to ensure the pork reaches a safe internal temperature of 145°F (63°C) throughout.
How do I make pulled pork?
Making delicious pulled pork is a rewarding process that results in tender, shreddable meat. The best cuts for pulled pork are those with a good amount of fat and connective tissue that break down beautifully during long, slow cooking:
- Choose the Right Cut: A boneless pork shoulder, often called pork butt or Boston butt, is the absolute best choice for pulled pork. Its marbling and connective tissue are perfect for this cooking method.
- Season Generously: Season the pork shoulder liberally with a bold spice rub. A classic rub includes brown sugar, smoked paprika, garlic powder, onion powder, chili powder, salt, and black pepper.
- Slow Cooking is Key: Pulled pork is all about low-and-slow cooking until it’s basically falling apart.
- Slow Cooker: Place the seasoned pork in a slow cooker with about 1-2 cups of liquid (chicken broth, apple cider, root beer, or even Dr. Pepper are great choices for flavor and moisture). Cook on LOW for 8-10 hours or HIGH for 4-6 hours.
- Oven: Roast in a Dutch oven or roasting pan (covered tightly with foil) at 275-300°F (135-150°C) for 40-60 minutes per pound, or until internal temperature reaches 200-205°F (93-96°C). Add liquid to the pan.
- Instant Pot: This is the fastest method. Brown the pork first using the “sauté” function, then add liquid and pressure cook on HIGH for 40 minutes per pound, followed by a 10-15 minute natural release.
- Shred and Serve: Once cooked, remove the pork from the liquid (reserve the liquid!). Transfer to a large bowl or cutting board and shred using two forks. Mix the shredded pork with some of the cooking liquid or your favorite barbecue sauce to keep it moist and flavorful.
Any quick and easy pork recipes for weeknights?
Absolutely! Pork offers many options for speedy weeknight meals.
- Pan-Fried Pork Chops: Thin-cut, bone-in or boneless pork chops pan-fried for 3-4 minutes per side are incredibly fast. Serve with a quick pan sauce made from chicken broth and a splash of cream.
- Pork Tenderloin Medallions: Slice pork tenderloin into 1-inch thick medallions, quickly sear in a hot pan or air fry for 3-4 minutes per side. They cook incredibly fast and stay tender.
- Pork Stir-Fry: Thin slices of pork loin or tenderloin are perfect for quick stir-fries. Marinate briefly, then cook quickly with your favorite vegetables and a stir-fry sauce.
- Ground Pork Dishes: Ground pork cooks quickly and is versatile for tacos, Asian-inspired bowls, or quick skillet meals with vegetables.
For quick sides, consider our sautéed green beans with browned butter and hazelnuts or incredibly easy steamed microwave carrots. Simple roasted asparagus or a quick side salad also pair perfectly.
From the satisfying sizzle of pan-fried pork chops to the comforting embrace of slow-cooked, melt-in-your-mouth pulled pork, this comprehensive guide is designed to empower you in the kitchen. We hope it helps you tackle any pork recipe with newfound confidence and skill. Whether you’re mastering the quick sear, the art of oven roasting, the smoky allure of the grill, or the effortless convenience of slow cooking, we’ve equipped you with the precise times, temperatures, and techniques you need for flawless results every time.
Here’s to the dedicated home cooks, the adventurous experimenters, and the “let’s just see what happens” mad kitchen scientists – may your pork always be perfectly cooked, falling off the bone, and melt-in-your-mouth delicious. Happy cooking!
⭐ Make sure to bookmark this Ultimate Guide: How Long to Cook Pork to Perfection and refer back to it every time you step into the kitchen!
Check Out Our Popular Pork Recipes Below:
- Pork Belly Buns Recipe
- Pork Chops with Apricot Brandy Sauce
- Thai Pork Chops in Ginger Coconut Sauce
- Sous Vide Pork Belly Recipe
- Braised Tofu with Ground Pork
- Pork Chop with White Wine Sauce
