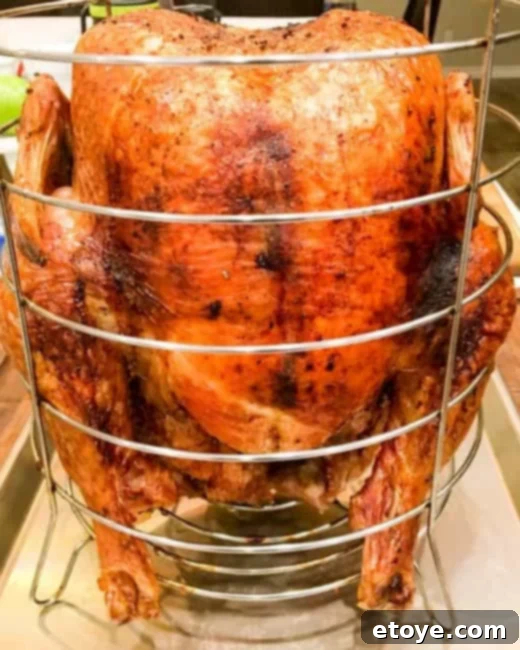
Thanksgiving is a time for cherished traditions, family gatherings, and, of course, an unforgettable turkey. For many, the idea of a deep-fried turkey conjures images of incredibly juicy meat and impossibly crispy skin, a culinary dream that often surpasses the results of a traditional oven roast. However, the conventional method of deep-frying a turkey involves heating gallons of oil to dangerous temperatures, a practice that can be messy, hazardous, and certainly not for the faint of heart. After a near-accident years ago while attempting to deep-fry our Thanksgiving turkey with vast quantities of hot oil, we realized there had to be a safer, simpler, and equally delicious way.
Enter the oil-less turkey fryer—a revolutionary approach to achieving that coveted “deep-fried” taste and texture without the oil, the mess, or the inherent risks. For over 16 years, our family has perfected the art of crafting a perfect Thanksgiving turkey using an oil-less fryer, and we’re excited to share our foolproof method with you. Prepare to discover the secrets to a turkey so moist and flavorful, with skin so irresistibly crisp, that it will become your new holiday tradition.
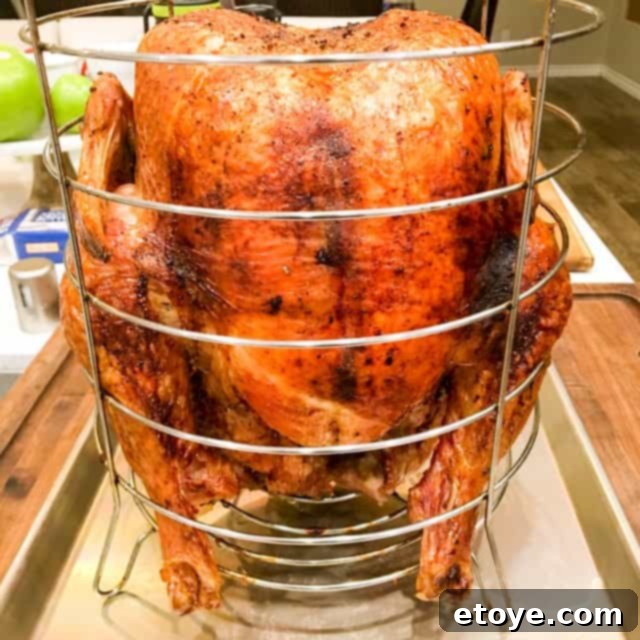
Mastering the Oil-Less Turkey: What You’ll Discover
This comprehensive guide will walk you through everything you need to know to achieve deep-fried turkey perfection, all without a single drop of cooking oil. Here’s a glimpse of what’s in store:
- The ultimate technique for an impossibly juicy, never-overcooked turkey, crowned with a crisp-crackling, golden-brown skin.
- An in-depth look at why the Char-Broil Big Easy Oil-Less Turkey Fryer has become our trusted kitchen companion for over a decade (and why this glowing recommendation is entirely unsolicited).
- A balanced exploration of the PROs and CONs of using the Char-Broil Big Easy Oil-Less Turkey Fryer, helping you decide if it’s the right investment for your holiday feasts.
- Our surprising insights into why brining is NOT recommended for oil-less turkey frying, and what to do instead.
- A detailed step-by-step recipe, from turkey preparation to carving, ensuring your success.
Years ago, a pivotal moment in our Thanksgiving journey led us to the Char-Broil Big Easy Oil-Less Turkey Fryer. It was such a game-changer that we’ve since acquired two more units—one for my brother’s household and another after our relocation to Nevada (we happily gifted our original one to a friend). For around $99, this innovative appliance represents one of the best investments we’ve ever made, guaranteeing a consistently perfect, foolproof turkey that transforms Thanksgiving into a truly “good-eatin'” celebration every year.
Char-Broil Big Easy Oil-Less Turkey Fryer: The Pros
The Char-Broil Big Easy is an infrared fryer, powered conveniently by a standard propane tank, just like the one you use for your BBQ grill. Its 16,000 BTU burner generates radiant heat that circulates efficiently within the cooking chamber, ensuring the turkey cooks uniformly from all sides. While, strictly speaking, this isn’t “deep frying” in the traditional sense, the results are remarkably similar and, arguably, superior: exceptionally moist and juicy meat (even the notoriously finicky breast meat!) and a gloriously crispy skin that is virtually impossible to replicate in a conventional oven. Let’s explore the many reasons why we wholeheartedly recommend the Char-Broil Big Easy for your Thanksgiving turkey:
- No Oil Needed: This is arguably the biggest advantage. Traditional deep-frying demands 5-6 gallons of cooking oil, a significant upfront expense, and an even bigger headache for disposal afterward. The Char-Broil Big Easy eliminates the need for any cooking oil, saving you money, effort, and environmental concern.
- Significant Time Savings: Compared to oven-roasting, which often takes 3-5 hours depending on turkey size, the Big Easy dramatically cuts down cooking time. A 12-14 pound turkey typically cooks in about 2 hours (approximately 10 minutes per pound), freeing up your oven and your valuable time on a busy holiday.
- Fast Heat-Up and Cool-Down: The Big Easy heats up in under a minute, ready for your turkey almost instantly. More impressively, it cools down remarkably quickly once turned off, often being cool to the touch by the time dinner is served. This is a stark contrast to oil-based fryers, where you must wait several hours for the oil to cool completely before disposal, adding stress and delay.
- Collected Drippings for Gravy: Unlike oil deep-frying, which yields no usable drippings, the Char-Broil Big Easy conveniently collects flavorful turkey drippings in a small pan at the bottom. These precious drippings are invaluable for crafting the most delicious, homemade gravy.
- Enhanced Safety: Safety is paramount. Traditional deep-frying carries inherent risks of tipping over, oil fires, and severe oil splatters—hazards we’ve unfortunately experienced firsthand. The Big Easy’s oil-less operation completely mitigates these dangers, offering a much safer cooking experience.
- Relatively Inexpensive: Considering its performance and safety benefits, the $99 investment in a Char-Broil Big Easy is truly worthwhile for consistently perfect, oil-less deep-fried turkey year after year. It’s a modest price for peace of mind and delicious results.
Char-Broil Big Easy Oil-Less Fryer: The Cons
As with any product review, transparency is key. While we adore our Char-Broil Big Easy, there are a few drawbacks to consider:
- Limited Warranty: The unit comes with only a 1-year warranty. While we’ve been fortunate never to encounter issues with our fryers, a longer warranty period would be reassuring, especially for an appliance primarily used once a year.
- Single-Use Appliance: For most users, the Big Easy is a dedicated Thanksgiving turkey fryer. It’s a bulky machine, requiring designated storage space in a garage, attic, or utility shed. While it can technically cook other items like chicken or kebabs, the effort of lugging out such a substantial piece of equipment for smaller meals often deters general use.
- No Stuffing Inside the Turkey: If you’re accustomed to stuffing your turkey for oven roasting, you’ll need to adapt. The Big Easy’s design doesn’t allow for internal stuffing. However, many culinary experts argue that stuffing a turkey can lead to uneven cooking anyway. We’ve always preferred preparing our dressing in a separate 9″x13″ baking dish in the oven, ensuring it cooks perfectly while the turkey focuses on achieving its juicy, crispy best.
- Challenging Cleanup: The wire basket and inner cooking pot can be a pain to clean. The best strategy for the wire basket is to scrub it immediately after use while it’s still warm (do not put it in the dishwasher!). The inner cooking pot also requires manual cleaning, and its large, awkward shape can make this a cumbersome task.
- Outdoor Use Only: The Char-Broil Big Easy is designed exclusively for outdoor use, which means weather conditions can be a factor. You’ll need to consider wind, rain, or snow when planning your cooking day, potentially requiring a sheltered area or covered patio.
Essential Considerations for Using Your Char-Broil Big Easy
If you’re contemplating adding the Char-Broil Big Easy Oil-Less Fryer to your holiday arsenal, here are some crucial points to keep in mind for a smooth and successful cooking experience:
- Propane Supply: Ensure you have an ample supply of propane. It would be incredibly frustrating to run out mid-cook! A full standard propane tank is always recommended for peace of mind. At least half a large tank is a bare minimum.
- Outdoor Location: Select a suitable outdoor spot that is well-shielded from strong winds and drafts. Wind can significantly affect cooking time and fuel efficiency.
- Temperature Impact on Cooking Time: The ambient outdoor temperature directly influences cooking duration. A 13-pound turkey might cook in about 90 minutes in warmer climates like Las Vegas or sunny Florida. However, the same turkey could require an additional 20 minutes or more in colder, windier environments, such as Wichita, Kansas, as we’ve experienced. If it’s snowing or raining, ensure you have an overhang or covered patio for protection.
- Mesh Lid Usage: The Big Easy comes with a mesh lid. This lid is typically used during the final 15 minutes of cooking to help reflect heat back onto the turkey, promoting even browning and crispier skin. In colder weather, using the mesh lid throughout the entire cooking process can help retain more heat within the pot, potentially reducing cooking time and ensuring consistent results.
- Seasoning the Cooking Pot: Before its inaugural use, you’ll need to season the Big Easy’s cooking pot. This simple process involves rubbing the interior with cooking oil and then heating the unit on high for a period, which helps create a non-stick surface and prevents rusting. Always refer to your appliance’s manual for precise seasoning instructions.
Exploring Alternatives for Oil-Less Turkey Cooking
For apartment dwellers, those with limited outdoor space, or anyone seeking alternatives to the Char-Broil Big Easy, there are other excellent machines that can deliver superb turkey results with super-crispy skin, rivaling the taste of deep-fried turkey without oil. Consider these two popular options:
- Ronco Rotisserie Oven ($127): We absolutely adore our Ronco Rotisserie. It’s a fantastic appliance for making foolproof, one-step prime rib roasts and delicious rotisserie chickens at home. While large enough for a 12-pound turkey, we generally recommend opting for a slightly smaller bird to ensure optimal rotation and even cooking.
- NuWave Oven ($95): Before owning the Ronco Rotisserie, the NuWave Oven was our go-to for roasting chicken, always yielding perfect results. One Thanksgiving, my Mom successfully roasted her turkey in the NuWave. It produced a good turkey, certainly better than a standard oven roast, but in our opinion, not quite on par with the Char-Broil Big Easy or the Ronco Rotisserie in terms of crispness and overall finish. It would be our third choice for turkey. Keep in mind that you’re generally limited to a 10-pound turkey unless you have an extender ring.
If you’re now convinced that the Char-Broil Big Easy is the perfect solution for your oil-less deep-fried turkey aspirations, click here to find it and make your purchase today. Your Thanksgiving feast will thank you!
The Case Against Brining for Deep Fried Turkey (Oil-Less or Traditional)
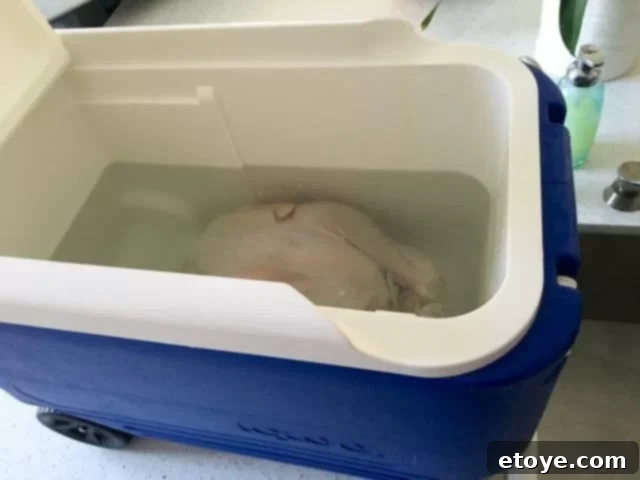
Brining is a popular technique cherished by many for producing tender and juicy oven-roasted turkey. It involves submerging the entire turkey in a bath of salt and sugar solution, typically for 24 hours. A common ratio is 4 quarts of water to 1 cup of kosher salt and 1/4 cup of granulated sugar. This process requires a food-safe container large enough for both the turkey and the brine, along with a significant amount of refrigerator space. Alternatively, a large, leak-proof plastic bag within a clean bucket or a well-chilled cooler with plenty of ice can be used.
Understanding the Problems with Brining Turkey:
- Compromised Crispy Skin: The primary goal of a deep-fried turkey, whether with or without oil, is that irresistible crispy skin. Submerging the turkey in brine water saturates the skin and the meat just beneath it with moisture. For traditional deep-frying with oil, this combination of water and boiling oil creates a dangerous and violent reaction, leading to skin-burning splatters and prolonged, fierce bubbling. Even if you pat the turkey very dry, the trapped moisture will inevitably cause problems. For oil-less deep-frying, the infrared heat will expend significant energy simply evaporating this excess surface water, rather than focusing on crisping the skin. Achieving truly crispy skin on a brined turkey, even in a conventional oven with high heat, is notoriously difficult.
- High Maintenance and Temperature Control: Brining in a cooler demands constant vigilance. You must meticulously monitor the water temperature to ensure it remains at or below 40°F (4°C) to prevent bacterial growth. This often means having bags of ice on hand and regularly refilling the cooler. Each addition of ice dilutes the brine, requiring you to compensate with more concentrated brine solution, adding complexity and supplies. Furthermore, finding freezer space for large quantities of ice can be a logistical challenge during the busy holiday season.
- Messy Cleanup: The brining process, especially with a large turkey, can be quite messy. The cooler or container used for brining must be thoroughly cleaned and sanitized, both before and after use, often requiring a bleach solution to ensure food safety standards.
- Extended Preparation Time: For those still committed to brining, plan on starting the process at least two days before Thanksgiving. Day one involves the brining itself. On day two, you must discard the brine, thoroughly pat the turkey dry inside and out, and then refrigerate it, uncovered, for a minimum of 12 hours. This extended drying period is crucial for allowing the turkey skin to dehydrate, which is a prerequisite for achieving that desired crispy texture.
The Superior Method: Injecting for Juicy Turkey Without Brining
For oil-less deep-fried turkey, a far more effective method to ensure incredibly juicy and tender meat while simultaneously guaranteeing crispy skin is to inject the turkey directly with a brine or marinade solution. This technique delivers moisture and flavor deep into the muscle fibers, strategically keeping excess water away from the skin—precisely where you want it to be dry for optimal crisping.
Our preferred injection marinade is a simple yet potent mixture of water, salt, maple syrup, and a touch of liquid smoke. Whisk these ingredients together until the salt is fully dissolved:
1 cup hot water
1/4 cup kosher salt
2 tablespoons maple syrup
1 1/2 teaspoons liquid smoke
Once the salt has dissolved, add 1/2 cup of ice to rapidly cool the mixture, making it safe for injection into the turkey.
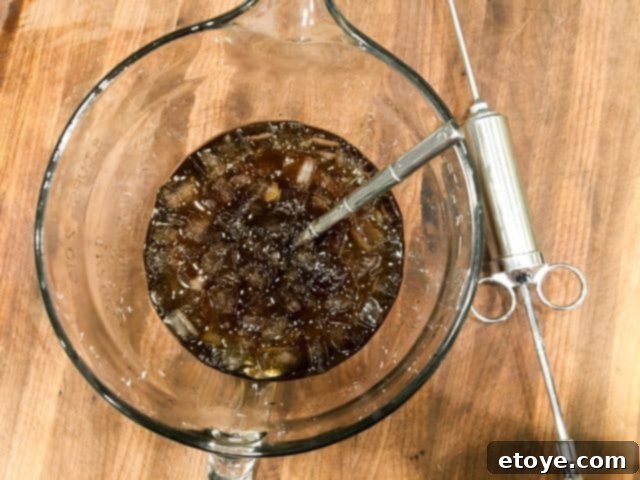
Understanding Liquid Smoke: A Flavorful Secret
Liquid smoke is a natural seasoning derived from actual wood smoke. Woods like hickory or mesquite are burned, and the smoke is captured, condensed, cooled, and then mixed with water before bottling. It imparts an authentic smoky flavor to food without the need for a smoker.
When choosing liquid smoke, aim for brands that list only water and smoke concentrate as ingredients, avoiding those with added flavorings or artificial colors. Our favorite brand is Wrights Liquid Smoke, known for its pure composition. Some might initially be skeptical of “fake smoke,” but it’s important to remember that liquid smoke originates from real wood smoke. If you enjoy foods like bacon, smoked gouda cheese, beef jerky, or smoked sausages, you’ve likely already tasted the subtle magic of liquid smoke.
Used in very small quantities, liquid smoke imparts just the faintest, most pleasant hint of smoky flavor to your turkey. This is definitely an ingredient where a little goes a very long way; moderation is key to achieving a delicate smoky undertone rather than an overpowering essence.
The Art of Injecting the Turkey: Technique Matters
There’s a right way and a wrong way to inject a turkey. Resist the urge to go “injection happy” and puncture the turkey skin all over! The crucial rule is to avoid puncturing the turkey skin itself. Piercing the skin will only cause the marinade to leak out onto the surface, which is precisely what we want to prevent for maximum crispiness.
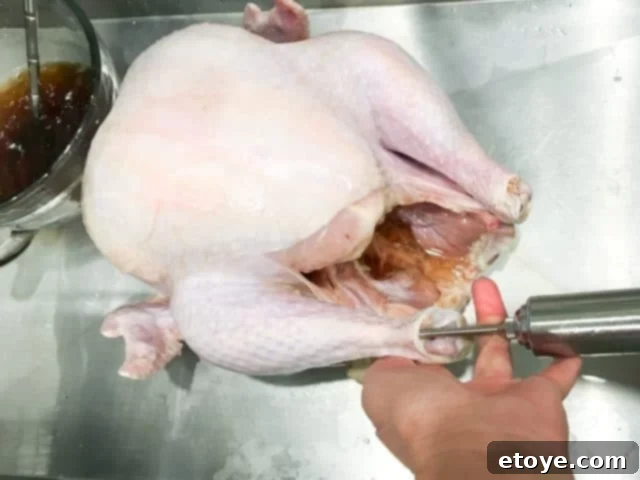
Instead, gently lift the skin in various areas and inject the marinade *under* the skin, directly into the meat. Focus on the breast, thighs, and drumsticks, finding natural pockets or spaces where the needle can penetrate without tearing the delicate outer layer.
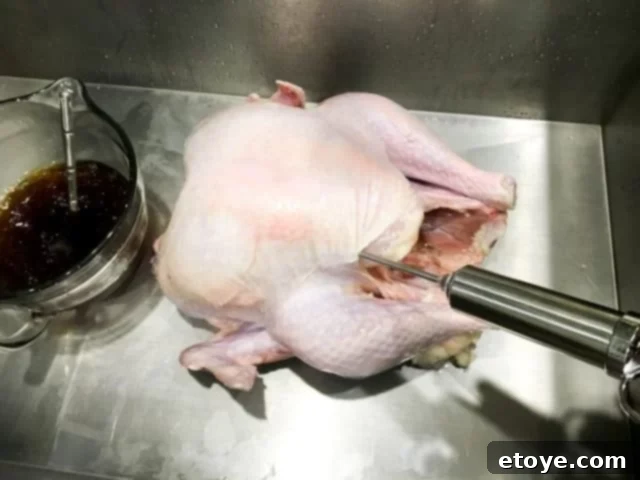
Simply identify areas where you can introduce the marinade effectively without piercing through the skin.
After a thorough injection, place the turkey, breast side up, in a large pot or roasting pan. You’ll notice it looks nicely plumped, almost like a “turkey botox” effect, signifying that the marinade has been effectively distributed.
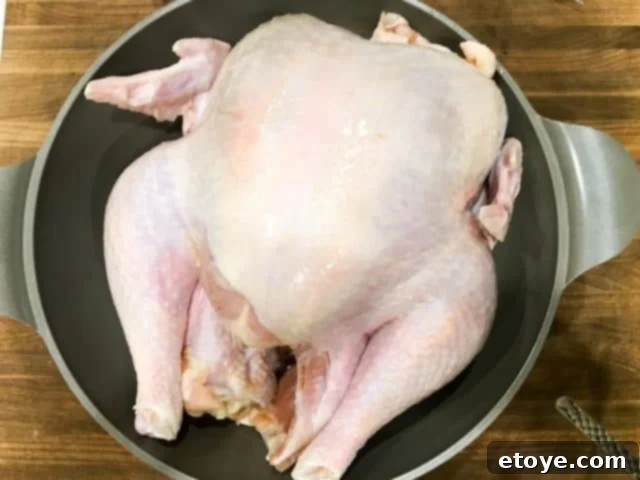
Refrigerate the injected turkey, uncovered, for at least 2 hours, and up to 24 hours. If you absolutely must cover it, tent it loosely with a sheet of aluminum foil to allow air circulation. This uncovered resting period is crucial; it helps the turkey skin dry out further, which is essential for achieving that prized crispy finish when cooked.
Why Injecting Surpasses Brining for Oil-Less Turkey
Injecting offers several distinct advantages over traditional brining, particularly when preparing a turkey for oil-less frying:
- Unrivaled Crispy Skin: By introducing moisture directly into the meat rather than saturating the skin, the turkey’s surface remains dry. This allows the heat to focus solely on crisping the skin to an exceptional crackly texture, without needing to evaporate excess surface water first.
- Space Efficiency: Injecting takes up significantly less space in your refrigerator compared to a massive brining container. This is a huge benefit, especially during the busy holiday season when fridge space is at a premium.
- Reduced Mess: The injection process is far less messy than handling gallons of brine solution and a large, water-logged turkey. Cleanup is minimal, saving you time and effort.
- Faster Preparation Time: While brining typically requires 24 hours, injecting only demands a couple of hours for the marinade to settle. Some experts suggest immediate cooking after injection, but for oil-less deep-frying, we recommend a minimum 2-hour resting time. This allows the marinade to fully penetrate the meat and any excess to leak out in a controlled environment, rather than seeping into your cooking pot during the frying process.
When to Skip Both Brining and Injecting Your Turkey
There’s one important exception to the rule of brining or injecting: if you purchase a Kosher turkey, there is absolutely no need for either. Kosher turkeys are already pre-brined as an integral part of the koshering process. They undergo a special salting and rinsing procedure that naturally tenderizes and seasons the meat, making any additional brining or injecting redundant and potentially resulting in an overly salty turkey.
Selecting the Perfect Turkey for Your Oil-Less Fryer
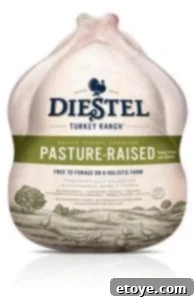 For a cherished family feast that graces our tables just once a year, we believe in splurging a little to ensure the best-tasting turkey possible. Beyond flavor, another critical consideration for us is sourcing humanely raised turkeys. Our go-to brand is Diestel, a family-run, sustainable ranch in California renowned for its commitment to ethical farming practices.
Diestel’s sustainable and humane approach to turkey farming has earned them a prestigious 5+ welfare rating, the highest possible accreditation from the non-profit Global Animal Partnership. You can find their exceptional turkeys at Whole Foods Markets or directly through their website. The beautiful bird featured in the photos for this oil-less deep-fried turkey recipe was a Pasture-Raised turkey generously provided by Diestel last year (along with a fully cooked one for us to sample!). Since then, we’ve happily purchased Diestel turkeys from Whole Foods and are already planning to do so again for this coming Thanksgiving, confident in their quality and ethical standards.
Additionally, for those who prefer convenience or aren’t keen on cooking a whole turkey from scratch, Diestel also offers fully cooked whole turkeys that simply require warming up in the oven before serving—a fantastic option for a stress-free holiday meal.
Achieving Deep Fried Turkey Without Oil Using the Char-Broil Big Easy Oil-Less Turkey Fryer
Preparing your turkey in the Char-Broil Big Easy is a straightforward process, but timing and attention to detail are key. First, calculate your total cooking time (refer to the “How to Calculate Cooking Time” section below).
When you’re ready to cook, give the turkey one final pat dry, both inside and out, to ensure minimal surface moisture. Lightly brush the entire skin of the turkey with a bit of cooking oil. Next, season generously with your favorite salt-less or low-salt herb/dry rub poultry seasoning. Remember, you’ve already infused the turkey with salt via the injection, so adjust your seasoning accordingly to avoid over-salting. It’s also crucial to choose a seasoning blend with little or no sugar, as sugar can cause the skin to burn during the high-heat cooking process. For the best results, consider making your own simple yet flavorful dry rub:
1 tablespoon paprika
1 tablespoon chili powder
1 teaspoon garlic powder
1 teaspoon onion powder
1 teaspoon dried thyme
Freshly ground black pepper (to taste)
To prevent the turkey from sticking, pour a small amount of cooking oil onto a wad of paper towel and thoroughly rub down the wires of the cooking basket. Carefully place the prepared turkey into the basket, ensuring the wing tips and drumsticks are tucked in neatly to prevent them from burning or getting caught.
Preheat the Char-Broil Big Easy Fryer for approximately one minute. Confirm that the unit lights up and the cooking pot is getting hot before carefully lowering the turkey, breast side up, into the fryer.
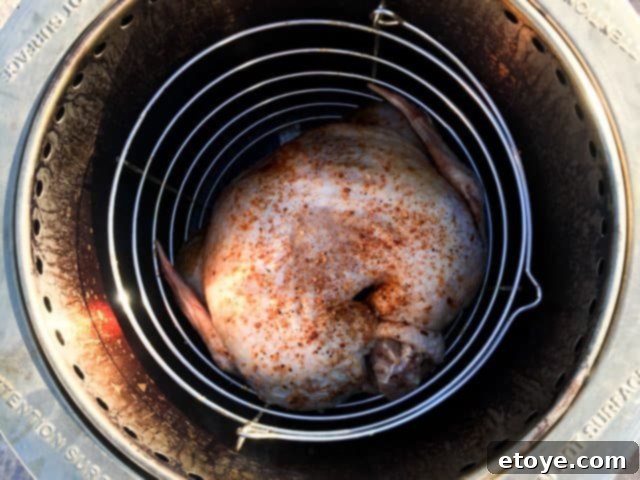
If this is your first time cooking with the Char-Broil Big Easy, you might experience a moment of panic about an hour into cooking. The turkey will often appear relatively unchanged for a significant period. You’ll wonder, “Will it cook in time? When will the skin crisp up?” Rest assured, this is normal.
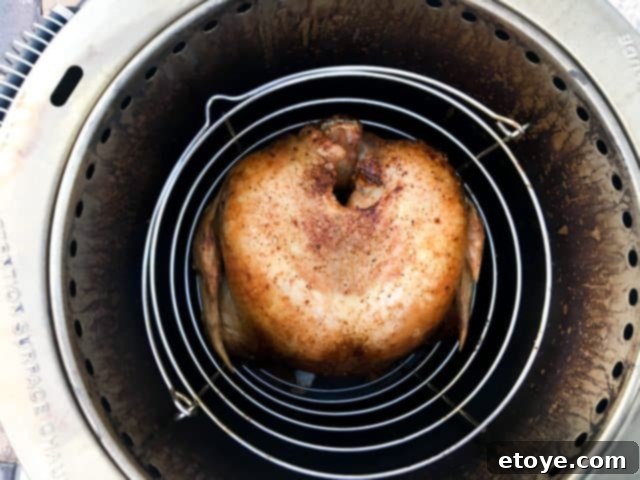
Be patient. Soon, you’ll see the transformation begin as it gets closer to perfection…
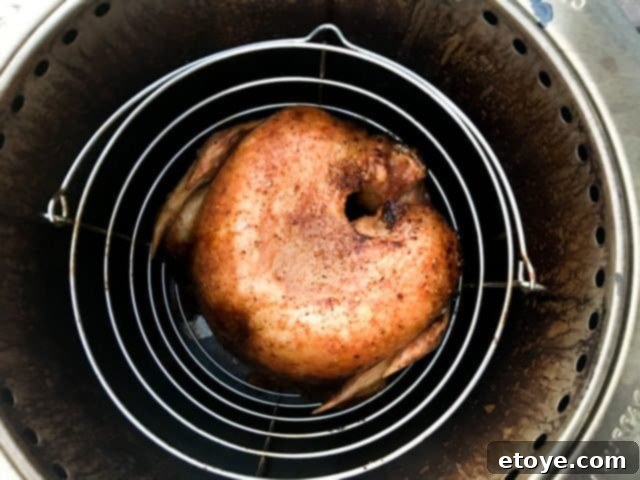
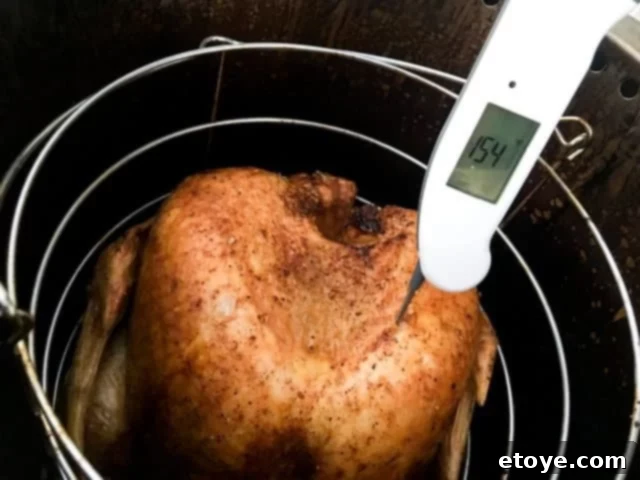
We recommend pulling the turkey out when the deepest part of the breast meat registers an internal temperature of 150°F-155°F (65°C-68°C) using an instant-read thermometer. Do not cook it higher than this! The turkey will continue to cook during the resting period (carryover cooking), reaching a safe final temperature while remaining incredibly juicy.
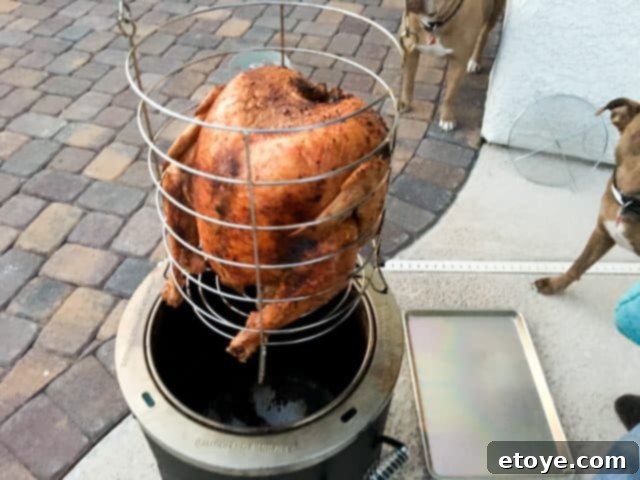
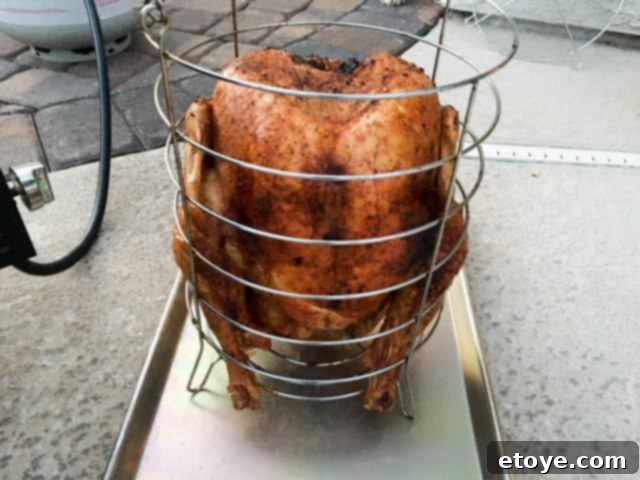
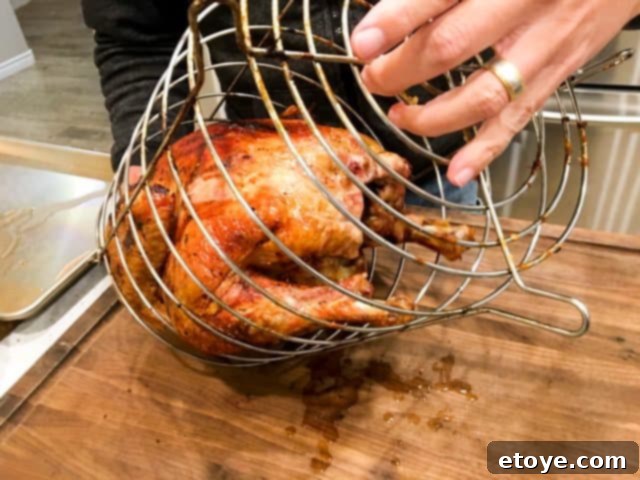
Carefully transfer the entire basket with the hot turkey inside onto a large cutting board indoors. This is a heavy beast, and you absolutely do not want to risk dropping your magnificent creation on the ground.
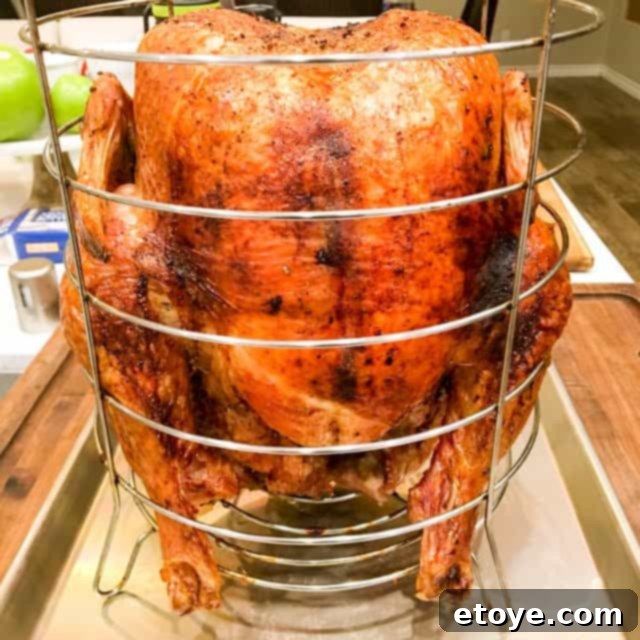
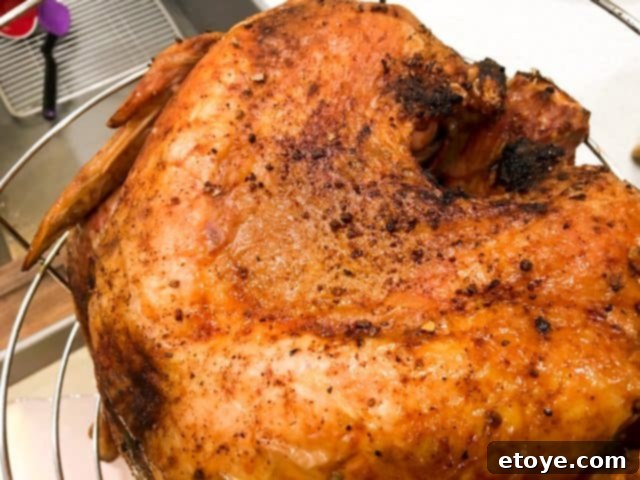
If you followed our advice and oiled the basket wires, the turkey should gracefully slide out, ready for carving.
Feast your eyes on that beautiful, crispy skin! This is the hallmark of a perfectly executed deep-fried turkey without oil.
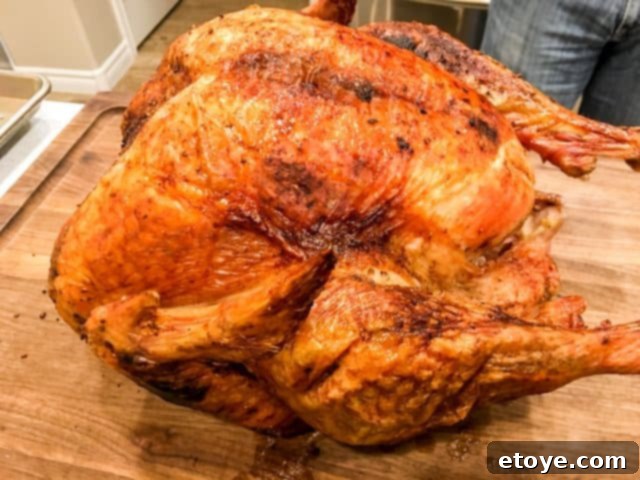
The skin is thin, crackly-crispy, and bursting with flavor.
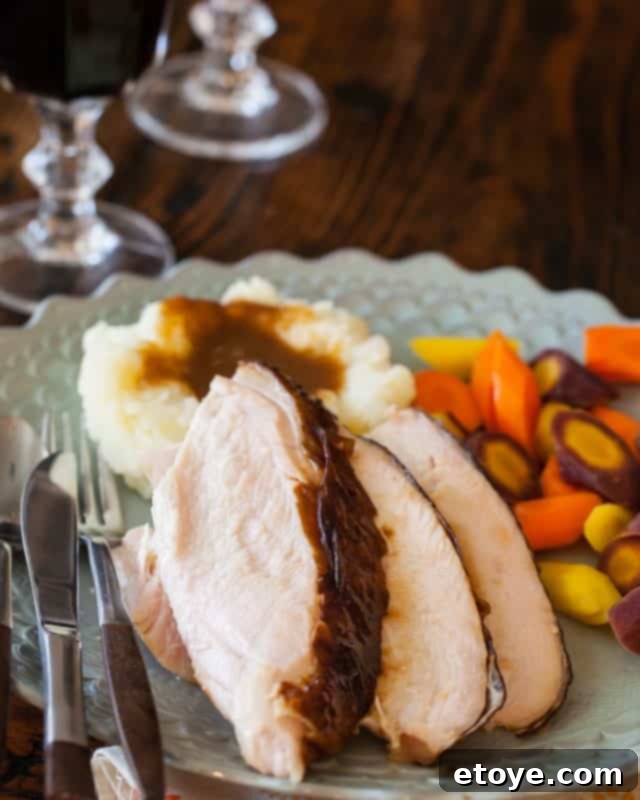
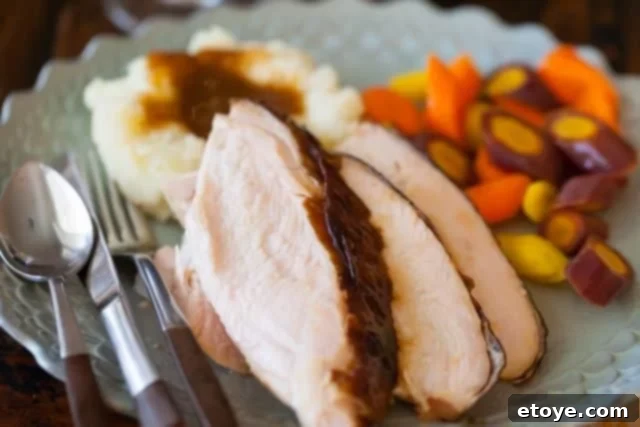
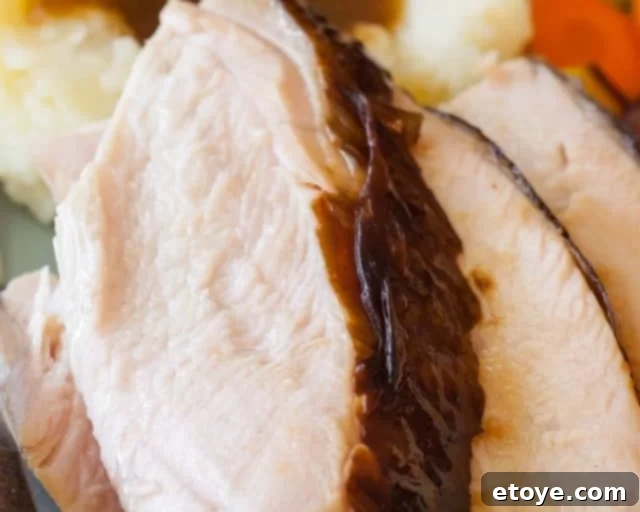
And the meat beneath it is incredibly juicy, tender, and flavorful, every single bite a testament to the magic of oil-less frying.
Precise Cooking Time Calculation for Your Oil-Less Turkey
The Char-Broil Big Easy generally estimates a cooking time of 9-10 minutes per pound of turkey. However, it’s crucial to treat this as a guideline, not a strict rule. Always prioritize an instant-read thermometer to check the internal temperature, rather than relying solely on the clock.
Several factors can influence the actual cooking time, with external weather conditions being a major one. If you’re cooking in very cold temperatures (as we did in Wichita, Kansas!), you’ll need to adjust your calculation to approximately 11 minutes per pound. Remember that colder temperatures require more energy and time for the fryer to maintain its internal heat and cook the turkey thoroughly.
The Big Easy’s basket can comfortably accommodate a turkey up to 16 pounds. However, we’ve consistently achieved the best results with turkeys weighing between 12-14 pounds. This size not only cooks most efficiently but also provides plenty of delicious meat to feed a crowd, with generous leftovers to spare!
To help you plan, here’s a typical timeline for a 14-pound turkey:
- 14-pound turkey x 10 minutes/pound = approximately 140 minutes (2 hours 20 minutes) cooking time.
- Allow an additional 120 minutes (2 hours) for the turkey to absorb the injection marinade, or even better, prepare it overnight for maximum flavor penetration.
- Add 10 minutes for hooking up the Big Easy and testing the propane connection.
- Factor in any additional time needed to compensate for cold weather conditions.
- Finally, allow a crucial 15-minute resting time before carving. This resting period allows the juices to redistribute throughout the meat, ensuring an even more tender and flavorful turkey.
Don’t Forget the Gravy! Making Gravy with Oil-Less Turkey Drippings
Just because you’re using an oil-less fryer doesn’t mean you have to sacrifice the beloved Thanksgiving gravy! The Char-Broil Big Easy actually makes it easier to collect flavorful drippings for an exceptional homemade gravy. Here’s how:
First, prepare a rich turkey stock. Before cooking your turkey, simmer the neck and gizzard (found in the pouch inside the turkey’s cavity—excluding the liver, which can impart a bitter flavor) with fresh thyme, garlic, onion, and a few bay leaves. This stock will form the delicious base for your gravy.
Once your turkey has finished frying in the Big Easy and is resting, carefully slide out the drippings collection pan located at the bottom of the unit. You’ll find a layer of fat on top and rich, flavorful turkey drippings beneath. Skim off and discard the top layer of fat. Then, add a couple of generous spoonfuls of these concentrated, savory drippings into your prepared gravy. This will infuse your gravy with an unparalleled depth of turkey flavor, making it the perfect accompaniment to your oil-less deep-fried masterpiece.
Deep Fried Turkey without Oil – Char-Broil Big Easy Turkey Fryer
Author: Jaden
Summary: If this is your first time using the Char-Broil Big Easy, remember to season the cooking pot prior to use, following the instructional manual.
Rating: 4.85 out of 5 stars (based on 32 votes)
Print Recipe |
Pin Recipe
Recipe Details
- Prep Time: 30 minutes
- Cook Time: 1 hour 30 minutes
- Total Time: 2 hours
- Course: Main Course
- Cuisine: American
- Servings: 12 people
Ingredients
Main Ingredients
- 14 pound turkey
For the Injection Marinade
- 1 cup hot water
- 1/4 cup kosher salt
- 2 tablespoons maple syrup
- 1 1/2 teaspoons liquid smoke
For the Dry Rub
- 1 tablespoon paprika
- 1 tablespoon chili powder
- 1 teaspoon garlic powder
- 1 teaspoon onion powder
- 2 teaspoon dried thyme
- Freshly ground black pepper (to taste)
For the Gravy
- 2 tablespoons cooking oil
- Neck and gizzard from turkey (no liver, wing tips can also be used)
- 1/2 onion, chopped
- 3 cloves garlic, kept whole
- 1 quart turkey or chicken stock
- 3 sprigs fresh thyme
- 2 bay leaves
- 4 tablespoons butter
- 1/4 cup all-purpose flour
- 2 tablespoons turkey drippings (from the Big Easy)
Instructions
2 Hours Prior to Cooking Time, Inject the Turkey
- Discard any plastic ties or plastic pop-up timers from the turkey. To prepare the injection marinade, whisk together the hot water, salt, maple syrup, and liquid smoke until the salt dissolves. Add in ice cubes to cool the mixture. Inject the turkey in several places, being careful not to puncture the skin.
- Place the turkey, breast side up, in a large pan. Refrigerate, uncovered, for 2 hours, or up to 24 hours. For best results, allow the turkey to sit at room temperature for the last 1 hour before cooking.
Prepare the Char-Broil Big Easy
- Rub the cooking basket with cooking oil to prevent sticking. Brush cooking oil generously all over the skin of the turkey. Season the turkey with the dry rub, both inside and out. Insert the turkey into the basket, breast side up. Turn on the Big Easy, ensuring the flame is strong and the cooking pot is heating up.
Cook the Turkey
- Carefully lower the turkey in its basket into the preheated Big Easy. Cook, uncovered, for approximately 9-10 minutes per pound. During the last 15 minutes of cooking, cover the Big Easy with the wire mesh lid to help the turkey skin brown beautifully. The deepest part of the turkey breast should register 150°F-155°F. Remove the turkey and let it rest for 15 minutes before carefully removing it from the basket. **While turkey is cooking, make gravy.
Make Gravy
- While the turkey cooks, prepare the gravy. In a large saucepan, heat the cooking oil over high heat. Once hot, add the turkey neck and gizzards (avoiding the liver). Brown the turkey pieces on one side, then flip. Add the chopped onion and whole garlic cloves and continue to cook until the onions soften and the turkey pieces are nicely browned. Pour in the turkey or chicken stock, then add the fresh thyme and bay leaves. Bring to a boil, then reduce the heat to low and simmer for 30 minutes. Strain the stock, discarding the solids. You should have approximately 2 1/2 cups of flavorful turkey stock.
- In a clean saucepan, over medium heat, melt the butter. When it begins to bubble, add the all-purpose flour. Whisk constantly for 5-8 minutes until a dark blonde roux is formed. Gradually pour in 2 cups of the prepared turkey stock (reserving the rest) and whisk continuously to combine, ensuring no lumps.
- Season the gravy with salt and freshly ground black pepper to taste. To thin the gravy, gradually add more of the reserved turkey stock. To thicken it, allow the gravy to continue cooking and reducing. For a quicker thickening method, combine 1 tablespoon of cornstarch with 1/4 cup of cold water in a small bowl to create a slurry. Pour this into the simmering gravy and whisk until it reaches your desired thickness.
- Once the turkey is finished frying, remove the drippings collection pan from the Big Easy. Use a large spoon to carefully skim and discard the top layer of fat/oil. Beneath the oil, you will find incredibly flavorful turkey drippings. Stir a generous spoonful or two of these drippings into your finished gravy to enhance its rich, savory flavor.
You May Also Enjoy…
- 5 of the Best BBQ Recipes to Make in Your Smoker
- Creative Meal Ideas For Your Thanksgiving Turkey Leftovers
- How to Smoke the Perfect Turkey in a Gas Smoker
