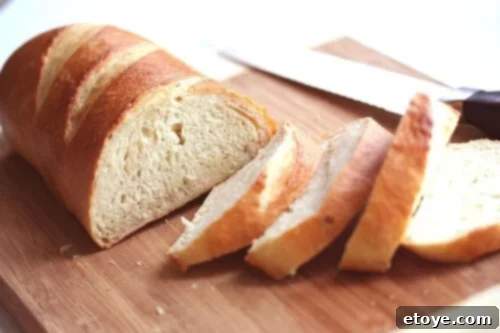
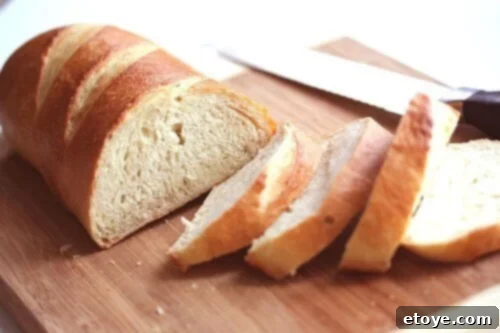
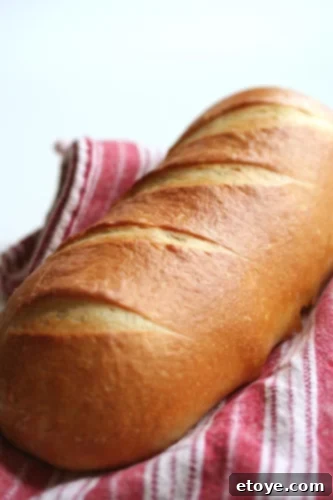
Ready to transform your kitchen into a haven of aromatic bliss? This easy homemade French bread recipe is your passport to baking perfection. Whether you’re a novice eager to embark on your first bread-baking adventure or a seasoned baker seeking a reliable and quick method for crusty French bread, this guide promises a golden-brown loaf that’s as gratifying to create as it is delightful to savor. The process, often perceived as daunting, is surprisingly straightforward, and the unparalleled taste of warm, freshly baked French bread straight from your own oven is an experience like no other. So, tie on your apron, prepare to knead, and brace yourself for the irresistible aroma that will fill your home. Good luck resisting the urge to tear into this masterpiece the moment it emerges from the oven!
Why This French Bread Recipe Stands Out
Baking French bread might seem like a sophisticated culinary art, but this recipe makes it accessible to everyone. Here’s why it’s destined to become your go-to:
- Uncomplicated Yet Flavorful: This recipe brilliantly demystifies the art of baking homemade bread. With focused kneading, precise shaping, and optimal baking, you’ll achieve a crusty French bread that rivals loaves from the finest bakeries. Each step, from the initial mix to the final rise, is designed to ensure a perfect texture and rich, authentic flavor. You’ll understand the science behind creating a light, airy interior encased in a crackly crust.
- Incredibly Versatile and Delicious: Once you master this easy bread recipe, the culinary possibilities are endless! Enjoy your bread simply sliced and served with butter, transform it into savory garlic bread, craft delightful French bread pizzas, or use it as a robust base for sandwiches and bruschetta. Its adaptability makes it a perennial favorite among bread recipes, promising a new way to enjoy it with every meal.
- The Game-Changing Steam Technique for a Flawless Crust: Our quick, effective method for creating steam in the oven is truly a secret weapon. This technique is precisely what gives your bread its signature beautifully crispy, golden-brown crust and a remarkably tender, airy interior – the hallmark qualities of the best French bread recipe. Understanding and applying this simple step will elevate your bread from good to extraordinary.
Unlocking the Secrets to the Perfect French Bread Loaf in Just 3 Hours
While my No Knead Bread recipe is a go-to for its sheer ease, it requires at least a 12-hour fermentation period. For those moments when time is of the essence, this 3-hour French bread recipe is a revelation. Born from countless trials and errors—over 40 loaves baked in eight months—this method distills the essential techniques for rapid, high-quality results. It’s a blend of wisdom gleaned from esteemed culinary figures like Pamela Anderson (the celebrated chef, not the model!), the iconic original No Knead Recipe published in the NY Times, and the unparalleled insights of Rose Levy Beranbaum, author of the definitive Bread Bible.
Secret #1: The Power of Strategic Kneading and Resting
Efficient kneading is paramount for developing gluten, which gives bread its structure and chew. With a stand mixer, use the dough hook: knead for 2 minutes, then let the dough rest for 7 minutes. This brief pause allows the gluten strands to relax and redistribute, leading to a smoother, more cohesive dough. Follow with another 3 minutes of kneading. If you’re kneading by hand, the rhythm is 6 minutes of kneading, 7 minutes of rest, and then a final 7 minutes of kneading. You’ll notice a remarkable difference in the dough after the rest—it becomes much more supple and soft, making it easier to work with and ensuring a finer crumb structure in the finished loaf.
Secret #2: The Art of Pinching for an Even Rise
When you’re shaping your dough into loaves, pay close attention to sealing the seams. Pinch all the ends tightly, creating a robust seal. This technique generates crucial surface tension across the dough. As the yeast produces carbon dioxide gas—or as Alton Brown colorfully describes it, “when the yeast burps”—this tension forces the dough to expand upwards and outwards uniformly. Without sufficient surface tension, gravity takes over, and your loaf might spread out flat like “Al Bundy on the couch,” lacking the desired height and characteristic French bread shape.
Secret #3: Harnessing Heat with the Right Baking Vessel
The choice of your baking vessel significantly impacts the crust and overall bake. A pizza stone, a cast iron Dutch oven, or a Pampered Chef Covered Baker are excellent choices because they retain and radiate oven heat incredibly evenly, ensuring a consistent bake and a superior crust. Just ensure your loaf fits comfortably within. If you don’t own one of these, don’t worry! A high-quality, thick baking sheet, inverted and preheated, will also work effectively, providing a stable, hot surface for your bread.
Secret #4: The Magic of Steam for a Perfect Crust
Steam is the unsung hero behind that wonderfully thin, crunchy, and beautiful crust characteristic of authentic French bread. In No Knead recipes, a high water-to-flour ratio naturally provides moisture. However, in this faster 3-hour recipe, we create steam manually. Here are two effective methods:
- For Pizza Stone or Baking Sheet: Once your bread is in the preheated oven, quickly toss 1/2 cup of water onto the oven floor (for electric ovens) and immediately shut the door. This rapid vaporization creates a burst of steam. This is a technique endorsed by professional bakers for home ovens, as commercial ovens often have built-in steamers. If you’re hesitant about pouring water directly onto the oven floor, an alternative is to place a metal loaf pan or baking sheet on the very bottom rack, offset to one side, while preheating the oven. Once the bread is in, pour 1/2 cup of water into this hot pan. The heated pan will instantly generate the necessary steam. Positioning it off to the side ensures the steam rises around the bread, rather than directly underneath it, for optimal crust development. Essentially, cold water meeting hot surfaces in a hot oven equals steam!
- For Covered Baker or Dutch Oven: When using a preheated covered baker or Dutch oven, you’ll need less water—about 1/4 cup. Carefully place the loaf into the scorching hot pot, add the water, and immediately seal with the lid. Transfer the covered pot directly into the oven. The trapped water within the preheated vessel will create a steamy environment, mimicking a professional steam oven.
Secret #5: Precision in Timing and Temperature
Achieving the perfect bake relies on accurate timing and temperature. Here are crucial guidelines:
- Internal Temperature is Key: Invest in an instant-read thermometer. The internal temperature of your French bread should register between 190-200°F (88-93°C) when it’s fully baked and ready to be removed from the oven.
- Know Your Oven: Every oven has its quirks, and slight variations in temperature and hot spots are common. Additionally, your loaves might be shaped differently, affecting bake time.
- Recipe Timing as a Guide: The baking times provided in this recipe serve as an approximate guide, based on my oven’s performance and my shaping methods.
- Verify Doneness: Always rely on the internal temperature of your bread to accurately gauge its doneness, ensuring a thoroughly baked loaf every time.
Crafting the Perfect French Bread: A Step-by-Step Guide
Follow these detailed steps to bake an exceptional French bread loaf that’s both beautiful and delicious:
- Prepare Your Ingredients and Mixer: Begin by reserving 1/4 cup of bread flour on a clean countertop. In your stand mixer bowl, combine the remaining 3 3/4 cups of bread flour. Spoon the active dry yeast onto one side of the bowl and the salt on the opposite side to prevent direct contact, which can inhibit yeast activity. Pour in the warm water. Using a regular mixer paddle, mix on low speed until the ingredients come together to form a rough, shaggy mass. Switch to the dough hook attachment.
- First Knead: With the dough hook, mix on medium speed for 2 minutes. The dough should begin to clear the sides of the bowl but still stick slightly to the bottom. If the dough is too sticky, add 1 tablespoon of the reserved flour at a time until the desired consistency is reached. If it appears too dry, add 1 tablespoon of water.
- Initial Rest: Let the dough rest in the mixer bowl for 5 minutes. During this brief rest, the gluten begins to relax, making the dough easier to work with.
- Second Knead: Turn the mixer back on and continue mixing with the dough hook for another 3 minutes.
- Hand Kneading and Smoothing: Transfer the dough from the mixer bowl onto your floured countertop. Using the reserved 1/4 cup of flour as needed, knead the dough by hand. Continue kneading until the dough transforms into a very satiny, smooth, and tight ball. It should feel supple and elastic.
- First Rise (Bulk Fermentation): Lightly oil a large bowl (cooking spray works well). Place the dough ball into the bowl, turning it once to ensure all sides are thinly coated with oil. Cover the bowl tightly with plastic wrap to prevent a skin from forming, and set it in a warm, draft-free place to rise for approximately 1 1/2 hours. The dough should nearly double in size, indicating proper yeast activity.
- Preheat Oven and Baking Vessel: About 1 hour into the rising process, preheat your oven to a robust 450°F (232°C). Place your chosen baking vessel—a pizza stone, an inverted heavy-duty baking sheet, or a covered cast-iron pot—into the oven to heat thoroughly. If you plan to create steam using a separate loaf pan, place it on the very bottom rack, off to one side, as well.
- Punch Down and Reshape: Once the dough has fully risen, gently punch it down to release the trapped gases. Form it back into a ball. To test its readiness, lightly poke the surface with your finger; the dough should yield to the pressure and slowly spring back.
- Shaping the First Loaf: This is where the fun truly begins! Divide the dough in half, keeping one piece covered to prevent it from drying out. Take one half and gently stretch it out to form a large rectangle. Lightly dust your work surface with flour. Fold over the ends of the dough.
- Create Surface Tension for a Perfect Loaf: Now, perform a gentle “karate chop” lengthwise down the middle of the bread, then stretch out the long ends again. Fold the dough in half lengthwise. The “karate chop” helps to tuck the middle securely inside, building internal structure. Crucially, pinch all sides shut very tightly, ensuring that both the long and short ends are firmly sealed. This creates the essential surface tension that allows the bread to rise and expand evenly upward and outward during baking. If your loaf looks a bit lopsided, let it rest for 5 minutes and gently stretch it back into shape. Avoid re-kneading, as this will deflate all the beautiful gas you’ve spent 1.5 hours creating!
- Final Proof (Second Rise): Turn the shaped loaf seam-side down onto a well-floured pizza peel or cutting board. Cover it with a damp kitchen towel. Repeat the shaping process with the second dough half. Allow both loaves to rest and proof for 30 minutes.
- Scoring the Loaves: After the final proof, take a sharp paring knife, a lame, or a razor blade, and make 3-4 shallow, diagonal slashes across the surface of each loaf. These slashes aren’t just for aesthetics; they allow the steam trapped inside the bread to escape in a controlled manner, facilitating even expansion and preventing uncontrolled bursts during baking.
- Ready to Bake: When you’re ready to bake, carefully remove your preheated baking vessel from the oven. Gently slide your beautifully proofed loaf (or loaves) onto or into the hot vessel.
- Baking with Pizza Stone or Inverted Baking Sheet: If using a pizza stone or inverted baking sheet, you can likely fit both loaves simultaneously, ensuring at least 6-8 inches of space between them for proper air circulation and expansion. Have 1/2 cup of water ready beside the stove. Open the oven door, slide the bread in, then quickly pour the water onto the oven floor or into your preheated loaf pan. Immediately close the oven door to trap the steam. Bake for 20-25 minutes. Check the internal temperature, which should be 190-200°F (88-93°C). Remove and let cool on a wire rack before slicing.
- Baking with a Covered Baker or Dutch Oven: If using a long cast-iron pot or covered baker, before securing the lid, pour 1/4 cup of water directly into the pot with the loaf. Cover immediately and place the pot directly into the oven. Bake for 10 minutes. Then, carefully remove the lid and continue baking for another 14 minutes. Check the internal temperature; it should register 190-200°F (88-93°C). For convection ovens, bake covered for 8 minutes, then uncovered for 10-12 minutes. Remove and let cool completely on a wire rack before cutting. Repeat the process for the second loaf.
- Enhance the Crust (Optional): To re-crisp a crust that has softened, place the cooled bread in a 375°F (190°C) oven for about 5 minutes. Enjoy one loaf yourself and consider sharing the other with a friend!
French Bread Recipe
Pin Recipe
Ingredients
- 4 cups bread flour
- 2 teaspoons active quick rising dry yeast
- 2 teaspoons salt
- 1 1/2 cups warm water
Instructions
- Put 1/4 cup of bread flour on your clean counter top and reserve. Place remaining 3 3/4 cups bread flour in your mixer bowl. Spoon the yeast on one side of the bowl, and the salt on the other side. Pour in the warm water and with your regular mixer paddle, mix on low speed until the dough comes together in a mass. Switch to the dough hook. Mix on medium speed for 2 minutes. Dough should clear the sides but stick to the bottom. If it is too sticky, add 1 tablespoon of flour at a time. If too dry, add 1 tablespoon of water to dough to adjust.
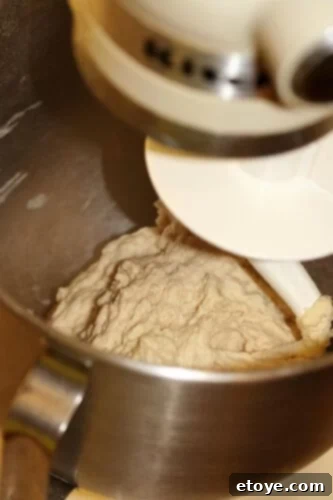
- Let the dough rest for 5 minutes.
- The dough should look like this during the rest:

- Turn the mixer on again and mix for 3 minutes. Take the dough out and place on the counter. Remember that 1/4 cup of flour that we reserved? We’ll use it now. As you knead the dough by hand, incorporate more flour as you need.
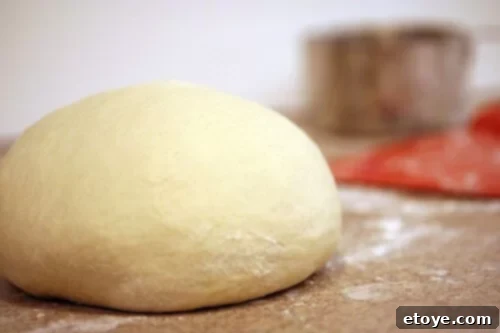
- Knead by hand until the dough is very satiny, smooth, tight and formed into a nice, compact ball:

- Place this dough in a large lightly oiled bowl (I use Pam spray). Turn dough over so that all sides have a thin coating of oil. Cover with plastic wrap and set in warm place for 1 1/2 hours to let rest and rise. Dough should almost double in size.
- While the dough is rising, about 1 hour into the rising stage, preheat your oven to 450F and place your pizza stone, inverted baking sheet or covered cast iron pot into the oven to heat up. If you are using a loaf pan for steam, also place that into the oven, on the very bottom rack, off to one side of the oven.
- After the dough has risen fully, punch dough down and form back into a ball. Poke your finger on the surface – the dough should give into the pressure and slowly creep back up.
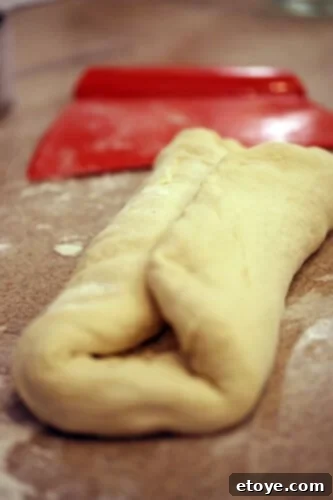
- Ok, here’s the fun part. Cut the dough into half & you’ll shape one half at a time (keep the other piece under wraps) Pick up the dough & stretch it out until it forms a big rectangle. Dust your work surface with flour and fold over the ends of the dough like this:

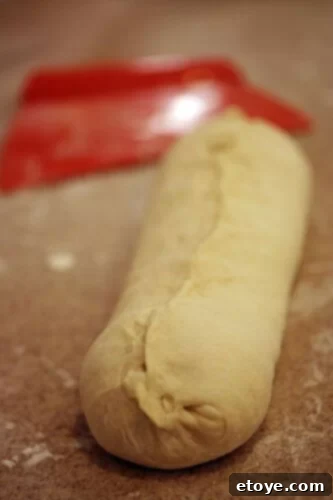
- Now do a little karate chop lengthwise down the middle of the bread and stretch out the long ends again. Fold over in half. The karate chop helps get the middle tucked inside. Pinch all sides shut. This is important you want to make sure that all ends including the short ends are pinched tightly to create a seal. This allows the bread to rise & expand up and out evenly. If the bread looks a little lopsided, you can try to fix it by letting it rest 5 minutes and gently stretching it out again. Just don’t knead the dough again & pop all the beautiful gas that took 1.5 hours to create!
- Here’s what it should look like:

- Turn the bread over so that it is seam side down. Cover the loaf with a damp kitchen towel. Repeat with the other dough ball. Leave the loaves to rest on your well-floured pizza peel or cutting board for 30 minutes.
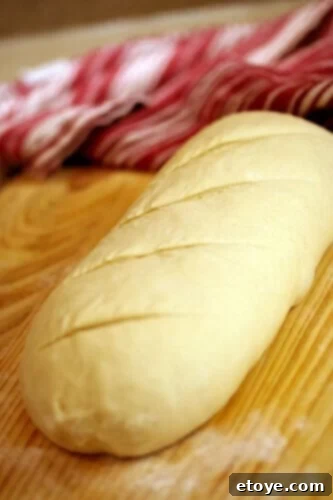
- After bread is done rising, take a sharp paring knife and make 3-4 shallow, diagonal slashes on the surface of the loaf. This allows the steam in the bread to escape so that it expands evenly during the baking process:

- When you are ready to bake, remove your baking vessel from oven. Carefully slide the gorgeous loaf into or onto your baking vessel.
- If you are using pizza stone or inverted baking sheet: You can probably fit both loaves on it at the same time, just leave at least 6-8″ of space between the loaves.
- Get a 1/2 cup of water ready next to the stove. Open the stove, put your bread in the oven and throw the water on the oven floor or in the pre-heated loaf pan. Immediately close the oven door. This creates your steam.
- Bake 20-25 minutes. Check temperature of the bread internal temperature should read 190-200F. Remove and let cool before cutting into it.
- If you are using a long cast-iron pot or covered baker: Before closing the lid on your pot/baker, put 1/4 cup of water directly in the pot. Cover immediately. Put pot in oven.
- Bake 10 minutes. Remove lid of pot. Bake another 14 minutes. Check temperature of the bread internal should be 190-200F.
- Remove and let cool before cutting into it. Repeat with other loaf. (For convection ovens- bake 8 min covered, 10-12 min uncovered.
- Check temperature of bread) To re-crisp the crust, put in 375F oven for 5 minutes. Eat one loaf, share the other loaf with a friend!

Frequently Asked Questions About Baking French Bread
Here are answers to common questions that arise when baking this delicious French bread:
- How do I know when my bread is perfectly baked?
- The bread is done when it boasts a beautiful golden-brown crust and sounds hollow when gently tapped on the bottom. For precise results, insert a digital thermometer into the center of the loaf; it should read between 190-200°F (88-93°C) for the ultimate texture and doneness.
- Can I transform this French bread into garlic bread or French bread pizza?
- Absolutely! This versatile French bread is ideal for both. For classic garlic bread, simply mix softened butter with finely minced garlic, a pinch of salt, and some fresh parsley. Spread generously over slices of bread, then broil until golden brown and fragrant. For French bread pizza, halve the loaf lengthwise, spread with your favorite pizza sauce, sprinkle with cheese, and add your preferred toppings. Bake until the cheese is bubbly and melted, and the crust is crisp.
- My bread didn’t rise significantly during the first rise. What could have gone wrong?
- A lack of rise can be attributed to several factors. The most common culprits include inactive or old yeast, insufficient warmth during the proofing stage, or inaccurate ingredient measurements. Always ensure your yeast is fresh by checking its expiration date or proofing it separately in warm water with a pinch of sugar. Additionally, make sure the dough is placed in a warm, draft-free environment (around 75-80°F or 24-27°C) to facilitate optimal yeast activity.
- Is it essential to use a pizza stone or a cast-iron pot for this recipe?
- While a pizza stone or cast-iron pot certainly enhances the bread’s crust by providing consistent, intense heat, they are not strictly mandatory. You can still achieve excellent results using a sturdy, thick baking sheet. The critical element is to create steam in the oven as the bread bakes, regardless of your chosen vessel. This steam is what contributes to the characteristic thin, crispy, and delightful exterior of classic French bread.
- How should I store homemade French bread to keep it fresh?
- For best results, consume your homemade French bread within 1-2 days. Store it at room temperature, wrapped in a clean kitchen towel or placed in a paper bag to allow the crust to breathe. Avoid plastic bags, as they can trap moisture and make the crust soggy. For longer storage, you can freeze a fully cooled loaf. Wrap it tightly in plastic wrap, then in foil, and freeze for up to a month. Thaw at room temperature and refresh in a 375°F (190°C) oven for a few minutes to restore its crispiness.
- Can I use all-purpose flour instead of bread flour?
- While bread flour is highly recommended due to its higher protein content, which develops stronger gluten and contributes to the signature chewy texture of French bread, you can substitute with all-purpose flour in a pinch. However, be aware that the resulting loaf might have a slightly less chewy crumb and a softer crust. If using all-purpose flour, you might need to adjust the water slightly as its absorption properties can differ.
Curious About No-Knead Bread?
If you’re fascinated by the world of easy bread making, you might enjoy exploring my other popular method: No Knead Bread. It’s so simple, even my then 4-year-old son, Andrew, managed to bake it with great success!
My 4-Year Old Son, Andrew Bakes No Knead Bread
