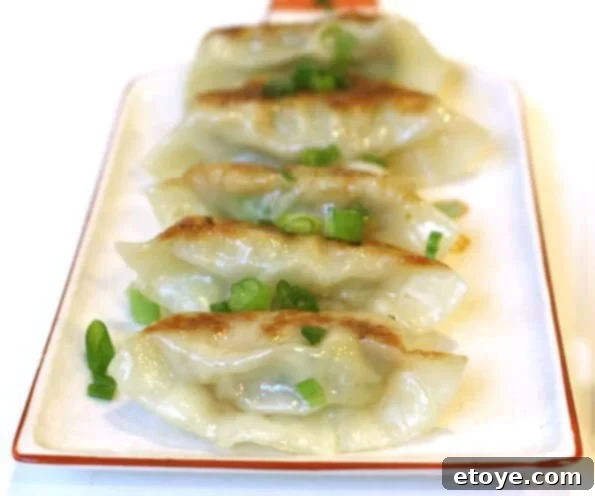
Homemade Gyoza Recipe: Master Japanese Pan-Fried Dumplings
Embark on a culinary journey to Japan with this incredible Gyoza recipe! These pan-fried dumplings, beloved for their perfectly golden, crispy bottoms and tender, juicy fillings, are a true delight. Whether you’re planning a fun weeknight dinner or an impressive appetizer for your next gathering, homemade gyoza offers an authentic taste experience that’s surprisingly simple to achieve.
This perfected Gyoza recipe draws inspiration and insights from Rachael, also known as La Fuji Mama, whose expertise has helped refine the flavors and techniques for an truly exceptional result.
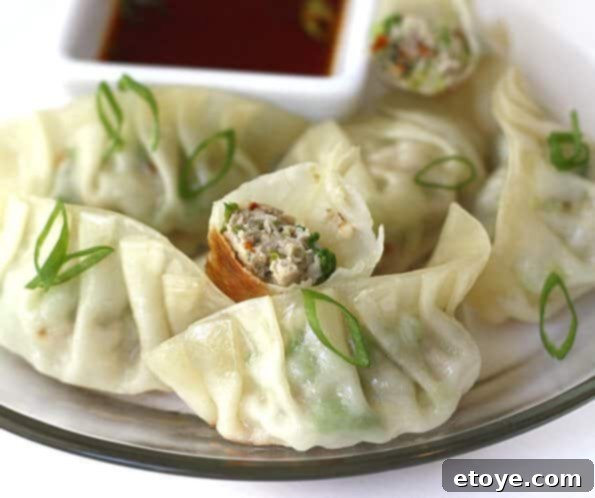
Why You’ll Love This Authentic Gyoza Recipe
Gyoza isn’t just a meal; it’s an experience. Our recipe delivers an irresistible combination of textures and flavors, making it a household favorite and a crowd-pleaser for any occasion. Here’s why these Japanese pan-fried dumplings will become a staple in your kitchen:
- **Effortlessly Elegant:** While they might look intricate with their beautiful pleats, this recipe makes crafting gyoza an approachable and enjoyable process, even for beginner cooks.
- **Perfect for Entertaining:** Gyoza makes an excellent appetizer or main course for dinner parties. They can be prepared in advance, allowing you more time to enjoy with your guests.
- **A Symphony of Textures:** Experience the delightful contrast between the wonderfully crispy, golden-brown exterior and the savory, tender, and juicy filling inside. This unique texture combination is what sets gyoza apart.
- **Irresistible Dipping Sauce:** Every batch of gyoza comes complete with a simple yet incredibly addictive dipping sauce that perfectly complements the rich flavors of the dumplings.
- **Customizable Flavors:** Easily adjust the filling to your preference, from adding a touch more spice to experimenting with different vegetables.
Understanding the Delicious World of Gyoza
Before diving into the recipe, let’s explore what makes gyoza so special. The journey of these beloved dumplings begins in China, where they are known as *Jiaozi* (餃子). These traditional Chinese dumplings consist of a ground meat and vegetable filling encased in a thinly rolled piece of dough, typically sealed by pressing the edges together. *Jiaozi* can be prepared in various ways: boiled (水餃), steamed (蒸餃), pan-fried (煎餃, often called *potstickers* in English), or deep-fried (炸餃子).
When *Jiaozi* made its way to Japan, it evolved into what we now know as *Gyoza*. While sharing a common ancestry, Japanese gyoza often features thinner wrappers and a more finely minced filling, distinguishing its texture and taste profile. The preferred cooking method in Japan is typically pan-frying, which creates the signature crispy bottom that is so highly prized.
Essential Ingredients for Your Homemade Gyoza
Crafting delicious gyoza begins with fresh, high-quality ingredients. Here’s what you’ll need to bring these savory Japanese pan-fried dumplings to life:
For the Flavorful Filling:
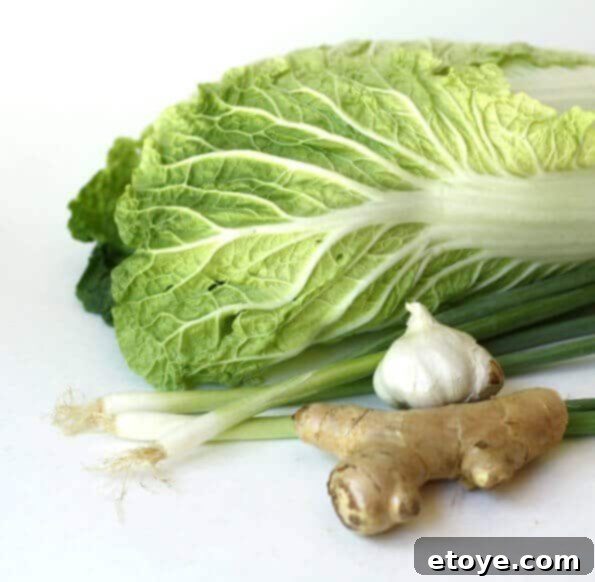
- **Napa Cabbage:** Approximately 4 cups loosely packed, minced (focus on the soft, green, leafy parts for best texture and flavor). Napa cabbage is essential for its subtle sweetness and ability to release moisture, preventing a dry filling.
- **Kosher Salt:** 1 teaspoon (or 1/2 teaspoon table salt). Used to draw out excess moisture from the cabbage, ensuring your dumplings are firm, not soggy.
- **Ground Pork:** 10 ounces. The traditional choice for its rich flavor and tender texture. Leaner meats can be used, but pork offers superior juiciness.
- **Freshly Grated Ginger:** 2 teaspoons (grated with a microplane for fine texture). Adds a vibrant, pungent warmth that is characteristic of Japanese cuisine.
- **Garlic Cloves:** 3 cloves, finely minced. Provides an aromatic depth that perfectly complements the pork and ginger.
- **Green Onion Stalks:** 1 stalk (green part only, minced). Offers a fresh, mild onion flavor and a touch of color.
- **Japanese Miso Paste (Aka Miso):** 2 teaspoons (red/dark miso paste). This fermented soybean paste adds a deep umami flavor and a slightly salty, earthy complexity.
- **Asian Sesame Oil:** 1 teaspoon. Contributes a nutty aroma and a distinct flavor that ties all the ingredients together.
- **Red Asian Chili Powder (Optional):** 1/4 teaspoon. For those who enjoy a subtle kick, this adds a gentle warmth to the filling.
- **Sugar:** 1/4 teaspoon. A small amount helps balance the savory and salty elements, enhancing the overall flavor profile.
Wrapper Essentials:
- **Dumpling Wrappers:** 40 round wrappers. These thin, pliable dough circles are crucial for achieving the perfect gyoza texture. If round wrappers aren’t available, square wonton wrappers can be cut into circles.
For Cooking and Dipping:
- **Cooking Oil:** 4 tablespoons (like canola or vegetable oil). Used for pan-frying to create the crispy bottom.
- **Water:** 3/4 cup. Essential for steaming the dumplings to cook the filling thoroughly and soften the wrappers.
Dipping Sauce:
- **Soy Sauce:** 6 tablespoons. The savory base of the dipping sauce.
- **Rice Vinegar:** 3 tablespoons. Adds a bright, tangy counterpoint to the rich dumplings.
- **Chili Oil or Asian Sesame Oil:** Several drops. Customize the heat and nutty flavor to your liking.
Step-by-Step Guide to Crafting Perfect Homemade Gyoza
Making gyoza is a fun and rewarding process. Follow these detailed steps to create your own batch of irresistible Japanese pan-fried dumplings:
1. Preparing the Flavorful Filling:
Begin by preparing your Napa cabbage. In a large bowl, combine the minced cabbage with 1 teaspoon of kosher salt. Toss well and let it sit for about 10 minutes. This crucial step draws out excess moisture from the cabbage, preventing your gyoza filling from becoming watery and mushy. After 10 minutes, using both hands or a clean cheesecloth, firmly squeeze the cabbage to drain and discard as much liquid as possible. Transfer the squeezed cabbage to a deep bowl.
Now, add the remaining filling ingredients to the bowl: ground pork, freshly grated ginger, minced garlic, minced green onion (green parts only), Japanese red miso paste, Asian sesame oil, optional red Asian chili powder, and sugar. Mix everything together thoroughly with your hands until all ingredients are evenly distributed. Don’t be shy; getting your hands dirty ensures a well-combined and flavorful filling.
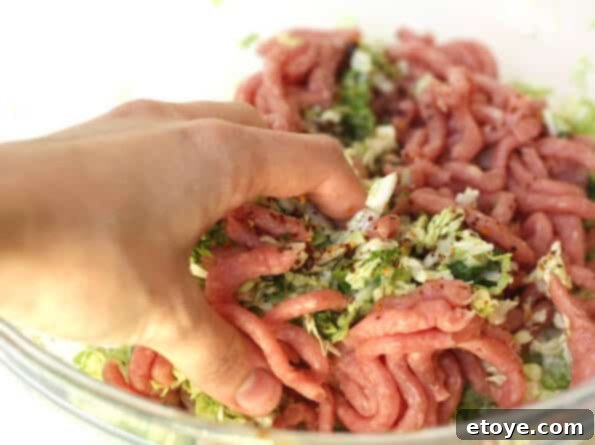
For a truly tender filling that sticks together perfectly, we’ll employ Elizabeth Andoh’s “baseball practice” technique. Scoop the mixture into a ball with your hands, lift it, and then throw it back into the bowl with a bit of force. Repeat this motion several times. This action tenderizes the meat and helps the mixture bind together, ensuring a cohesive and delicious filling.
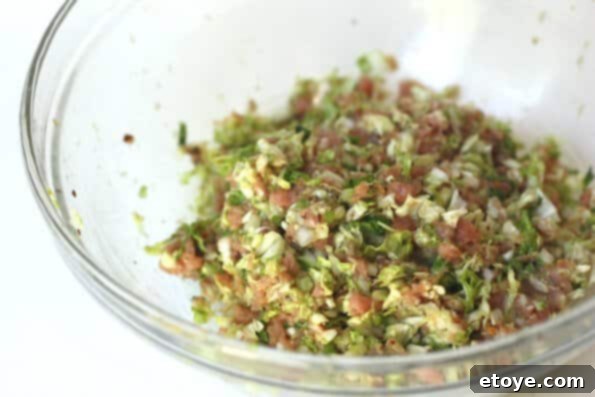
2. Mastering the Art of Gyoza Wrapping:
This is where the magic happens! Have a small bowl of cold water ready. Lay a single dumpling wrapper flat on a dry work surface. Place about a teaspoon of the meat mixture directly in the center of the wrapper. Dip your fingertip in the cold water and trace a line along half of the edge of the round wrapper. This moisture will help seal the dumpling.
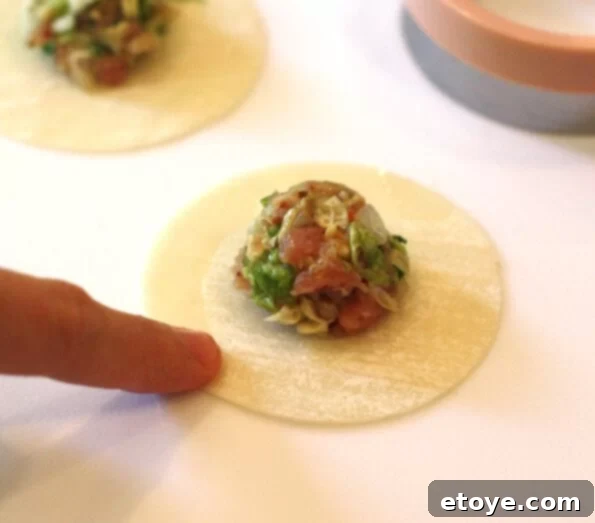
Fold the wrapper in half over the filling, creating a half-moon shape, and pinch it firmly in the very center to seal that initial spot.
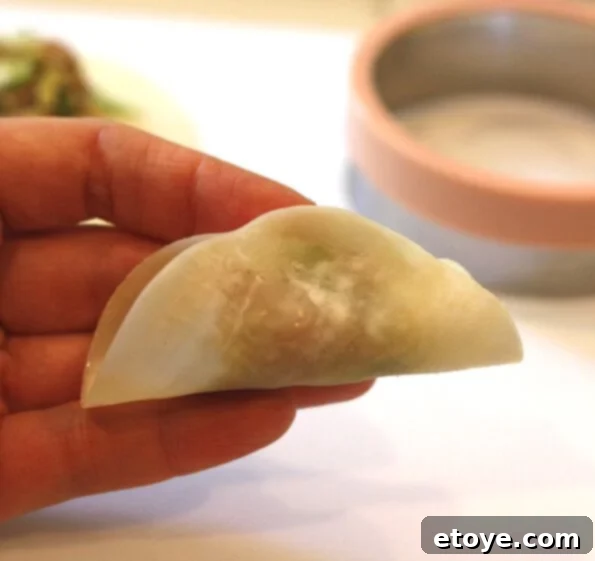
Now for the pleating! Holding the pinched middle spot with your left hand, create a small pleat in the top part of the wrapper, pressing it against the flat, unpleated edge of the wrapper at the back. Continue to make two or three more pleats to the right of the first pleat, always pressing the folded edge to the flat back edge. Then, switch to the other side (to the left of the pinched middle) and repeat the pleating process.
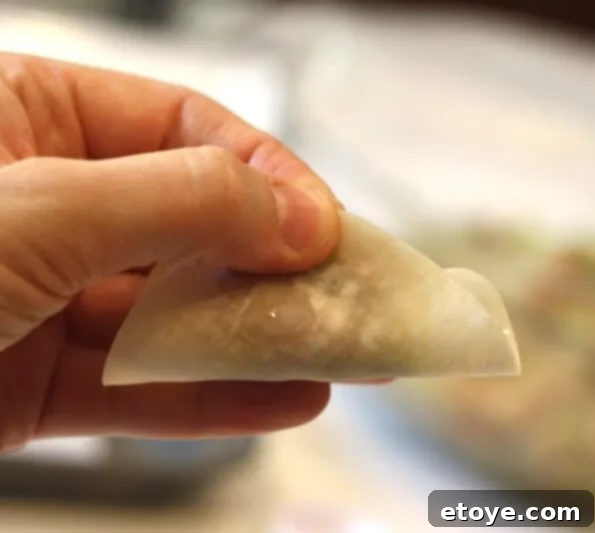
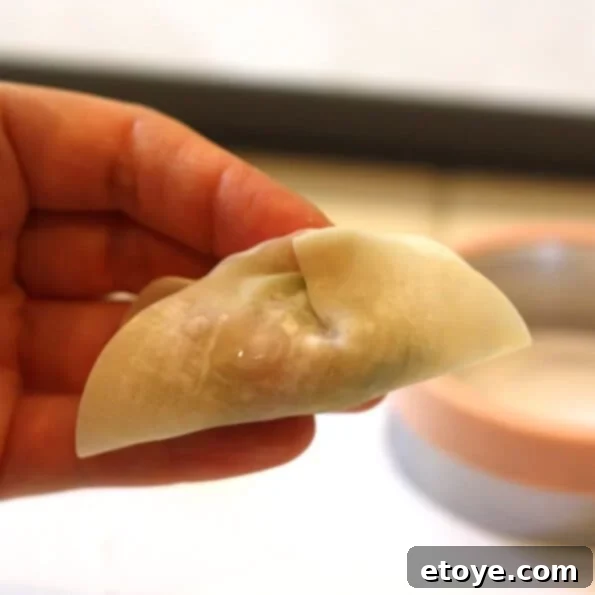
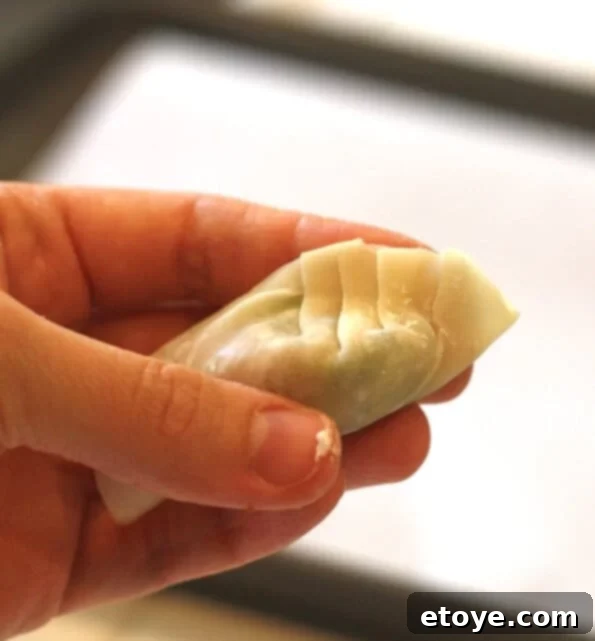
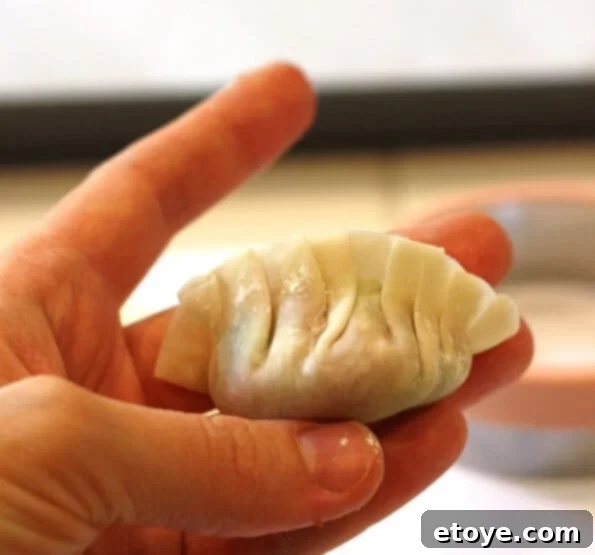
Once your dumpling is beautifully pleated, set it aside with the pleated-wrapper edge facing up. Repeat this process until all 40 wrappers are filled and pleated. This step can be a wonderful activity to share with family or friends – it makes the time fly by!
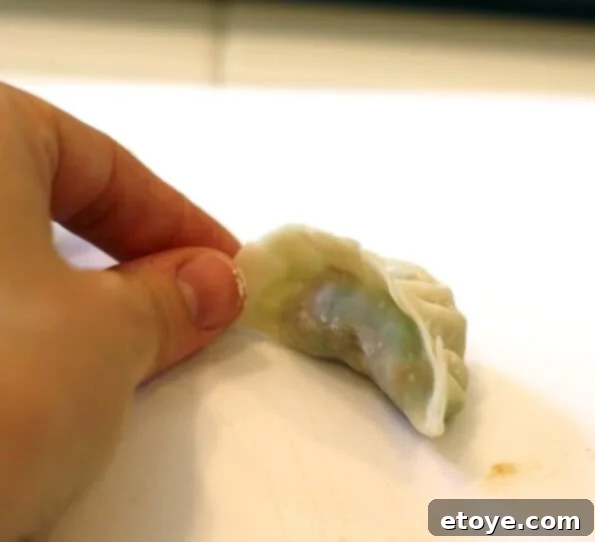
3. Cooking Your Gyoza to Golden Perfection:
Once all your gyoza are assembled, you have a few options: cover them with plastic wrap and refrigerate for a couple of hours if cooking later, freeze them for long-term storage, or cook them immediately for instant gratification.
To cook, heat 1 tablespoon of cooking oil in a large skillet with a tight-fitting lid over medium-high heat. Carefully arrange as many dumplings as can fit in a single layer without touching, with the pleated-wrapper edge facing up (the flat side down). Cook for about 3 minutes, or until the bottoms are a beautiful golden brown and crispy. You can lift one or two dumplings to check their progress.
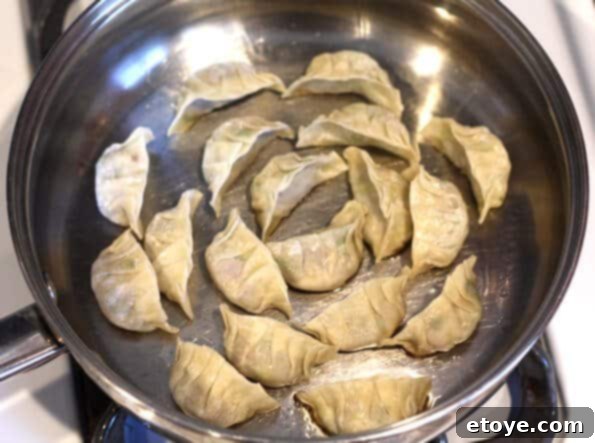
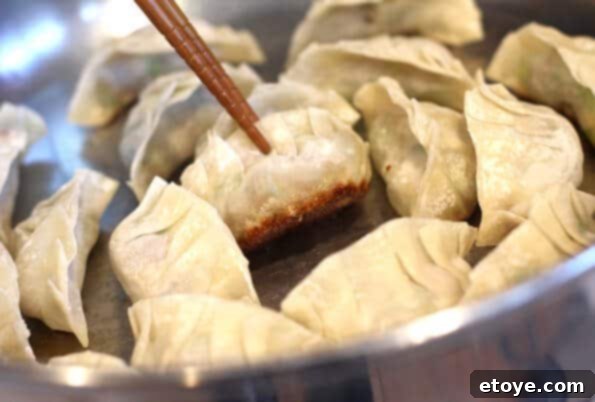
Once the bottoms are perfectly browned, use the skillet lid as a shield and carefully pour in 1/4 cup of water. As the sizzling and splattering subside, drizzle 1 teaspoon of cooking oil around the edge of the skillet. Immediately place the lid on the skillet to trap the steam, then quickly reduce the heat to maintain a bare simmer. The steam will cook the filling and soften the top part of the wrappers.
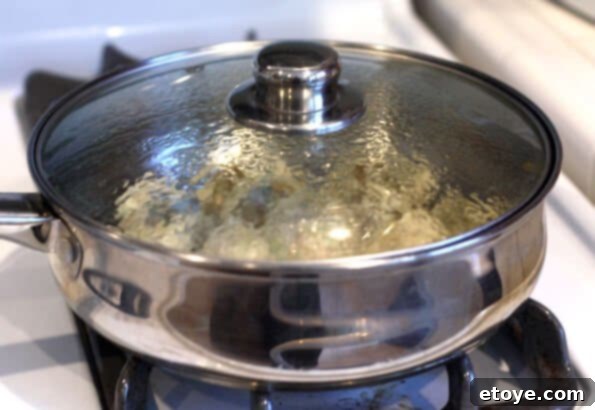
Check the dumplings after 2 minutes. The wrappers should appear slightly translucent, and the meat filling should feel firm when lightly pressed with a spoon. Remove the lid and increase the heat slightly. Continue to cook until all the water has evaporated and only the oil remains (typically about 2 more minutes). You’ll hear a distinct sizzling sound as the water evaporates. Gently shake the skillet; the dumplings should slide easily. If they stick, briefly remove from heat and replace the lid to create a little more steam, then try again.
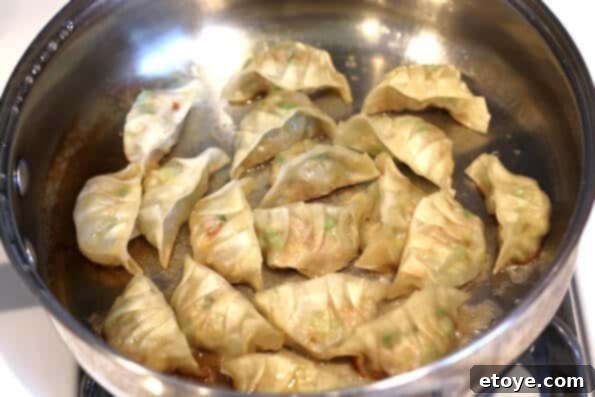
Remove the cooked dumplings from the skillet using a broad, flexible spatula. For presentation, you can flip them over so the seared, crispy bottom faces up. Cook any remaining dumplings in batches using the same method. Serve hot with your freshly prepared dipping sauce.
4. Whipping Up the Dipping Sauce:
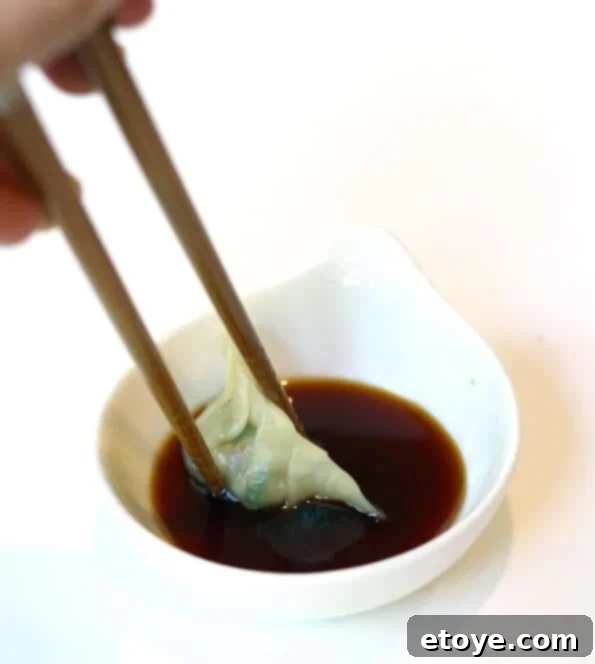
While your gyoza are cooking, prepare the simple yet essential dipping sauce. In a small bowl, whisk together the soy sauce, rice vinegar, and a few drops of chili oil or Asian sesame oil. Adjust the amount of chili oil to your preferred level of heat.
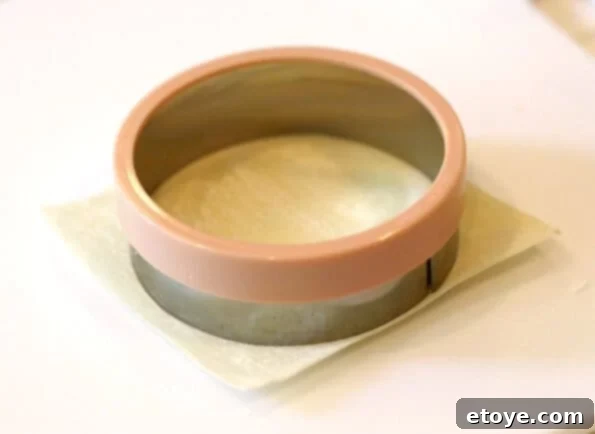
If you’re unable to find round gyoza wrappers, don’t worry! Square wonton wrappers can be easily transformed into round ones by using a large biscuit cutter to cut them into circles.
Expert Tips for Gyoza Success
Achieving gyoza perfection is easier with a few insider tips:
- **Wrapper Options:** While store-bought wrappers are convenient, you can also make your own wrappers from scratch for an even more authentic experience. If using square wonton wrappers, simply cut them into circles with a large biscuit cutter to mimic traditional gyoza shape.
- **The Crispy Bottom is Key:** Always start by frying the gyoza on their flat side (pleats up) until a deep golden brown. This is what gives gyoza its characteristic crispy texture.
- **Freezing for Later:** Gyoza is excellent for meal prep! To freeze uncooked gyoza, arrange them on a baking sheet, ensuring space between each to prevent sticking. Place the sheet in the freezer until the dumplings are solid. Once frozen, transfer them to a freezer-safe bag or container and store for up to a month. When cooking from frozen, do not defrost; simply cook them as usual, adding an extra 1-2 minutes to the steaming time.
- **Miso Paste Substitutions:** If you can’t find *aka miso* (red/dark miso paste), you have a couple of options. You can omit it entirely, but if you do, increase the kosher salt in the filling by 1/2 teaspoon to compensate for the lost savory depth. Alternatively, you can substitute with *shiro miso* (white miso paste). If using shiro miso, omit the sugar from the filling recipe and increase the kosher salt by 1/4 teaspoon, as white miso is generally sweeter and less intensely salty than red miso.
- **Don’t Overcrowd the Pan:** Cook gyoza in batches if necessary, ensuring there’s enough space between each dumpling. Overcrowding can lower the pan temperature, resulting in steamed rather than properly pan-fried and crispy bottoms.
- **Achieving the Perfect Crisp:** After steaming, ensure all water has evaporated. The sizzling sound indicates the oil is doing its work to re-crisp the bottoms. A quick shake of the pan should free the dumplings easily.
Serving Suggestions & Pairings
Gyoza are incredibly versatile and can be enjoyed in many ways. Serve them hot with the tangy dipping sauce as a standalone appetizer, or make them part of a larger meal. They pair wonderfully with:
- Steamed white rice for a simple, satisfying meal.
- A warm bowl of ramen or miso soup for a complete Japanese culinary experience.
- A crisp green salad with a light vinaigrette to balance the richness.
- Other Asian-inspired appetizers like spring rolls or edamame.
- As a side dish to teriyaki chicken or beef stir-fry.
Storage and Reheating Homemade Gyoza
Proper storage ensures you can enjoy your homemade gyoza at their best. Uncooked gyoza can be refrigerated for up to 2 hours before cooking or frozen as described in our “Expert Tips” section.
Cooked gyoza can be stored in an airtight container in the refrigerator for up to 3-4 days. To reheat, the best method is to pan-fry them again until crispy and heated through. You can also microwave them, but they may lose some of their crispy texture. For best results, a quick pan-fry or even air-frying them will bring back their delicious crunch.
More Delicious Dumpling Recipes to Explore
If you’ve fallen in love with making gyoza, there’s a whole world of dumplings waiting for you to discover! Expand your culinary skills with these fantastic recipes:
- Chinese Soup Dumplings Recipe (with Pork & Crab)
- Xiao Long Bao – Shanghai Steamed Soup Dumplings
- Steamed Siu Mai Dumplings
- Curried Beef Dumplings
We hope you enjoy making and savoring these incredible Japanese pan-fried dumplings. There’s nothing quite like the satisfaction of homemade gyoza!
Have you tried this Gyoza recipe? We’d love to hear about your experience! Feel free to leave a star rating and share your thoughts in the comments below!
Gyoza Recipe (Japanese Pan-Fried Dumplings)
Makes 40 dumplings
By Jaden |
4.80 from 10 votes
Prep Time: 40 mins |
Cook Time: 30 mins |
Total Time: 1 hr 10 mins
Course: Appetizer |
Cuisine: Japanese
Servings: 6 people |
Calories: 403 kcal
Ingredients
For the Gyoza Filling:
- 4 cups loosely packed, minced Napa cabbage (soft, green, leafy parts only)
- 1 teaspoon kosher salt (or 1/2 tsp table salt)
- 10 ounces ground pork
- 2 teaspoons freshly grated ginger (with a microplane grater)
- 3 cloves garlic (finely minced)
- 1 stalk green onion (green part only, minced)
- 2 teaspoon Japanese miso paste (red/dark miso paste)
- 1 teaspoon Asian sesame oil
- 1/4 teaspoon red Asian chili powder (optional)
- 1/4 teaspoon sugar
- 40 dumpling wrappers
For cooking the dumplings:
- 4 tablespoon cooking oil (like canola, vegetable)
- 3/4 cup water
Dipping Sauce:
- 6 tablespoons soy sauce
- 3 tablespoons rice vinegar
- Several drops of chili oil or Asian sesame oil
Instructions
- Toss the minced cabbage with the salt in a large bowl and let it sit for 10 minutes. Using both hands, or a cheese cloth, squeeze the cabbage firmly to drain and discard the excess water (to prevent your dumplings from becoming mushy). Transfer the cabbage to a deep bowl. Add the pork, ginger, garlic, green onion, miso, sesame oil, chili powder, and sugar. Mix everything together with your hands until all the ingredients are evenly distributed. Using your hands, scoop the mixture into a ball, lift it, and then throw it back into the bowl. Repeat several times to tenderize the meat and help the mixture stick together.
- Have a small bowl of cold water ready. Lay a dumpling wrapper on a dry work surface, and place a teaspoon of the meat mixture in the center of the wrapper. With a fingertip moistened with water, trace a line along half of the edge of the round wrapper. Fold the wrapper over to enclose the filling, and pinch the wrapper in the center to seal the edges together at that spot. Holding the filled half-circle in the left hand, pleat the top of the wrapper from the middle out, pressing it to the flat edge of the wrapper at the back. Set aside the stuffed dumpling with the pleated-wrapper edge up. Repeat to make 40 dumplings in all.
- In a large skillet with a tight-fitting lid, heat 1 tablespoon of the cooking oil over medium-high heat. Carefully place as many of the dumplings that can fit without touching in the skillet with the pleated-wrapper edge up. Cook the dumplings for 3 minutes, or until nicely browned on the bottom. Check the progress by lifting 1 or 2 dumplings by their pleated edge.
- Once the bottoms are nicely browned, use the skillet lid to shield yourself and carefully pour in 1/4 cup of the water. When the hissing and splattering die down, drizzle in 1 teaspoon of the cooking oil around the edge of the skillet. Place the lid on the skillet to trap in the moisture and then quickly lower the heat to keep the liquid at a bare simmer.
- Check the dumplings after 2 minutes. When the wrappers appear slightly translucent and the meat feels firm when pressed lightly with a spoon, remove the lid and raise the heat slightly. Continue to cook until all the water has evaporated and only the oil remains (about 2 minutes). Once you hear a sizzling sound, shake the skillet. The dumplings should slide about. If they seem to stick to the skillet, move the skillet away from the stove and replace the lid for a moment. Remove the dumplings from the skillet with a broad flexible spatula. If you’d like, flip them over so that the seared surface faces up. Cook the remaining dumplings the same way. Serve the dumplings hot accompanied by the dipping sauce.
- While the dumplings are cooking, make the dipping sauce by mixing the soy sauce, rice vinegar, and sesame/chili oil together in a small bowl.
Nutrition Information
(Per serving, approximate)
- Calories: 403 kcal
- Carbohydrates: 36 g
- Protein: 17 g
- Fat: 21 g
- Saturated Fat: 4 g
- Cholesterol: 38 mg
- Sodium: 1798 mg
- Potassium: 596 mg
- Fiber: 3 g
- Sugar: 2 g
- Vitamin A: 545 IU
- Vitamin C: 43.7 mg
- Calcium: 158 mg
- Iron: 3.1 mg
