Mastering Homemade Potato Chips: Crispy Perfection and Flavorful Dips
There’s a unique satisfaction that comes with creating a batch of perfectly crispy, golden-brown potato chips right in your own kitchen. Forget the store-bought bags; homemade potato chips offer an unparalleled freshness and a delightful crunch that simply can’t be matched. While it might seem like a culinary challenge, making your own potato chips is surprisingly easy, rewarding you with a snack that’s far superior in taste and texture.
This comprehensive guide will walk you through every step, from selecting the right potatoes to achieving that coveted “light as air” crispness, and even crafting a spectacular dip to elevate your chip experience. Get ready to impress your taste buds and your guests with this simple yet sensational snack!
Essential Equipment for Perfect Potato Chips
To achieve consistently thin and evenly cooked homemade potato chips, a few key pieces of equipment can make all the difference. While some items are highly recommended for optimal results, we’ll also discuss suitable alternatives to ensure you can embark on your chip-making journey with ease.
The Mandoline Slicer: Your Secret Weapon for Uniformity
The single most crucial tool for making excellent potato chips is a mandoline slicer. This ingenious device allows you to slice potatoes to an incredibly uniform thickness, which is absolutely essential for even frying and consistent crispness. Without a mandoline, achieving that perfect, paper-thin slice with just a knife is a tedious and often inconsistent task, leading to some chips burning while others remain undercooked.
My preferred choice for precision slicing is the Pampered Chef Mandoline, renowned for its razor-sharp blade and easily adjustable settings. For ideal chip thickness, set your mandoline to approximately 1/16th of an inch (about 1.5mm). Remember, safety first! Always use the safety guard that comes with your mandoline to protect your fingers from the extremely sharp blade.
Deep Fryer vs. Traditional Pot: Frying Your Crispy Chips
While a dedicated deep fryer offers precise temperature control and can make the frying process a bit more hands-off, it’s certainly not a strict requirement. Many home cooks achieve fantastic results using a large, heavy-bottomed pot on the stovetop.
- Deep Fryer: A deep fryer provides consistent oil temperature, which is paramount for even cooking and preventing greasy chips. Many models also come with convenient baskets for easy batch frying and removal.
- Large Heavy Pot & Thermometer: A sturdy cast iron or stainless steel pot with high sides will hold heat well and minimize splatter. A reliable cooking thermometer (such as a candy or deep-fryer thermometer) is absolutely essential to accurately monitor the oil temperature. Maintaining the correct temperature is vital for achieving optimal crispness and ensuring a safe frying environment.
Regardless of your chosen frying method, safety is paramount. Always ensure you have a clear, dry workspace, keep children and pets away from the hot oil, and have a lid nearby to smother any potential oil fires. Never leave hot oil unattended.
The Golden Rule: Removing Excess Starch for “Light as Air” Chips
The biggest secret to making “light as air” potato chips that are incredibly crispy, not chewy or soggy, lies in one simple yet critical step: soaking the potato slices. Potatoes are naturally rich in starch, and removing this excess starch is crucial. It prevents the slices from sticking together during frying, browning too quickly on the outside while remaining soft inside, and ultimately becoming disappointingly soggy. This process is truly non-negotiable for achieving that coveted, restaurant-quality crunch that defines a perfect potato chip.
Soaking Methods for Optimal Crispness
- The Quick Soak (30 minutes): After carefully slicing your potatoes with the mandoline, immediately place them in a large bowl filled with plenty of cold water. Gently agitate or rub the slices together for a minute or two to help dislodge surface starch. Let them soak for at least 30 minutes. You’ll observe the water becoming cloudy, which is a clear indication that the starch is being effectively released.
- The Overnight Soak (Recommended for Best Results): For truly superior crispness and an even lighter texture, consider soaking your potato slices overnight in the refrigerator. This extended soak allows even more starch to leach out. If soaking for more than a few hours, it’s a good practice to change the water at least once to ensure maximum starch removal.
Crucial Drying: Preventing Splatter and Promoting Crispness
After the soaking process, thoroughly draining and meticulously drying your potato slices is perhaps the most critical step before they hit the hot oil. Water and hot oil are a dangerous combination, as even a small amount of moisture can lead to violent splattering, potential burns, and a messy kitchen. Furthermore, excess moisture will cause the chips to steam rather than fry, resulting in a less crispy, often rubbery outcome.
Here’s how to ensure your potatoes are perfectly dry:
- Initial Drain: Pour the soaked potato slices into a colander and allow them to drain thoroughly for a few minutes, shaking the colander gently.
- Pat Dry with Towels: Spread the potato slices in a single layer over several layers of clean paper towels or a thick, clean kitchen towel. Place more towels on top and firmly press down to absorb as much surface moisture as possible. You may need to repeat this process with fresh, dry towels until the slices feel completely dry to the touch. Don’t skip this step – it’s crucial for both safety and chip quality.
Remember: Any residual water will cause the oil to splatter vigorously, which is not only messy but also genuinely dangerous. A little extra effort here goes a long way in ensuring a safe, enjoyable, and successful deep-frying experience, yielding wonderfully crispy homemade potato chips.
The Art of Frying Homemade Potato Chips
With your potatoes perfectly prepped and thoroughly dry, it’s time for the exciting part: frying! Achieving that perfect golden-brown crispness requires careful attention to oil temperature and proper batch management.
Choosing Your Oil and Setting the Optimal Temperature
- Oil Choice: Opt for an oil with a high smoke point to ensure it can withstand the high temperatures required for deep frying without breaking down or imparting undesirable flavors. Excellent choices include peanut oil, canola oil, vegetable oil, or sunflower oil.
- Temperature Control: Heat your chosen frying oil to precisely 375°F (190°C). Use your deep fryer’s built-in thermostat or a reliable cooking thermometer to monitor the temperature closely and accurately. If the oil is too cool, the chips will absorb too much oil, resulting in a greasy, heavy texture. If it’s too hot, they’ll burn quickly on the outside before crisping through, leaving them brittle and bitter.
Frying in Batches for Even Cooking
Do not, under any circumstances, overcrowd the fryer. Frying too many potato slices at once will drastically lower the oil temperature, leading directly to soggy, oily chips. Instead, fry your potato slices in small, manageable batches. The ideal batch size depends on the dimensions of your fryer or pot, but generally, it’s enough slices to form a single layer without overlapping, allowing each chip ample space to cook evenly.
Carefully place a batch of dried potato slices into the hot oil. They should sizzle immediately upon contact. Fry for several minutes, stirring occasionally with a slotted spoon or spider skimmer to prevent sticking and ensure uniform cooking, until they turn a beautiful golden brown and the vigorous bubbling largely subsides (indicating most of the moisture has evaporated).
Draining and Seasoning for Maximum Flavor
Once the chips are golden and perfectly crispy, swiftly remove them from the hot oil using a slotted spoon or spider skimmer. Immediately transfer them to a baking sheet lined with several layers of paper towels, topped with a wire rack. This setup allows excess oil to drip away efficiently, preventing the chips from becoming greasy. While the chips are still piping hot, generously season them with fine sea salt. The residual heat helps the salt adhere better and melt slightly, ensuring every chip is perfectly seasoned.
Beyond Salt: Creative Seasoning Ideas for Your Homemade Chips
While classic salted potato chips are undeniably delicious and a timeless favorite, don’t hesitate to experiment with different seasonings to add a unique and exciting twist to your homemade creations. Here are a few inspiring ideas to elevate your chip game:
- Spicy Kick: For those who love a bit of heat, a light dusting of cayenne pepper, chili powder, or smoked paprika will add a warm, smoky spice.
- Garlic & Herb Infusion: Combine garlic powder, onion powder, and a mix of dried herbs like parsley, oregano, or rosemary for an aromatic and savory profile.
- Cheesy Delight: Sprinkle finely grated Parmesan cheese immediately after salting, while the chips are still hot enough to melt it slightly, creating a delectable cheesy crust.
- Sweet & Salty Surprise: For an unexpected treat, dust your chips with a blend of sugar and cinnamon – a delightful dessert-chip experience.
- Robust BBQ Blend: Create your own barbecue seasoning by combining brown sugar, paprika, chili powder, garlic powder, and onion powder for a deeply flavorful and robust BBQ profile.

The Perfect Companion: Sweet Smoky Paprika & Cumin Aioli
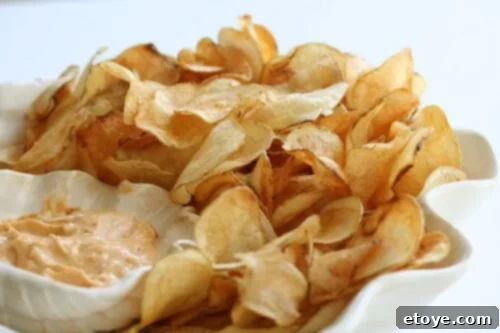
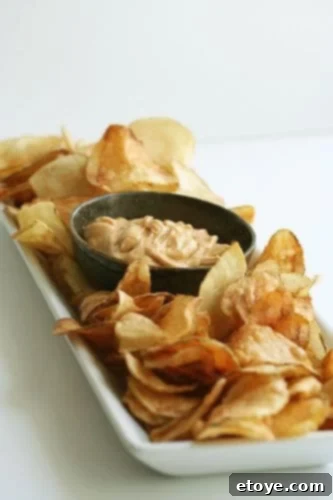
No batch of crispy potato chips is truly complete without a fantastic dip to complement its savory crunch. While ketchup remains a beloved classic (and as the saying goes, it counts as a vegetable serving!), we’re going to introduce you to a truly exceptional pairing that will elevate your homemade chips to gourmet status: a Cumin-Sweet Smoked Paprika Aioli. This dip, inspired by the renowned Martini’s & Tapas Restaurant, offers a unique and surprisingly harmonious blend of earthy cumin and sweet, smoky paprika that perfectly complements the salty crispness of the chips. The combination is a flavor revelation that will undoubtedly leave you craving more.
While traditional aioli is typically made from scratch with egg yolks, garlic, and olive oil, we’re taking a convenient shortcut using good quality store-bought mayonnaise. This clever trick allows you to whip up this incredibly flavorful dip in mere minutes, ensuring you can enjoy your fresh, hot chips without any delay.
Recipe: Light as Air Potato Chips with Sweet Smoky Paprika & Cumin Aioli

Light as Air Potato Chips with Sweet Smoky Paprika & Cumin Aioli
Prep Time: 5 minutes
Cook Time: 10 minutes
Servings: 2
Ingredients
For the Chips:
- 1 large russet potato for every 2 people
- Oil for deep frying (peanut, canola, vegetable, or sunflower)
- Fine sea salt, to taste
For the Dip (Sweet Smoky Paprika & Cumin Aioli):
- 1 cup good quality mayonnaise
- 1 teaspoon ground cumin
- 1 teaspoon sweet smoked paprika
- 1 large clove garlic, minced with a garlic press (or finely grated)
- 1/2 teaspoon salt (or to taste)
- Freshly ground black pepper, to taste
Instructions
For the Chips:
- Using a mandoline slicer set at approximately 1/16th inch thickness, carefully slice the potatoes.
- Immediately place all sliced potatoes in a large bowl of cold water. Let them soak for at least 20 minutes, or for best results, soak them overnight in the refrigerator, changing the water once. This step removes excess starch for ultimate crispness.
- When ready to fry, heat your deep fryer or heavy-bottomed pot to 375°F (190°C) with enough oil for deep frying.
- Thoroughly drain the potato slices from the water. Spread them in a single layer on several layers of paper towels or a clean kitchen towel. Pat them super dry with additional towels. Any residual water will cause oil to splatter dangerously.
- Carefully place a batch of dried potato slices into the hot oil. Do not overcrowd the fryer; fry in batches to maintain oil temperature. Ensure slices are submerged and not sticking together.
- Fry until the chips turn a beautiful golden brown and become crispy, typically 3-5 minutes per batch.
- Using a slotted spoon or spider skimmer, remove the chips from the oil and transfer them to a baking sheet lined with a wire rack to drain excess oil.
- While the chips are still hot, generously season them with fine sea salt. Repeat the process for remaining potato slices.
For the Dip:
- In a medium bowl, combine the mayonnaise, ground cumin, sweet smoked paprika, minced garlic, salt, and freshly ground black pepper.
- Stir well until all ingredients are thoroughly combined and the dip is smooth.
- Taste and adjust seasoning as needed. If you have time, let the dip sit in the refrigerator for 30 minutes to allow the flavors to meld, though it’s delicious immediately.
Storage Tips for Homemade Chips
Homemade potato chips are undeniably best enjoyed fresh, right off the rack. However, if by some miracle you have leftovers (and that’s a big “if”!), they can be stored for another day while retaining a good portion of their crispness. The key to successful storage is to avoid trapping moisture, which is the nemesis of a crispy chip.
- Avoid Airtight Containers: Do not cover your chips tightly or store them in airtight containers. This common mistake traps steam and moisture, which will inevitably lead to soggy, unappealing chips.
- Breathable Storage: The most effective method is to leave your chips in an open bowl and loosely drape a paper towel or a clean, thin kitchen towel over them. This simple technique allows for crucial air circulation while still protecting them from dust and airborne particles.
- Reviving Soggy Chips: If your chips have lost some of their desired crunch over time, don’t despair! You can often revive them by spreading them in a single layer on a baking sheet and heating them in a preheated oven at 300°F (150°C) for 5-10 minutes, or until they crisp up again. Keep a very close eye on them during this process to prevent them from burning.
As for their longevity, homemade chips generally maintain a good crunch for about 24 hours. They make a surprisingly delightful breakfast snack (especially when dipped in ketchup, for a quick and easy serving of “vegetables”!).
Troubleshooting Common Potato Chip Issues
Even with careful preparation, you might encounter a few hiccups on your journey to perfect homemade potato chips. Here’s how to troubleshoot common issues and ensure your next batch is a resounding success:
- Soggy or Chewy Chips:
- Cause: This is often due to insufficient starch removal, not drying the potato slices thoroughly enough before frying, an oil temperature that is too low, or overcrowding the fryer.
- Solution: Ensure a generous soaking period (preferably overnight) and meticulous drying. Maintain the oil temperature accurately at 375°F (190°C) and always fry in smaller batches to prevent temperature drops.
- Burnt or Dark Chips:
- Cause: The oil temperature might be too high, or the chips could have been fried for too long.
- Solution: Monitor your oil temperature closely with a thermometer and reduce the heat if necessary. Remove chips as soon as they reach a beautiful golden brown color, even if they don’t look fully crispy in the oil (they will crisp up more as they cool).
- Chips Sticking Together:
- Cause: This usually points to insufficient starch removal or once again, overcrowding the fryer during the frying process.
- Solution: Extend the soaking time for your potato slices and gently rub them in the water to release more starch. Fry in very small batches, ensuring each individual slice has ample space to move freely and cook without adhering to its neighbors.
- Lack of Flavor:
- Cause: The most common reason for bland chips is not enough salt or seasoning applied immediately after frying.
- Solution: Season your chips generously while they are still hot from the fryer. The heat helps the salt (or any other seasoning) adhere better and melt slightly, infusing flavor into every bite.
Embrace the Homemade Chip Experience
Making homemade potato chips is more than just a culinary task; it’s an experience. The comforting aroma of freshly fried potatoes filling your kitchen, the deeply satisfying crunch with every bite, and the incredible ability to customize flavors to your exact preference make it a truly rewarding endeavor. With the right tools, a little patience during the crucial soaking and drying stages, and a keen eye on safety, you’ll soon be creating batches of “light as air” potato chips that will undoubtedly become a cherished staple in your home.
So go ahead, slice those potatoes, heat that oil, and prepare for a snack revelation that will change the way you think about potato chips forever! If you’ve tried this recipe and loved it, we’d love to hear from you! Share your thoughts, tips, and experiences in the comments section below.
