Welcome to the delightful world of effortless baking, where the magic of homemade bread comes to life with minimal fuss. Today, we’re diving into a revolutionary recipe that promises the rustic charm and irresistible crunch of artisanal baguettes without the traditional labor-intensive kneading process. This is the celebrated No-Knead Baguette recipe, often referred to as “stecca,” a technique popularized by the visionary baker Jim Lahey of New York City’s renowned Sullivan Street Bakery. Prepare to transform your kitchen into a sanctuary of heavenly aromas and discover just how simple it can be to bake extraordinary bread.
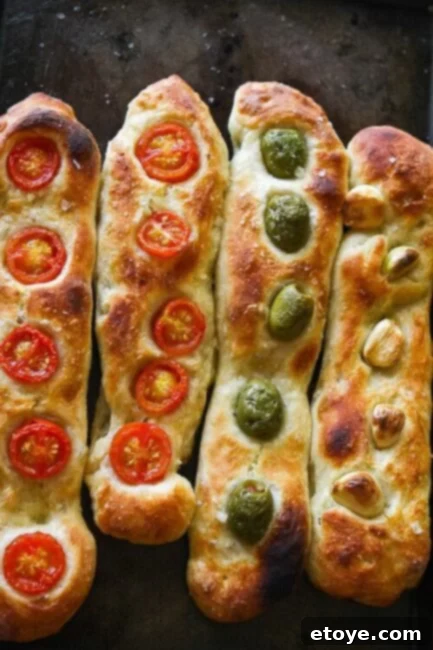
The Art of Effortless Baking: Jim Lahey’s No-Knead Baguette (Stecca)
Jim Lahey’s no-knead method revolutionized home baking, proving that exceptional bread doesn’t require hours of vigorous kneading or a professional baker’s touch. His genius lies in a long, slow fermentation process that develops complex flavors and a perfect crumb structure, all while you sleep. The “stecca” style, which translates to “stick” in Italian, refers to these rustic, free-form breadsticks that are inherently imperfect and wonderfully charming. This recipe embraces that simplicity, focusing on stretching the dough rather than intense manipulation, making it accessible for even the most novice bakers.
Why You’ll Love This No-Knead Baguette Recipe
As a self-proclaimed lazy baker, I can attest to the sheer joy and satisfaction this no-knead method brings. It’s truly a game-changer for anyone who loves the idea of fresh, crusty bread but dreads the work. This recipe is an absolute dream because it minimizes active preparation time, letting time and yeast do most of the heavy lifting. The result is an incredibly flavorful baguette with a wonderfully crisp crust and a soft, airy interior—qualities typically associated with professional bakeries.
The beauty of the no-knead technique extends beyond baguettes. It’s a versatile foundation for a variety of delicious breads. I’ve personally experimented with and adore other no-knead delights like:
- No-Knead Sticky Pecan Caramel Cinnamon Rolls: A dangerously delicious treat that proves no-knead isn’t just for savory breads.
- No-Knead Pizza Dough: Pear and Gorgonzola Flatbread with Baby Arugula: Perfect for a quick and gourmet weeknight meal.
- No-Knead Nutella and Hazelnut Challah: A sweet, braided bread that looks impressive but is incredibly simple to achieve.
My own journey with no-knead began years ago when my son, Andrew, at just four years old, successfully made the original No-Knead Bread. If a four-year-old can do it, you absolutely can too! The simplicity and reliability of this method are truly empowering. Furthermore, I’m absolutely thrilled to share that this passion for easy, delicious food has even led to my work being featured on Oprah’s website, a testament to the universal appeal of approachable gourmet cooking.
The Overnight Transformation: Mixing Your No-Knead Dough
The secret to this incredible no-knead baguette starts the night before. This extended fermentation period is crucial for flavor development and creating that signature airy texture. Think of it as allowing time to work its magic. You’ll need just a few basic ingredients: bread flour, salt, sugar, yeast, and water. The type of yeast doesn’t matter much; instant or active dry both work beautifully.
In a spacious bowl, combine your bread flour, salt, sugar, and yeast. Give them a quick whisk to ensure even distribution. Then, add the cool water. The temperature of the water is important – aim for 55 to 65°F (13 to 18°C). Using a wooden spoon or a sturdy spatula, mix everything together for about 30 seconds until the ingredients are just combined and you have a wet, sticky dough. Don’t worry about lumps or achieving a smooth consistency; the goal is simply to hydrate the flour.
Once mixed, cover the bowl tightly with plastic wrap to prevent the dough from drying out. Let it rest at room temperature for 10 to 18 hours. During this time, the yeast will slowly activate, consuming sugars and producing gases that create those wonderful air pockets. You’ll know it’s ready when the surface is dotted with numerous bubbles, and the dough has more than doubled in size.
A note on room temperature: if your home is particularly cold, especially during winter months, the yeast might need more time to work. In such cases, allowing the dough to ferment for up to 24 hours can compensate for the cooler environment. If your house is really chilly, find the warmest spot in your home, or as a playful tip, you could even tuck the bowl under a blanket to keep it cozy!
The Second Rise: Developing Flavor and Texture
After its long, luxurious overnight rest, your dough is ready for its second, shorter rise. Generously flour your work surface. Using a bowl scraper or a rubber spatula, gently scrape the wonderfully bubbly and expanded dough out onto the floured counter in one piece. Resist the urge to press out all the air; those delicate bubbles are precious and contribute to the baguette’s light texture.
With wet hands (this prevents the sticky dough from adhering to your skin), gently fold the dough over itself about three times. This process helps to build a little structure and redistribute the yeast activity. Then, softly shape it into a somewhat flattened ball, tucking the edges and seams underneath to create a smooth top. This gentle handling ensures that the internal structure of the dough remains intact.
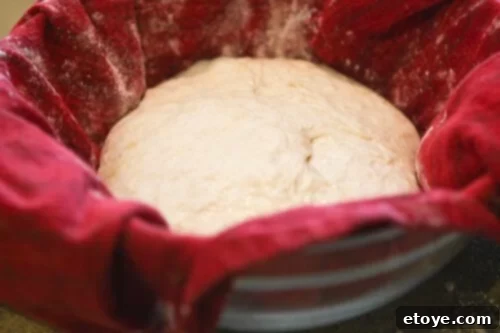
Brush the surface of your dough ball with a touch of olive oil and sprinkle it with about ¼ teaspoon of coarse salt. The salt will gradually dissolve, adding another layer of flavor. Now, place this dough ball, seam side down, into a large, lightly oiled bowl (one big enough to allow for doubling). Cover the bowl loosely with a clean kitchen towel and let it rise in a warm, draft-free spot for 1 to 2 hours. The dough is ready when it has nearly doubled in size. To check, gently poke it with a floured finger; if the indentation remains, it’s good to go. If it springs back immediately, give it another 15 minutes.
Shaping Your Rustic “Stecca” Baguettes
The shaping process for these no-knead baguettes is wonderfully forgiving and contributes to their rustic charm. Remember, “stecca” means stick, so perfection isn’t the goal; natural, elongated forms are. As you begin, gently scoop the risen dough from the bowl onto a generously floured counter. Be mindful not to deflate those precious air bubbles you’ve worked so hard to create!
A quick tip from experience: while a floured towel might seem appealing, it can sometimes stick to the delicate dough. Parchment paper, lightly floured, is generally a more reliable option to prevent sticking and ensure easy transfer.
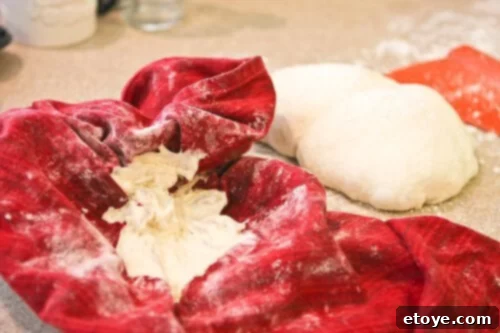
Divide the dough into four equal parts. This can be done with a dough scraper or a sharp knife. Each piece will become a delicious baguette.
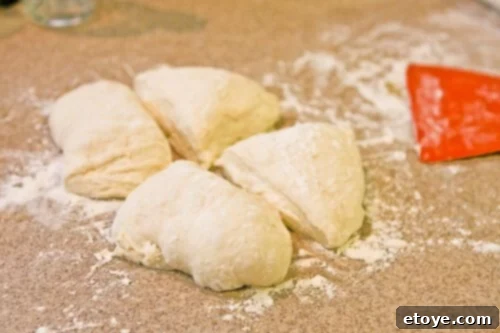
The dough should feel soft and wonderfully stretchy. Gently stretch each dough ball into a long, thin baguette shape, aiming for a length roughly equivalent to your baking pan. Don’t worry about making them perfectly uniform; the rustic appearance is part of their appeal.
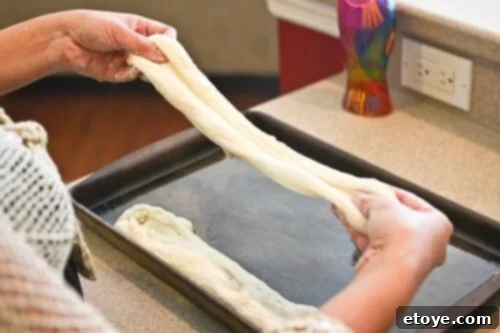
Adding Flavor: Toppings and Seasoning
Once shaped, carefully transfer each baguette to a nicely oiled baking sheet, ensuring there’s about an inch of space between each loaf. This recipe truly shines with the addition of fresh toppings. Consider embedding whole garlic cloves, juicy cherry or plum tomatoes, or briny olives directly into each loaf. Aim for about five pieces of your chosen topping per baguette, gently pressing them into the dough.
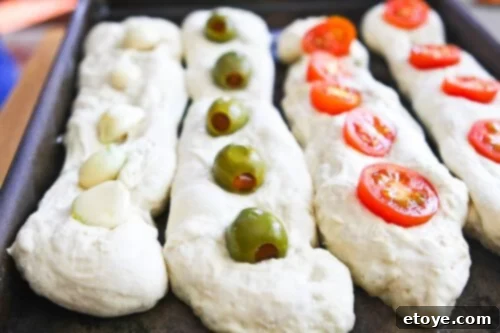
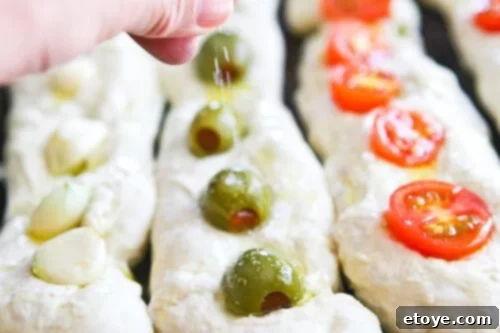
Now, generously drizzle or brush each baguette with extra virgin olive oil. This not only adds a beautiful sheen but also contributes to the golden crust and rich flavor. Finish by sprinkling coarse salt or flaky sea salt over each loaf. Be mindful with the olive-topped baguettes, as olives are naturally quite salty.
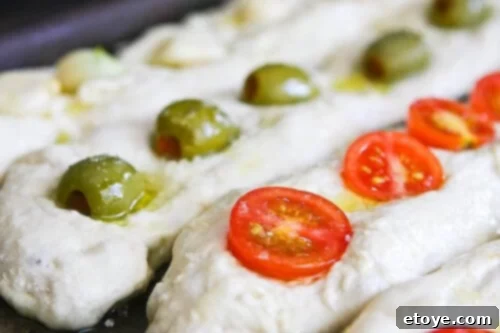
I often find myself making two tomato-topped baguettes because they are always a crowd-pleaser and a personal favorite!
Baking to Golden Perfection: High Heat, Crispy Crust
The key to achieving that desirable crispy crust and airy interior is a super-hot oven. Preheat your oven to a blistering 500°F (260°C) at least 30 minutes before baking to ensure it’s thoroughly heated. If your oven doesn’t reach 500°F, crank it up to its highest possible setting and add a few extra minutes to the baking time.
Carefully slide your baking sheet, laden with those promising baguettes, into the preheated oven. Bake for 15 to 25 minutes, or until the crust turns a beautiful golden brown and sounds hollow when tapped. The high heat creates steam and helps the crust crisp up rapidly, while the interior bakes through perfectly.

Voila! Out of the oven, you’ll be greeted with beautifully rustic, fragrant baguettes. Allow them to cool on the pan for about five minutes before using a spatula to transfer them to a wire rack to cool completely. This cooling process is essential for the crust to fully crisp up and for the internal structure to set.

They are truly beautiful – a testament to the simplicity and effectiveness of this no-knead method.

And so festive, making them perfect for any gathering or a simple family meal.

These baguettes are best enjoyed immediately, while they’re still warm and their crust is at its crispiest. The salt on the surface can sometimes cause the bread to soften after a few hours. If you’re not planning to eat them right away, don’t worry! Simply pop them back into a hot oven for a few minutes just before serving to revive their crispness. They make an excellent accompaniment to soups, salads, or simply enjoyed with a good olive oil for dipping.
The Ultimate Lazy Baker’s Shortcut (and Why It’s Still Great)
For those days when you truly want to bypass even the minimal effort of mixing dough, there’s an even lazier (but still delicious) shortcut. Head to your local supermarket and grab a ball of fresh pizza dough (you can usually find it refrigerated in the bakery or deli section). Simply stretch this ready-made dough into thin baguettes, add your favorite toppings, and bake as directed. It’s an incredibly fast way to enjoy warm, fresh bread, and sometimes, that’s exactly what you need. This method still allows you to customize with toppings and enjoy the satisfaction of fresh-baked goods.
Explore More No-Knead Delights
If you’ve enjoyed the simplicity and deliciousness of this no-knead baguette recipe, you’ll be thrilled to discover the vast world of other no-knead bread recipes. Here are a few more to inspire your baking adventures:
- No-Knead Bread: So Easy a 4-Year-Old Can Make It! (Steamy Kitchen)
- No-Knead Nutella and Roasted Hazelnut Challah (Steamy Kitchen)
- No-Knead Sticky Pecan Caramel Cinnamon Rolls (Steamy Kitchen)
- Tear Away Cheese Bread (Food Network)
- Peasant Bread (YummyHealthyEasy.com)
Recommended Baking Gear: The Secret to Perfect Baguettes
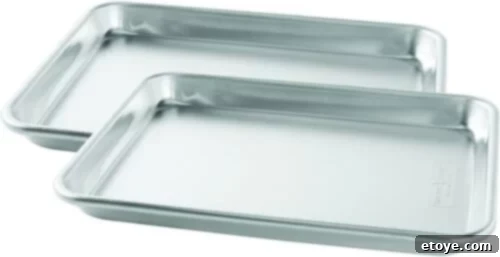
Having the right tools can make all the difference in your baking journey. For these no-knead baguettes, a high-quality baking sheet is essential for even cooking and a beautifully golden crust. I personally highly recommend Nordic Ware Natural Aluminum Commercial Baker’s Half Sheet pans. They are incredibly durable, conduct heat efficiently, and are a staple in many professional kitchens. These pans often come in convenient 2-packs and are available with various side heights to suit all your baking needs. With over 7,000 positive reviews averaging 4.5 stars, they are a proven favorite among home bakers.
You can find them here: Nordic Ware Natural Aluminum Commercial Baker’s Half Sheet.


No-Knead Baguette (Stecca) Recipe
From Jim Lahey, Sullivan Street Bakery
Rated 4.34 out of 5 stars from 6 votes
Prep Time: 20 mins
Cook Time: 25 mins
Resting Time: 10-18 hrs
Course: Appetizer, Side Dish
Cuisine: American
Servings: 4 baguettes
Ingredients
- 3 cups bread flour
- 1/2 teaspoon salt
- 3/4 teaspoon sugar
- 1/4 teaspoon yeast (instant or active dry)
- 1 1/2 cups cool (55 to 65°F) water
- Additional flour for dusting
- Any of the following for toppings: cherry or plum tomatoes, whole garlic cloves, olives
- 1/4 cup extra virgin olive oil
- Coarse salt or flaky sea salt, for sprinkling
Instructions
- In a medium bowl, stir together the bread flour, table salt, sugar, and yeast. Add the water and, using a wooden spoon, mix until you have a wet, sticky dough, about 30 seconds. Cover the bowl tightly with plastic wrap and let sit at room temperature until the surface is dotted with bubbles and the dough is more than doubled in size, 10 to 18 hours (up to 24 hours if your home is very cold).
- When the first rise is complete, generously dust a work surface with flour. Use a bowl scraper or rubber spatula to scrape the dough out of the bowl in one piece. Gently fold the dough over itself three times and lightly shape it into a somewhat flattened ball. Brush the surface of the dough with some of the olive oil and sprinkle with 1/4 teaspoon of the coarse salt.
- Grab a large bowl (large enough to hold the dough when it doubles in size) and brush the insides with olive oil. Gently place the dough, seam side down, into the bowl. Cover the bowl with a towel. Place in a warm, draft-free spot to rise for 1 to 2 hours. The dough is ready when it is almost doubled. If you gently poke it with your finger, it should hold the impression. If it springs back, let it rise for another 15 minutes.
- Half an hour before the end of the second rise, preheat your oven to 500°F (260°C), with a rack in the center. Lightly oil a 13″ x 18″ x 1″ baking sheet.
- Cut the dough into quarters. Gently stretch each piece evenly into a long, thin baguette shape, approximately the length of your pan. Place them on the oiled baking sheet, leaving about 1 inch between the loaves. Embed your chosen toppings (garlic cloves, olives, or cherry tomatoes) into the loaves, about five pieces per loaf. Drizzle or brush olive oil generously on each loaf. Sprinkle sea salt or kosher salt over each loaf, going light on the olive loaf since the olives are already salty.
- Bake for 15 to 25 minutes, until the crust is golden brown and crisp. Cool on the pan for five minutes, then use a spatula to transfer the baguettes to a wire rack to cool thoroughly.
- Note: The baguette may become a bit soft in just a few hours because of the salt on the surface. If that happens, simply reheat the loaves in a hot oven for a few minutes until crisp again before serving.
Tried this recipe?
Let us know how it was! We’d love to hear your feedback.
