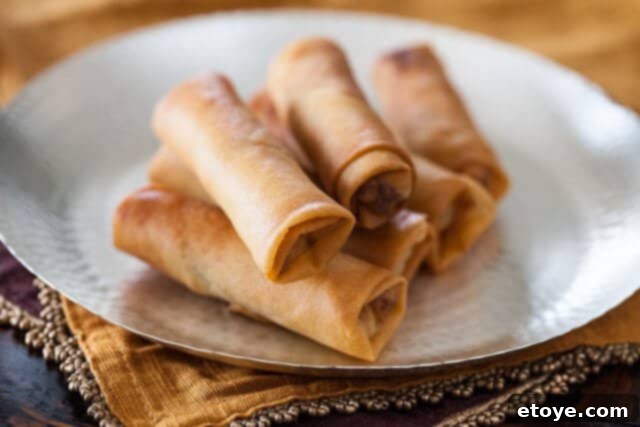
Prepare to elevate your home cooking with these incredible Chicken Spring Rolls. Unlike the often greasy, oversized versions found in some takeout establishments, these homemade delights are designed to be light, with an irresistibly crisp-crackly skin, and perfectly portioned for a delightful two-to-four-bite experience. The filling itself is a testament to fresh, quality ingredients, brimming with tender-crisp vegetables and seasoned ground chicken, ensuring that every single flavor stands out. This isn’t just a recipe; it’s an authentic culinary journey, passed down through generations, promising a truly delicious and satisfying experience.
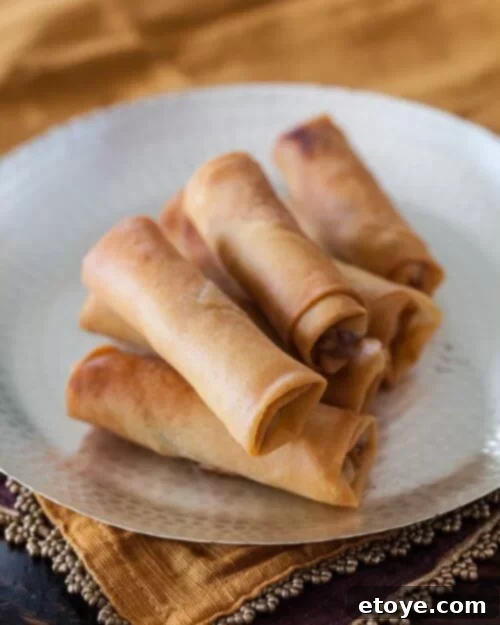
Authentic Crispy Chicken Spring Rolls: The Ultimate Homemade Recipe
There’s nothing quite like the experience of biting into a perfectly golden, crispy spring roll. The satisfying crunch, followed by a burst of savory, fresh flavors from within – it’s a culinary delight that transcends cultural boundaries. While many associate spring rolls with complex, restaurant-level cooking, this recipe demystifies the process, bringing the joy of authentic, homemade chicken spring rolls right into your kitchen. Whether you’re a seasoned chef or a curious beginner, our comprehensive guide, brimming with time-tested tips and techniques, ensures you’ll create spring rolls that are not just delicious but also consistently light, delicate, and incredibly crisp.
Why This Is the Best Chicken Spring Rolls Recipe You’ll Ever Make
What sets this particular chicken spring roll recipe apart from the rest? It’s a harmonious blend of tradition, precision, and a few clever tricks that guarantee outstanding results every time. Here’s why this recipe deserves a prime spot in your culinary repertoire:
- An authentic Chinese chicken spring roll recipe straight from our family’s kitchen, using only the freshest ingredients. This isn’t a watered-down version but a genuine taste of tradition, perfected over many years.
- Discover the secrets to a superior cooking technique that specifically targets and prevents common issues like soggy or greasy spring rolls. We’ll guide you through the process of achieving that coveted dry, crisp exterior.
- Learn about the best spring roll wrappers to use for consistently crispy, delicate, and light results. The right wrapper makes all the difference in achieving that signature shatteringly thin texture.
- A detailed, step-by-step guide on the best way to wrap your chicken spring rolls. Proper wrapping is crucial for preventing oil seepage and ensuring a beautiful, even fry. We’ll show you exactly how to seal in the flavor and crispiness.
- This recipe emphasizes the preparation of a light, flavorful filling where each ingredient’s individual taste and texture can be savored. No bland, mushy fillings here!
- We provide expert tips for handling and freezing spring rolls, making them an ideal make-ahead appetizer or snack.
Essential Ingredients for Your Crispy Chicken Spring Rolls
Crafting the perfect spring roll begins with a selection of fresh, high-quality ingredients. Here’s a breakdown of what you’ll need, along with brief notes on their importance:
- Soy Sauce: Provides a foundational savory, umami flavor for the chicken marinade and overall filling.
- Rice Wine Vinegar: Adds a subtle tang and helps tenderize the chicken. Alternatively, dry sherry can be used.
- Black Pepper: Freshly ground black pepper offers a gentle warmth and aromatic depth.
- Cornstarch: A crucial ingredient for the chicken marinade, helping to tenderize the meat and create a smooth texture, preventing it from drying out during cooking.
- Ground Chicken: Lean and tender, ground chicken is the star protein. You can also experiment with ground pork, beef, or turkey.
- Cooking Oil: Used for stir-frying the filling ingredients and deep-frying the rolls. Neutral oils like canola, vegetable, or peanut oil are ideal.
- Garlic: Freshly minced garlic provides an aromatic backbone to the filling.
- Ginger: Grated fresh ginger adds a pungent, warming spice that brightens the flavors.
- Green Onion (Scallions): Offers a mild, fresh onion flavor and a hint of color.
- Cabbage: Shredded green cabbage adds a refreshing crunch and sweetness to the vegetable medley.
- Carrots: Julienne-cut carrots provide natural sweetness, vibrant color, and a pleasant texture.
- Oyster Sauce: A sweet and savory condiment that ties all the filling flavors together, adding a rich, complex umami.
- Spring Roll Wrappers: The key to a crispy exterior! We’ll discuss choosing the right type of wrapper for shatteringly crisp results.
For the Cornstarch Slurry (for sealing):
This simple mixture acts as the “glue” to seal your spring rolls, preventing them from unraveling during frying.
- Cornstarch: The thickening agent.
- Water: To create a smooth, pliable paste.
Mastering the Art of Homemade Chicken Spring Rolls: Step-by-Step Guide
Creating these delectable chicken spring rolls is a process of precise steps, each contributing to the final perfect bite. Follow these instructions carefully for the best results:
1. Prepare Your Vegetables with Precision
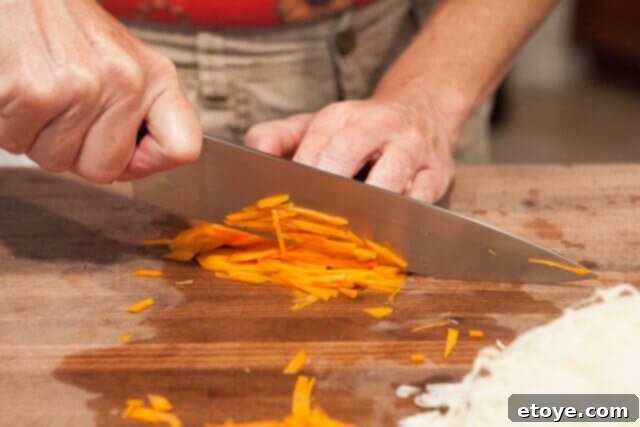
The texture of your vegetables is paramount for a light, tender-crisp filling. You’ll want to achieve very thin, matchstick-like cuts for both your carrots and green cabbage. You can accomplish this by hand using a sharp knife and meticulous julienning technique, or for greater ease and consistency, employ a mandoline slicer. If using a mandoline, first slice the vegetables into thin discs, then stack and slice them further into fine matchsticks with a knife. The goal here is thinness, as this allows the vegetables to cook quickly and evenly without becoming soggy.
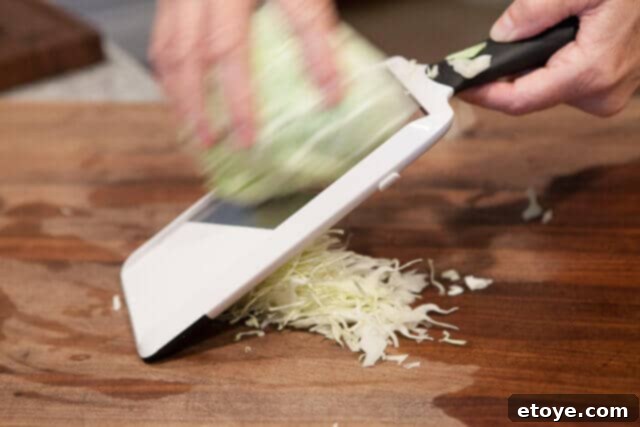
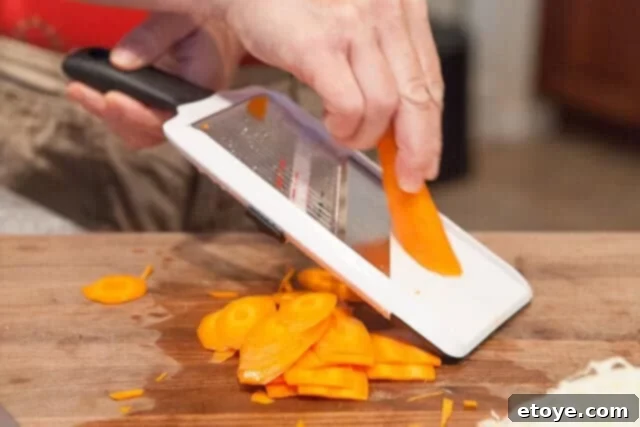
As illustrated, after achieving thin slices with a mandoline, further refine them into very thin matchsticks using a knife. The repeated emphasis on “thin” highlights its critical importance for the desired texture in your spring roll filling.
2. Marinate the Chicken for Maximum Flavor
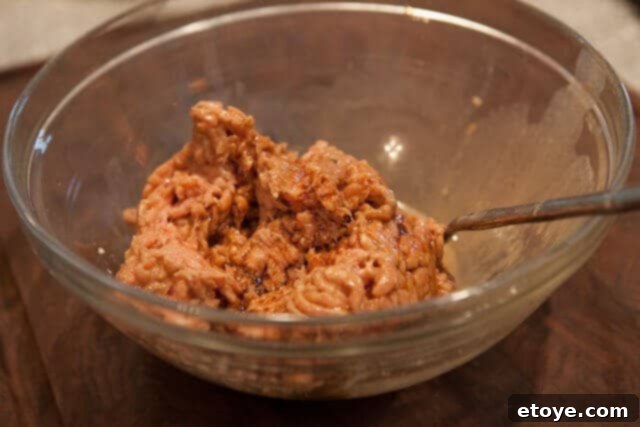
In a small bowl, whisk together the soy sauce, rice wine vinegar, black pepper, and cornstarch. This mixture creates a flavorful marinade that also tenderizes the ground chicken. Add the ground chicken to the bowl, ensuring it’s thoroughly coated with the marinade. Allow it to marinate for at least 10 minutes, or for an even deeper flavor, you can cover and refrigerate it overnight.
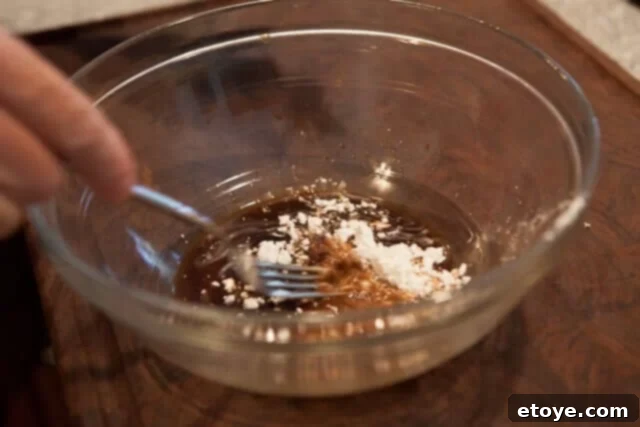
Once the marinade is prepared, gently mix in the ground chicken until it’s evenly coated.
3. Cook the Chicken Separately
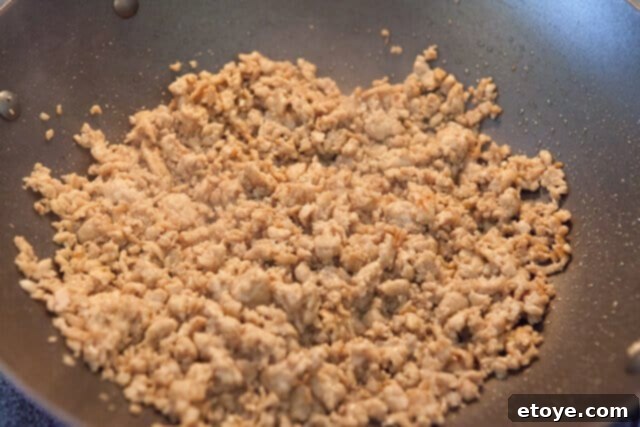
Heat a wok or a large sauté pan over high heat, then add just a tablespoon of cooking oil. Once hot, add the marinated ground chicken and stir-fry until it’s fully browned and cooked through. This high heat ensures the chicken develops a good sear and avoids stewing. Once cooked, remove the chicken from the wok and transfer it to a separate bowl, setting it aside.
4. Stir-Fry the Vegetables and Combine
Wipe the wok clean to remove any residual chicken bits, then return it to medium heat. Add the remaining cooking oil, and once warm, introduce the finely minced garlic, grated ginger, and chopped green onions. Sauté these aromatics for about 30 seconds until fragrant, being careful not to burn them. Next, add the julienne-cut carrots and shredded cabbage. Increase the heat to medium-high and stir-fry the vegetables for approximately 2 minutes, or until the carrots begin to soften but still retain a pleasant crunch. This separate cooking method for meat and vegetables is key: it allows the meat to brown beautifully and prevents the vegetables from becoming overcooked and soggy. The result is a filling where the chicken tastes distinctly like chicken, and the vegetables boast a fresh, crisp flavor.
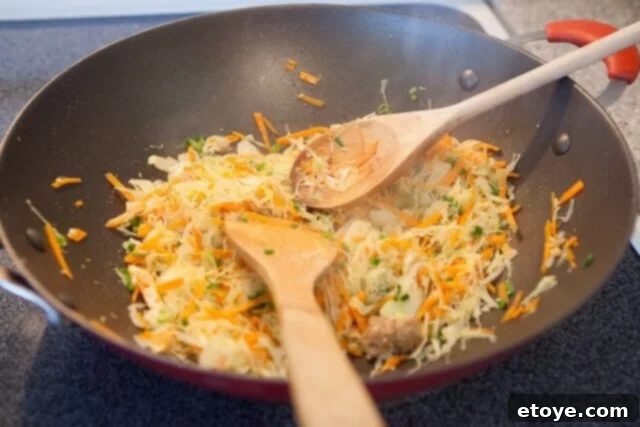
Now, return the cooked ground chicken to the wok with the stir-fried vegetables.
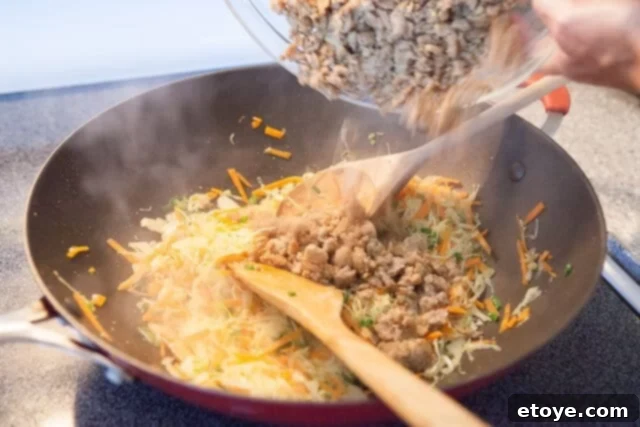
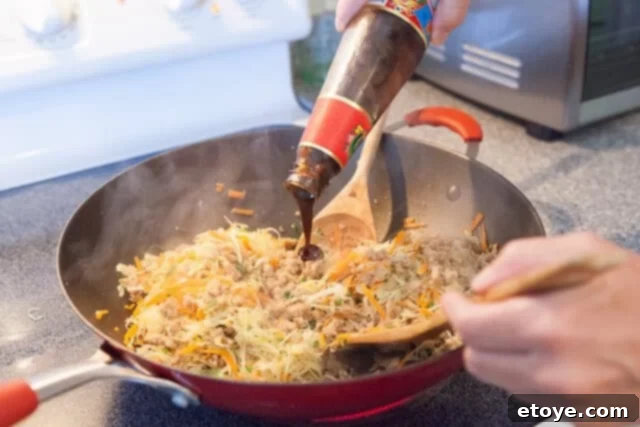
Add the oyster sauce to the filling, ensuring it’s evenly distributed.
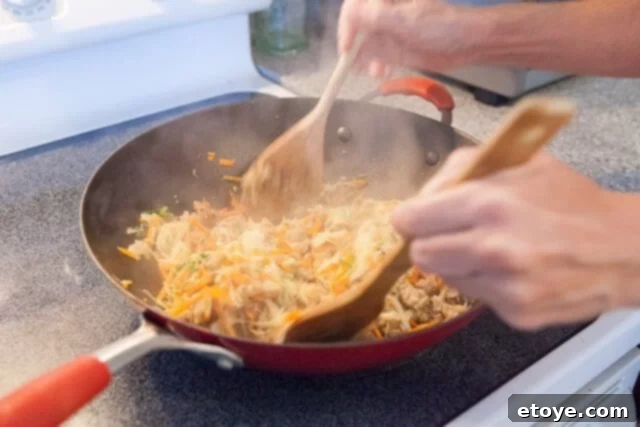
Toss all the ingredients together thoroughly to combine the flavors.
5. Cool the Filling Properly
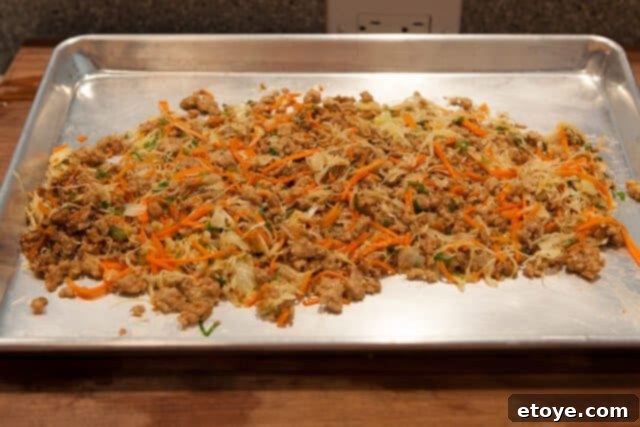
Transfer the cooked chicken and vegetable mixture onto a baking sheet and spread it out in a thin layer. This maximizes surface area, allowing the filling to cool down quickly. To further prevent any sogginess, slightly prop up one end of the baking sheet so any excess liquid or juice can drain away. Discard this liquid once cooled. A cool, drier filling is critical for achieving a crisp spring roll wrapper, as hot or wet filling creates steam that makes the wrapper damp and prone to becoming greasy during frying. For an extra measure, you can gently blot the cooled filling with paper towels to absorb any lingering oil.
The Art of Folding Spring Rolls: Ensuring Crispiness
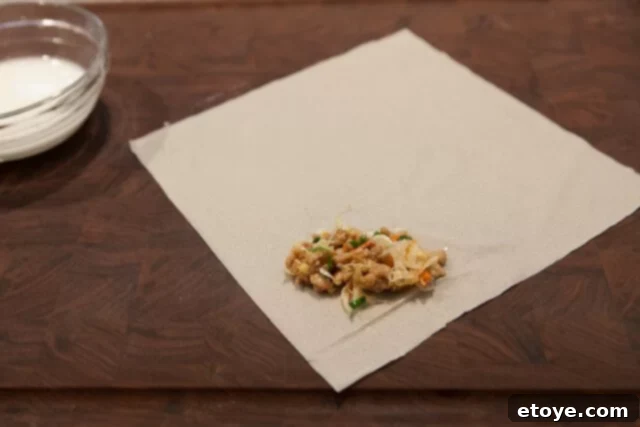
Proper folding is perhaps the most critical step for achieving a perfectly crispy, non-greasy spring roll. A tightly wrapped roll prevents oil from seeping in and keeps the filling secure. Imagine you’re folding a pristine shirt or making a bed with military precision – every crease matters. Here’s how to do it right:
- Lay a spring roll wrapper on a clean, dry surface with one corner pointing towards you, like a diamond. Place about one tablespoon of the cooled filling near the corner closest to you. Remember, less is more! Overstuffed spring rolls are prone to bursting during frying.
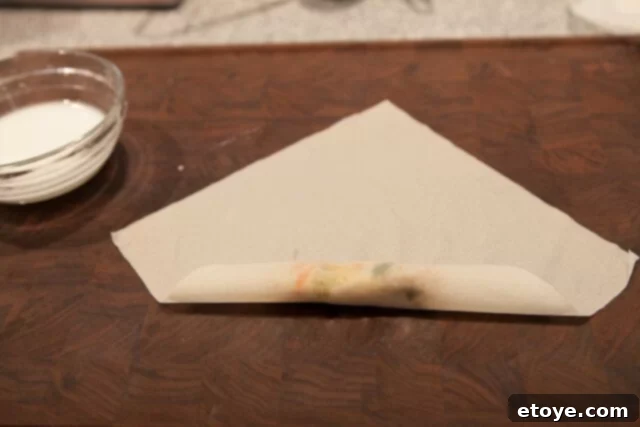
- Fold the bottom corner over the filling, tucking it tightly. Roll it once, ensuring the filling is snug.
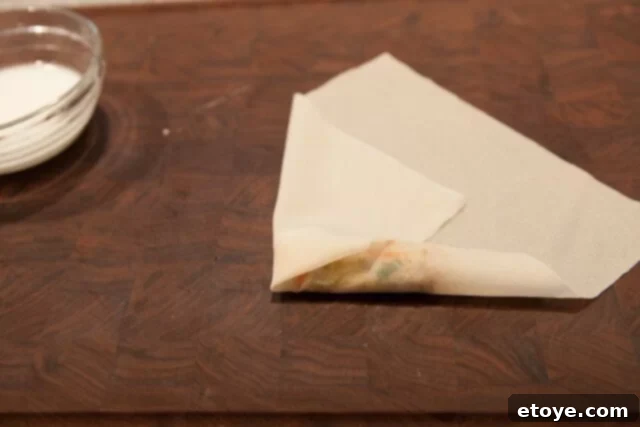
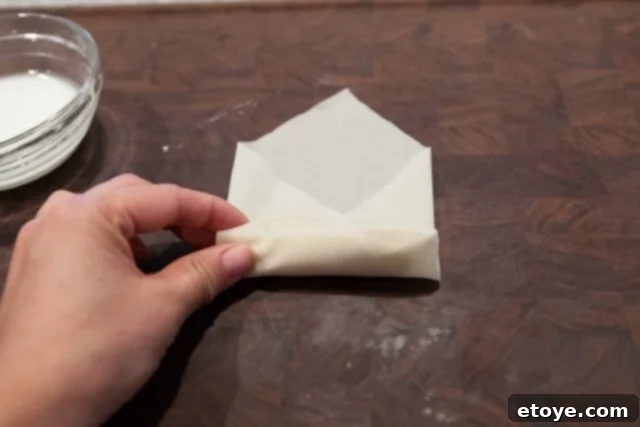
- Fold in the left side of the wrapper, then the right side. It’s crucial to leave absolutely no space or air pockets. Air pockets are the enemy of a crispy spring roll; they allow oil to seep in, resulting in a greasy, unpleasant texture.
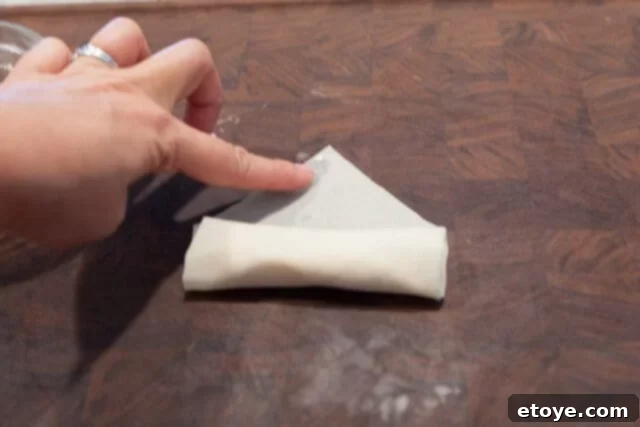
- Continue rolling the spring roll upwards, maintaining consistent tightness.
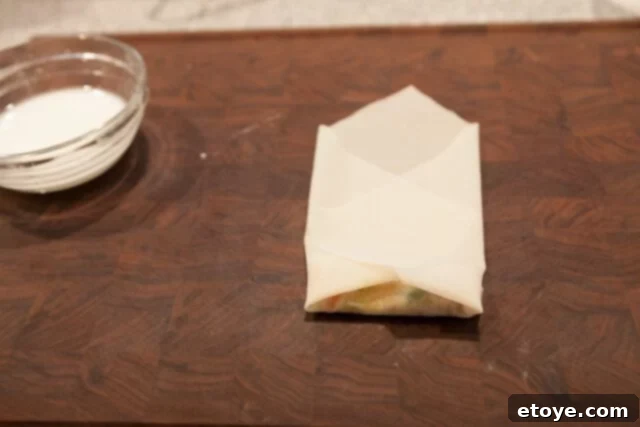
- Prepare a cornstarch slurry by whisking together cornstarch and water in a small bowl. Dip your finger in the slurry and paint a thin layer along the top edge of the wrapper, just like sealing an envelope.
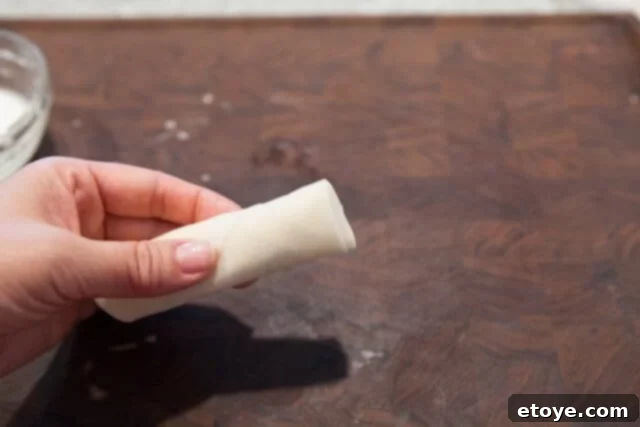
- Close the roll, pressing firmly to ensure a tight, secure seal. The finished roll should be neat, without any holes or air pockets, much like a perfectly folded garment.
- Place the finished spring rolls seam-side down on a plate or tray. This helps to secure the corner and prevent it from popping open.

Common Wrapping Mistakes to Avoid:
To further illustrate the importance of tight wrapping, here are examples of common errors:
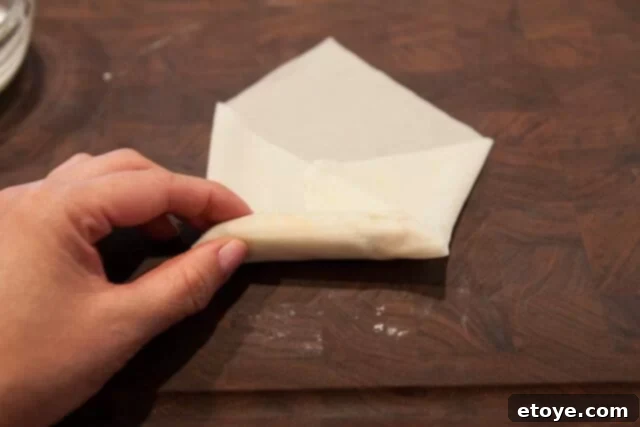
WRONG: Notice how the right side of the wrapper is skewing outwards? This slight misalignment can lead to significant problems during frying.
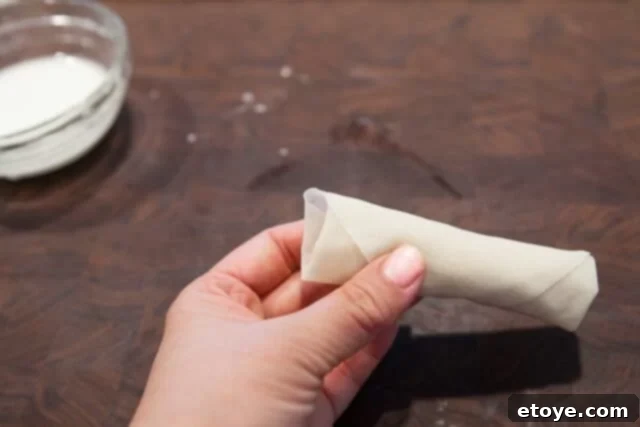
WRONG: That skewed-out right side will inevitably roll up into a giant air pocket. This pocket becomes a vulnerability, allowing oil to seep in and the filling to potentially fall out, resulting in a greasy, broken spring roll. The key to success is a wrap that’s nice, tight, and even, like a perfectly sculpted physique.
6. Prepare for Frying
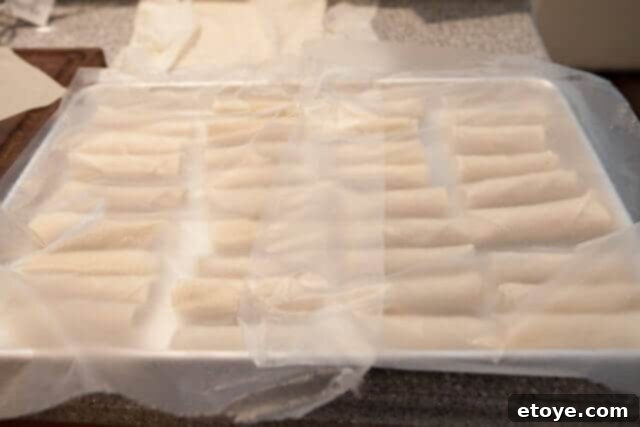
As you finish rolling, it’s vital to keep the wrapped spring rolls covered with parchment paper or plastic wrap. Spring roll wrappers dry out very quickly when exposed to air, becoming brittle and prone to cracking, which will ruin their ability to crisp up properly.
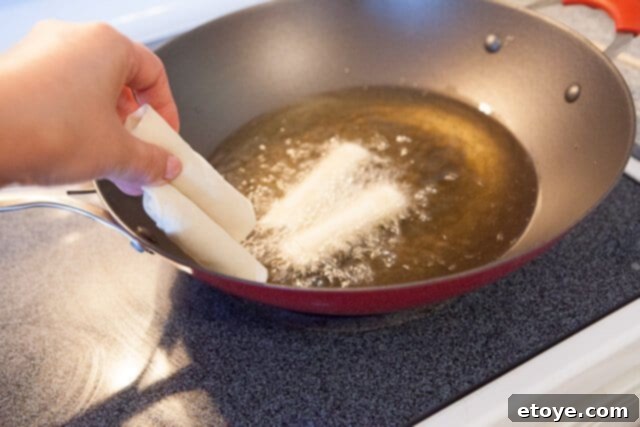
When you’re ready to fry, pour approximately 1.5 inches of cooking oil (such as canola, vegetable, rice bran, corn, or peanut oil) into a wok or deep, heavy skillet. Heat the oil to 350°F (175°C). If you don’t have a thermometer, an ancient Chinese secret works wonders: stick a wooden chopstick straight down into the oil. If small bubbles immediately form and actively rise around the wood, the oil is hot enough. If there are no bubbles, it’s not ready. Remember, only use wood or bamboo chopsticks, as plastic ones will melt!
7. Fry to Golden Perfection
Carefully and gently slide a few spring rolls into the hot oil. Avoid overcrowding the pan, as this lowers the oil temperature and leads to uneven cooking and less crispiness. Before placing each roll, quickly inspect it for any corners that may have popped open; re-seal with a dab of cornstarch slurry if necessary. Fry the spring rolls in batches, turning them occasionally to ensure they brown evenly on all sides. Once they achieve a beautiful golden-brown color, they are perfectly cooked.
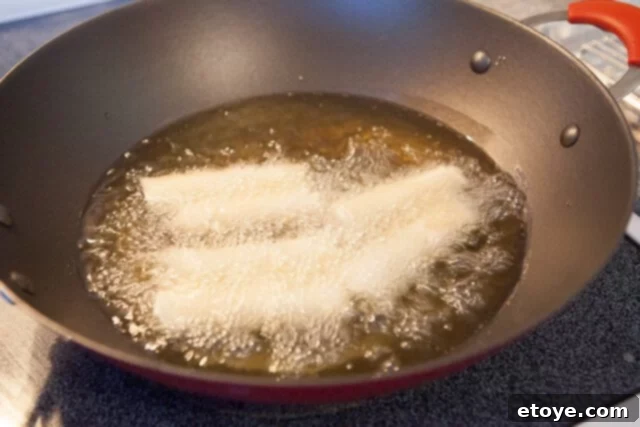
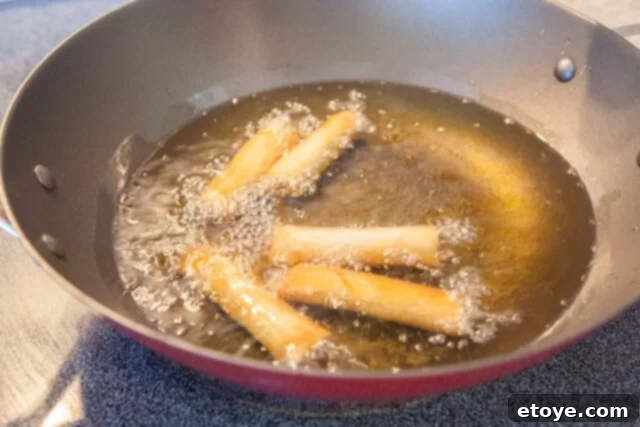
8. Drain and Serve
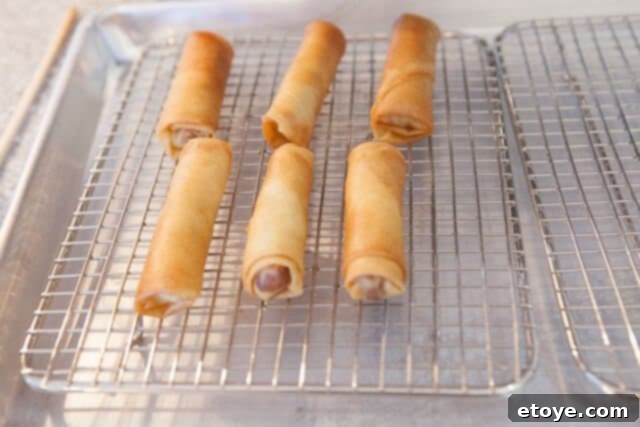
Once golden and crisp, carefully remove the spring rolls from the oil using tongs or a spider strainer. Place them on a wire rack set over a baking sheet to allow any excess oil to drain off. This crucial step prevents the rolls from sitting in oil and losing their crispiness. Serve immediately with your favorite dipping sauce!
Spring Rolls or Egg Rolls? Unraveling the Delicious Confusion
The culinary world often sees a delightful overlap in terminology, and the distinction between “spring rolls” and “egg rolls” is a classic example. For many, especially in the Western context, the terms are used interchangeably for these crispy, fried delights. My mother, for instance, calls them “Egg Rolls,” and I often use both terms as there isn’t a universally agreed-upon English standard. Historically, egg rolls tend to have a slightly thicker, bubblier wrapper that often contains egg in the dough, while traditional spring rolls (especially from Southeast Asia) use thinner, rice-paper-based wrappers or very thin wheat-flour wrappers. However, in many Chinese-American restaurants, what’s called an “egg roll” can often refer to a larger, fried roll with a thicker, chewier skin, much like the “massive spring rolls the size of a soda can” I’ve encountered that can sometimes disappoint.
Then there are “summer rolls!” These typically refer to the uncooked Vietnamese rolls, often wrapped in delicate, translucent rice paper sheets and served fresh with dipping sauces. So, yes, the terminology can be quite confusing, with “spring roll” sometimes encompassing both fried and fresh varieties depending on regional context. For the purpose of this recipe, we are making the crispy, fried kind, focusing on a thin, delicate wrapper for that perfect crunch.
Can You Freeze These Chicken Spring Rolls? Absolutely!
One of the many benefits of making these delicious chicken spring rolls at home is their freezer-friendly nature, making them perfect for meal prep or impromptu cravings. To freeze them successfully, it’s all about preventing them from sticking together and maintaining their shape:
- Pre-Frying Freezing: After you have expertly rolled your spring rolls, but *before* you fry them, arrange them in a single layer on a baking sheet lined with parchment paper. Ensure they are not touching each other. If you need to freeze more, you can add another layer of parchment paper and then another single layer of spring rolls. This prevents them from sticking.
- Once Frozen: Once the spring rolls are completely frozen solid (this usually takes a few hours), you can transfer them to a freezer-safe plastic bag or airtight container. At this point, they won’t stick together, so you can stack them more compactly.
- Frying from Frozen: The beauty of freezing these rolls pre-fry is that you can cook them directly from the freezer – **no defrosting needed!** In fact, defrosting them beforehand will likely make them soggy, wrinkly, and less appealing. Simply preheat your oil as instructed, and gently lower the frozen spring rolls into the hot oil. Be cautious of any ice crystals, which can cause oil to splatter.
- Reheating Leftover Fried Spring Rolls: If you have already fried spring rolls that have cooled, you can reheat them in a toaster oven or conventional oven at 300°F (150°C) for about 5-7 minutes, or until they are crispy again. Avoid the microwave, as it will make them soggy.
A Global Favorite: The Enduring Appeal of Spring Rolls
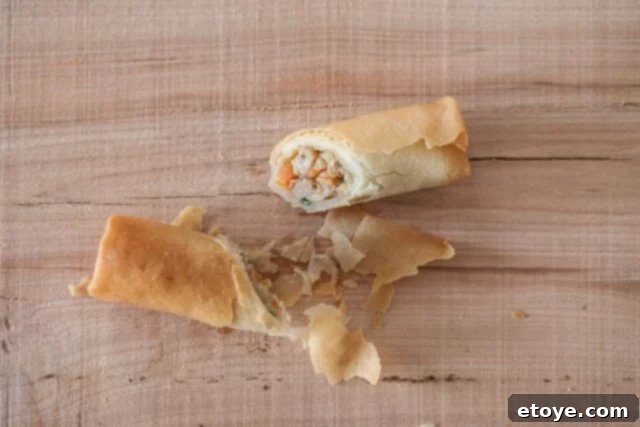
The spring roll’s popularity is undeniable, making it a beloved appetizer or snack across countless cuisines and cultures. However, not all spring rolls are created equal. As mentioned, the disheartening experience of encountering overly massive, chewy, bubbly-skinned rolls with a wet, soggy filling is all too common at some Chinese-American takeout spots. This recipe aims to deliver the opposite: a refined, authentic version that celebrates fresh ingredients and a perfectly crisp texture. While this recipe specifically features a delightful chicken filling – a personal favorite among my boys and an excellent way to utilize leftover chicken – the versatility of spring rolls is immense. We’ve explored countless variations, from savory pork, shrimp, crawfish, and other seafood fillings to robust beef, entirely vegetarian options, and even delicious tofu spring rolls. The principles of a crisp wrapper and flavorful, dry filling remain constant, allowing for endless creative possibilities.
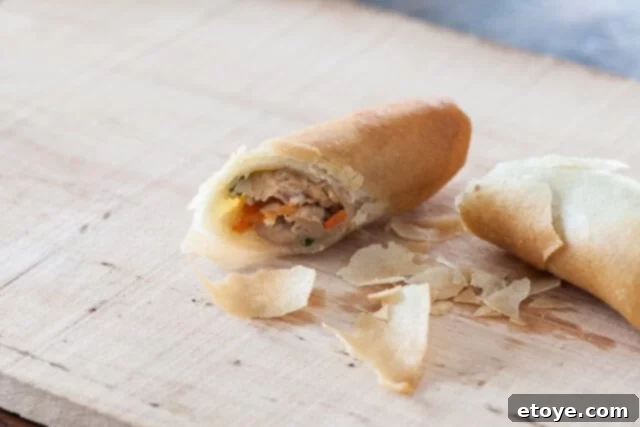
Choosing the Best Wrappers for Superior Crispy Spring Rolls
The choice of wrapper is critical to achieving that signature delicate crispness. Not all spring roll wrappers are created equal, and selecting the right kind can make or break your final product. Here’s what you need to know:
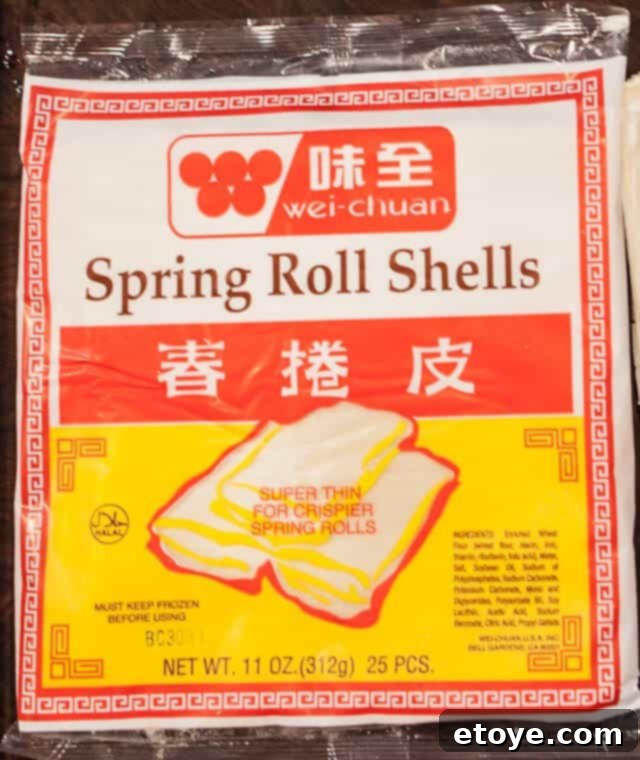
- Look for Frozen Wrappers: My preferred brand comes frozen, usually found in the freezer aisle of Asian grocery stores. These thin, almost translucent wrappers are designed to fry up to a shatteringly crispy texture.
- Avoid “Pasta Sheets” from Supermarkets: Do NOT buy wrappers found in the refrigerated section of regular supermarkets, often next to the tofu. These are typically thicker “pasta sheets” that are designed for different applications. When fried, they tend to become chewy, thick, and bubbly, resulting in a less desirable “hot mess” rather than a delicate spring roll.
- Defrosting is Key:
- Overnight in the Refrigerator: This is the gentlest method, allowing the wrappers to thaw slowly and evenly.
- Countertop Method: If you’re short on time, leave the frozen package on the counter for about 30 minutes.
- Keep Them Moist: Once defrosted and the package is opened, immediately cover the stack of wrappers with a barely damp cloth or paper towel. Spring roll wrappers dry out incredibly quickly when exposed to air, becoming stiff and brittle, making them impossible to roll without cracking.
- Reviving Dry Wrappers: If your wrappers do become stiff, don’t despair! Place a few wrappers on a plate, cover them with a damp towel, and microwave on medium heat for about 10 seconds. This short burst of moisture and warmth can help soften them up enough to be usable again.
- Smooth Side Out (Optional): For the truly meticulous, there’s a subtle difference between the two sides of a spring roll wrapper. One side is often slightly smoother than the other. If you have keen eyesight and a desire for aesthetic perfection, place the smoother side facing outwards for a slightly nicer-looking fried finish. This is a minor detail, purely for aesthetics, but it’s a trick my mother taught me, and now I’m sharing it with you!
Top Tips for Flawless Chicken Spring Rolls
Beyond the step-by-step instructions, these expert tips will ensure your spring rolls are consistently perfect, from preparation to frying:
- **Precision Vegetable Prep:** Never use a box grater for your vegetables, especially cabbage and carrots. Grating releases far too much liquid, which contributes to a soggy filling. Instead, opt for a food processor with a thin slicing attachment, a mandoline slicer (like the affordable and excellent Oxo handheld model), or a sharp knife to achieve very thin julienne cuts. The goal is fine, uniform strips.
- **Wok Wisdom for Frying:** For deep frying, the size and shape of your pot matter. While a wider pot generally requires more oil, a traditional wok is ideal. Its round, concave shape naturally reduces the amount of oil needed to fill it sufficiently for frying, making it an economical and efficient choice. Investing in a good wok is highly recommended for Asian cooking.
- **Ancient Chinese Oil Temperature Secret:** If you don’t have a thermometer, employ this reliable method passed down through generations: insert a wooden or bamboo chopstick straight down into the hot oil. If tiny bubbles actively form and rise around the wood, your oil is perfectly heated to approximately 350°F (175°C). No bubbles mean it’s not hot enough. (Crucially, avoid plastic chopsticks, as they will melt.) A wooden spatula handle works just as well.
- **Cool Filling is Crucial:** Always ensure your filling is completely cool before wrapping. Hot filling generates steam, which moistens the wrapper, leading to a less crispy, potentially greasy spring roll. Spread it thinly on a baking sheet to cool faster.
- **Drain Excess Liquid:** After cooking and cooling the filling, tilt the baking pan to allow any extra liquid or juices to collect at one end. Discard this liquid. The drier the filling, the better your spring rolls will be, as moisture is the enemy of crispiness. You can even blot the cooled filling with paper towels to absorb any excess oil or water.
- **Avoid Overcrowding the Fryer:** Fry spring rolls in small batches. Overcrowding the pan drastically lowers the oil’s temperature, resulting in rolls that absorb too much oil and turn out soggy and pale instead of golden and crisp. Give them space to swim and brown evenly.
- **The “Less is More” Filling Rule:** Resist the urge to overstuff your spring rolls. One generous tablespoon of filling per wrapper is typically all you need. Overstuffed rolls are more likely to burst open during frying, wasting your efforts and making a mess.
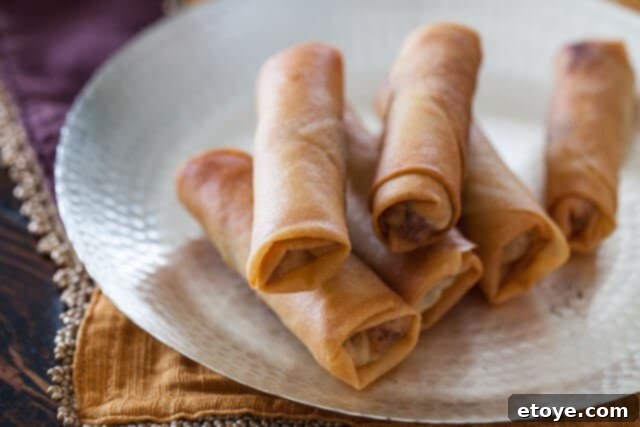
Explore More Delicious Asian Recipes
If you’ve enjoyed making these crispy chicken spring rolls, you’ll love exploring other authentic Asian delights. Here are some more recipes to tantalize your taste buds:
- Red Lantern Crisp Parcels (Cha Gio or Spring Rolls)
- Vietnamese Spring Rolls with Orange-Almond Sauce
- My Mother’s Famous Chinese Egg Rolls
- Vegetable Spring Rolls (Egg Rolls)
Have you tried making these authentic Chicken Spring Rolls? We’d love to hear about your experience! Feel free to leave a star rating and share your thoughts and tips in the comments below.
Chinese Spring Rolls Recipe
Author: Jaden
Authentic Chinese Spring Rolls Recipe from Steamy Kitchen.
Rating: 4.95 from 76 votes
Print Recipe | Pin Recipe
Recipe Details
- Prep Time: 1 hour
- Cook Time: 20 minutes
- Total Time: 1 hour 20 minutes
- Course: Appetizer
- Cuisine: Chinese
- Servings: 50 rolls
- Calories: 162 kcal per roll
Ingredients
- 1 tablespoon soy sauce
- 1 teaspoon rice wine (or white wine)
- 1/4 teaspoon freshly ground black pepper
- 1 teaspoon cornstarch
- 1 pound ground chicken
- 2 tablespoons cooking oil (divided)
- 2 cloves garlic (finely minced)
- 1 teaspoon grated fresh ginger
- 1-2 stalks green onion (chopped)
- 1/2 head of small cabbage (about 8 ounces, shredded)
- 2 carrots (thin julienne cut)
- 2 tablespoons oyster sauce
- 50 frozen spring roll wrappers (defrosted)
- 2 cups cooking oil (vegetable, canola or peanut oil for deep frying)
For the Cornstarch Slurry
- 1 tablespoon cornstarch
- 1/4 cup water
Instructions
Prepare the Filling
- In a large bowl, combine the soy sauce, wine, pepper, and cornstarch. Add in the chicken and mix well. Let marinate for 10 minutes (or up to overnight in the refrigerator).
- Heat a wok or large sauté pan over high heat. When hot, swirl in just 1 tablespoon of the cooking oil. Stir fry the ground chicken until browned. Remove browned ground chicken from wok to a bowl and set aside.
- Wipe the wok clean and turn heat to medium. When just starting to get hot, swirl in the remaining cooking oil. Add in the green onion, garlic, and ginger and cook for 30 seconds. Take care not to burn these aromatics. Add in the carrots and cabbage. Stir well and turn the heat to medium-high. Stir fry the vegetables for 2 minutes, or until the carrots have softened. Add the cooked chicken back into the wok, stir well. Add in the oyster sauce and toss again. Spread the mixture out on a baking sheet to let cool. Prop up the baking sheet on one end so that any liquid collects on the other side. When the mixture is cool, discard the liquid.
Wrapping Spring Rolls
- Mix cornstarch slurry: in a small bowl, whisk together the cornstarch and water. Open the egg roll wrapper package, cover with barely damp towel to prevent drying out.
- Add 1 tablespoon of filling to egg roll (see photos for instructions above) and roll up. Secure with cornstarch slurry. Keep rolled egg rolls covered with plastic wrap to prevent drying.
Frying Spring Rolls
- When ready to fry, heat 1 1/2″ of oil in a wok or deep, heavy skillet to 350°F (175°C) (see tip in photos if you don’t have thermometer). Carefully slide in the egg rolls, a few at a time, to the oil to fry. Turn the egg rolls occasionally to brown evenly and fry for about 3 minutes. Let cool on rack. Repeat with remaining.
Notes
- Feel free to use ground pork, beef, chicken, or turkey in this recipe. Chinese rice wine is an optional ingredient; substitute with dry sherry (or just leave it out).
- To Freeze Spring Rolls: After rolling the spring rolls (but before frying), arrange them in a single layer on a baking sheet or plate, ensuring they do not touch. Cover with plastic wrap between layers if stacking. Freeze until solid. Once frozen, transfer to a freezer-safe bag or container for long-term storage.
- Frying Frozen Spring Rolls: When ready to cook, fry directly from the freezer; no defrosting necessary. Defrosting will make them soggy. Preheat oil to 350°F (175°C) and gently lower frozen rolls into the oil. Be careful of ice crystals causing splattering.
- To Reheat Leftover Spring Rolls: Heat your toaster oven or conventional oven to 300°F (150°C). Place fried spring rolls on a wire rack and bake for about 5-7 minutes, or until crispy again.
Nutrition
Serving: 1 roll | Calories: 162 kcal
