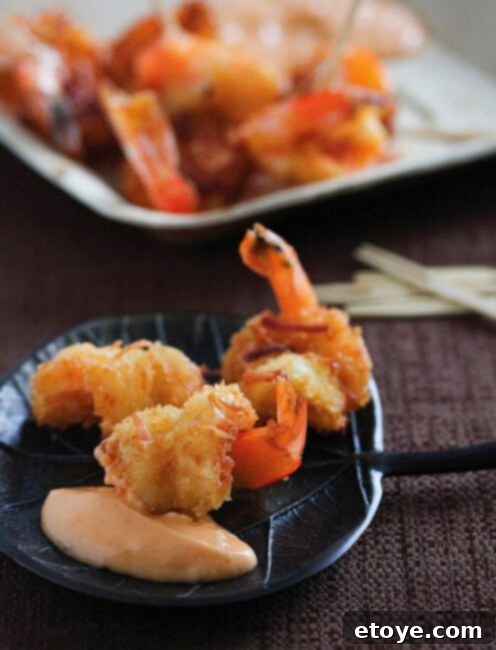
There are some culinary creations so utterly delightful, so universally adored, that they simply demand to be shared. This particular recipe for Crispy Coconut Shrimp with Sweet Chili Mayo is one of them. It’s a dish that brings smiles to faces and joy to taste buds, a true crowd-pleaser that effortlessly combines the tropical sweetness of coconut with the succulent bite of perfectly cooked shrimp, all elevated by a tangy, spicy dipping sauce. This recipe was almost a forgotten gem, nearly slipping through the cracks and missing its rightful place in my upcoming cookbook. While it was too late to include it in the published collection, which has already been submitted to the publisher, I’m absolutely thrilled to share it with you here, now!
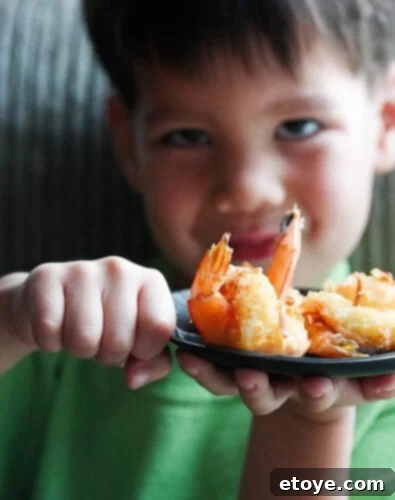
The pure joy this dish brings is perfectly encapsulated by my friend Nathan, who has an undeniable love affair with this Coconut Shrimp with Sweet Chili Mayo. His enthusiasm is infectious, and watching him enjoy these golden, crispy bites makes all the effort worthwhile. It’s truly a testament to how exceptional this homemade version is.

Unveiling the Secrets to Perfect Homemade Coconut Shrimp
Forget those often-disappointing, overly battered, and greasy renditions you might find as appetizers at many restaurants. This homemade Coconut Shrimp recipe stands head and shoulders above the rest. Not only is it incredibly easy to prepare in your own kitchen, but it also delivers an unparalleled crispiness and flavor that’s both satisfying and surprisingly light. Plus, making it yourself is significantly more budget-friendly, allowing you to indulge in this exquisite appetizer without breaking the bank.

The Magic of Panko Breadcrumbs: Your Key to Ultimate Crispiness
The secret to achieving that coveted, ethereal crunch in every bite lies in the innovative use of Japanese breadcrumbs, famously known as Panko. Unlike traditional breadcrumbs, Panko is made from crustless white bread that is processed into large, airy, flaky crumbs. This unique structure prevents them from absorbing as much oil during frying, resulting in a significantly lighter, crispier, and less greasy exterior for your shrimp. When combined with sweet coconut flakes, Panko creates a breading that is both flavorful and boasts an irresistible texture that’s simply unmatched.
Using Panko isn’t just about crispiness; it’s also about creating a superior eating experience. The larger flakes provide more surface area for the heat to interact with, ensuring an even golden-brown crust and a satisfying auditory crunch with every mouthful. This subtle difference is what elevates our homemade coconut shrimp from good to absolutely spectacular, proving that sometimes, the simplest ingredients can hold the most powerful culinary magic.
Crafting the Irresistible Sweet Chili Mayo Dipping Sauce
No Coconut Shrimp experience is complete without its perfect companion: a vibrant and zesty Sweet Chili Mayo dipping sauce. This sauce is incredibly simple to whip up, yet it offers a complex flavor profile that beautifully complements the sweet and savory notes of the shrimp. Typically, it involves a blend of mayonnaise, sweet chili sauce, a squeeze of fresh lime juice, and perhaps a touch of sriracha for an extra kick. Some variations might include a dash of soy sauce or minced garlic for added depth.
The creamy texture of the mayo provides a smooth contrast to the crispy shrimp, while the sweetness of the chili sauce adds a delightful tropical undertone. The acidity from the lime cuts through the richness, leaving your palate refreshed and ready for the next delicious bite. It’s the ideal balance of creamy, sweet, tangy, and subtly spicy, making it an indispensable part of this appetizer. Don’t skip this step; it truly brings the entire dish together.
Selecting and Preparing Your Shrimp
The foundation of any great shrimp dish is, of course, fresh, high-quality shrimp. When purchasing shrimp, look for those that are firm, translucent, and have a mild, oceanic smell, not a strong fishy odor. For this recipe, medium to large shrimp (21-25 count or 16-20 count per pound) work best, as they provide a good balance of size and tenderness. You can buy them fresh or frozen; if frozen, ensure they are fully thawed in the refrigerator before use.
Preparing the shrimp properly is crucial for both taste and presentation. Start by peeling the shrimp, leaving the tail on for a convenient handle. Then, devein them by making a shallow incision along the back of the shrimp and removing the dark digestive tract. A small paring knife or a specialized deveining tool works perfectly. Rinsing the cleaned shrimp under cold water and patting them thoroughly dry with paper towels is essential. Excess moisture can prevent the breading from sticking properly and result in less crispy shrimp, so take your time with this step!
The Breading Process: A Step-by-Step Guide for Optimal Adhesion
Achieving a perfectly coated and crispy exterior for your Panko and coconut breaded shrimp requires a simple yet effective dredging process. You’ll typically set up a three-station assembly line:
- Flour Station: A shallow dish with all-purpose flour seasoned with a pinch of salt and pepper. This initial coating provides a dry surface for the egg to adhere to.
- Egg Wash Station: A shallow dish with whisked eggs (often mixed with a splash of milk or water). The egg acts as a binder, helping the breadcrumbs stick.
- Panko & Coconut Station: A shallow dish with the star ingredients – Panko breadcrumbs and unsweetened shredded coconut flakes, thoroughly mixed.
Working with one shrimp at a time, first dredge it in the flour, shaking off any excess. Next, dip it into the egg wash, ensuring it’s fully coated, then let any excess drip off. Finally, transfer the shrimp to the Panko-coconut mixture, pressing gently to ensure an even and generous coating on all sides. Place the breaded shrimp on a wire rack set over a baking sheet. This allows for even air circulation and prevents the bottom from becoming soggy. For best results and extra crispiness, consider chilling the breaded shrimp in the refrigerator for 15-30 minutes before cooking. This helps the breading adhere firmly and prevents it from falling off during frying.
Cooking Your Coconut Shrimp: Frying vs. Baking
While deep frying yields the most traditional and intensely crispy results, there are other excellent cooking methods to consider, each with its own advantages:
Deep Frying (for Maximum Crispiness)
Heat about 2-3 inches of neutral oil (like canola, vegetable, or peanut oil) in a heavy-bottomed pot or deep fryer to 350-375°F (175-190°C). Fry the breaded shrimp in batches, being careful not to overcrowd the pan, which can lower the oil temperature and lead to soggy shrimp. Cook for 2-3 minutes per batch, or until golden brown and cooked through. The internal temperature of the shrimp should reach 145°F (63°C). Use a slotted spoon or spider to remove the shrimp and transfer them to a wire rack lined with paper towels to drain any excess oil. Season lightly with salt immediately after frying.
Pan Frying (a Lighter Alternative)
For a slightly less oil-intensive method, pan frying can also produce delicious results. Heat about ½ inch of oil in a large skillet over medium-high heat. Once the oil is hot, add the shrimp in a single layer, ensuring not to overcrowd. Cook for 2-3 minutes per side, or until golden brown and cooked through. Again, drain on a paper towel-lined wire rack and season.
Baking or Air Frying (for a Healthier Option)
If you’re looking for a lighter, healthier version of this delectable dish, baking or air frying are fantastic alternatives. Preheat your oven to 400°F (200°C) or your air fryer to 375°F (190°C). Lightly spray the breaded shrimp with cooking spray on all sides (this helps achieve a golden color and crisp texture). For baking, arrange them in a single layer on a baking sheet lined with parchment paper and bake for 10-15 minutes, flipping halfway through, until golden and cooked. For air frying, cook for 8-12 minutes, shaking the basket or flipping the shrimp every few minutes, until perfectly crispy. While not quite as rich as deep-fried, these methods still deliver a satisfying crunch and incredible flavor.
Serving Suggestions and Variations
Your homemade Coconut Shrimp with Sweet Chili Mayo is a star on its own, but you can elevate the experience even further with a few thoughtful garnishes and side dishes. A sprinkle of fresh cilantro or finely chopped green onions adds a vibrant pop of color and a fresh herbal note. A wedge of lime served alongside allows guests to add a burst of citrusy brightness to their shrimp. For a full meal, consider serving it with a side of jasmine rice, a light green salad with a citrus vinaigrette, or even some grilled pineapple for an extra tropical flair.
Feeling adventurous? You can experiment with different dipping sauces. A creamy mango salsa, a spicy peanut sauce, or a simple lime-cilantro vinaigrette could all offer delightful variations. For those who love heat, a dash of red pepper flakes in the breading or an extra swirl of sriracha in the mayo can kick things up a notch.
Are you ready to create this incredible appetizer in your own kitchen? I’ve detailed the full, comprehensive recipe for my dear friend Elise at Simply Recipes. Head over there now to discover all the precise measurements, step-by-step instructions, and expert tips about mastering panko breadcrumbs—the undisputed secret to achieving that perfectly crispy breading—and the super easy recipe for making the most delicious Coconut Shrimp with Sweet Chili Mayo. You won’t regret making this unforgettable dish!
