
Savoring Spring: A Guide to Cooking Delicious Baby Artichokes with Garlic and Tomatoes
Spring is a season of renewal, vibrant colors, and fresh, exciting flavors. Among the many culinary delights it offers, the humble artichoke stands out, particularly its smaller, more tender counterpart: the baby artichoke. Often misunderstood, these delightful vegetables are a true treat, offering a unique blend of earthy, slightly sweet, and nutty notes. In this comprehensive guide, we’ll demystify the baby artichoke, explore its benefits, and provide an incredibly simple yet flavorful recipe for Sautéed Baby Artichokes with Garlic and Tomatoes that will quickly become a springtime favorite.
Unveiling the “Baby” Artichoke: A Culinary Secret
Don’t be misled by the endearing name “baby artichoke”; these aren’t immature, underdeveloped artichokes at all. In reality, an artichoke plant produces several large artichokes at its crown, while smaller buds sprout closer to the bottom. These smaller buds are harvested and marketed as “baby artichokes.” This clever labeling highlights their convenient size and tender nature. While they boast the same exquisite flavor as their larger brethren, their significant advantage lies in their preparation: they lack the prickly, inedible choke found in the center of mature artichokes, making them much easier and quicker to clean and cook.
Their compact size, typically just a little larger than a golf ball, means the entire tender heart is edible, minimizing waste and maximizing enjoyment. This makes them an ideal choice for quick weeknight meals or elegant appetizers, allowing you to enjoy the unique taste of artichokes without the extensive prep usually associated with their larger counterparts. When selecting baby artichokes, look for ones that feel firm, are heavy for their size, and have tightly closed, bright green leaves. Avoid any with dry, wilting, or discolored leaves, as these indicate they are past their prime.
Why Embrace Artichokes in Your Diet? Health Benefits and Versatility
Beyond their delightful taste, artichokes are packed with nutritional value, making them a fantastic addition to any healthy diet. They are an excellent source of dietary fiber, which aids digestion, promotes satiety, and helps regulate blood sugar levels. This makes them a beneficial food for weight management and maintaining digestive regularity.
Rich in powerful antioxidants, particularly cynarin and silymarin, artichokes are renowned for their liver-protective properties. These compounds help detoxify the liver and protect its cells from damage, contributing to overall well-being. Artichokes also provide a good supply of essential vitamins and minerals, including Vitamin C, Vitamin K, folate, magnesium, and potassium. Vitamin C supports the immune system, Vitamin K is crucial for blood clotting and bone health, and folate is vital for cell growth and function. Magnesium and potassium play key roles in muscle function, nerve transmission, and blood pressure regulation.
Incorporating artichokes into your meals can therefore boost your immune system, improve gut health, and support various bodily functions. Their unique flavor profile, often described as a delicate blend of nutty, earthy, and slightly bitter notes, allows them to be incredibly versatile. They shine in a myriad of dishes, from fresh salads and hearty pasta to roasted sides, elegant appetizers, and even dips. This recipe, focusing on simple sautéing with garlic and tomatoes, perfectly showcases their natural goodness and makes them accessible to even novice cooks, offering a delicious way to harness their many health benefits.
A Spring Celebration of Artichokes: Culinary Inspiration
The arrival of spring often brings a craving for fresh, vibrant produce, and artichokes perfectly fit that bill. Around this time, culinary enthusiasts and food bloggers often come together to celebrate seasonal ingredients. My culinary friends and I are joining this joyous celebration, focusing our collective creativity on the magnificent artichoke. Whether you’re a seasoned artichoke lover or new to cooking them, these diverse approaches will undoubtedly inspire you to experiment further with this versatile vegetable. Here are some other inspiring artichoke recipes and insights from my fellow food lovers:
- Roberto at Food2: The Art of the Artichoke
- Nicole at Pinch My Salt: Artichoke Recipe Roundup
- Kirsten at FN Dish: Artichokes for Beginners
- Diane and Todd at White On Rice Couple: Grilled Artichoke Stems
- Gaby at What’s Gaby Cooking: Baby Artichokes
- Roberto at Cooking Channel: Artichoke Appetizers
- Dana at Food Network Healthy Eats: All About Artichokes
Preparing Baby Artichokes: A Step-by-Step Visual Guide
One of the greatest advantages of baby artichokes is their straightforward preparation. For this recipe, aim to select artichokes that are slightly larger than a golf ball but no bigger. Smaller artichokes guarantee maximum tenderness and the absence of any fibrous choke. Follow these simple steps to prepare them perfectly, ensuring a delightful culinary experience:
Step 1: The Lemony Water Bath – Essential for Freshness
Before you even begin trimming the artichokes, prepare a large bowl of cool water infused with lemon juice. Halve one lemon, generously squeeze its juice into the water, and then toss the spent lemon half into the bowl. This acidic bath is crucial: it prevents the cut artichokes from oxidizing and turning brown, preserving their fresh, appealing color and taste. Artichokes, like apples, tend to discolor rapidly upon exposure to air, so this immediate submersion is key. As you prepare each artichoke, immediately submerge its slices in this lemony water.
Step 2: Trimming the Top – Removing Tough Ends
Begin by carefully cutting off the top portion of each artichoke, about ½ inch from the tip. This step efficiently removes the tougher, spiky leaf ends that are not pleasant to eat. Use a sharp chef’s knife for a clean cut. After trimming, place the artichoke onto a cutting board, ensuring a stable base for the next step.
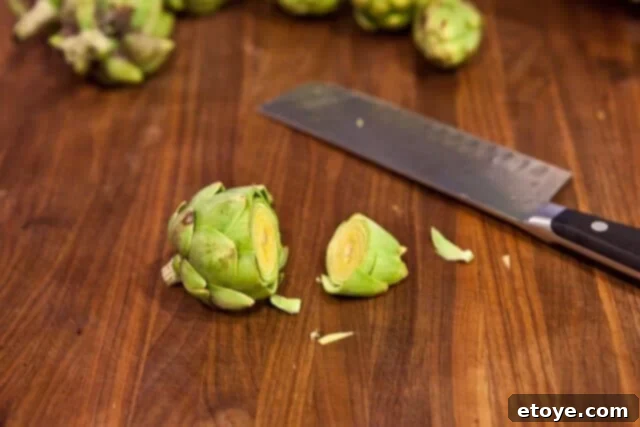
Step 3: Removing Outer Leaves – Revealing Tenderness
Next, snap off the first two layers of dark green, fibrous outer leaves. These leaves are typically too tough to eat. Continue peeling away leaves, working your way around the artichoke, until you reveal the pale, smooth, and light green inner leaves. These are the tender parts you want to keep and enjoy. This process ensures you’re left with only the most delicious, edible portions of the artichoke heart and inner leaves.
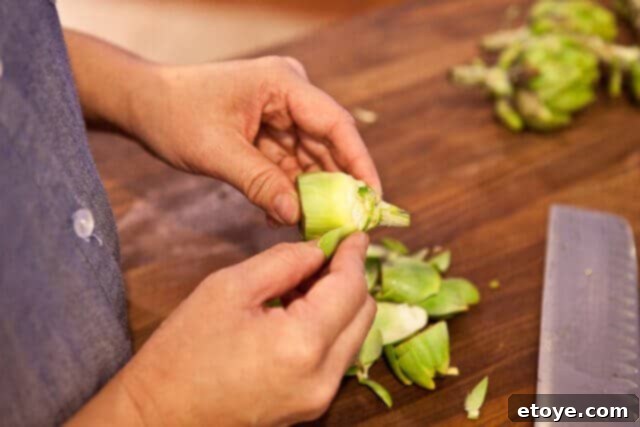
Step 4: The Core Revealed – No Choke Here!
You’ll notice that after removing the tougher outer leaves, you’re left with a beautiful, tender core. This entire center is edible and, significantly, free of the fibrous choke (the fuzzy inedible part) found in larger, mature artichokes. This is the main reason why baby artichokes are so much easier and quicker to prepare, saving you time and effort in the kitchen.
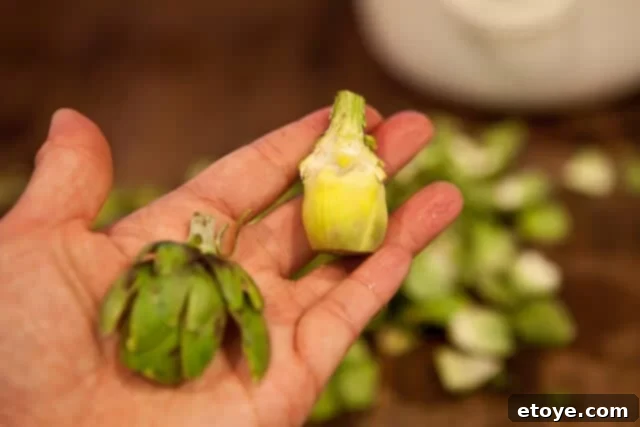
Step 5: Slicing for Cooking – Uniformity is Key
With the tender core exposed, slice each artichoke into approximately ¼-inch thick pieces. These thin slices are ideal as they will cook quickly and evenly, allowing them to absorb all the wonderful flavors of garlic and tomatoes in your dish. Uniform slices also ensure consistent texture throughout the final product.
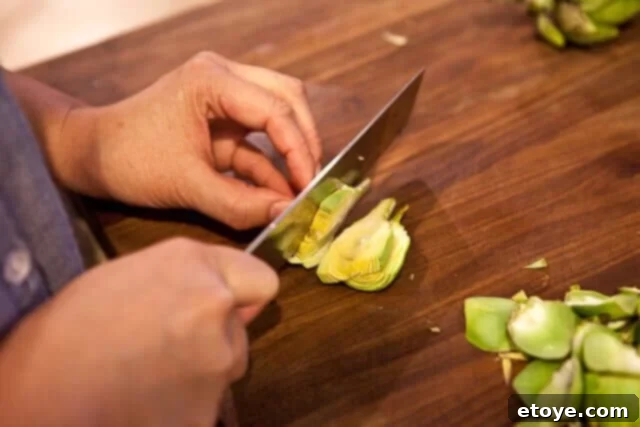
Ensure your slices are consistently about ¼ inch thick for optimal cooking results. Precision here helps achieve that perfect tenderness and browning, making each bite a delight.
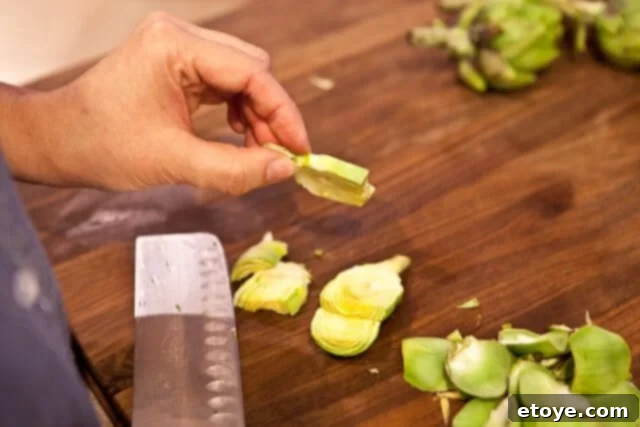
Step 6: The Lemony Soak – Maintaining Vibrant Color
Immediately after slicing, transfer the artichoke pieces into your prepared bowl of lemony water. This step is vital to prevent discoloration and keep the artichokes bright and appealing until you’re ready to cook. The acid in the lemon juice acts as a natural preservative, preventing enzymatic browning. You can prepare them ahead of time by keeping them submerged in this water and refrigerating them for several hours, making meal prep much easier.
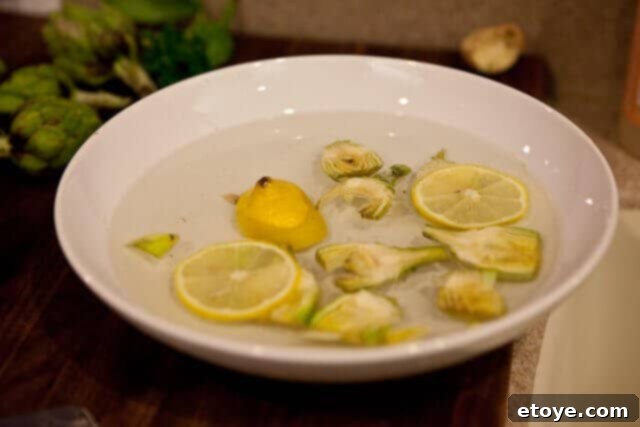
Sautéing Baby Artichokes to Perfection: The Cooking Process
Once your baby artichokes are prepped and ready, the cooking process is quick and simple, culminating in a dish bursting with flavor. The key is to achieve a beautiful browning on the artichokes before incorporating the other ingredients. Here’s how to bring it all together for a truly delicious result:
Step 7: Drying the Artichokes – Crucial for Browning
Just before cooking, it’s absolutely crucial to thoroughly dry the artichoke slices. Excess water will dramatically prevent proper browning and instead cause the artichokes to steam rather than sauté. A salad spinner works wonders for this, quickly removing surface moisture. Alternatively, you can pat them very dry with clean kitchen towels or paper towels. This ensures they develop a lovely golden crust and deepens their flavor.
Step 8: Sautéing the Artichokes – Developing Flavor
Heat a large sauté pan or a wok over medium-high heat. Add two tablespoons of olive oil. Once the oil is shimmering and hot (you might see faint wisps of smoke), add the dried artichoke slices. Arrange them in a single layer as much as possible to ensure even cooking and browning. If your pan is not large enough to hold all slices in a single layer without overcrowding, cook them in two batches. Overcrowding the pan lowers the temperature and leads to steaming instead of sautéing, preventing that desirable golden-brown char. Sauté for about 2 minutes until they begin to brown beautifully, then toss to flip and cook for another minute or two. You’re looking for that lovely golden-brown char that signifies intense flavor and a slightly crispy texture.
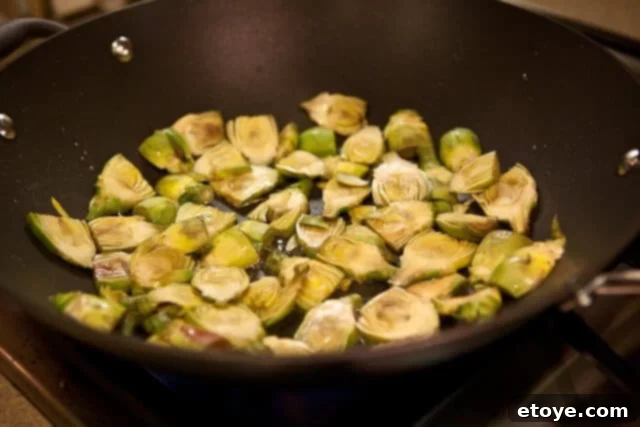
Step 9: Adding Garlic and Tomatoes – Building the Aromatic Base
Once the artichokes are nicely browned, add the thinly sliced garlic. It’s important to add the garlic *after* the artichokes have started browning, or even after the first batch is done and the second is started. This prevents the delicate garlic from burning, which can impart an unpleasant bitter taste to your dish. Sauté for another minute or so, tossing frequently, until the garlic becomes fragrant and lightly golden. The aroma that fills your kitchen at this stage is truly inviting.
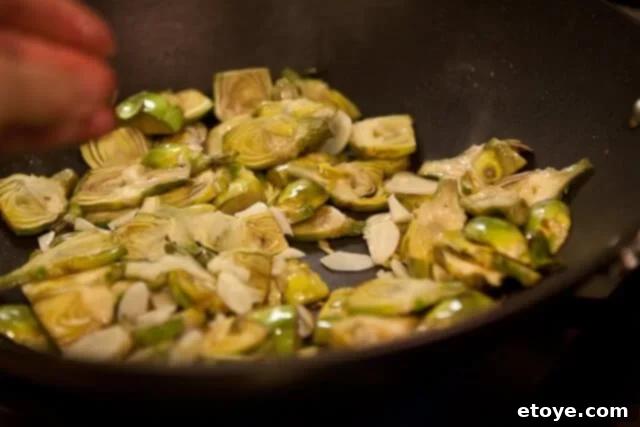
Continue to toss gently to combine the flavors, ensuring the garlic’s fragrance infuses every piece of artichoke.
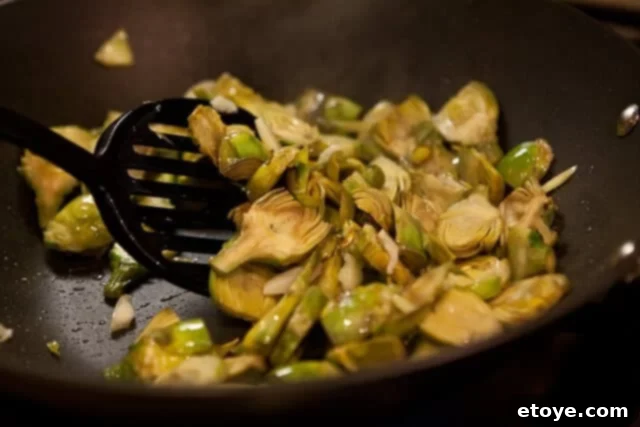
Next, add the roughly chopped fresh tomatoes to the pan. Their natural acidity and subtle sweetness will complement the artichokes and garlic beautifully, adding another layer of freshness and vibrant color to the dish.
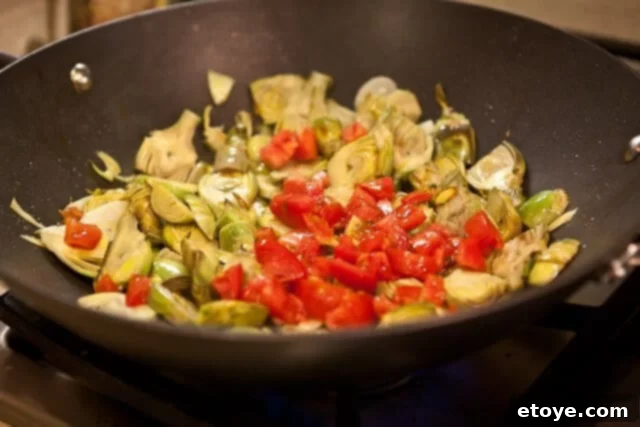
Step 10: Seasoning and Deglazing – Enhancing Depth of Flavor
Season the mixture generously with salt and freshly ground black pepper to taste. Adjust these seasonings to your preference. Give everything a good toss to distribute the seasonings evenly, ensuring every component is well-flavored.
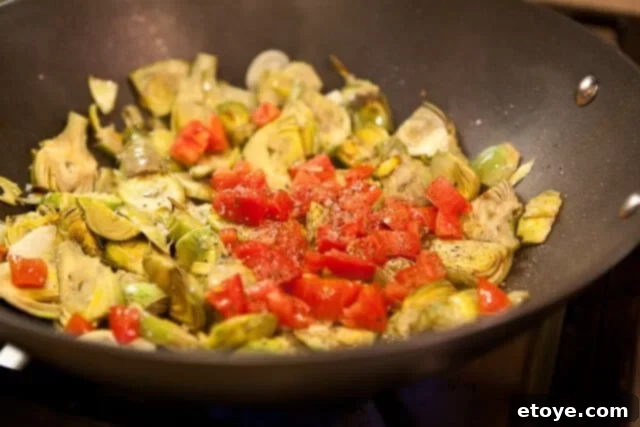
Squeeze in the juice from the remaining lemon half. This adds a bright, zesty note that cuts through the richness and enhances all the other flavors, bringing a delightful tang to the dish.
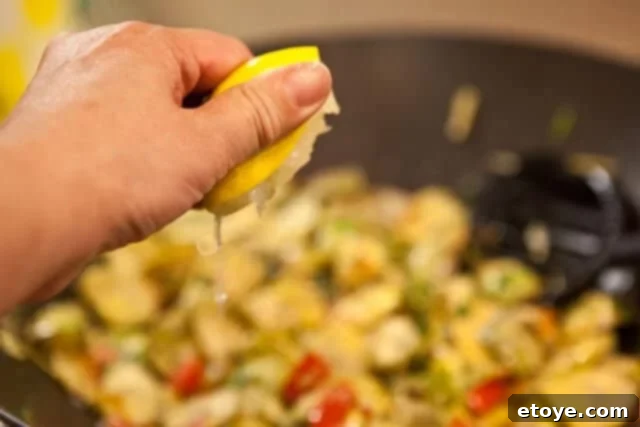
Pour in the white wine and vegetable broth. These liquids serve a dual purpose: they will deglaze the pan, lifting any delicious browned bits from the bottom and incorporating them into the sauce, and they will create a flavorful steaming environment to help the artichokes cook through completely, becoming exquisitely tender.
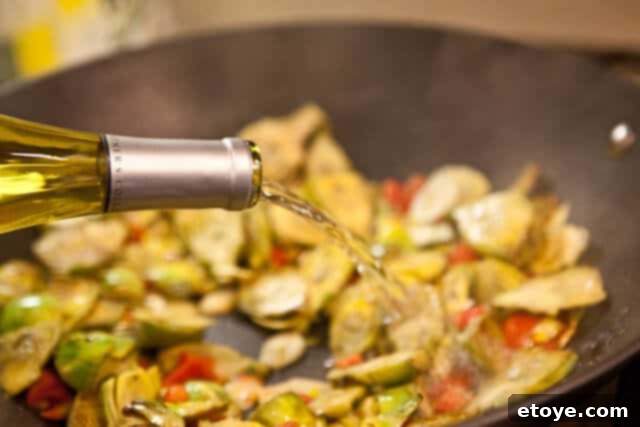
Step 11: Simmer and Finish – Perfecting Tenderness and Aroma
Bring the mixture to a gentle simmer, then cover the pan, reduce the heat to medium-low, and let the artichokes cook for about 5 minutes. This gentle steaming process ensures the artichokes become perfectly tender while infusing them with the rich, aromatic flavors of the garlic, tomatoes, wine, and broth. After 5 minutes, give it a taste – check for tenderness and adjust seasoning with salt and pepper if needed. If they’re not quite as tender as you prefer, cover and cook for another minute or two.

Finally, just before serving, stir in the fresh minced parsley. Its vibrant color and fresh, herbaceous notes provide a beautiful contrast and a delightful finish to the dish, enhancing its visual appeal and adding a final burst of freshness.
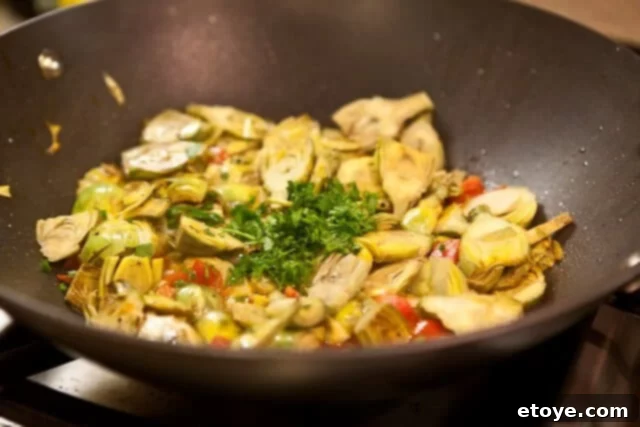
Serving Suggestions
Serve your delicious Sautéed Baby Artichokes with Garlic and Tomatoes immediately while hot to best appreciate their fresh flavors and tender texture. This versatile dish makes an excellent side for a variety of main courses, pairing wonderfully with grilled chicken, baked fish, roasted lamb, or even a hearty steak. It can also be served as a delightful vegetarian appetizer, perhaps alongside some crusty bread for dipping into the flavorful sauce. For a light main course, consider tossing it with freshly cooked pasta, or serving it over quinoa or couscous. A sprinkle of freshly grated Parmesan cheese or a generous drizzle of good quality extra virgin olive oil just before serving can elevate it even further, adding richness and depth. Enjoy this healthy, flavorful, and easy-to-prepare dish that truly celebrates the flavors of spring!
Recipe: Baby Artichokes with Garlic and Tomatoes
This recipe transforms fresh baby artichokes into a flavorful and tender dish, perfect as a side or a light appetizer. Be sure to choose baby artichokes that are no larger than a golf ball to ensure they are tender and free of the inner choke.
Prep Time: 15 mins
Cook Time: 12 mins
Servings: 4
Ingredients
- 1 pound baby artichokes
- 1 lemon, halved
- 2 tablespoons olive oil
- 2-3 cloves garlic, thinly sliced
- 1-2 tomatoes, roughly chopped
- Salt and freshly ground black pepper, to taste
- 1/4 cup white wine (dry white wine like Sauvignon Blanc or Pinot Grigio works well)
- 1/4 cup vegetable broth
- 2 tablespoons minced fresh parsley (or other fresh herb like basil)
Instructions
- Prepare Lemon Water: Fill a large bowl with cool water. Take just one of the lemon halves and squeeze its juice into the water. Drop the squeezed lemon half into the water as well. This will be your anti-browning bath for the artichokes.
- Clean Artichokes: Prepare the artichokes by cutting off and discarding the top ½ inch. Peel away the first couple of dark green, tough layers of leaves until you reach pale, smooth, light green leaves. Slice each artichoke into approximately ¼-inch thick pieces. Immediately place the slices into the lemon-water to prevent discoloration. Repeat with all remaining artichokes. You can complete this step ahead of time and refrigerate the artichokes in the lemon water until ready to cook.
- Dry Artichokes: Just before you are ready to cook, drain the artichoke slices and place them into a salad spinner to remove all excess water. Alternatively, you can pat them very dry with clean kitchen towels. This step is crucial for achieving a good sear.
- Sauté Artichokes (First Batch): Heat a large sauté pan or wok over medium-high heat. Swirl in the 2 tablespoons of olive oil. When the oil is hot and shimmering, add the artichoke slices. Try to spread them out in a single layer without overlapping. If your pan is not large enough, cook the artichokes in two batches. Cook for 2 minutes until they start to brown, then toss to flip and cook for another minute.
- Combine Batches (if necessary): If you cooked in two batches, remove the first browned batch from the pan and set aside. Cook the second batch. Once the second batch is done, return the first batch to the pan.
- Add Aromatics and Vegetables: Add the thinly sliced garlic to the pan with the artichokes and sauté until fragrant, tossing frequently (about 1 minute). Next, add the roughly chopped tomatoes and give everything another good toss. Season generously with salt and freshly ground black pepper.
- Deglaze and Simmer: Squeeze in the juice of the remaining lemon half. Pour in the white wine and vegetable broth. Bring the mixture to a simmer.
- Cook to Tenderness: Cover the pan, reduce the heat to medium-low, and cook for 5 minutes, allowing the artichokes to become tender and absorb the flavors. Taste and adjust seasoning with salt and pepper if needed. If the artichokes are not quite tender to your liking, cover and cook for another minute or two.
- Garnish and Serve: Stir in the fresh minced parsley just before serving. Serve hot and enjoy!
This simple yet elegant dish is a testament to the beauty of fresh, seasonal ingredients. Enjoy the unique taste and texture of these delightful baby artichokes! We hope you’ll try this recipe and share your experience.
