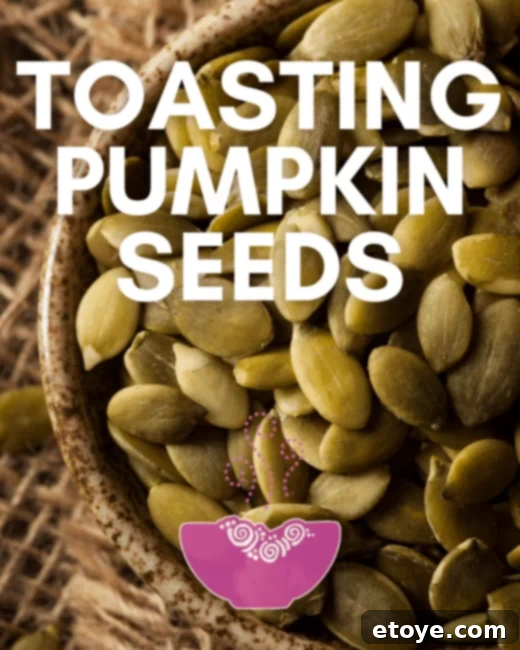
If you’re seeking to elevate your culinary creations with a simple yet profound touch, look no further than perfectly toasted pumpkin seeds, often known as pepitas. These tiny powerhouses are not just incredibly delicious; they’re also packed with nutrients, making them an exceptionally healthy snack and a versatile addition to countless recipes. The best part? Achieving that irresistible nutty crunch takes minimal effort and time. This comprehensive guide will walk you through the easy steps to transform raw pepitas into a gourmet topping that will undoubtedly level up your Buddha bowls, granolas, salads, and so much more!

Imagine a standalone Buddha bowl, a vibrant salad, or a beautifully crafted granola bowl. What simple step could make them truly unforgettable? The answer lies in the easiest technique ever: toasting pumpkin seeds! Whether you’re preparing a quick appetizer for friends or adding a delightful texture to your autumn dishes, mastering this skill is a game-changer for any home cook.

While this guide focuses on pumpkin seeds, the dry-toasting method can be applied to many other seeds like sesame, sunflower, or even watermelon seeds. Just remember to keep a watchful eye on your pan, as different seeds toast at varying rates. A quick note of caution: always research seeds before toasting. For instance, some seeds, like apple seeds, contain compounds that can be harmful when consumed.
Pepitas vs. Pumpkin Seeds: Understanding the Distinction
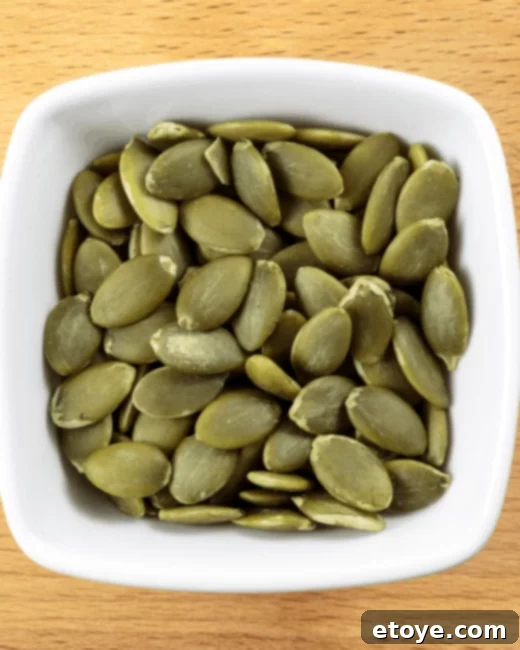
Technically, “pumpkin seeds” and “pepitas” refer to the same thing, but in modern culinary parlance, there’s a subtle distinction. “Pepitas” is the Spanish term for “little squash seeds,” and it’s commonly used to describe the shelled, hull-less version of pumpkin seeds. This term has become popular for its ease of use, especially when shopping for ready-to-eat pumpkin seeds in stores.
You’ll most often encounter raw pepitas or fresh pumpkin seeds, which are quite palatable on their own. However, if you’re seeking to unlock a more intense, nutty, and vibrant flavor profile, toasting is the essential step. This simple process enhances their natural oils, deepens their color, and adds an irresistible crunch that raw seeds simply can’t match.
The Nutritional Powerhouse: Health Benefits of Toasted Pepitas
Beyond their delightful taste and texture, toasted pumpkin seeds are a treasure trove of nutrients, making them an excellent addition to a health-conscious diet. These small seeds are particularly rich in magnesium, a vital mineral involved in over 300 bodily functions, including muscle and nerve function, blood glucose control, and blood pressure regulation. They are also a good source of zinc, which supports immune function and cell growth, and iron, crucial for energy and red blood cell production.
Furthermore, pepitas boast a significant amount of healthy fats, including omega-3 and omega-6 fatty acids, which are important for heart health and reducing inflammation. They are also packed with protein and dietary fiber, contributing to satiety and digestive health. With their impressive antioxidant content, pumpkin seeds help protect your cells from damage, making them a truly beneficial snack for overall wellness.
Preparing Your Pumpkin Seeds for Toasting: From Gourd to Goodness
Harvesting & Cleaning Fresh Pumpkin Seeds
If you’re carving a jack-o’-lantern or cooking with a small pie pumpkin, don’t let those valuable seeds go to waste! Properly cleaning them is the first crucial step before toasting. Start by using a sturdy metal spoon to scrape out the mass of seeds and stringy pumpkin flesh from your gourd. Once scooped out, the next task is to meticulously separate the seeds from any clinging bits of pumpkin or fibrous strands.
The most efficient way to clean them is to place the seeds in a fine-mesh strainer and rinse them under cool running water. Agitate the seeds with your fingers to help dislodge any attached pulp, allowing the loosened debris to wash down the drain. If some stubborn bits remain, spread the damp seeds out on a clean kitchen towel, pat them dry, and then carefully remove any lingering stringy pieces by hand. Before toasting, it’s paramount that your seeds are thoroughly dry. Spread them in a single layer on paper towels or a clean cloth and allow them to air dry for several hours, or even overnight, until all excess moisture has evaporated. The drier your seeds, the crispier and more evenly they will toast.
Selecting Store-Bought Pepitas
For convenience, you can easily find raw pepitas at most grocery stores or health food markets. When purchasing, look for bright green, plump seeds that appear fresh and have a mild, earthy aroma. Avoid any packages with discolored, shriveled, or musty-smelling seeds, as these may be old or improperly stored. Buying raw pepitas gives you full control over the toasting process and the ability to customize their flavor to your liking.
Mastering the Art of Toasting Pumpkin Seeds
Toasting pumpkin seeds is a remarkably simple process that yields significant flavor rewards. While pan-toasting is the quickest and most popular method, you can also use an oven or even an air fryer for different results or larger batches.
The Classic Pan-Toasting Method (Dry-Roasting)
This stovetop method is ideal for small to medium batches and provides excellent control over the toasting level.
- Prepare Your Pan: Start with a clean, dry, heavy-bottomed pan, such as a cast iron skillet or stainless steel pan. While some recipes suggest adding a touch of oil, the natural oils within the pumpkin seeds are usually sufficient for dry-toasting.
- Heat Evenly: Place your pan over medium heat and allow it to preheat for 1-2 minutes until it’s evenly hot.
- Add Pepitas: Distribute the raw pumpkin seeds in a single, even layer across the bottom of the pan. Avoid overcrowding, as this can steam the seeds rather than toast them. If you have a large quantity, toast them in batches.
- Toast and Stir: As the seeds heat, they will begin to become fragrant. Keep a close eye on them, as they can go from perfectly toasted to burnt very quickly. Toss or stir the pepitas frequently with a wooden spoon or spatula to ensure even browning.
- Look for Golden Brown: Continue toasting for approximately 3-5 minutes, or until the seeds are evenly golden brown, slightly puffed, and exude a rich, nutty aroma. Some might even make a faint popping sound.
- Cool and Serve: Once toasted to your liking, immediately remove the seeds from the hot pan to prevent further cooking. Spread them on a plate or baking sheet to cool completely before serving or storing.
Oven Roasting for Larger Batches
For greater quantities or a more hands-off approach, oven roasting is an excellent alternative.
- Preheat Oven: Preheat your oven to 300°F (150°C).
- Prepare Baking Sheet: Spread the raw pumpkin seeds in a single layer on a parchment-lined baking sheet. For optional flavor and better adhesion of seasonings, you can lightly toss them with a teaspoon of olive oil or avocado oil beforehand.
- Roast and Stir: Bake for 10-20 minutes, stirring every 5-7 minutes to ensure even toasting.
- Check for Doneness: The seeds are ready when they are golden brown, crunchy, and fragrant. Cooking time can vary depending on your oven and the size of the seeds.
- Cool Down: Remove from the oven and let them cool completely on the baking sheet.
Air Fryer Toasting: A Modern Twist
If you own an air fryer, it offers a fast and efficient way to achieve extra crispy pepitas.
- Preheat Air Fryer: Preheat your air fryer to 325°F (160°C).
- Lightly Oil (Optional): Lightly toss the pepitas with a tiny amount of high-smoke point oil like avocado oil, especially if you plan to add seasonings. This helps seasonings adhere.
- Air Fry: Place the seeds in a single layer in the air fryer basket.
- Shake and Monitor: Cook for 5-8 minutes, shaking the basket halfway through to ensure even cooking. Keep a close watch as air fryers cook quickly.
- Golden Crunch: Remove when they are golden and wonderfully crisp.
Flavor Infusion: Elevate Your Toasted Pepitas with Seasonings
Once you’ve mastered the basic toasting technique, it’s time to unleash your creativity and infuse your pumpkin seeds with exciting flavors. While plain toasted pepitas are delicious, a thoughtful blend of spices can transform them into an extraordinary snack or topping. The key is to toss your raw seeds with a small amount of oil (such as avocado, coconut, or olive oil) before adding your chosen seasonings. This helps the spices adhere beautifully during the toasting process.
Savory Spice Blends for a Zesty Kick
- Earthy & Bold: Combine curry powder, a pinch of cumin, and kosher salt.
- Spicy & Smoky: Mix chili powder, a dash of smoked paprika, black pepper, and sea salt.
- Herby & Aromatic: Try garlic powder, onion powder, dried oregano, and a touch of rosemary.
- Tangy & Zesty: A sprinkle of nutritional yeast for a cheesy flavor, with a squeeze of lime juice after toasting.
Sweet & Spicy Combinations for a Caramelized Crunch
- Classic Sweet Tooth: Toss with maple syrup, brown sugar, and a pinch of cinnamon for a delightful caramelized crunch.
- Warm & Inviting: Mix with a little honey, a dash of ginger powder, and a sprinkle of nutmeg.
- Sweet & Salty Fusion: A drizzle of honey or agave nectar with a generous pinch of flaky sea salt.
- Chai Spice Inspired: Combine cinnamon, cardamom, ginger, and a touch of cloves.
Remember to toss your seeds thoroughly with the oil and spices before they hit the heat. This ensures every pepita is coated, leading to a consistent and delicious flavor experience.
Storage Secrets: Keeping Your Toasted Pepitas Fresh and Crunchy
After you’ve created your batch of perfectly toasted and seasoned pumpkin seeds, proper storage is essential to maintain their freshness and signature crunch. The first critical step is to allow them to cool completely to room temperature. Packing warm or even slightly warm seeds can trap moisture inside the container, leading to condensation that will make them soggy and prone to spoilage.
Once fully cooled, transfer your toasted pepitas to an airtight container. A glass jar with a tight-fitting lid or a heavy-duty resealable bag works perfectly. Stored in your pantry at room temperature, they will retain their crispness and flavor for up to two weeks. If you’ve made a larger batch or want to extend their shelf life, storing them in the refrigerator can keep them fresh for about a month. For even longer preservation, especially for plain toasted seeds, you can freeze them for several months in a freezer-safe bag or container.
Frequently Asked Questions (FAQs) About Toasting Pepitas
Do I need to boil pumpkin seeds before toasting them?
Boiling pumpkin seeds in salted water is an optional step that some people prefer, especially with fresh seeds straight from a pumpkin. It can add a subtle salty flavor and slightly soften the exterior, which some believe leads to a better texture. However, it’s not a mandatory step for perfectly toasted pepitas. If you’re short on time, skipping the boiling is perfectly fine. The most important thing is to ensure the seeds are thoroughly dry before toasting to achieve that desired crunch.
Can I toast seeds from other squash varieties?
Absolutely! The toasting methods described here work wonderfully for seeds from other squash varieties like spaghetti squash, acorn squash, butternut squash, and even delicata squash. These seeds generally tend to be smaller and thinner than typical pumpkin seeds, so they will likely toast faster. Always keep a close eye on them and check frequently to prevent burning.
What are the best ways to season pumpkin seeds?
The “best” way to season pumpkin seeds really depends on your personal preference and how you plan to use them. For a classic, simple snack, a sprinkle of kosher salt or sea salt is often enough. For more adventurous flavors, try garlic powder, onion powder, smoked paprika, chili powder, or even a blend of your favorite herbs. If you prefer a sweet touch, maple syrup, brown sugar, or honey combined with cinnamon or nutmeg creates a delightful treat. For a sweet and savory experience, a combination of a sweetener and a pinch of salt or a mild spice can be fantastic.
How long do toasted pumpkin seeds last?
When stored correctly in an airtight container at room temperature, toasted pumpkin seeds typically maintain their freshness and crunch for up to two weeks. To significantly extend their shelf life, store them in the refrigerator, where they can last for approximately one month. For maximum longevity, plain toasted seeds can be frozen for several months.
Can I toast the seeds from store-bought pumpkins?
Yes, absolutely! Whether you’re using a large carving pumpkin for Halloween or a small pie pumpkin for baking, don’t discard those valuable seeds. Follow the cleaning and toasting steps outlined in this guide, and you’ll have a delicious, homemade snack ready in no time.
What are common mistakes to avoid when toasting pumpkin seeds?
The most common mistake is overcrowding the pan or baking sheet. This leads to steaming rather than toasting, resulting in soft, chewy seeds instead of crispy ones. Another common error is using heat that’s too high, which causes the outside to burn before the inside is properly toasted. Lastly, not monitoring the seeds closely is a frequent pitfall; they can go from perfectly golden to burnt in a matter of seconds. Constant stirring and visual checks are key!
Can I toast pumpkin seeds in the microwave?
While technically possible, microwaving is generally not recommended for toasting pumpkin seeds if you’re aiming for a truly crispy and evenly browned result. Microwaves heat unevenly and tend to steam the seeds, which can make them tough or chewy rather than light and crunchy. For best results, stick to pan-toasting, oven roasting, or air frying.
Unleash Culinary Creativity: Recipes Featuring Toasted Pepitas
The versatility of toasted pumpkin seeds knows no bounds. Their delightful crunch and nutty flavor make them a fantastic addition to both sweet and savory dishes. Use them as a topping to add texture and a boost of nutrition to almost anything.
- Pineapple Chicken Teriyaki Buddha Bowl Recipe
- Roasted Vegetable Buddha Bowl
- Warm Kale Salad with Maple Roasted Acorn Squash
- Cardamom Pepita Brittle
- Mexican(ish) Kale & Quinoa Salad
- Curried Squash Soup with Spiced Toasted Pumpkin Seeds
Essential Recipe: Pan-Toasted Pumpkin Seeds (Pepitas)
Here’s all you need to jazz up raw pumpkin seeds so that they’re perfectly nutty and crunchy and ready to add to any Buddha bowl, salad, or nutty dessert.

Quick Facts
Prep Time: 5 mins
Course: Snack
Cuisine: American
Ingredients
- 1/2 cup hulled raw pumpkin seeds (pepitas)
Instructions
- Heat a clean, dry 10-inch pan over medium heat until thoroughly hot.
- Add pumpkin seeds in one even layer, spreading them out to avoid overcrowding. Toast, in batches if needed, tossing pepitas occasionally, until evenly golden brown and slightly fragrant, 3 to 5 minutes total.
- Immediately remove from the hot pan and spread on a plate or baking sheet to cool completely before using or storing.
Nutrition Information (per serving)
- Calories: 179 kcal
- Carbohydrates: 3g
- Protein: 10g
- Fat: 16g
- Saturated Fat: 3g
- Sodium: 2mg
- Potassium: 259mg
- Fiber: 2g
- Sugar: 1g
- Calcium: 15mg
- Iron: 3mg
With so many exciting ideas and applications, incorporating toasted pumpkin seeds into your daily foodie life is effortless and rewarding. How will you enjoy these crunchy delights? Let us know your favorite ways to use them in the comments below!
