Mastering the Art of Boiling Eggs: Your Ultimate Guide to Perfection
The humble egg, a culinary canvas, holds immense potential, yet its simplest preparation – boiling – often proves surprisingly elusive. From a quick breakfast staple to a versatile salad component, a perfectly boiled egg is a game-changer. But if you’ve ever battled with stubborn shells, encountered a rubbery white, or been disappointed by that tell-tale gray ring around the yolk, you know there’s a secret to achieving egg-cellent results every time. This comprehensive guide will demystify the process, empowering you to create flawless soft-boiled or hard-boiled eggs, transforming a common kitchen task into a consistently satisfying culinary triumph.

Understanding the Spectrum of Boiled Egg Consistencies
Boiling an egg might appear straightforward, but the magic truly lies in precision timing. The duration an egg spends in the simmering or boiling water directly dictates its internal structure, from a luscious, runny yolk to a firm, crumbly center. Let’s explore the distinct stages of cooked eggs and their ideal applications:
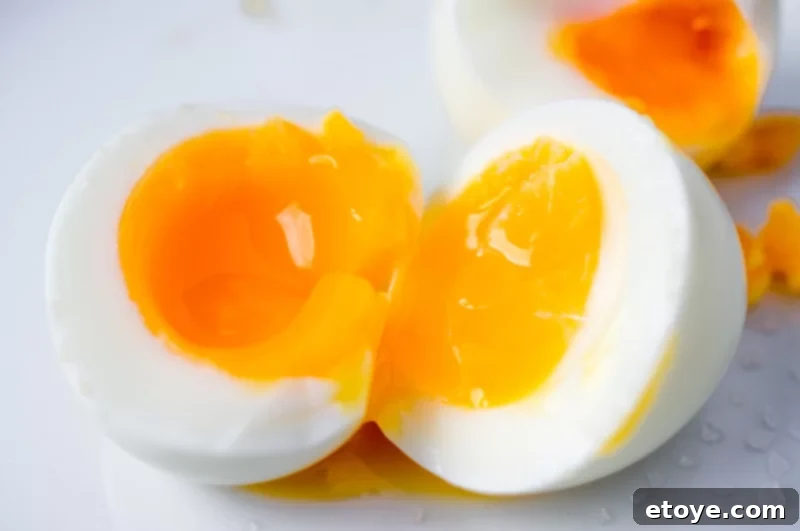
- Soft-Boiled: The Runny Delight (4-5 minutes)
- White: The albumen (egg white) will be mostly set but may still have a delicate, slightly translucent quality around the yolk.
- Yolk: Luxuriously liquid and warm, perfect for dipping crusty toast soldiers, drizzling over asparagus, or enhancing a bowl of ramen. This stage offers a rich, creamy mouthfeel that elevates simple dishes.
- Medium Soft-Boiled: The Custardy Core (6-7 minutes)
- White: Fully set and firm, providing a pleasant contrast to the yolk.
- Yolk: Features a captivating balance—the outer edge will be gently set, while the core remains beautifully creamy and slightly fluid. This consistency is fantastic for adding richness to salads or as a delightful snack on its own.
- Medium Hard-Boiled: The Almost Set (8-9 minutes)
- White: Completely firm and opaque throughout.
- Yolk: Predominantly set, offering a tender, almost fudgy texture with just a hint of moisture and yielding creaminess in the very center. This stage is ideal for slicing onto avocado toast or incorporating into a light protein-rich meal.
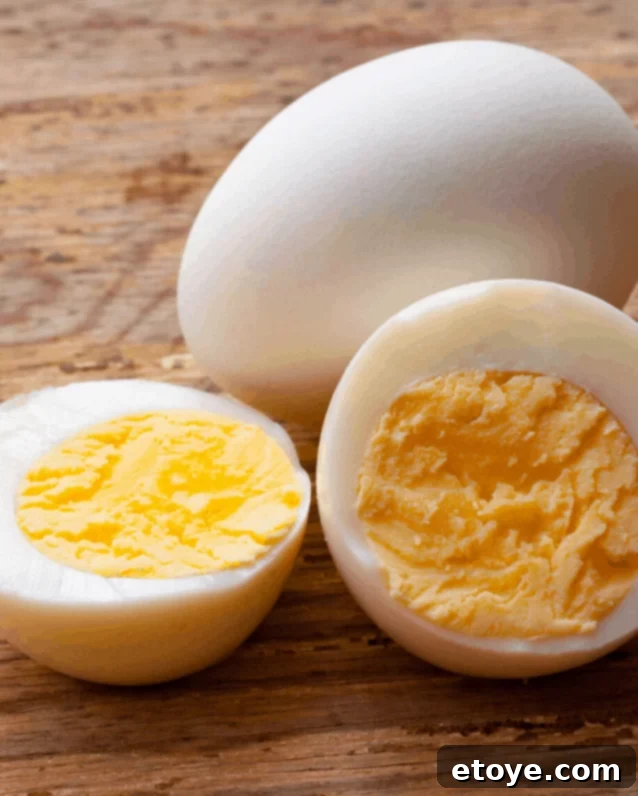
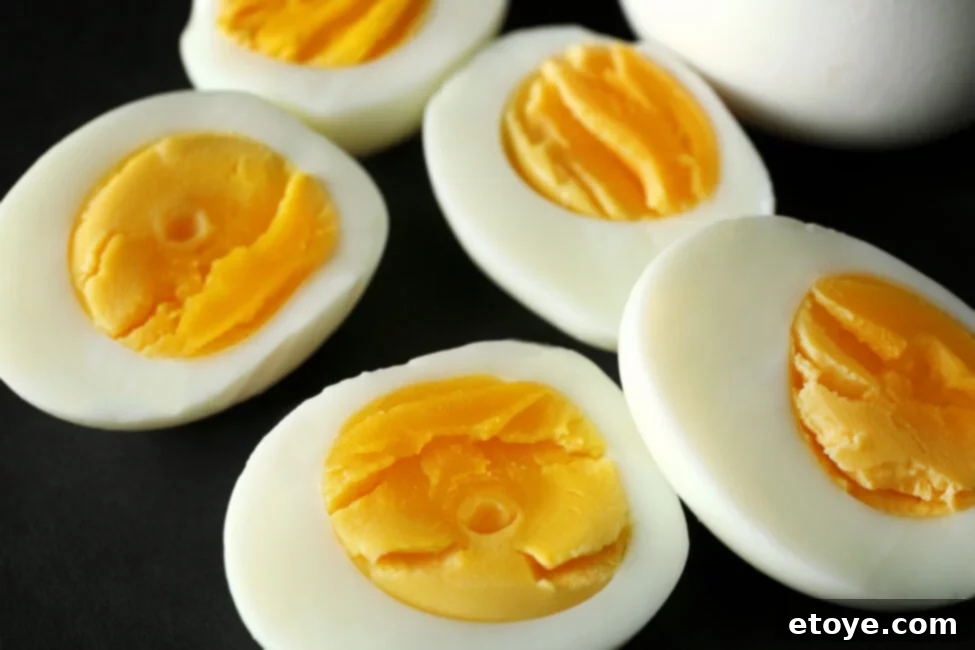
- Hard-Boiled: The Firm & Flakey Classic (10-12 minutes)
- White: Robust and thoroughly set, providing a satisfying bite.
- Yolk: Entirely cooked through, presenting a firm yet moist and crumbly texture. This is the go-to for egg salads, deviled eggs, nutrient-packed snacks, or as a protein addition to almost any lunch.
Mastering these stages is not just about personal preference; it’s about unlocking culinary versatility. Whether you’re crafting a vibrant salad, simmering a comforting bowl of ramen, or simply enjoying them for breakfast, understanding these timing nuances ensures you’ll always have the perfect egg to complement your dish and delight your palate.

Selecting the Perfect Eggs for Boiling Success
The journey to a perfect boiled egg begins long before you reach the stovetop. Your choice of eggs at the market significantly impacts not only the final taste and texture but also the ease of peeling. Here’s what to look for when choosing your eggs:
- The Role of Freshness: Easier Peeling with Older Eggs
- Why It Matters: Counterintuitively, eggs that are a few days to a week old are generally easier to peel after boiling than super fresh ones. This is due to a natural chemical change: as an egg ages, the pH level of the egg white (albumen) gradually increases. This higher pH causes the albumen to become less adherent to the inner shell membrane, making for a smoother, less frustrating peeling experience. Super fresh eggs, while delicious, often cling stubbornly to their shells.
- Practical Tip: If you’re unsure about the age of your eggs, perform a simple float test. Gently place an egg in a bowl of cold water. A very fresh egg will sink flat to the bottom. An egg that’s a week or so old, ideal for boiling, will usually stand upright on its end but remain submerged. An old, spoiled egg will float to the surface, indicating it’s time to discard it. Always store eggs in their original carton in the coldest part of your refrigerator, not in the door, to maintain consistent temperature and freshness.
- Consistency in Size for Uniform Cooking
- Why It Matters: The size of an egg directly influences its cooking time. A larger egg contains more volume and thus requires a longer period to cook through to the desired consistency compared to a medium or small egg. Mixing different sizes in one batch can lead to some eggs being overcooked and others undercooked.
- Practical Tip: For consistently perfect results across all your boiled eggs, strive to boil eggs that are uniform in size. If you must boil various sizes together, consider starting the larger eggs a minute or two earlier or adjusting the overall cooking time to favor the majority size. As a general rule, add about 30-60 seconds for jumbo eggs and subtract 30-60 seconds for small eggs, relative to the timing for large eggs.
- Decoding Egg Labels: Free-Range, Organic, & Conventional
- Conventional Eggs: These are the most common and typically the least expensive. They come from hens usually housed in industrial settings with limited space. While budget-friendly, the flavor might be less pronounced compared to other options.
- Cage-Free Eggs: Hens are not kept in cages but may still be housed indoors without access to the outdoors. They have more space to roam, perch, and lay eggs in nests, which is an improvement in welfare.
- Free-Range Eggs: These hens have access to the outdoors for at least part of the day, allowing them to forage, dust bathe, and engage in natural behaviors. This varied diet and active lifestyle often result in eggs with richer, more vibrant yolks and superior flavor.
- Organic Eggs: Come from hens raised on organic feed (no pesticides, herbicides, or GMOs) and have access to the outdoors. They are also raised without synthetic hormones or antibiotics. This label primarily pertains to the feed and environmental conditions.
- Pasture-Raised Eggs: Often considered the gold standard for welfare, these hens spend most of their lives outdoors on pastures, constantly moving and foraging for a significant portion of their diet. This leads to the most nutrient-dense and flavorful eggs, often characterized by deep orange yolks.
- Practical Tip: Your choice here depends on your personal preferences, budget, and ethical considerations regarding animal welfare and sustainability. Generally, hens with better living conditions and varied diets tend to produce eggs with a more robust flavor and nutritional profile.
While any egg can be boiled, understanding these subtle differences empowers you to make informed decisions, ensuring your boiled eggs align with your culinary needs and personal values.

Crafting the Perfect Hard-Boiled Egg: A Step-by-Step Guide
A perfectly cooked hard-boiled egg is a versatile kitchen essential—ideal for adding protein to salads, making creamy egg salad sandwiches, or simply enjoying as a nutritious snack. Achieving that firm yolk without the dreaded green ring is easier than you think with this reliable method:
- Start with Room Temperature Eggs: Allow your eggs to sit out of the refrigerator for at least 15-30 minutes before boiling. This crucial step helps prevent the shells from cracking when they are introduced to warm water, as sudden temperature changes can stress the shell.
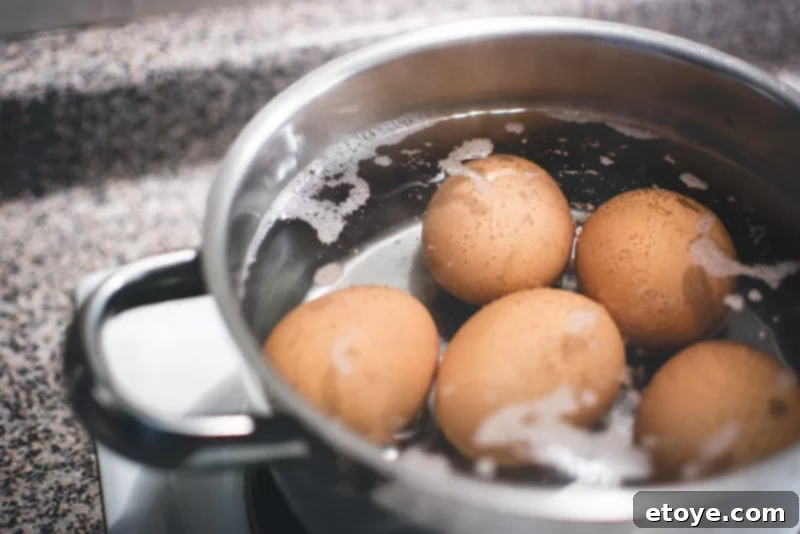
- Arrange Eggs in a Single Layer: Choose a saucepan large enough to accommodate all your eggs comfortably in a single layer at the bottom. Overcrowding the pot can lead to uneven cooking and increase the likelihood of eggs cracking as they jostle against each other.
- Cover Completely with Cold Water: Gently place the eggs in the empty pot. Then, add enough cold tap water to cover the eggs by at least one to two inches. Starting with cold water ensures a gradual increase in temperature, which further minimizes cracking and promotes even cooking of the egg whites.
- Slowly Bring to a Rolling Boil: Place the pot on a stovetop burner over medium-high heat. Gradually bring the water to a full, rolling boil. A gentle boil is preferred over a vigorous, bubbling one, as excessive agitation can still cause shells to crack.
- Remove from Heat and Cover for Cooking: Once the water reaches a full boil, immediately turn off the heat source. Cover the pot tightly with a lid and let it stand undisturbed. For perfectly hard-boiled eggs with a firm, moist yolk, allow them to sit for 9-12 minutes. The residual heat from the water will continue to cook the eggs gently to perfection, preventing overcooking.
- Cool Promptly in an Ice Bath: As soon as the timer goes off, carefully transfer the eggs from the hot water into a bowl filled with ice water, or run them under cold tap water until thoroughly chilled. This “ice bath” step is vital: it immediately halts the cooking process, preventing the development of that unappetizing greenish-gray ring around the yolk, and it also causes the egg to contract slightly, making the peeling process significantly easier. Allow them to cool for at least 5-10 minutes.
With these steps, you should consistently achieve perfectly cooked hard-boiled eggs with a firm, vibrant yolk and a smooth, unblemished white—ready for any culinary creation. For easiest peeling, gently tap the wide end of the cooled egg on a hard surface, then roll it to create fine cracks all around before peeling under cold running water or in the ice bath.

Achieving the Dreamy Soft-Boiled Egg: A Simple Method
The allure of a soft-boiled egg lies in its exquisite, runny yolk—a golden treasure that transforms breakfast or brunch into a luxurious experience. Here’s how to achieve that coveted, dreamy center consistently:
- Begin with Room Temperature Eggs: Just as with hard-boiled eggs, starting with eggs that have been sitting out of the refrigerator for approximately 15-30 minutes helps prevent thermal shock, which can lead to cracking when the eggs hit the hot water.
- Prepare Your Pot with Care: Gently place your eggs in a single layer at the bottom of a saucepan. Ensure the pot is just large enough to hold the eggs without overcrowding. Cover the eggs with cold tap water, ensuring there’s at least an inch of water above them.
- Bring to a Rapid Boil: Place the pot on the stovetop over high heat. Bring the water to a full, rolling boil as quickly as possible. The rapid heat helps set the whites quickly while keeping the yolk beautifully fluid.
- Precision Timing is Everything: As soon as the water reaches a vigorous boil, reduce the heat immediately to low (or turn it off entirely, depending on your stove’s heat retention) to maintain a gentle simmer, or simply cover and let stand off the heat. Let the eggs cook for precisely 4-5 minutes for a perfectly runny, dippable yolk, or 6-7 minutes for a slightly more gel-like, custardy yolk that still flows gracefully. Use a timer to ensure accuracy, as even 30 seconds can make a significant difference.
- Immediate Ice Bath Transfer: The moment your timer signals the end of cooking, use a slotted spoon to transfer the eggs directly into a bowl filled with ice water. Alternatively, run them under a stream of very cold tap water for at least 5 minutes. This rapid chilling is crucial; it immediately halts the cooking process, preventing the yolk from firming up further, and also aids in a smoother peeling experience by causing the egg to contract.
Once cooled, gently crack and peel your soft-boiled eggs, and you’ll be rewarded with a glistening, golden center—a true delicacy waiting to be enjoyed with a sprinkle of salt and pepper, or dipped into by crisp toast.

Common Mistakes (and How to Avoid Them) for Egg-cellent Results
While boiling eggs seems like one of the simplest culinary tasks, subtle errors can lead to frustrating results. Understanding these common pitfalls and their solutions will pave your way to consistently perfect eggs:
- Overcooking: The Dreaded Green Ring: This is arguably the most frequent misstep. Overcooked hard-boiled eggs often develop a greenish-gray ring around the yolk. This discolored ring is a harmless, yet unappetizing, result of a chemical reaction between the iron in the yolk and the sulfur in the egg white, accelerated by excessive heat and prolonged cooking. While safe to eat, it indicates suboptimal texture and appearance. Solution: Adhere strictly to the recommended cooking times for your desired consistency, and always use a reliable kitchen timer. The immediate transfer to an ice bath is also crucial for preventing this reaction.
- Using Super Fresh Eggs for Hard Boiling: Counterintuitive as it may seem, extremely fresh eggs (just a day or two old) are notoriously difficult to peel once boiled. The inner membrane of a very fresh egg adheres tightly to the egg white. Solution: For hard-boiled eggs, opt for eggs that have been in your refrigerator for about a week to ten days. As eggs age, their pH increases, causing the albumen to separate more easily from the shell membrane, resulting in effortless peeling.
- Cracking Eggs During Boiling: Dropping cold eggs directly into rapidly boiling water or overcrowding the pot can lead to thermal shock and eggs knocking against each other, causing the shells to crack. This can result in some of the egg white seeping out. Solution: Always start with eggs at room temperature (if possible) and place them gently into cold water before bringing it to a boil. Ensure the pot isn’t overcrowded, allowing eggs to sit in a single layer with a little space. For an extra layer of protection, some chefs add a pinch of salt or a teaspoon of vinegar to the water, which can help seal small cracks and prevent excessive leakage.
- Attempting to Peel Hot Eggs Immediately: While tempting, trying to peel eggs immediately after boiling—without proper cooling—often results in chunks of egg white tearing away with the shell, leading to a pockmarked and messy egg. Solution: Always cool your boiled eggs thoroughly. Transferring them immediately to an ice bath or running them under cold water for several minutes is essential. The rapid cooling causes the egg to contract, creating a tiny air gap between the egg and the shell, which makes peeling significantly smoother and cleaner.
- Not Using Enough Water: If the eggs are not fully submerged in water, they will cook unevenly, with parts of the egg being undercooked or overcooked. Solution: Always ensure there is ample cold water in the pot, covering all eggs by at least one to two inches, to guarantee consistent heat distribution and even cooking.
- Forgetting the Timer: Eyeballing cooking times is a recipe for inconsistency, especially with delicate soft-boiled eggs where minutes, even seconds, count. Solution: Always use a reliable kitchen timer. This eliminates guesswork and ensures repeatable results for your desired egg consistency every single time.
By keeping these common pitfalls in mind and diligently following these simple solutions, you’ll elevate your egg-boiling game and consistently produce beautiful, perfectly cooked eggs.

Our Favorite Method: The Steaming Secret to Perfect Peeling
After countless experiments with various techniques, one method consistently stands out for yielding impeccably cooked eggs with an unparalleled ease of peeling: steaming. This approach provides a gentler, more uniform heat that results in superior texture and helps separate the shell more effectively.
- Prepare the Eggs (Optional but Recommended): Locate the larger, broader end of each egg. Using a bamboo skewer, a clean thumbtack, or the tip of a small paring knife, carefully tap or prick a tiny hole into the shell without piercing the inner membrane. This small puncture allows trapped air to escape during cooking, preventing cracking and significantly aiding in the peeling process later. Once punctured, gently transfer the eggs into a steamer basket, ensuring they are in a single layer.
- Set Up Your Steamer: Pour approximately 1 inch of water into a saucepan that is appropriately sized to hold your steamer basket without the basket touching the water.
- Bring Water to a Boil: Place the saucepan on your stovetop over high heat and bring the water to a rapid boil. You should see steam actively rising.
- Steam the Eggs to Perfection: Carefully lower the steamer basket, containing your prepared eggs, into the saucepan. Ensure the lid is tight-fitting to trap the steam effectively. Reduce the heat to medium-low to maintain a steady, gentle steam. Cook for:
- 8 minutes for Soft-Boiled Eggs (runny yolk, firm white)
- 12 minutes for Hard-Boiled Eggs (firm yolk, firm white)
- Immediate Ice Bath for Easy Peeling: As soon as the cooking time is complete, immediately remove the steamer basket and transfer the eggs into a large bowl filled with ice-cold water. Let the eggs cool in the ice bath for at least 5-10 minutes. This rapid cooling stops the cooking process dead in its tracks and, crucially, causes the egg to contract, creating a small air gap that makes them incredibly easy to peel cleanly, every single time.
Try this steaming method, and you’ll likely discover it becomes your new go-to for consistently perfect, effortlessly peeled boiled eggs.

Frequently Asked Questions About Boiled Eggs
Got more questions about boiling eggs? Here are answers to some of the most common queries:
- Why do some hard-boiled eggs have a grayish-green ring around the yolk?
This common occurrence is typically a sign of overcooking. The greenish-gray ring forms due to a chemical reaction between the iron in the egg yolk and the sulfur in the egg white when exposed to high heat for too long. While it might look unappetizing, it’s perfectly safe to eat. To avoid it, ensure you stick to the recommended cooking times and cool eggs immediately in an ice bath. - How long can I store boiled eggs?
Hard-boiled eggs, whether peeled or unpeeled, can be safely stored in the refrigerator for up to one week. For best results and to prevent them from absorbing odors, store them in a covered container or an airtight bag. Soft-boiled eggs should ideally be consumed within 2-3 days for optimal freshness and texture. - Can I freeze boiled eggs?
It is generally not recommended to freeze whole boiled eggs. Freezing causes the egg whites to become rubbery and watery, and the yolks can develop a mealy or crumbly texture upon thawing. However, you can freeze separated hard-boiled egg yolks to use later in dishes like deviled eggs or as a garnish. - Why is there sometimes an “air pocket” at the bottom of a boiled egg?
The “air cell” or “air pocket” naturally forms at the large end of an egg as it cools after being laid. As the egg cools, its contents contract, and the inner membrane separates from the outer membrane, creating a small gap. This pocket expands slightly when the egg is heated during boiling. It’s completely natural, harmless, and often indicates a slightly older egg, which can be easier to peel. - Is there a difference in boiling times for brown versus white eggs?
Absolutely not. The color of an eggshell has no bearing on its internal composition or cooking time. Whether brown or white, the primary factors influencing boiling duration are the egg’s size (small, medium, large, jumbo) and its starting temperature (refrigerated vs. room temperature). - Why do egg whites sometimes appear slightly brown or discolored after boiling?
If your boiling water has a high mineral content, particularly iron, these minerals can react with the egg whites and cause a slight brownish tint or discoloration. This is harmless and the eggs are safe to eat. If you prefer to avoid it, you can try using filtered or distilled water, or simply a different water source. - What if my egg cracks while boiling? Is it still safe to eat?
Yes, if an egg cracks during boiling, it is still perfectly safe to eat. Some of the egg white might seep out and coagulate in the water, giving it an irregular shape, but the egg itself is still wholesome. To prevent cracking, start with room temperature eggs and place them in cold water before heating. - Can I boil eggs using other methods, like an Instant Pot or air fryer?
Yes, absolutely! The Instant Pot (pressure cooker) is a popular method for hard-boiled eggs, often yielding incredibly easy-to-peel results. Air fryers can also “boil” eggs by essentially baking them, creating a similar effect to conventional boiling but without water. These methods offer alternatives for different kitchen setups and preferences.
Egg-ceptional Dishes to Elevate with Boiled Eggs
Ready to put your newly perfected boiling skills to delicious use? Here are some fantastic recipes where the creamy allure of a soft-boiled egg or the satisfying texture of a hard-boiled egg will truly elevate the dish:
- Pressure Cooker Ramen
- 15-Minute Miso Ramen
- 30-Minute Tofu and Veggie Ramen with Sesame Seeds and Chili Oil
- Leftover Turkey Miso Ramen
Dive into these recipes and savor the perfect texture and rich flavor that only a perfectly boiled egg can bring to your table!
