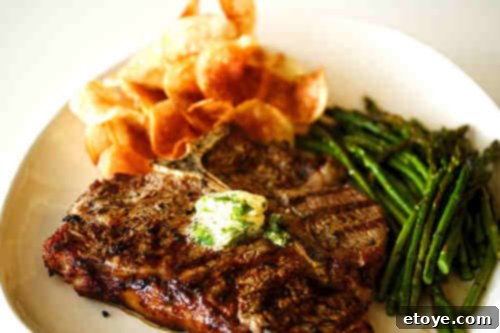
Unlock Prime Steak Flavor: The Ultimate Guide to Salting Cheap Cuts for Unbelievable Tenderness
Are you a devoted steak lover? If the thought of a perfectly seared, incredibly tender, and intensely flavorful steak makes your mouth water, then you’ve stumbled upon a culinary revelation. This guide will walk you through a simple yet transformative technique that promises to elevate even the most budget-friendly “Choice” cuts to the luxurious texture and taste typically associated with premium “Prime” beef. And yes, for our vegetarian friends, this knowledge is still golden – imagine the awe on your carnivore companions’ faces when you drop this steak-master secret!
In our household, steak isn’t just a meal; it’s a passion. My family, myself included, could easily be described as professional steak enthusiasts. My husband, in particular, has dedicated years to perfecting his grilling prowess, striving for that elusive balance: a beautifully charred, crusty exterior giving way to a flawless medium-rare interior, complete with impressive grill marks. Why the dedication? Because we’re firm believers that restaurant-quality steak experiences should be attainable at home without breaking the bank. For the past four months, our kitchen has been a testing ground, relentlessly pursuing a method to achieve the rich, beefy succulence of a ribeye combined with the butter-knife tenderness of a filet mignon – all from more affordable cuts. After countless delicious experiments (eating steak twice a week is hardly a hardship!), we believe we’ve cracked the code.
Today, I’m excited to share this game-changing secret with you. It’s a method that consistently transforms an ordinary “Choice” grade steak into something truly extraordinary, rivaling a “Prime” cut in both tenderness and flavor. And yes, I’m well aware that “Choice” and “Prime” refer to marbling – the fat content that natural salting doesn’t alter. However, I use these terms as a relatable figure of speech to convey the profound impact this technique has on the eating experience. Imagine the sheer delight of buying a “Choice” cut and savoring a “Prime” experience. It’s like buying an economy car and finding a luxury upgrade coupon in the glove box!
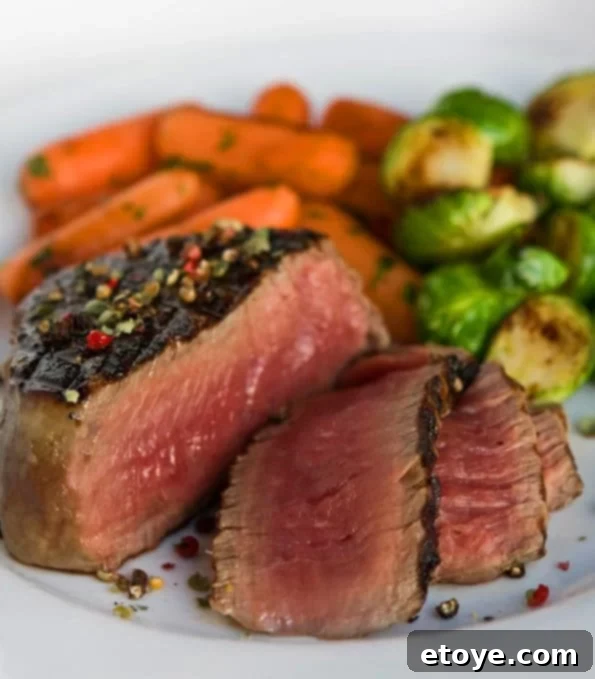
Why This Steak Salting Method Is a Game-Changer
This simple yet highly effective dry brining technique isn’t just a kitchen hack; it’s a fundamental shift in how you prepare steak. Here’s why it consistently delivers superior results, making it an indispensable part of your culinary repertoire:
- Unrivaled Tenderness: The magic begins with salt’s ability to act as a natural tenderizer. When applied, salt works slowly to break down the tough muscle fibers and connective tissues within the meat. This process, often referred to as “dry brining,” ensures that even traditionally tougher and more fibrous cuts become remarkably tender, almost melting in your mouth with a buttery, yielding texture. It transforms the chewiness of a less expensive steak into something truly luxurious.
- Deep, Even Flavor Infusion: Unlike a quick sprinkle of salt right before cooking, which only seasons the surface, this method allows the salt ample time to penetrate deep into the steak. The salt initially draws out the meat’s natural juices. It then dissolves into this moisture, creating a highly concentrated natural brine. This flavorful, salty liquid is subsequently reabsorbed back into the muscle fibers through osmosis. This means every single bite, from the caramelized edge to the succulent center, is seasoned perfectly and bursting with rich, beefy flavor, without a hint of blandness.
- Unbelievably Juicy Results: The process of salting and reabsorption is key to locking in moisture. While it might seem counterintuitive that salt initially draws out moisture, the subsequent reabsorption ensures that the meat’s cells retain their natural juices more effectively during the cooking process. This cellular retention prevents excessive moisture loss, resulting in a steak that is consistently juicy, succulent, and far less prone to drying out than an un-salted counterpart. You’ll bite into a steak that actively resists becoming dry and chalky.
- Works Wonders on Any Cut: This technique is truly democratic in its application. Whether you’re working with an economical chuck steak, a versatile flat iron, a lean sirloin, or even a robust hanger steak, this method is universally effective. It’s the ultimate equalizer, making high-quality, tender, and flavorful steak accessible regardless of your budget or the specific cut you choose from your local butcher or grocery store. Consider it the Swiss Army knife of steak preparation methods, always delivering reliable results.
- Customizable Flavor Profiles: This dry brining method provides a fantastic foundation that can be easily customized to your taste. Feel free to incorporate your favorite herbs, spices, or rubs directly with the salt application. As the salt permeates the meat, it will carry these additional aromatic and flavorful compounds deeper into the steak, creating a more complex, integrated, and nuanced taste experience. Think of it as your ultimate flavor wingman, ensuring all your chosen seasonings reach their full potential, creating a symphony of flavors in every bite.
- Eliminates Cooking Guesswork: Properly salted and rested steak cooks much more evenly. The pre-salting process helps to denature proteins and relax muscle fibers, leading to a more consistent internal temperature as the steak cooks. This significantly reduces the chances of having overcooked edges and an undercooked, cool center, which is a common frustration for home cooks. With this method, you can achieve your desired doneness with greater precision and confidence, making you look like a seasoned culinary professional every time you present your masterpiece.
Mastering the Art of Tender, Flavorful Steak: The Dry Brine Method
The Golden Rule for Perfect Steak: Salt your steaks 1 hour before cooking for every inch of thickness.
Let’s walk through this simple yet incredibly effective process, ensuring every detail is clear for your culinary success. Imagine you have two beautiful pieces of regular supermarket steak, each approximately 1.25 inches thick. Following our golden rule, these steaks will benefit from approximately 1 hour and 15 minutes of dedicated salting time.
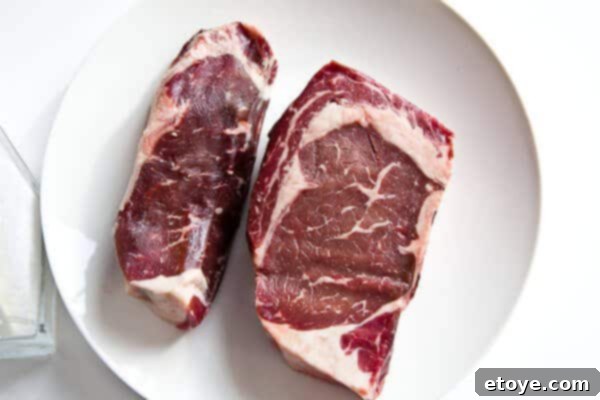
The choice of salt is absolutely crucial here. You’ll want to liberally season both sides of your steak with either kosher salt or coarse sea salt. If you’re accustomed to using fine table salt, the amount required might seem quite generous at first glance. However, it’s vital to remember that the flakes of kosher and sea salt are significantly larger – typically 2 to 3 times the size – than individual table salt grains. This means a visually similar “liberal” coating translates to a different actual volume of salt, making it less likely to over-salt the meat quickly. Ensure thorough and even coverage on all surfaces of the steak.
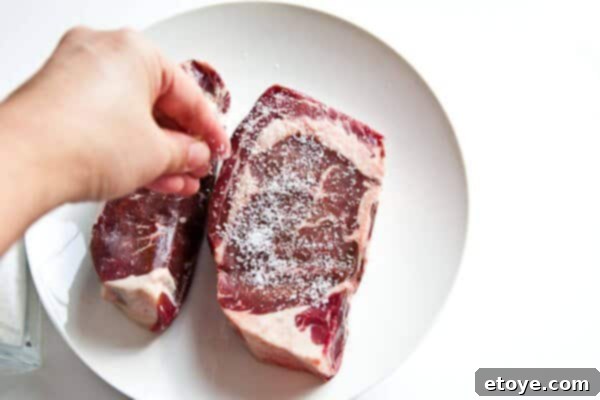
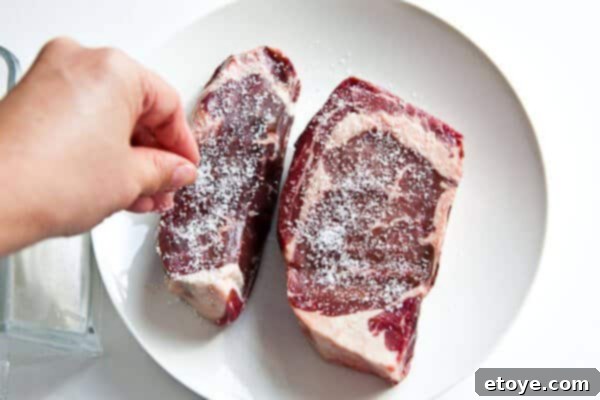
Once seasoned, simply let the steak rest uncovered at room temperature on a wire rack set over a tray or plate. This setup allows air to circulate evenly around the meat, promoting a consistent salting process, and catches any moisture that drains off. Avoid covering it, as this can trap moisture and impede the dry brining process.
Observe the fascinating transformation over time:
After approximately 15 minutes, you’ll begin to see visible moisture emerging on the surface of the meat. This is a direct result of the salt drawing out the steak’s natural juices through osmosis – a crucial first step in the dry brining process. You’ll also notice some salt crystals still clearly visible on the surface, dissolving into this newly formed liquid.
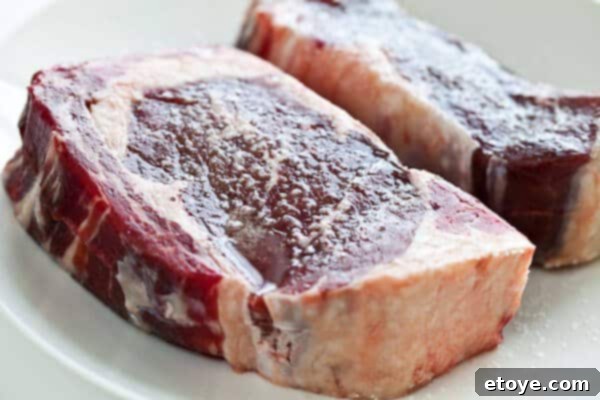
Around the 30-minute mark, even more moisture will have surfaced, creating a more noticeable and widespread pool of liquid across the steak. The salt continues its diligent work, dissolving further into this moisture, creating a concentrated brine right on the meat’s surface.
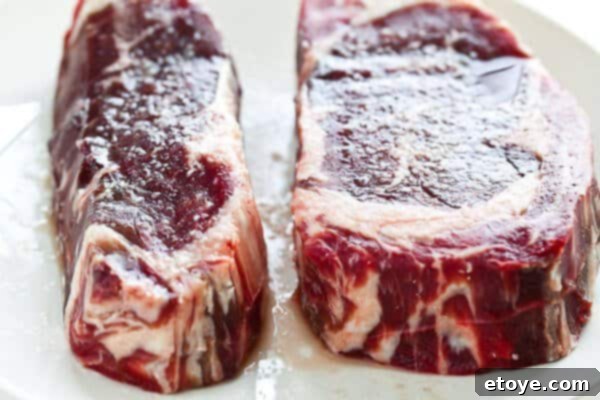
As you approach the one-hour mark, the steak will be visibly glistening with a substantial amount of accumulated moisture. This briny solution is a potent mix of the meat’s own juices and the now dissolved salt, ready to be reabsorbed.
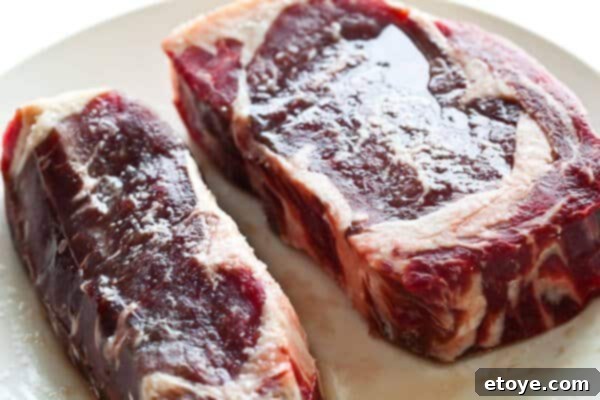
And finally, after 1.25 hours (or whatever duration meticulously matches your steak’s thickness), you’ll observe a significant amount of water still present on the surface. Crucially, at this stage, you may also still see some salt on the surface. However, a good portion of the salt has already dissolved and begun its journey back into the steak, deeply seasoning it.
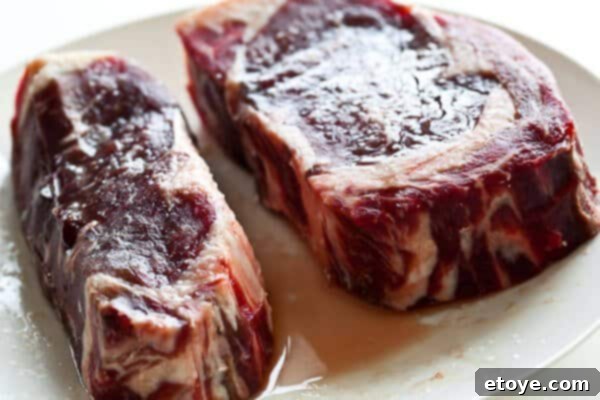
The next critical step in this process is to carefully discard any accumulated water that has drained onto the tray. Then, thoroughly rinse the steak under cold running water to remove all surface salt. This is an absolutely essential step to prevent the final product from being overly salty or having an unpleasantly salty crust. After rinsing, you must pat the steak absolutely, painstakingly dry with clean paper towels. Any residual moisture will severely hinder the development of a beautiful, crusty sear when the steak is cooked, potentially leading to a steamed exterior instead of a perfectly caramelized one. With your steak now perfectly prepared and dry, it’s ready for the grill, pan, or oven, destined for deliciousness.
You might be wondering about the origins of such a seemingly unconventional yet effective culinary method. This dry brining technique first captivated me through the renowned work of Judy Rodgers and her seminal “The Zuni Cafe Cookbook.” Rodgers famously applies a similar generous salting practice to her chickens before roasting, a principle I’ve successfully adapted and refined for steaks. Further understanding of the scientific underpinnings and reinforcement for this method comes from culinary giants like Harold McGee’s “On Food and Cooking” and Alton Brown’s “I’m Just Here For the Food,” alongside insights and experiments from various passionate food bloggers. These comprehensive resources collectively illuminate the precise science behind how salt profoundly enhances both the tenderness and flavor of meat when given adequate time.
(And if my explanatory drawings look less than professional, please cut me some slack. Attempting detailed illustrations with a laptop touchpad after a bourbon on the rocks is a unique and challenging endeavor!)
The Science Behind Salting: How It Tenderizes and Flavors Your Steak
Understanding the intricate mechanism of dry brining is key to appreciating its transformative power and why it yields such superior results compared to traditional seasoning. Many home cooks, perhaps out of habit or a lack of understanding, season their steak immediately before grilling, often without realizing the significant consequences of this timing.

When you apply salt to a steak just prior to cooking, the salt rapidly begins to draw moisture to the surface of the meat through osmosis. This process is almost instantaneous. If you then place this steak on a hot surface – be it a grill, a pan, or a griddle – without thoroughly drying it, that surface moisture quickly turns into steam. This layer of steam acts as a barrier, preventing the direct contact necessary for a proper Maillard reaction (the complex chemical reaction responsible for the browning, rich aromas, and deep, savory flavors characteristic of a perfectly seared crust). Instead of achieving that desirable crust, you end up essentially steaming your steak, leading to a grey, less appealing, and ultimately less flavorful exterior. Furthermore, with only a short contact time, the salt primarily remains on the surface, leaving the interior of the steak largely unseasoned and bland, resulting in an inconsistent eating experience.

The dry brining method, however, meticulously allows time for a sophisticated two-stage process. First, as we observed, the salt draws out moisture, creating a highly concentrated saline solution right on the surface of the meat. Over the extended resting time, the muscle fibers (which are bundles of proteins) begin to relax, unravel, and even slightly denature due to the presence of salt. This is precisely where the remarkable tenderizing effect originates. Second, and equally important, this salty liquid is gradually reabsorbed back into the meat through a process known as reverse osmosis or diffusion. This process carries the salt deeply into the steak, seasoning it thoroughly from within the muscle structure itself. While it’s true that some salt remains on the surface and will be rinsed off, the sufficient amount that penetrates is enough to tenderize and flavor the entire cut, ensuring deep seasoning. Rest assured, you won’t be ingesting an excessive amount of salt; the majority of what’s initially applied is either absorbed in small, effective quantities or completely removed during the crucial rinsing step.

Yes, sometimes a good bourbon can make complex topics seem simpler. Or perhaps just more entertaining to illustrate!

I can already hear the common concerns echoing in the background: “But won’t all that water drawn to the surface permanently leave my meat dry and tough?” or “Will my steak taste overwhelmingly like a salt lick?” These are entirely valid questions stemming from a natural apprehension. However, as meticulously explained, the moisture isn’t permanently lost from the steak. It’s initially drawn out, becomes a concentrated, flavorful brine on the surface, and then, critically, is reabsorbed back into the meat. This cycle effectively seasons the steak deep inside while simultaneously tenderizing it. The final rinsing step precisely removes any excess surface salt, ensuring your steak is perfectly seasoned, not overwhelmingly salty, and incredibly juicy – a far cry from a dry, leathery “salt lick” experience. Trust the process, and your taste buds will thank you.

Verifying the Efficacy of This Dry Brining Technique

The effectiveness of the pre-salting, or dry brining, method isn’t merely anecdotal; it’s a scientifically sound technique championed and verified by leading culinary experts and highly respected publications. For instance, the January 2008 issue of Cook’s Illustrated, a renowned authority in culinary science, extensively details the profound benefits of this method. Their in-depth research involved salting a substantial 4-pound roast beef with a precise quantity of 4 teaspoons of kosher salt for an extended period of 18-24 hours. This comprehensive experiment beautifully illustrates a critical and interconnected relationship: the precise thickness of the meat, the carefully measured amount of salt applied, and the optimal duration of salting are all interdependent variables. A significantly thicker cut, naturally, requires more time for the salt to penetrate fully and effectively, ensuring optimal tenderization and a complete flavor infusion throughout the entire roast. This robust scientific backing and expert endorsement reinforce that this dry brining method is not just a clever trick, but a proven and reliable path to achieving a consistently superior steak experience in your own kitchen.
Essential Guidelines for Perfect Dry Brining
To achieve the most outstanding results with this transformative steak preparation method, making every bite memorable and delicious, it is crucial to keep these detailed key points firmly in mind:
- Choose Your Salt Wisely: Always, without exception, opt for kosher salt or coarse sea salt. This is a non-negotiable step and fundamental to the success of the technique. Fine table salt, with its tiny, dense grains, dissolves far too quickly, creating an immediate, harsh surface salinity, and often contains anti-caking agents or iodine that can impart an unpleasant, metallic taste to your meat. The larger, more irregular flakes of kosher and sea salt allow for far better control over the application, a more gradual and even absorption into the meat fibers, and a cleaner flavor profile.
- Steak Thickness Matters Significantly: This method is most effective and truly shines for steaks that are 1 inch thick or more. Thinner cuts simply don’t provide enough internal mass for the salt to work its tenderizing and flavoring magic over the necessary period without the risk of becoming overly salty or curing too rapidly. For very thin cuts, adjust the salting time downwards drastically, sometimes to as little as 10-15 minutes per side, or consider a different seasoning approach entirely.
- Adhere Strictly to the Timetable: Our recommended guideline of 1 hour of salting per inch of steak thickness is not merely a suggestion; it is crucial for optimal results. This precise duration allows sufficient time for the salt to initiate moisture draw, create a concentrated brine on the surface, and then be reabsorbed, fully seasoning and tenderizing the meat from within. Deviating too much from this timetable can lead to frustratingly under-seasoned, bland results (if too short) or unpleasantly excessively salty and firm meat (if too long).
- Addressing the Skeptics and Culinary Scholars: For those who might question the nuanced science behind this method – perhaps you’re a devoted student of Harold McGee, a meticulous member of Alton Brown’s esteemed research team, or even my discerning high school chemistry teacher, Mr. Burke – I genuinely welcome your scrutiny and scientific inquiry! While I’ve drawn heavily from your established scientific principles and foundational culinary texts, this specific timetable and precise application for transforming everyday steak often required me to formulate, extrapolate, hypothesize, and even guesstimate based on existing knowledge. It’s a highly mental, experimental, and incredibly rewarding activity that consistently yields fantastic, verifiable results in the kitchen!
- Distinct from Salt Curing: It’s absolutely critical to distinguish this dry brining technique from traditional salt curing (such as when making beef jerky or preserved meats). Salt curing involves significantly larger amounts of salt and much longer durations – often weeks or even months, designed to completely dehydrate and preserve the meat for extended periods. Our method, conversely, is a brief, targeted “nap” for the steak, just enough to gently break down muscle fibers and infuse flavor, not to dry it out or preserve it long-term. The intent and outcome are entirely different.
- Don’t Fear the Salt (Seriously): Despite the seemingly generous initial application, please do not worry about consuming too much salt. As demonstrated through the visual progression, only a carefully calibrated, sufficient amount is absorbed into the meat to achieve the desired tenderizing and flavoring effects. The vast majority of the initially applied surface salt is meticulously rinsed away before cooking, leaving you with a perfectly seasoned, balanced, and not excessively salty, steak. Your palate will find it perfectly balanced.
- Avoid Wet Brining for Steak: You might be tempted to consider a traditional wet brine, a method often used for poultry. However, for steak, especially cuts you intend to sear for a crust, this approach often leads to a water-logged texture and a diluted, inferior flavor profile. The beauty and efficacy of dry brining is that it concentrates and enhances the natural beef flavors, rather than diluting them with added water. Stick to the dry method for superior steak.
I understand that introducing this dry brining method might initially cause a stir, a bit of confusion, or even playful controversy in your household. But I strongly encourage you to embrace the experiment! Try incorporating aromatic elements like freshly crushed garlic, fragrant rosemary sprigs, or your favorite robust spice blend directly with the salt application. As the salt works its way into the meat, it will act like a culinary magnet, carrying these additional flavors deeper into the steak, much like a pop star dragging its entire entourage of flavor into the performance. And if domestic confusion reaches truly unbearable levels, well, you always have that hunk of perfectly salted and tenderized steak as a persuasive (and undeniably delicious) argument!
Frequently Asked Questions About Salting Steak
To help you confidently embark on your journey to cooking the perfect steak and master this dry brining technique, here are detailed answers to some commonly asked questions:
- How does salting specifically enhance a steak’s tenderness and flavor? Salting, or more accurately, dry brining, works wonders by initiating a process where salt disrupts the muscle proteins and connective tissues within the steak. This breakdown allows the meat to relax and become significantly more tender than it would otherwise be. Initially, salt draws out moisture from the steak, forming a concentrated natural brine on the surface. This brine is then gradually reabsorbed back into the meat through osmosis, carrying the salt deep within. This process seasons the steak thoroughly from the inside out, ensuring every bite is succulent, incredibly tender, and bursting with rich, beefy flavor.
- Can this dry brining technique be applied to other types of meat, such as pork chops or beef brisket? Absolutely! This versatile technique isn’t exclusive to transforming budget steak cuts. It can be highly effective for a wide range of other meats, including thicker pork chops, chicken breasts, lamb chops, or even larger, tougher cuts like beef brisket or roasts. The key to success lies in adjusting the salting time proportionally based on the thickness, density, and fat content of the particular cut. For thicker, denser meats, you’ll naturally need a longer salting period to allow the salt sufficient time to penetrate fully.
- What is the ideal type of salt to use for optimal results with this method? For the best outcome, always use kosher salt or coarse sea salt. These types of salt have larger, more irregular crystal structures compared to fine table salt. This characteristic is crucial because it allows them to dissolve more slowly and evenly on the surface of the meat, creating a more controlled and effective dry brine. Fine table salt, conversely, can over-salt the surface too quickly due to its rapid dissolution and often contains iodine or anti-caking agents that can impart an unpleasant, slightly metallic or chemical aftertaste, compromising the delicate flavor of your steak.
- How long should the salted steak rest at room temperature before it’s cooked? After diligently applying the salt, it’s crucial to let the steak rest uncovered at room temperature for the recommended duration (which is 1 hour for every inch of its thickness). This room temperature resting period serves a dual and vital purpose: it allows the salt ample time to fully penetrate and tenderize the meat’s internal structure, and it also brings the internal temperature of the steak up slightly closer to cooking temperature. This slight warming promotes significantly more even cooking when the steak finally hits the hot grill or pan, preventing a cold center and overcooked exterior.
- Are there effective ways to add additional flavors to the steak beyond just salt? Yes, absolutely! This dry brining method provides an excellent, deeply seasoned canvas for incorporating extra layers of flavor. Once you’ve applied the initial salt, consider adding fresh ground black pepper, garlic powder, onion powder, smoked paprika, or your favorite proprietary steak rub. You can also press fresh herbs like rosemary or thyme sprigs, or even thinly sliced garlic, directly into the salted surface. As the salt works its magic and gets reabsorbed, these additional aromatics will also infuse deeper into the meat, enhancing its profile and transforming a simple budget steak into a gourmet, multi-dimensional culinary experience.
- Can I cook the dry-brined steak using methods other than grilling? Indeed! While a blazing hot grill or a heavy cast-iron skillet provides an incredible sear and char that many steak lovers crave, this dry brining method is highly adaptable and will significantly improve any cooking technique. You can confidently pan-sear, oven-roast, use the reverse-sear method (low oven, then high heat sear), or even employ sous vide for incredibly precise temperature control. Each method will greatly benefit from the improved tenderness and deep, even seasoning provided by the initial dry brining.
- What should I consider when selecting a steak from the local grocery store for this method? When shopping, strategically look for thicker cuts that offer excellent value and have a decent amount of marbling (intramuscular fat), such as chuck eye steak, flat iron steak, sirloin steak, or even top round. These often come at a lower price point than prime cuts but possess great potential for flavor and texture transformation with this salting technique. Avoid extremely thin cuts, as they can over-salt quickly, or those with very little visible marbling, as they might not achieve the desired tenderness. Focus on cuts that look relatively fresh, have a vibrant red color, and are cut at least an inch thick.
- What’s the best approach to determine if the steak is cooked to my desired doneness? The most reliable and foolproof way to accurately check for doneness is by using an instant-read meat thermometer. Visual cues (like color or firmness) can be highly misleading, especially with varying steak thicknesses and types of meat. Refer to a reliable internal temperature chart for your preferred level of doneness (e.g., 125-130°F for rare, 130-135°F for medium-rare, 135-140°F for medium). Remember that the steak’s internal temperature will continue to rise by a few degrees after it’s removed from the heat (this is known as carryover cooking), so remove it slightly before your target temperature.
- Is rinsing the steak after salting truly a necessary step? Yes, rinsing is absolutely crucial and cannot be skipped! It’s the critical final step that meticulously removes any excess surface salt, which would otherwise result in your steak tasting unpleasantly, overwhelmingly salty. After a thorough rinse under cold water, it is equally vital to ensure you pat the steak exceptionally dry with paper towels. This complete dryness is absolutely essential for achieving that perfect, crispy, golden-brown sear and crust when you finally cook the steak – moisture on the surface will inhibit browning and lead to steaming.
Elevate Your Steak with Delicious Sides
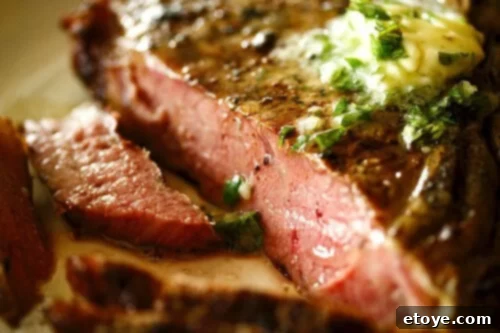
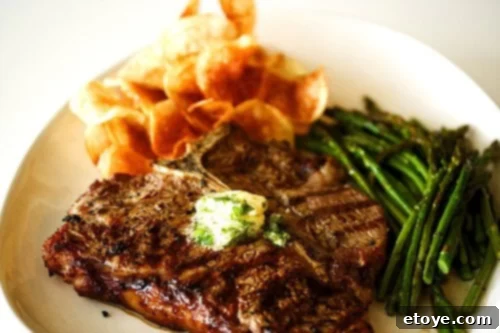
A perfectly cooked steak deserves an equally impressive accompaniment to complete the meal. Consider pairing your dry-brined masterpiece with a dollop of flavorful herb butter. This vibrant herb butter is fantastic not just for grilled corn, but it melts beautifully over a hot, freshly cooked steak, adding an extra layer of richness, aromatic goodness, and a burst of fresh flavor!

To create a truly unforgettable and satisfying meal, we highly recommend complementing your steak with classic, homemade sides like crispy garlic truffle shoestring fries or light-as-air homemade potato chips. While the “green stuff” (like a simple garnish of parsley or chives) on the plate often serves primarily for a splash of color and freshness, it becomes an integral and delicious part of the experience, especially when slathered with that exquisite garlic-herb butter!
Easy Dry-Brined Steak Recipe
This recipe outlines the simple, step-by-step process to tenderize and deeply flavor your steak using the dry brining method. It ensures a juicy, incredibly tender, and perfectly seasoned result every single time, transforming even a basic cut into a culinary delight.
Ingredients
PER STEAK (1 inch thick or more)
- 2 teaspoons kosher salt or coarse sea salt
- 1 piece steak (such as chuck eye, flat iron, sirloin, at least 1 inch thick)
Instructions
- Sprinkle approximately 1 teaspoon of kosher salt or coarse sea salt evenly over each side of the steak. Ensure thorough and even coverage across all surfaces.
- Allow the steak to salt at room temperature, uncovered on a wire rack, for a duration of 1 hour for every inch of its thickness. For example, if your steak is 1.5 inches thick, let it sit for 1 hour and 30 minutes. If it’s 0.5 inches thick, then 30 minutes will suffice.
- After the prescribed salting period, thoroughly rinse all of the salt off the steak under cold running water. This crucial step prevents the final dish from being overly salty.
- Pat the steak very, very dry with clean paper towels. It is absolutely essential that no moisture remains on the surface, as this is crucial for achieving a perfect, crispy sear when cooked.
- Season the steak with freshly ground black pepper or any other desired seasonings or rubs (e.g., garlic powder, onion powder, herbs). Do not add any additional salt at this stage, as the steak is already perfectly seasoned internally. Your steak is now ready to be cooked using your preferred method (grilling, pan-searing, etc.).
Recipe Notes
- Prep Time: 2 minutes
- Salting Time: 1 hour (per inch of thickness)
- Course: Main Course
- Cuisine: American
- Keyword: steak, dry brine, tender steak, flavorful steak, cheap steak, prime steak
- Summary: Salting the steak is a “dry brine” technique that tenderizes the steak and makes it significantly more flavorful. If you are using fine sea salt (which has smaller crystals), cut the amount of salt in half to avoid over-salting.
- Average Rating: 4.77 from 43 votes (based on original data)
More Steak & Culinary Adventures You Might Enjoy:
How to Dry Age Steaks at Home with the Drybag Method
Watch Me Talk About Kobe Beef Burgers on CBS
Artisan Steak Tasting – A Comprehensive Taste Test of 6 Steaks from Small Artisan Ranchers
 Chipotle Skirt Steak Tacos Recipe & The Parking Adventures of La Taqueria
No-Knead Bread – So Easy, Even a Child Can Master It
Negative Calorie Chocolate Cake (A Humorous & Indulgent Recipe Idea!)
Gourmet Garlic Truffle Shoestring Fries
Tropical Island Salmon: Discover How Low and Slow Cooking Creates Dreamy, Silky Fish
