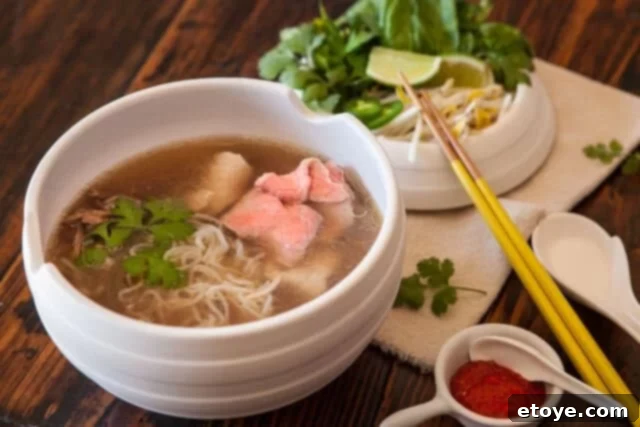
Imagine savoring a steaming bowl of authentic Vietnamese Pho, brimming with fragrant broth, tender slices of beef, and a vibrant array of fresh herbs – all made effortlessly in your own kitchen. While traditional Pho broth typically demands hours of slow simmering to develop its signature depth, the magic of a pressure cooker or Instant Pot transforms this complex culinary feat into a remarkably achievable home cooking adventure. If you’ve ever dreamt of crafting a restaurant-quality bowl of homemade Pho without the all-day commitment, then this comprehensive guide to creating delicious Pressure Cooker Pho is exactly what you need. Get ready to unlock the secrets to a deeply flavorful broth, succulent meats, and perfectly prepared noodles, all packed into one incredible, comforting meal.
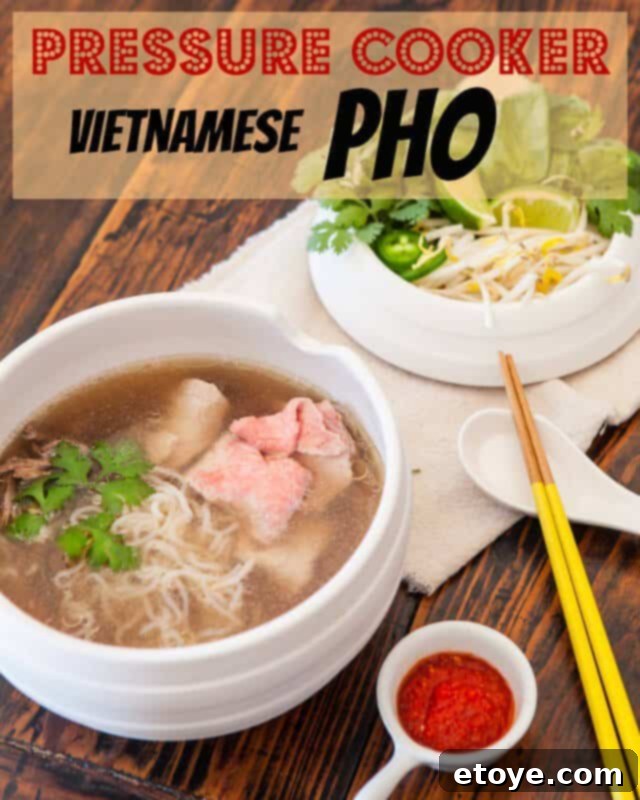
Authentic Vietnamese Beef Pho: Your Pressure Cooker Shortcut to Flavor
Creating a truly authentic bowl of Vietnamese Beef Pho often involves a labor of love, with simmering bones and a delicate balance of spices for many hours to extract that signature rich, aromatic broth. Historically, this meant an entire day dedicated to the kitchen. However, with the advent of modern kitchen appliances like the pressure cooker, this beloved classic is now more accessible than ever. This recipe harnesses the power of high pressure to condense hours of traditional flavor development into a fraction of the time, delivering a divine, deeply savory broth that rivals your favorite Pho restaurant.
Why This Pressure Cooker Pho Recipe Is a Must-Try
This isn’t just another Pho recipe; it’s a game-changer for anyone craving genuine Vietnamese flavors with modern convenience. Here’s why our Instant Pot Pho stands out and is quickly becoming a household favorite:
- Effortless & Time-Saving: Bid farewell to all-day simmering! Your pressure cooker drastically cuts down cooking time, transforming this traditional dish into an ideal easy Pho recipe for even your busiest weeknights.
- Deeply Concentrated Flavors: The high-pressure environment efficiently extracts maximum flavor from bones and spices, resulting in an exceptionally rich, complex, and aromatic broth that truly sings with authentic Vietnamese essence.
- Perfect for Batch Cooking: This recipe yields a generous quantity of delicious Pho broth and tender meat, making it perfect for feeding a family, entertaining guests, or stocking your freezer for quick, nutritious, and comforting meals anytime you desire.
- Customizable Spice & Flavor Levels: You maintain complete control over the seasoning and heat. Easily adjust the amount of fish sauce, jalapeños, and Sriracha to tailor each bowl to individual preferences, from a mild and comforting hug to a fiery and bold experience.
- Tender, Succulent Meats: The pressure cooking method ensures your beef cuts, from tough cross shanks and oxtails to brisket, become incredibly tender and flavorful, practically melting in your mouth. The thin slices of eye of round are gently cooked by the hot broth for perfect doneness.
- Dietary Adaptable: We provide clear instructions and delicious suggestions for making this recipe Paleo-friendly, and it can also be adapted for other dietary needs like Keto, without compromising on the incredible taste.
Essential Ingredients for Your Authentic Pressure Cooker Pho
The soul of any great Pho lies in its carefully selected, fresh ingredients. Here’s a detailed list of what you’ll need to create this aromatic masterpiece. We recommend sourcing the freshest ingredients possible for the most vibrant and authentic results.
For the Aromatic Broth (The Heart of Pho):
- Whole Spices: 3 whole star anise, 2 tablespoons whole coriander seeds, 1 cinnamon stick, 3 whole cloves, 1 green cardamom pod. These specific spices are the foundation of Pho’s unique, unforgettable fragrance.
- Cooking Fat: 2 tablespoons butter, divided (for a non-Paleo version, cooking oil is also suitable). Butter adds a layer of richness, while oil offers a lighter alternative.
- Fresh Aromatics: 8 slices (approximately 1/2 inch thick, unpeeled) fresh ginger, 1/2 large yellow onion (peeled). Searing these will unlock their deeper, sweeter aromatic qualities, crucial for the broth.
- Beef Cuts for Broth & Meat: A carefully chosen combination of 2 pounds beef cross shanks (about 1-1/2 inches thick), 1-1/2 pounds oxtails, and 1-1/2 pounds beef brisket. This medley provides varying textures and collagen, contributing to a robust, gelatinous, and flavorful broth.
- Essential Seasoning: 3-1/2 tablespoons fish sauce. This irreplaceable Vietnamese condiment adds a crucial savory, umami depth that defines Pho. It should be adjusted to taste.
- Water: Sufficient to cover all ingredients in your pressure cooker pot, or up to its maximum fill line.
For Serving – Fresh Garnishes & Noodles (The Finishing Touches):
These fresh additions are critical for the full, dynamic Pho experience, offering essential texture, brightness, and a burst of complementary flavors. Have them prepared and ready for assembly.
- Noodles: 8 cups shirotaki noodles (for a Paleo-friendly and low-carb option). For a traditional experience, use dried rice noodles (please see our detailed guide below for perfect preparation).
- Raw Beef for Topping: 1 pound beef eye of round roast, sliced very thinly. Keep this well-refrigerated until the last moment before serving, as the hot broth will gently cook it to perfection.
- Citrus: 2 limes, cut into neat wedges, for a bright, tangy zest that cuts through the richness.
- Chili Heat: 2 jalapeño peppers, thinly sliced, allowing each diner to add their preferred level of heat.
- Abundant Fresh Herbs: 1 bunch fresh cilantro, 1 bunch fresh Thai basil (or regular Italian basil), 1 bunch fresh mint. These aromatic herbs are non-negotiable for authenticity, adding unparalleled freshness and complex herbal notes.
- Crisp Sprouts: 2 cups fresh bean sprouts, for a delightful, refreshing crunch.
- Hot Sauce: Sriracha sauce (either store-bought or your favorite 20-Minute Homemade Sriracha Recipe), to provide an extra layer of heat and spicy-sweet flavor for those who desire it.
Step-by-Step Guide: Crafting Your Pressure Cooker Pho Masterpiece
Follow these detailed instructions to create an unforgettable bowl of Pressure Cooker Vietnamese Pho that will impress both family and friends. Precision in each step ensures maximum flavor extraction and a superior broth.
- Toast the Spices: In a large, dry saucepan set over medium-high heat, add all the whole spices: star anise, coriander seeds, cinnamon stick, cloves, and cardamom pod. Toast them gently, stirring constantly, for about 2-3 minutes until they become intensely fragrant. Be extremely careful not to burn them, as burned spices will impart a bitter taste to your broth. Once perfectly toasted, carefully transfer the spices into a coffee filter or a piece of cheesecloth and tie it securely into a neat sachet. Place this essential spice sachet directly into your pressure cooker pot.
- Sear the Aromatics: Using the same saucepan (no need to clean it!), add 1 tablespoon of butter (or cooking oil) over medium-high heat. Add the sliced onion and ginger pieces. Brown them thoroughly, turning occasionally, until they develop a beautiful, deep golden-brown sear and some caramelization appears. This crucial step enhances their sweetness and adds another layer of profound flavor to your broth. Remove the seared aromatics and add them to the pressure cooker alongside the spice sachet.
- Brown the Beef Cuts: Add the remaining tablespoon of butter to the saucepan. Working in small batches to avoid crowding the pan, sear the beef cross shanks, oxtails, and brisket until deeply browned on all sides. It’s vital to give each piece plenty of space in the pan so they truly sear and brown, rather than steam. Crowding the pan will prevent the Maillard reaction, which is key to developing rich beefy flavors. As each batch is seared to perfection, transfer the meat to the pressure cooker.
- Pressure Cook the Broth: Once all the beef, seared aromatics, and spice sachet are carefully placed in the pressure cooker, cover them generously with cold water up to the pressure cooker’s maximum fill line. Secure the lid according to your manufacturer’s instructions. Set your pressure cooker to cook on high pressure for 60 minutes. Understand that the total process will involve time for the unit to build up pressure (typically around 30 minutes) and additional time for it to naturally release pressure after cooking (also usually around 30 minutes). Always prioritize safety and follow your specific pressure cooker’s user manual.
- Refine the Broth & Prepare Meat: After the pressure has naturally released and it’s absolutely safe to open the lid, carefully open your pressure cooker. You’ll observe a layer of fatty liquid accumulated on the surface of the broth. Using a fine-mesh skimmer or a ladle, meticulously remove and discard this excess fat for a clearer, cleaner, and more palatable broth. Next, carefully remove and discard the spent onion, ginger, and spice sachet, as their flavor has been fully extracted. Transfer all the cooked beef cuts to a cutting board. Using two forks, shred the tender brisket, and remove any remaining meat from the oxtail bones. Slice any other large cooked beef pieces as desired.
- Dilute and Season the Broth: The broth you’ve just created is an incredibly rich and concentrated base. To achieve the perfect Pho consistency and flavor profile, dilute this concentrate by adding 4-6 cups of fresh water. Now, it’s time to season your Pho broth generously with fish sauce. Start with the recommended amount, then taste and adjust, adding more fish sauce in small increments as needed until the broth reaches a perfectly balanced, savory, umami, and aromatic profile that pleases your palate. Bring the diluted and seasoned broth to a gentle simmer on the stovetop just before you are ready to assemble and serve your Pho bowls.
Assembling Your Perfect Pho Bowls for an Authentic Experience
Serving Pho is an art form, and presenting individual bowls ensures the freshest, most delightful experience for each diner. The key is to assemble your bowls just before serving to maintain optimal noodle texture, meat tenderness, and broth temperature.
- Prepare the Noodle Base: In a large, deep bowl for each person, place a generous portion of your perfectly prepared shirotaki noodles (or traditional rice noodles, following our cooking guide below).
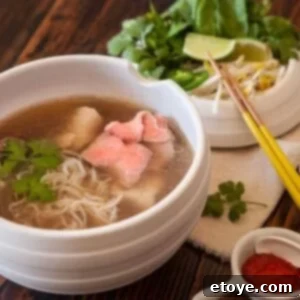
- Arrange the Meats: Artfully arrange a mix of the shredded brisket, any other cooked beef from the pressure cooker, and a few thin slices of the raw beef eye of round over the noodles. The contrast in textures and temperatures is part of Pho’s appeal.
- Pour the Hot Broth: Carefully and slowly ladle the piping hot, simmering Pho broth over the noodles and meat. The intense heat of the broth will instantly cook the thinly sliced raw beef to a tender, slightly rare doneness, ensuring it’s never overcooked.
- Garnish and Serve Immediately: Immediately serve the assembled bowls with an array of fresh garnishes presented on a separate platter: lime wedges, sliced jalapeños, fresh cilantro, Thai basil, mint leaves, and crisp bean sprouts. This “a la carte” style allows each person to customize their soup to their exact liking, adding zest, heat, and herbaceous freshness. Don’t forget to offer Sriracha sauce for an extra spicy kick!
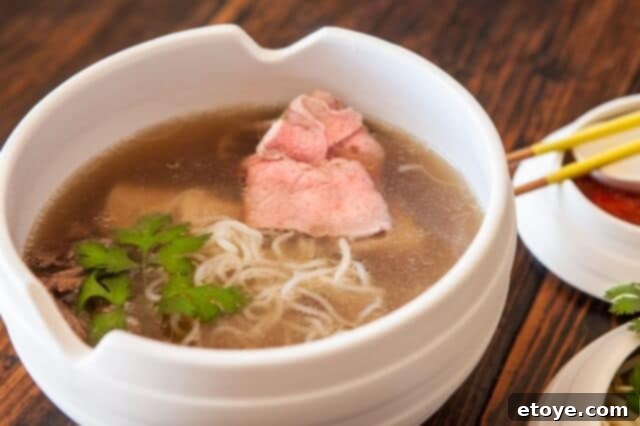
The Power of the Pressure Cooker for Authentic Pho Broth
One of the perennial challenges of making truly traditional Vietnamese Pho broth at home is the sheer amount of time required to extract all the rich, nuanced flavors from the beef bones, meat, and aromatics. Historically, this meant hours, sometimes even a full day, of meticulous slow simmering. However, the pressure cooker revolutionizes this process, offering a compelling shortcut without compromising on depth, authenticity, or the intricate flavor profile.
While some culinary purists might argue that only a slow simmer can achieve true Pho perfection, the pressure cooker creates an environment where flavors are intensely concentrated and collagen breaks down rapidly. This results in a gelatinous, full-bodied broth in a fraction of the time, often yielding results comparable to an all-day stovetop simmer. The only minor limitation with both slow cookers and pressure cookers can be their internal space. If you’re like us and want to make a substantial batch of this incredible beef noodle soup to enjoy now and freeze for later, it’s worth noting the capacity constraints of your appliance.
Our innovative approach in this recipe treats the pressure cooker as a “pho broth concentrator.” The quantities of beef and spices are deliberately generous to create an incredibly rich and potent broth. This concentrate can then be diluted with water after cooking to achieve your desired intensity and volume, making it incredibly versatile for serving multiple people or stocking up your freezer with convenient, flavorful “instant noodle” broth portions. This method ensures you get maximum flavor in minimum time, a true win-win for home cooks.
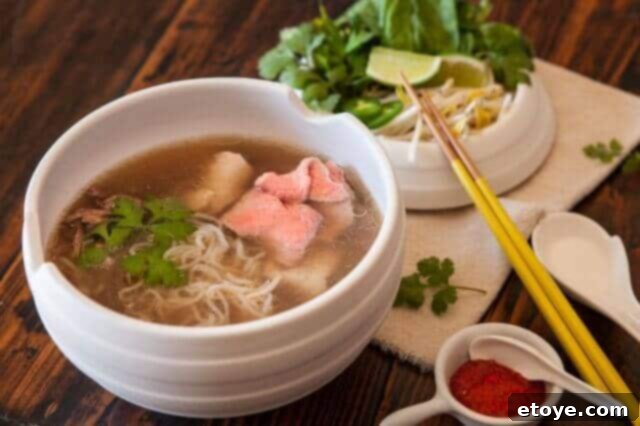
Embracing Dietary Needs: Paleo-Friendly and Other Variations
Good news for those following specific dietary guidelines! Vietnamese Pho is inherently quite versatile and can be easily adapted to various eating plans, making it a fantastic option for a healthy and flavorful meal. This recipe includes considerations for a Paleo-friendly Pho, and the adjustments are straightforward.
- Paleo-Friendly Fats: If you’re adhering to a Paleo diet, simply substitute butter with a Paleo-approved cooking oil for searing your aromatics and meat. Excellent choices include avocado oil, coconut oil, or ghee.
- Grain-Free Noodle Alternatives: The world of grain-free noodles has expanded wonderfully, offering delicious options for this Paleo Pho recipe and other low-carb diets. We highly recommend exploring:
- Shirotaki Noodles: These slippery, almost translucent noodles are made from konjac yam (often referred to as Asian mountain potatoes). They are virtually calorie-free and carb-free, making them perfect for Paleo and Keto diets. You can typically find them in the refrigerated section of most grocery stores, often alongside tofu.
- Zucchini Noodles (Zoodles): Easily made at home with a spiralizer, zoodles offer a fresh, light, and vegetable-based alternative that holds up surprisingly well in hot broth, adding extra nutrients.
- Kelp Noodles: Made from seaweed, these offer a unique, slightly firmer texture and are another excellent low-carb, grain-free option that works wonderfully in Pho.
For those on a Keto diet, shirotaki noodles or zucchini noodles are also perfect choices, aligning seamlessly with low-carb principles. The rich, savory broth and tender beef ensure you won’t miss out on any flavor, regardless of your dietary path.
Mastering Dried Rice Noodles: Your Guide to Perfect Texture
For those not adhering to a Paleo diet, traditional Vietnamese Pho noodles are typically thin, flat rice noodles. While fresh rice noodles are a treat found at well-stocked Asian markets, dried rice noodles are more widely accessible in most grocery stores and come in various widths. We generally find 1/4-inch thick noodles to be a versatile and popular choice for Pho.
It’s crucial to understand that dried rice noodles cook very differently from conventional wheat-based Italian-style pasta. They are incredibly fast-cooking – often ready in as little as 1 to 3 minutes! Overcooking them will result in a mushy, gluey, and unappetizing texture, so precision and quick action are key. Here’s our foolproof method for perfectly cooked dried rice noodles:
- Initial Softening Soak: Place the dried noodles in a large bowl and cover them completely with very hot water from the tap (not boiling water from a kettle or stove). Let them soak for approximately 10 minutes. This step gently softens the rice noodles without fully cooking them. Drain them thoroughly once softened.
- Quick Simmering Bath: Bring a small pot of water to a gentle simmer on the stovetop. You don’t need a large volume of water, unlike for pasta; just enough to fully submerge the noodles. Crucially, turn off the heat as soon as the water reaches a simmer.
- Final Rapid Cook: Add the drained, softened rice noodles to the hot (but no longer boiling) water. Let them sit for just 1 minute. Very thin noodles will often be perfectly tender after this time. Thicker rice noodle varieties might need an extra minute or two. Test for tenderness – they should be al dente, with a slight chewiness, but not hard in the center. Immediately drain them once cooked to prevent any carryover cooking that leads to mushiness. Rinse quickly with cold water if you won’t be serving immediately to halt cooking and prevent sticking.
Why You Should NOT Cook Noodles Directly in Pho Broth
It’s a common temptation for efficiency, but resist the urge to cook your noodles directly in the precious Pho broth! There are several important reasons why this practice is strongly discouraged and could compromise the quality of your homemade Pho:
- Risk of Overcooking: As highlighted, rice noodles cook incredibly fast. Adding them directly to a simmering broth makes it very easy to overcook them, turning them into a mushy, unpleasant disaster. You don’t want to ruin a batch of hard-earned, flavorful broth with subpar noodles!
- Starch Release: All noodles, especially rice noodles, release starch when cooked. This starch will cloud your beautifully clear and pristine Pho broth, altering its appearance and potentially its delicate texture. You want a translucent, sparkling broth, not a cloudy, starchy one.
- Best Served Fresh and “To Order”: Pho is best assembled “to order,” meaning individual bowls are prepared just before serving. By cooking the noodles separately and adding them to each personal bowl first, you ensure the noodles are perfectly cooked and maintain their ideal texture. Then, pouring in the piping hot broth allows them to warm up without overcooking. This also prevents the noodles from soaking up too much broth and becoming soggy if left to sit in the main pot. It’s the traditional and superior method for the ultimate Pho experience.
No Pressure Cooker? No Problem! The Traditional Stovetop Method
Don’t own a pressure cooker? No worries at all! You can still achieve a fantastic homemade Pho broth on the stovetop; it simply requires more time and a little more attention. The traditional method is a labor of love that yields an equally rewarding, deeply flavored broth. Here’s how to adapt this recipe for conventional simmering:
- Initial Preparation: Follow all the initial steps (toasting spices, searing aromatics, browning meat) exactly as described above for the pressure cooker method. These steps are crucial for building the foundational flavor of your broth.
- Combine Ingredients in a Large Pot: Place all the seared spices (still in their sachet), the browned aromatics (onion and ginger), and all the seared beef cuts into a very large stockpot or Dutch oven.
- Add Water and Initiate Simmer: Fill the pot with approximately 2.5 quarts (about 10 cups) of cold water, or enough to generously cover all the ingredients. Bring the water to a full, rolling boil, then immediately reduce the heat to the absolute lowest setting possible. The goal is a bare simmer – you should only see tiny bubbles gently breaking the surface here and there, indicating minimal activity.
- Long, Gentle Simmer: Partially cover the pot with a lid, leaving a small gap for steam to escape. Let the broth simmer gently for a minimum of 3-4 hours, or even longer (up to 6-8 hours for an even deeper, more complex flavor profile). The extended, gentle simmering process is what slowly extracts all the rich flavors from the bones and spices.
- Frequent Skimming is Key: During the entire simmering process, use a fine-mesh skimmer or a large spoon to frequently skim off any foam, impurities, or excess fat that rise to the surface. This continuous skimming is crucial for achieving a clear, clean, and visually appealing broth, a hallmark of excellent Pho.
- Final Broth & Meat Processing: Once adequately simmered, proceed with the remaining steps from the pressure cooker recipe: remove and discard the spice sachet and aromatics, remove the cooked meat for shredding and slicing, and finally, season the broth with fish sauce to taste. Although stovetop broths are less concentrated than pressure cooker ones, taste before adding water to ensure perfect balance.
Top Tips for the Ultimate Pressure Cooker Pho Experience
Achieving a truly stellar, restaurant-quality Pho at home is entirely within reach with these expert tips and tricks:
- Prioritize Searing: Do not skip or rush the searing steps for the aromatics and meat. The browning process creates a Maillard reaction that adds incredible depth, richness, and complexity to your broth that cannot be achieved otherwise.
- Toast Spices Carefully: Toasting whole spices awakens their essential oils, intensifying their fragrance and flavor. Always do this in a dry pan and be vigilant not to burn them, as burned spices will impart a bitter, acrid taste to your entire broth.
- Dilute Pressure Cooker Broth: Remember that pressure cooker broth is highly concentrated. Always dilute it with 4-6 cups of water after cooking to achieve the perfect balance and volume for your Pho.
- Quality Fish Sauce is Imperative: Invest in a good quality fish sauce, as it is absolutely vital for developing the authentic, savory umami flavor of Pho. Season the broth incrementally, tasting frequently as you go, until you reach your desired flavor profile.
- Master Noodle Preparation: Dried rice noodles cook extremely quickly (1-3 minutes!). Prepare them just before serving and never cook them directly in your Pho broth to prevent them from becoming mushy and clouding your beautiful broth.
- Don’t Skimp on Garnishes: The fresh herbs (cilantro, basil, mint), lime, jalapeños, and bean sprouts are not mere decorations; they are integral to the Pho experience. They add essential layers of freshness, texture, and aroma that complete the dish.
- Consider Freezing for Future Meals: Make a large batch! The rich Pho broth freezes beautifully in airtight containers or freezer bags for up to 3 months, providing convenient access to comforting homemade Pho whenever you desire a quick, nutritious, and flavorful meal.
- Invest in a Good Knife: For the raw beef eye of round, a very sharp knife is essential to get those paper-thin slices that cook perfectly in the hot broth.
Vietnamese Pho Pressure Cooker (Noodle Soup) Recipe Video
Explore More Delicious Vietnamese-Inspired Recipes
If you’ve enjoyed mastering this incredible Pressure Cooker Pho recipe and appreciate the vibrant flavors of Vietnamese cuisine, we encourage you to explore other fantastic dishes:
- Vietnamese Iced Coffee (Cafe Sua Da)
- Vietnamese BBQ Tacos
- 20 Minute Sriracha Sauce Recipe – Paleo Friendly
- Cauliflower Fried Rice Recipe – Paleo Friendly
We hope this comprehensive guide inspires you to confidently create incredible homemade Vietnamese Pho using your pressure cooker. It’s a rewarding dish that brings warmth, comfort, and authentic flavors right to your dining table.
Vietnamese Pho Pressure Cooker (Noodle Soup)
Jaden Hair
Pin Recipe
Ingredients
- 3 whole star anise
- 2 tablespoons whole coriander seeds
- 1 cinnamon stick
- 3 whole cloves
- 1 green cardamom pod
- 2 tablespoons butter divided (Non-Paleo version: cooking oil)
- 8 slices fresh ginger unpeeled, 1/2 inch thick
- 1/2 large yellow onion peeled
- 2 pound beef cross shanks 1-1/2 inches thick
- 1-1/2 pound oxtails
- 1-1/2 pound beef brisket
- 3-1/2 tablespoons fish sauce
- 1 pound beef eye of round roast very thinly sliced (keep refrigerated until ready to serve)
- 8 cups shirotaki noodles Non-Paleo version: dried rice noodles
FOR THE TABLE:
- 2 limes cut into wedges
- 2 jalapeño peppers sliced
- 1 bunch fresh cilantro
- 1 bunch fresh Thai basil or regular Italian basil
- 1 bunch fresh mint
- 2 cups bean sprouts
- Sriracha sauce store bought or 20 Minute Sriracha Recipe
Instructions
- In a large saucepan over medium-high heat, add all spices and toast until they become fragrant. Take care not to burn them! Place them in a coffee filter or piece of cheesecloth and tie it up. Place the sachet into the pressure cooker pot.
- In the same sauce pan over medium-high heat, add 1 tablespoon butter (or oil) and add onion and ginger pieces. Brown until there is a nice sear on them. Remove them from the pan and place them in the pressure cooker.
- Sear the meat in batches: add the remaining tablespoon of butter to the pan and sear the shank, oxtail and brisket. You’ll do this in batches, all in a single layer. Give everything plenty of space so that they SEAR and brown. Crowding the pan will not brown the meat. Sear each side, remove each meat from the pan and add them to the pressure cooker.
- Cover the contents of the pressure cooker with water or up to the fill line. Set your pressure cooker to cook for 60 minutes. This means it will cook under pressure for 60 minutes. It will take time to build up pressure (usually 30 minutes) and additional time to release pressure after cooking (usually 30 minutes).
- Approximately: 30 minutes to build up pressure + 60 minutes under pressure + 30 minutes to release pressure. Exact timing is really not that important – and also depends on your pressure cooker system. Follow manufacturer instructions.
- Once finished cooking and safe to open, open the pressure cooker and using a fine mesh or ladle, remove the top layer of fatty liquid that has accumulated on the surface of the broth and discard (there will be lots of it.) Remove the onion, ginger and spice sachet and discard. Remove the meat to your cutting board. Shred the brisket using two forks. Remove any other meat from bone.
- The resulting broth is a concentrate. Dilute the pho concentrate with 4-6 cups of water. Season the Pho broth with fish sauce. Taste and add additional fish sauce if needed. Bring to a simmer on stovetop right before you are ready to serve.
Assemble the Pho Bowls:
- Serve to order. In a large bowl for each person, add shirotaki noodles and meat (including the sliced eye of round). Pour the just-simmering hot broth into each bowl. Hot broth will cook the sliced eye of round. Serve with the remaining sides a la carte so each person can add whatever they’d like to their soup.
Nutrition
We are grateful to Michelle Tam and Henry Fong, the brilliant minds behind the Nom Nom Paleo Food for Humans Cookbook. This cookbook is an absolute treasure, highly recommended for its stellar, flavorful recipes and a personal favorite I often gift to friends. Their dedication to accessible and delicious Paleo cooking is truly inspiring.
We hope this comprehensive guide inspires you to confidently create incredible homemade Vietnamese Pho using your pressure cooker. It’s a profoundly rewarding dish that brings warmth, comfort, and authentic flavors right to your dining table. Don’t forget to leave a star rating and share your experiences and any clever adaptations you make in the comments section below!
