In our fast-paced lives, moments of true relaxation and self-care often feel like a luxury we can barely afford. Imagine a sanctuary where stress melts away, and your skin, hair, and body are pampered with the purest ingredients – all without leaving the comfort of your home or breaking the bank. Forget the expensive spa treatments and the bewildering array of chemical-laden beauty products found on store shelves. What if we told you that the secret to ultimate rejuvenation is likely already residing in your kitchen pantry?
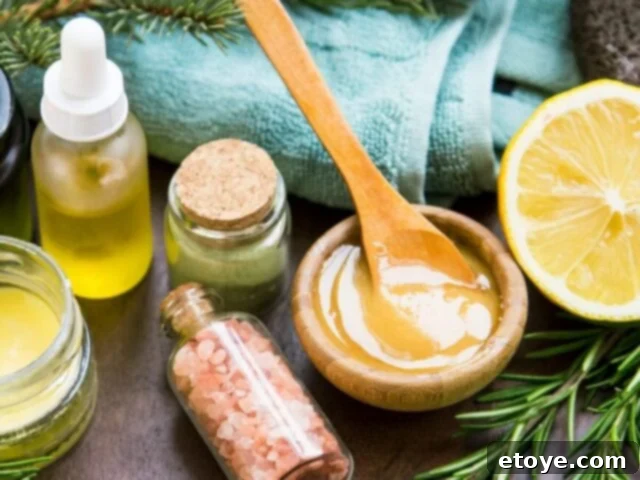
That’s right! Your kitchen is a treasure trove of natural ingredients, brimming with potential for a luxurious and deeply satisfying at-home spa day. Today, we’re unlocking the power of these everyday items to craft DIY beauty treatments that nourish your skin, revitalize your hair, and soothe your body from head to toe. From exfoliating body scrubs to hydrating face masks, and even revitalizing hair and foot treatments, these recipes harness the inherent goodness of nature to bring you visible results and a feeling of profound well-being.
So, clear your schedule, gather your coziest towel, and prepare to transform your home into a personal haven of tranquility. Indulge in an experience that not only beautifies but also calms your mind and spirit, all powered by the simple, potent magic of nature.
The Power of Your Pantry: Why Choose DIY Natural Beauty?
Before we dive into specific recipes, let’s explore why embracing a DIY approach to beauty with natural ingredients from your kitchen is such a game-changer. Beyond the obvious cost savings, there are numerous compelling reasons to make this shift:
- Chemical-Free Purity: Store-bought products often contain synthetic fragrances, parabens, sulfates, and other harsh chemicals that can irritate the skin, disrupt hormones, or cause long-term concerns. With DIY, you have complete control over every ingredient, ensuring a pure, gentle, and effective treatment.
- Budget-Friendly Pampering: High-end spa products and professional treatments come with a hefty price tag. By utilizing ingredients you likely already own – or can easily purchase for pennies – you can enjoy luxurious self-care without straining your finances.
- Customization for Your Needs: Every individual’s skin and hair are unique. DIY recipes allow you to tailor ingredients to your specific concerns. Whether you have oily, dry, sensitive, or combination skin, or hair that’s fine, thick, color-treated, or prone to breakage, you can adjust recipes for optimal results.
- Environmental Consciousness: Reducing your reliance on packaged beauty products helps minimize plastic waste and the environmental impact associated with manufacturing and transportation. Many kitchen ingredients are sustainably sourced and biodegradable.
- Freshness and Potency: Homemade treatments are made fresh, ensuring that the active ingredients are at their most potent. There are no preservatives needed because you’re using them immediately, allowing your skin and hair to absorb the maximum benefits.
- Mindful Self-Care Ritual: The process of creating your own beauty treatments can be a wonderfully therapeutic ritual in itself. It encourages mindfulness, creativity, and a deeper connection to the products you apply to your body.
Honey & Oatmeal Face Mask: Soothe and Exfoliate
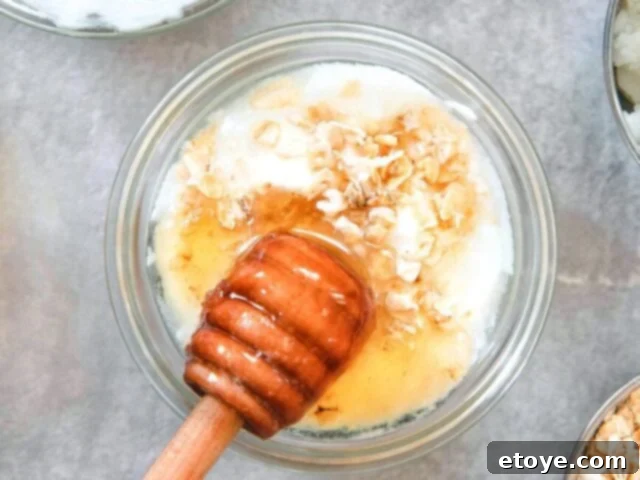
Has your skin been feeling dull, congested, or a little irritated lately? If you’re yearning for that fresh, post-facial glow without exposing your delicate skin to unpronounceable chemicals, then this Honey & Oatmeal Face Mask is your perfect solution. It’s a gentle yet effective way to exfoliate, soothe, and nourish, making it a staple for anyone looking to achieve a radiant complexion with natural ingredients.
Ingredients:
- 2 tablespoons of oatmeal (finely ground works best, you can use a coffee grinder for this)
- 1 tablespoon of raw honey (local and organic if possible)
- 2-3 tablespoons of plain yogurt (full-fat Greek yogurt adds extra creaminess)
Instructions: In a small bowl, combine the ground oatmeal, raw honey, and plain yogurt. Mix thoroughly until you achieve a smooth, consistent paste. Ensure your face is clean and dry, then gently apply the mask evenly across your face, avoiding the delicate eye area. Allow the mask to work its magic for approximately 10 to 15 minutes. Once the time is up, rinse off thoroughly with warm water, using gentle circular motions to provide a light exfoliation. Pat your skin dry with a soft towel and follow up with your favorite moisturizer.
Benefits:
- Oatmeal: Far more than just a breakfast staple, oatmeal is a dermatologist-recommended ingredient for sensitive and irritated skin. Its natural anti-inflammatory properties, attributed to compounds called avenanthramides, help to calm redness and itching. As a gentle physical exfoliant, finely ground oatmeal sloughs away dead skin cells without the harshness of synthetic scrubs, making it ideal for those with sensitive, acne-prone, or rosacea-affected skin. It also contains saponins, which are natural cleansing agents.
- Honey: This golden elixir is a true multitasker in skincare. Raw honey is a powerful natural humectant, meaning it draws moisture from the air into your skin, providing deep hydration and leaving your complexion plump and dewy. Its potent antibacterial and antiseptic properties make it excellent for preventing and treating breakouts, while its anti-inflammatory compounds can soothe irritated skin. Furthermore, honey aids in balancing the skin’s pH, promoting a healthy skin barrier and a more even skin tone.
- Yogurt: Your favorite probiotic food brings a wealth of benefits to your skin. Plain yogurt is rich in lactic acid, a mild Alpha Hydroxy Acid (AHA) that gently exfoliates the skin’s surface. This natural exfoliation helps to dissolve dead skin cells, revealing brighter, smoother skin underneath. Regular use can reduce the appearance of fine lines, wrinkles, and hyperpigmentation, while the probiotics can help to balance the skin’s microbiome, reducing inflammation and promoting a clearer complexion.
Brown Sugar & Coconut Oil Body Scrub: Silky Smooth Skin
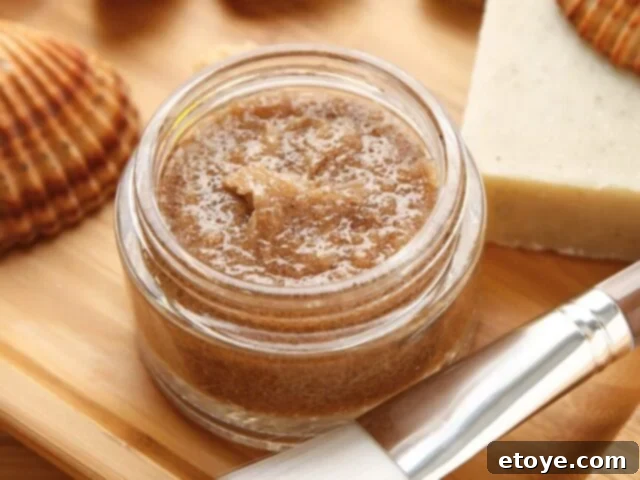
Dreaming of luxuriously soft, glowing skin from head to toe? This Brown Sugar & Coconut Oil Body Scrub is your ticket to achieving an all-over exfoliation that not only removes dead skin cells but also deeply moisturizes. Say goodbye to dry, flaky skin and hello to a smooth, supple texture that feels truly nourished and revitalized. This simple yet effective scrub is a must-have in your natural skincare routine.
Ingredients:
- ½ cup of brown sugar (packed)
- ¼ cup of coconut oil (melted, but not hot)
- Optional: A few drops of your favorite essential oil like lavender or peppermint for an enhanced sensory experience.
Instructions: In a bowl, combine the brown sugar and melted coconut oil. Mix thoroughly until the sugar is evenly coated and you have a consistent scrub texture. For the best results, apply this scrub to damp skin, ideally just before you step into the shower or during your bath. Gently massage the scrub onto your skin using circular motions, paying extra attention to rough areas such as elbows, knees, heels, and any dry patches. The warmth of the water will help the ingredients penetrate deeper. After scrubbing, rinse off completely with warm water in the shower, allowing the residual coconut oil to hydrate your skin. Pat dry and admire your newfound silky smoothness.
Benefits:
- Brown Sugar: The star exfoliant in this recipe, brown sugar, is renowned for its gentle yet effective exfoliating properties. Its fine texture makes it less abrasive than regular cane sugar, making it suitable for even sensitive skin types. Brown sugar is a natural source of glycolic acid, an Alpha Hydroxy Acid (AHA) that works to loosen the bonds between dead skin cells, promoting their shedding and revealing fresh, brighter skin underneath. This natural chemical exfoliation, combined with the physical scrubbing action, ensures a comprehensive renewal of your skin’s surface, improving texture and promoting an even tone.
- Coconut Oil: A powerhouse of natural hydration, coconut oil is an exceptional moisturizer that locks in moisture, leaving your skin feeling incredibly soft and smooth. Rich in saturated fats, it helps to repair and strengthen the skin’s natural barrier, protecting it from environmental stressors and preventing moisture loss. Beyond its moisturizing capabilities, coconut oil also boasts impressive antibacterial and antifungal properties, thanks to its lauric acid content. This makes it beneficial for keeping the skin clean and healthy, potentially warding off minor skin irritations and leaving you with a healthy glow.
Avocado & Honey Hair Mask: Revive Dull and Damaged Locks
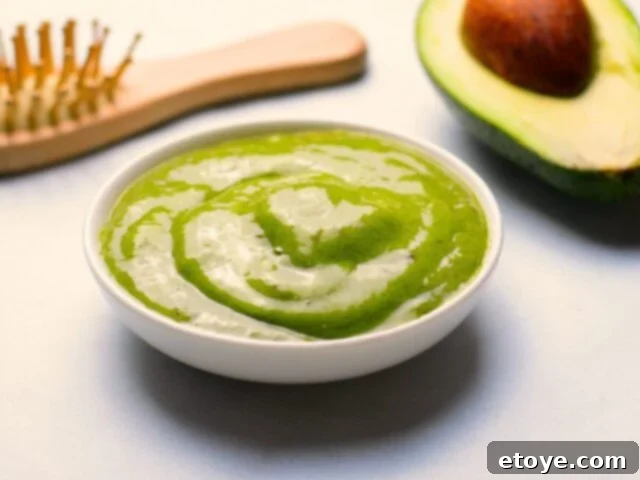
Is your hair showing signs of neglect, sporting split ends, or feeling dry and brittle? Professional hair treatments can be incredibly expensive, but you don’t need to break the bank to restore your hair’s vitality. This Avocado & Honey Hair Mask is a luxurious and deeply nourishing treatment, perfect for bringing life back to dry, color-treated, or simply stressed-out hair. It’s a natural way to provide intense hydration, strengthen strands, and enhance your hair’s natural luster.
Ingredients:
- 1 ripe avocado
- 2 tablespoons of raw honey
- 2 tablespoons of olive oil (extra virgin is preferred for maximum nutrients)
- Optional: A few drops of rosemary or peppermint essential oil for scalp stimulation.
Instructions: Start by mashing the ripe avocado thoroughly in a bowl until it’s completely smooth and free of any lumps. A fork or a blender can help achieve the desired consistency. Then, add the raw honey and olive oil to the mashed avocado. Mix all ingredients well until you have a creamy, uniform paste. Apply this rich mask to dry or slightly damp hair, starting from the roots and working your way down to the ends, ensuring every strand is coated. For extra penetration, you can cover your hair with a shower cap. Leave the mask on for about 30 minutes, allowing the nutrients to deeply penetrate. Afterwards, shampoo your hair twice to thoroughly remove the mask, then condition as usual.
Benefits:
- Avocado: Often called “nature’s butter,” avocado is a superfood for your hair. This fleshy fruit is packed with monounsaturated fatty acids, which deeply penetrate the hair shaft to provide intense moisture and improve elasticity, reducing breakage. It’s also an excellent source of vitamins E and B (biotin), crucial for healthy hair growth and strength. Vitamin E acts as a powerful antioxidant, protecting hair from environmental damage, while biotin supports keratin production, a key component of hair structure. Avocado helps to smooth the hair cuticles, resulting in shinier, less frizzy hair.
- Honey: While it might feel a little sticky during application, honey is a miraculous ingredient for hair health. It functions as a powerful natural humectant, actively drawing moisture from the air and sealing it into your hair strands. This deep hydration enhances your hair’s natural luster and softness, making it less prone to dryness and breakage. Its emollient properties help to smooth the hair follicle, adding shine and reducing frizz. Honey also possesses mild antiseptic qualities that can contribute to a healthier scalp environment.
- Olive Oil: A staple in Mediterranean diets, olive oil is equally beneficial for your hair. Rich in antioxidants and monounsaturated fatty acids, it penetrates deep into the hair shaft, providing nourishment and protection. Olive oil helps to strengthen hair follicles, reducing hair loss and preventing damage from heat styling and environmental factors. It also has remarkable soothing properties for the scalp, helping to alleviate dryness, itchiness, and flakiness, promoting overall scalp health which is vital for strong hair growth.
Cucumber & Aloe Vera Eye Gel: Banish Puffiness and Dark Circles
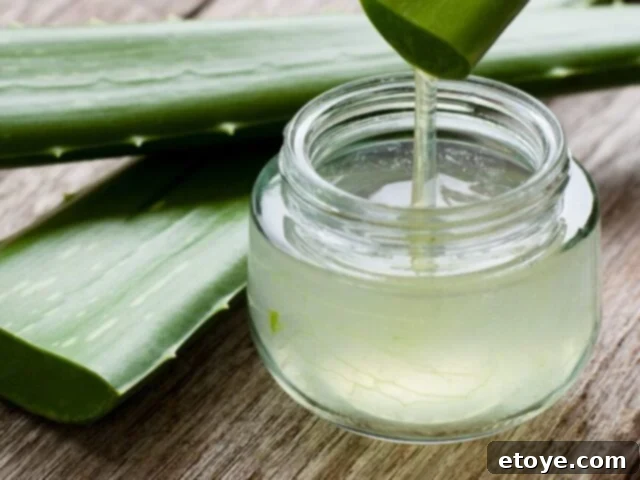
The delicate skin around your eyes is often the first to show signs of fatigue, stress, and aging. If you’re struggling with puffy eyes, dark circles, or an uneven skin tone in this sensitive area, then it’s the perfect time to incorporate this refreshing Cucumber & Aloe Vera Eye Gel into your beauty routine. This natural remedy offers a soothing, hydrating, and revitalizing boost, helping you look and feel more awake and refreshed.
Ingredients:
- ½ fresh cucumber
- 2 tablespoons of pure aloe vera gel (ensure it’s 100% pure, ideally from a plant or a trusted brand)
Instructions: Peel and chop the cucumber into small pieces. Place the cucumber pieces into a blender or food processor and blend until you achieve a smooth, liquid consistency. Strain the cucumber juice through a fine-mesh sieve or cheesecloth to separate the liquid from any pulp. Discard the pulp. In a clean bowl, mix the freshly extracted cucumber juice with the aloe vera gel until thoroughly combined. Gently apply this cool gel under your eyes, being extremely careful not to get it directly into your eyes. You can use your ring finger for the lightest touch. Let the gel sit for 15 to 20 minutes, allowing the active ingredients to penetrate. Afterwards, rinse off with cool water and gently pat the area dry. Store any leftover gel in an airtight container in the refrigerator for up to 2-3 days.
Benefits:
- Cucumber: A time-honored spa staple, cucumbers are celebrated for their incredible benefits, especially around the eyes. Their high water content provides immediate hydration and a cooling sensation that helps to reduce swelling and puffiness. Cucumbers are rich in antioxidants, such as Vitamin C and caffeic acid, and flavonoids, which work together to reduce inflammation and soothe irritated skin. The silica content in cucumbers can also help to strengthen connective tissues, potentially minimizing the appearance of fine lines and promoting a firmer look.
- Aloe Vera: Renowned for its unparalleled soothing and healing properties, aloe vera is an ideal companion to cucumber. It’s packed with vitamins, minerals, enzymes, and amino acids that provide deep hydration to the thin, sensitive skin around the eyes. Aloe vera’s anti-inflammatory compounds, including aloin and emodin, effectively reduce redness and swelling, making it excellent for de-puffing. Furthermore, its ability to stimulate cell regeneration and improve skin elasticity can help diminish the appearance of dark circles and fine lines, leaving the under-eye area looking brighter and more youthful.
Soothing Banana and Honey Foot Mask: Treat Tired and Calloused Feet
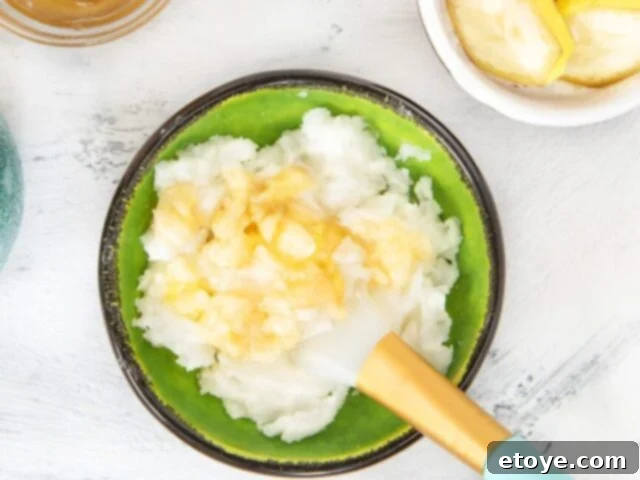
Our feet work hard for us every day, yet they often get the least attention in our beauty routines. If your feet have seen better days, struggling with dryness, calluses, or even minor cracks, then this indulgent Banana & Honey Foot Mask is the perfect at-home treatment. It’s designed to deeply moisturize, gently exfoliate, and repair, leaving your feet feeling incredibly soft, smooth, and revitalized.
Ingredients:
- 1 very ripe banana (the riper, the better for easy mashing)
- 2 tablespoons of raw honey
- 1 tablespoon of fresh lemon juice
- 1 tablespoon of olive oil (extra virgin)
Instructions: In a medium-sized bowl, mash the ripe banana thoroughly until it forms a completely smooth, lump-free paste. You can use a fork or a potato masher for this. Add the raw honey, fresh lemon juice, and olive oil to the mashed banana. Mix all the ingredients well until they are fully incorporated and you have a smooth, consistent mask. Before applying, ensure your feet are clean and dry. Apply a generous layer of this mask to your entire feet, focusing on rough areas like the heels, balls of your feet, and any calluses. For enhanced absorption and to minimize mess, you can cover your feet with plastic wrap or old socks. Allow the mask to penetrate deeply for 20-30 minutes. Afterwards, rinse off with warm water and pat your feet dry with a soft towel. Finish by applying your favorite nourishing foot cream or moisturizer to seal in the benefits.
Benefits:
- Banana: This humble fruit is a powerhouse of natural moisturizers and skin-loving vitamins. As a natural emollient, bananas help to hydrate and soften dry, rough skin. They are rich in vitamins A, B, and E, which are essential for skin repair and regeneration. Vitamin A helps to smooth rough skin, B vitamins support overall skin health, and Vitamin E is a powerful antioxidant that aids in healing cracked skin and protecting it from damage, making your feet feel supple and renewed.
- Honey: Once again, honey proves its versatility and potency. Its humectant properties are crucial here, as it actively attracts and locks moisture into the skin, providing intense hydration to parched feet. This is particularly beneficial for treating dryness and helping to soften calluses. Furthermore, honey’s natural antibacterial and antiseptic qualities help to cleanse the skin, reducing the risk of minor infections and promoting a healthier environment for skin healing, offering both soothing and purifying benefits simultaneously.
- Lemon Juice: The acidic nature of fresh lemon juice makes it a fantastic natural exfoliant. It contains citric acid, an Alpha Hydroxy Acid (AHA) that gently breaks down the bonds holding dead skin cells together. This mild chemical exfoliation effectively sloughs away rough, flaky skin and reduces the tough texture that often plagues the heels and balls of our feet. Regular use can reveal brighter, smoother skin and help to soften stubborn calluses, preparing your feet for deeper moisturization.
- Olive Oil: Adding an extra boost of hydration and nourishment, olive oil is rich in Vitamin E and healthy monounsaturated fats. These components deeply moisturize the skin, enhancing its elasticity and helping to repair the skin barrier. The antioxidants in olive oil also protect the skin from environmental damage, while its emollient properties leave your feet feeling incredibly soft, smooth, and conditioned, working in harmony with the other ingredients for comprehensive foot care.
Frequently Asked Questions About DIY Natural Beauty Treatments:
Making the switch to DIY natural beauty treatments often comes with questions. Here are some of the most common inquiries to help you confidently embark on your at-home spa journey:
Why are natural ingredients superior for home spa treatments?
Natural ingredients stand out because they are generally gentler, safer, and remarkably effective compared to many commercial products that often contain synthetic chemicals, artificial fragrances, parabens, and sulfates. These harsh additives can sometimes lead to irritation, allergies, or long-term skin concerns. Natural ingredients, on the other hand, are packed with essential nutrients, vitamins, antioxidants, and minerals that work synergistically with your skin and hair’s natural biology. They aim to rejuvenate, hydrate, soothe, and protect in a way that feels inherently compatible with your body. Moreover, using ingredients from your kitchen is not only cost-effective but also an environmentally friendly choice, reducing packaging waste and your carbon footprint.
Can these DIY treatments cause skin reactions or allergies?
While natural ingredients are generally well-tolerated and much gentler than synthetic alternatives, it’s crucial to remember that individuals can still have allergic reactions to certain food ingredients, just as they might with any product. For instance, some people are sensitive to citrus, nuts, or even honey. Therefore, it is absolutely essential to perform a patch test before applying any new homemade treatment to a large area of your face or body. Apply a small amount of the mixture to an inconspicuous area, such as behind your ear or on your inner forearm, and wait 24 hours. If you observe any signs of irritation, redness, itching, or swelling, rinse it off immediately and discontinue use. Always listen to your body and avoid ingredients you know you’re sensitive to.
How often should I incorporate these DIY beauty treatments into my routine?
The optimal frequency for using DIY beauty treatments depends largely on the specific treatment and your individual skin and hair type. For exfoliating treatments like the Honey & Oatmeal Face Mask or the Brown Sugar & Coconut Oil Body Scrub, it’s generally recommended to use them no more than once or twice a week to avoid over-exfoliation, which can strip your skin’s natural oils and compromise its barrier. Hair masks, such as the Avocado & Honey Hair Mask, can typically be used once a week or every two weeks for deep conditioning. Lighter treatments like eye gels can often be used more frequently. Overuse of any treatment, even natural ones, can potentially disrupt your skin’s natural pH and oil balance. Pay close attention to how your skin and hair respond, and adjust your usage accordingly.
What if I don’t have one of the ingredients listed in a recipe? Can I substitute?
Absolutely! Many DIY beauty recipes are incredibly versatile and allow for creative substitutions, making them accessible even if your pantry isn’t fully stocked. For example, if a recipe calls for coconut oil, you can often substitute it with other nourishing oils like olive oil, almond oil, jojoba oil, or grapeseed oil, provided you don’t have allergies to these alternatives. Similarly, different types of yogurt can often be interchanged. Before making a substitution, do a quick search to ensure the alternative ingredient offers similar benefits or is at least safe for topical use. As always, perform a patch test with any new or substituted ingredients to prevent potential irritation.
Will these homemade treatments work for all skin and hair types?
Most of the natural ingredients featured in these recipes are widely beneficial across a broad range of skin and hair types. However, every individual’s body chemistry is unique, and sensitivities can vary. For those with extremely sensitive skin, it’s advisable to skip highly acidic ingredients like lemon juice or potentially irritating essential oils, focusing instead on soothing and hydrating components. If you have very dry skin, prioritize treatments rich in intensely moisturizing ingredients like avocado, honey, and various nourishing oils. Conversely, if your skin is oily, you might gravitate towards ingredients with balancing or purifying properties. The beauty of DIY is the ability to customize; always consider your specific needs and reactions.
How long can I store these homemade beauty treatments?
Since homemade beauty treatments lack the synthetic preservatives found in commercial products, their shelf life is significantly shorter. It is generally best to prepare and use your treatments immediately for maximum freshness and potency. If you have a small amount leftover, you can store it in an airtight container in the refrigerator for no more than 1-3 days, depending on the ingredients (e.g., those with fresh fruits or dairy will spoil faster). Always check for any signs of spoilage, such as changes in color, smell, or texture, before re-using.
Can these homemade treatments replace my regular skincare and hair care products entirely?
While homemade beauty treatments offer wonderful benefits and can significantly enhance your routine, they are often best viewed as an enhancement rather than a complete replacement for your established skincare and hair care regimens. Commercial products are typically formulated with specific active ingredients in controlled concentrations to target specific concerns, and they often include necessary preservatives and stabilizers. Think of DIY treatments as powerful supplementary tools – they provide boosts of natural goodness, deep nourishment, and targeted care that complement your regular cleansers, serums, and conditioners, leading to holistic health and beauty.
What else can I do to ensure a successful and relaxing DIY spa day at home?
Creating a truly successful and relaxing DIY spa day at home is all about setting the right atmosphere. Start by decluttering your chosen space – perhaps your bathroom or bedroom – to create a serene environment. Dim the lights, put on some soothing instrumental music or nature sounds, and light a few candles (always practicing utmost fire safety, of course). Slip into comfortable clothing or a plush robe. Consider preparing a small platter of healthy snacks, like fresh fruit or a handful of nuts, and a refreshing glass of water or herbal tea. Having all your ingredients, bowls, and tools laid out and ready before you begin will help you stay in a state of calm and focus, allowing you to fully immerse yourself in the pampering experience.
Can I adjust these recipes to my specific needs and experiment with other ingredients?
Absolutely! These recipes are fantastic starting points, but feel free to experiment and adjust them to better suit your unique needs and preferences. You can modify ingredient quantities, add a few drops of a skin-friendly essential oil (after a patch test), or research other natural ingredients that are known to benefit your specific skin or hair type. Perhaps a dash of turmeric for brightening, or some green tea for its antioxidants? Always do your research on new ingredients and, most importantly, perform a patch test before applying any new concoction to your entire face, body, or hair to ensure compatibility and prevent irritation.
Now It’s Time to Relax and Shine!
We sincerely hope this comprehensive guide inspires you to explore the incredible world of DIY home beauty treatments using the wholesome ingredients right in your fridge and pantry. Embracing natural self-care is a wonderful journey that benefits not only your skin and hair but also your overall well-being. Rediscover the joy of simple, pure ingredients and revel in the luxurious results.
Do you have any cherished homemade beauty secrets or favorite kitchen-based remedies that you swear by? We would absolutely love for you to share your insights and experiences with our community in the comments below! Happy pampering!
